This guide will show you how easy it is to install the latest version of Docker on Ubuntu.

Docker is an OS-level virtualization platform that is designed so you can deliver software within a self-contained package.
These self-contained packages are called containers. A container is completely separated from the host system. This separation allows it to have its own operating system and configuration.
Docker enables you to define channels for the containers to talk to the operating system or another container.
One of the most significant advantages of installing Docker on your Ubuntu system is that you can quickly install software using it. Instead of installing several different packages and adding additional clutter you can instead pull a containerized version with everything it needs.
Docker maintains versions of their runtime for all currently supported versions of Ubuntu. So, as long as Ubuntu still supports your Ubuntu version, Docker will continue to be built for your system.
Installing Docker on Ubuntu
In the following sections, we will walk you through how to install Docker on Ubuntu. We will use its official package repository to ensure we get the latest version of Docker on our system.
While you could install Docker from the standard Ubuntu repository, this version is typically significantly out-of-date, meaning you lose out on crucial new features and fixes. The official Docker repository, however, is always guaranteed to have the latest available version of the software, as it is the official source.
For the following steps, you will need to either use SSH to your Ubuntu system or be utilizing the Ubuntu terminal directly.
Below we have embedded a video that will walk you through the steps of install the latest release of Docker on Ubuntu. We also have our written steps included below that allows you to go at your own pace.
Preparing your System
1. Before we begin to install Docker, let us perform an update of our Ubuntu system.
To update the package list and the packages themselves, run the following two commands.
sudo apt update
sudo apt upgradeCopy
2. Once the package list cache has been updated, we can move on to install the packages we require to set up the Docker package repository for Ubuntu.
Run the following command on your system to install packages we require to set up Docker.
sudo apt install curl ca-certificatesCopyIf you are interested on what these packages are and why we are installing them read on. Otherwise, you can now skip to step 3.
curl – We will be using curl to fetch the GPG key for the Ubuntu versions of Docker. curl allows us to pipe this key directly to the apt package manager.
ca-certificates – The final package we install is the bundle of certificates. These certificates are what helps the system know that the website it is connecting to is who they say they are.
Adding the Docker Repository to Ubuntu
3. To install Docker on Ubuntu from the official repository, we must add the GPG key to our “keyrings” directory. The package manager uses this key to ensure we are installing a valid version of Docker and not a package someone has swapped out through a man-in-the-middle attack.
Saving this GPG key to your system is as simple as running the following command within the terminal.
sudo curl -fsSL https://download.docker.com/linux/ubuntu/gpg -o /usr/share/keyrings/docker-archive-keyring.ascCopy4. Finally, with the GPG key added, we can add the Docker repository to our Ubuntu system.
We can do this using the following simple one-liner. We pipe our repository string directly into a new sources file called “docker.list“.
echo "deb [signed-by=/usr/share/keyrings/docker-archive-keyring.asc arch=$(dpkg --print-architecture)] https://download.docker.com/linux/ubuntu $(lsb_release -cs) stable" | sudo tee -a /etc/apt/sources.list.d/docker.listCopyTo ensure we add the correct line for your version of Ubuntu, we use “lsb_release -cs“. This command retrieves the current codename for the distribution. For example, on our system, it would add “focal” as we are using Ubuntu 20.04.
Installing the Latest Version of Docker on Ubuntu
5. As we have made changes to the repository sources, we need to perform another update.
Without performing an update, Ubuntu will not be aware of the repository we just added and will attempt to install the older version of Docker available in the Ubuntu repository.
sudo apt updateCopy6. Once the package list update finishes updating, we can move on to installing Docker on your Ubuntu system.
Thanks to us adding the official repository, all you need to do to install the latest version of Docker is to run the following command within the terminal.
sudo apt install docker-ceCopyAdding your User to the Docker Group
7. To allow users to access and manage your Docker containers without having to escalate to superuser privileges, you must add them to the “docker” group.
You can add your current user to the “docker” group by using the usermod command.
sudo usermod -aG docker $USERCopy8. If you just added your current Ubuntu user to the “docker” group you will need to log out before the change will take effect.
You can log out by using the following command.
logoutCopyAlternatively, you can restart your system to ensure all application are aware of your users updated groups.
sudo rebootCopy9. At this point, you should now have successfully installed Docker from the official repository.
You can move on and begin to spin up containers on your system. We have a ton of guides that showcase some of the awesome software you can run within Docker containers.
Testing your new Docker Installation
Now that you have Docker installed on your Ubuntu system, you will probably want to test it to ensure that everything is working correctly.
The next few steps will walk you through a couple of ways that you can check your Docker installation.
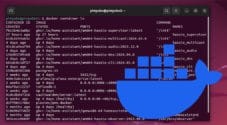
1. The easiest way to check if Docker is now installed on your Ubuntu system is to get it to output its version.
To do that, all you need to do is run the following command within the terminal.
docker --versionCopyFrom this, you should get the version of Docker that you have installed to your system. The message should look a bit like what we have below.
Docker version 20.10.6, build 370c2892. Our next step is to pull a small example container called “hello-world“. This is a super simple image provided by Docker for testing that your system can run actually run containers.
Pulling an image using Docker is as simple as using “docker pull” followed by the name of the image you want to pull.
sudo docker pull hello-worldCopyDocker will proceed to download the container to your system and prepare it for use.
3. Once Docker has finished pulling the container to your Ubuntu system, you can run it.
Again, running a Docker container is a straightforward process. All we need to use is “docker run” followed by the container name.
sudo docker run hello-worldCopyWhen this container runs, it will output text letting you know that your installation appears to be working correctly.
It will also give you a quick rundown of everything that occurred to produce that message.
Conclusion
At this stage, you should now have successfully installed Docker to your Ubuntu system.
Docker is an incredibly powerful container system that is also straightforward to use. You can easily pull prebuilt containers from services like Docker hub with a single command.
Please feel free to leave a comment below if you have had any issues with getting Docker installed on your system.
If you found this guide helpful, we have a wealth of other Ubuntu guides that you might find useful. Additionally, we offer a variety of Docker tutorials for those who wish to delve deeper into Docker.


Agreed that this tutorial is extremely well written and does not at all assume knowledge on the part of the reader, for which I’m grateful.
I’ve done this twice on two different hosts and everything goes fine until I try to access the web page, then I get a 404 error.
Could you point me at resources to get help with this? I’m assuming I have a problem with plant-it, not the install.
This is without a doubt, one of the most well-written tutorials I have ever encountered.
I’ve been in the IT field since 1968 and over the years have used many technical documents and this is one of the very few that could be graded as “Excellent”.
I did find a typo (I think).
In this sentence “These self-contained packers are called containers”, I think “packers” should be “packages”.
Hi Ray,
Thank you for your very kind feedback! Really glad to hear that.
Also, thank you very much for pointing out that typo. I have now corrected it to be “packages”.
Kind regards,
Emmet
Change arch to arm64
echo “deb [arch=amd64] https://download.docker.com/linux/ubuntu $(lsb_release -cs) stable” | sudo tee -a /etc/apt/sources.list.d/docker.list
To
echo “deb [arch=arm64] https://download.docker.com/linux/ubuntu $(lsb_release -cs) stable” | sudo tee -a /etc/apt/sources.list.d/docker.list
Hi Harry,
Thank you for pointing this out. I have updated the tutorial so we now grab the current package architecture.
It should now work correctly if you are running an ARM64 or AMD64 system.
Cheers,
Emmet