In this tutorial, we will show you how to install and run the MongoDB server using Docker Compose.

MongoDB is a popular document-orientated database server. Unlike a relational database like MariaDB, it does not require a strict structure for your data. This form of storing data is what is called NoSQL.
Docker is a great solution for self-hosting your MongoDB server. It makes the setup process straightforward and allows you to run the version you require without fighting with your operating system.
We will be using Docker Compose to set up this server, which allows you to easily run your MongoDB server alongside the software that requires it.
The Mongo container we are using has builds for x64 and ARM64 systems. Please note that while this container will work on the Raspberry Pi, the version of ARM the Pi 5 and earlier, is not officially supported.
Setting up the MongoDB Container using Docker Compose
In the following sections, we will walk you through setting up and running MongoDB using a Docker container.
These steps are written for Linux based operating systems and should work fine for almost all distributions.
Installing Docker on your System
1. To run the MongoDB Docker Container on your system, you will need to install the Docker runtime. If you already have Docker installed, you can skip this section.
Luckily, if you are running a Linux operating system, we have a quick and easy install guide for Docker.
https://pimylifeup.com/linux-docker-install/Preparing for you MongoDB Docker Compose File
2. Once you have Docker installed, we can create a directory to store the MongoDB Compose file and its configuration files.
Using the command below, you can create a directory within the “opt” directory. This directory is an excellent place to store software or configuration files that isn’t your user’s home directory.
Using the “-p” option, the mkdir command will generate all missing directories.
sudo mkdir -p /opt/stacks/mongodbCopy3. Once the directory is created, change to it by using the cd command as shown below.
cd /opt/stacks/mongodbCopyWriting a Compose File for the MongoDB Docker Container
4. Now that you are in the “mongodb” folder we created, we can continue with this guide.
Your next step is writing the Docker Compose file for the MongoDB server. We are using the nano text editor, which is straightforward to use.
sudo nano compose.yamlCopy5. In this file, type out the following lines.
If you intend your MongoDB server to be accessible outside your home network, you should set an admin username and password.
Fill in the following two placeholders to set a username and password for the admin user. Alternatively, delete the “environment” section entirely if you don’t want authentication required.
<ADMINUSER>: Replace this placeholder with a username you want to use to interact with your MongoDB database.<ADMINPASSWORD>: Replace the other password with the password you will use to authenticate with your server.
services:
  mongodb:
    image: mongo
    container_name: mongodb
    restart: always
    ports:
      - '27017:27017'
    environment:
      MONGO_INITDB_ROOT_USERNAME: <ADMINUSER>
      MONGO_INITDB_ROOT_PASSWORD: <ADMINPASSWORD>
    volumes:
      - ./db:/data/dbCopy
6. After writing out the compose file, save and quit by pressing CTRL + X, Y, and then ENTER.
Starting up your New MongoDB Container
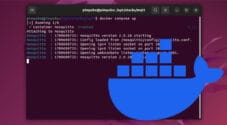
7. With the Compose file now written, you can start up the MongoDB Docker Container by running the command below.
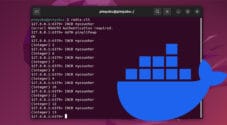
Docker will interpret the Compose file and download and start the MongoDB server. We use the “-d” option so that Docker will detach from the terminal once the container is running.
docker compose up -dCopyTesting out your MongoDB Docker Container
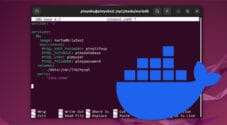
8. Now that your MongoDB Docker container is up and running, you can start interacting with the server using the command below.
This command will start an interactive session with our MongoDB container using the Mongo shell.
sudo docker exec -it mongodb mongoshCopy9. Your terminal will now be using the Mongo CLI that is installed within the MongoDB container.
To test that the server works as intended, we can use the following command to get the connection status.
db.runCommand({ connectionStatus: 1 })Copy10. If you get back a message like the one shown below, you should now be able to connect and use your MonogoDB server.
{
  authInfo: { authenticatedUsers: [], authenticatedUserRoles: [] },
  ok: 1
}
11. Once you use the MongoDB Command line tool, you can exit back to the normal terminal by using the following command.
exitCopyUpdating the MongoDB Docker Container
A key advantage of running your MongoDB server within a Docker container is that it makes the update process simple and fast.
These next few steps will show you how easy upgrading to the latest version is.
1.To pull the latest version of MongoDB, we need to change the directory we created at the start of this tutorial.
If you followed this tutorial exactly, you can use the following command to get to the correct place.
cd /opt/stacks/mongodbCopy2. We can now use the following command to get Docker to pull the latest version of the MongoDB image.
While this will download the latest release, it won’t upgrade the already running container.
docker compose pullCopy3. Use the command below to get Docker to move your already running container to the new release.
Docker will detect that a new image is available and automatically move the running container over to it.
docker compose up -dCopyConclusion
At this point in the guide, you should now have the MongoDB Docker container up and running on your machine.
This database server is a great solution for storing documents that don’t need to conform to a specific schema.
Using Docker to host this server is a great solution, making it easier to maintain and upgrade.
Please feel free to comment below if you have any questions about using Docker to run your MongoDB server.
If you liked this guide, we highly recommend checking out the many other pieces of software you can run using Docker.