In this guide, you will be learning how you can add a new user on Ubuntu.
One of the first things that you should learn when dealing with a multi-user operating system such as Ubuntu is how to create a user.
Users are a crucial part of the operating system and are how you have users that have different permission levels.
For example, if you wanted someone who didn’t have access to certain things or could not install programs, you would create them their own user.
Adding a new user on Ubuntu is a straightforward process that can be done using the terminal or the GUI interface.
Throughout this guide, you will learn how to create a new user for most versions of Ubuntu Please note that you will need to either be the root user or have superuser privileges to add a new user to your system.
Adding a New User Using the Terminal on Ubuntu
The first method we will show you for adding a user on Ubuntu is the terminal. The benefit of using the terminal is that it is super speedy and the tools you use are available on almost any Linux based operating system.
To add a new user to your Ubuntu system, we will be showing you how to use the adduser command. There is also the useradd command which offers a bit more of a hands-free approach to creating a user.
Using adduser Command to Add a New User to Ubuntu
1. The adduser tool makes adding a new user to Ubuntu a really simple and straightforward process.
Using the following, we can create a new user using the username that you specify. Ensure that you replace “<USERNAME>” with the name you want your newly added user to have.
sudo adduser <strong><USERNAME></strong>Copy2. For example, if we add to create a user called “pimylifeup” to our Ubuntu system we would use the following command.
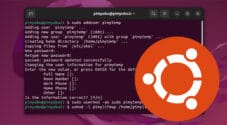
sudo adduser pimylifeup3. After running this command, you will see the following text appear in the terminal.
Adding user `pimylifeup' ...
Adding new group `pimylifeup' (1001) ...
Adding new user `pimylifeup' (1001) with group `pimylifeup' ...
Creating home directory `/home/pimylifeup' ...
Copying files from `/etc/skel' ...
There are a few things that happen immediately after running this command.
It starts by creating a group with the same name as your new user. It will then create a user and assign it to this group.
After that’s completed, it will create a new home directory for the user. Finally, it will copy all files from the “/etc/skel” directory into the new home.
4. During the creation of a new user, you will be asked to set a password for this user.
When entering a password, try to make sure it is something that is secure.
New password:
Retype new password:
5. After setting a password for your newly added Ubuntu user, you will be asked to enter some additional information.
If you would like to use the default value for these values (Typically blank), you can press the ENTER key.
Enter the new value, or press ENTER for the default
        Full Name []: Pi My Life Up
        Room Number []:
        Work Phone []:
        Home Phone []:
        Other []:
5. Finally, you will be asked if all the information you entered is correct.
To finish the creation of this new user, type in Y, then press the ENTER key.
Is the information correct? [Y/n]6. At this point, you will now have successfully added a new user to your Ubuntu system.
Giving Your New User Superuser Privileges
7. Newly added users on Ubuntu do not have superuser privileges. This is a good thing as you don’t want just anyone having full control over your system.
However, if you want this user to have full control adding superuser privileges is fairly sraightfroward. All we need to do is add your new user to the “sudo” group.
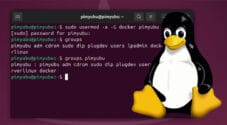
Adding your user to this group is as simple as using the usermod command and typing in the name of your user.
sudo usermod -aG sudo <USERNAME>8. For example, if we wanted to give our “pimylifeup” user sudo privileges, we would run the command below within the terminal.
sudo usermod -aG sudo pimylifeupCopyUsing the Ubuntu GUI to Add a New User
Using the desktop interface is a straightforward way to create a new user on the Ubuntu operating system.
If you are unsure what version you are running, check out our guide on checking your Ubuntu version.
You will see that the desktop interfaces will allow you to create a user, set a password, and even make it an administrator. An administrator is similar to putting a user into the sudo group.
Creating a New User on Ubuntu Desktop 20.04
Let us dive into using the Ubuntu 20.04 desktop interface to create a new user.
To create users within the desktop, you will need to start by going to the settings screen.
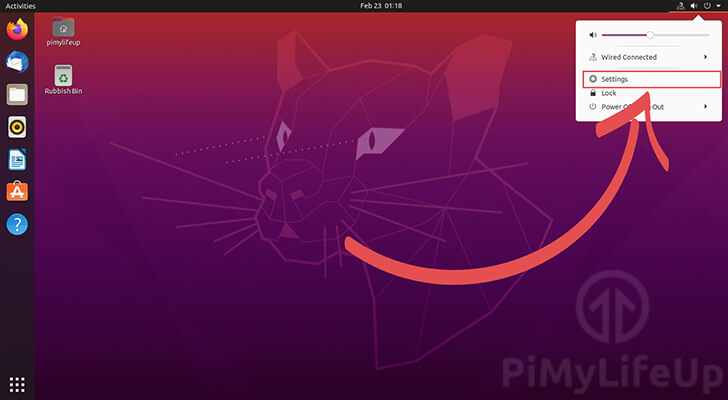
1. To modify users on an Ubuntu 20.04 based operating system, we need to the settings menu.
Start by clicking the icons on the menu on the top-right of the screen.

2. In the panel that pops up, you need to click the “Settings” option.
This option will bring up the settings interface.
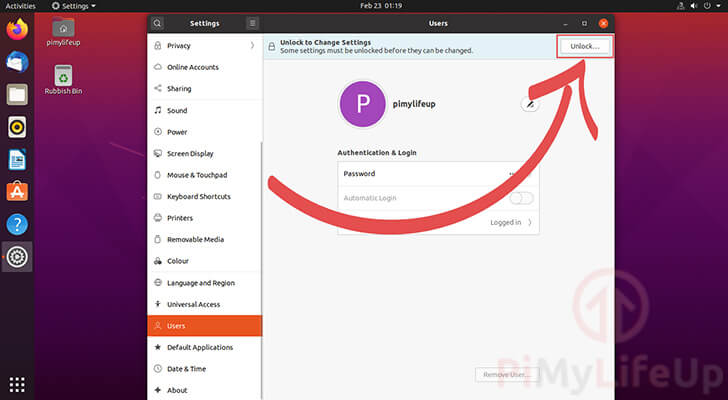
3. You now need to change to the “Users” screen by clicking the option in the left sidebar.
Sometimes you may have to scroll down to find this option.

4. Before we can create a new user on our Ubuntu 20.04 system, we need to unlock the interface.
Without unlocking the system, you won’t be able to add a new user.
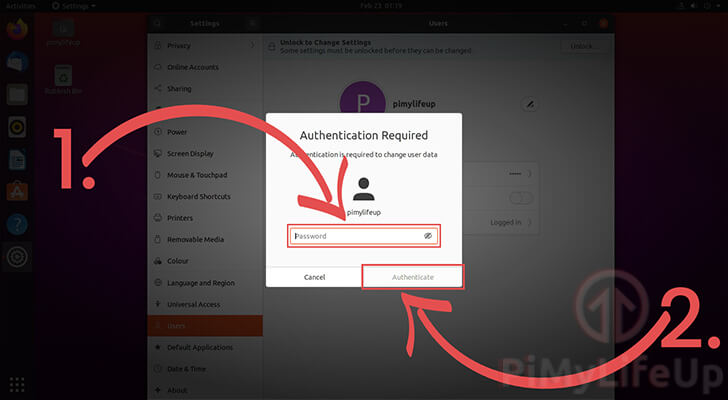
5. Your next option is to authenticate yourself as an administrator.
To do this, you will need to type in the password for your account (1.).
Once done, click the “Authenticate” button (2.).
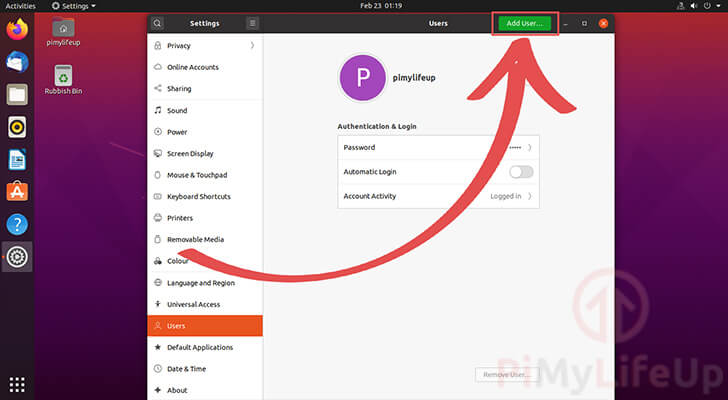
6. At the top of the window, you should see that there is now a “Add User...“. button.
You need to click this button to bring up the create user dialog.
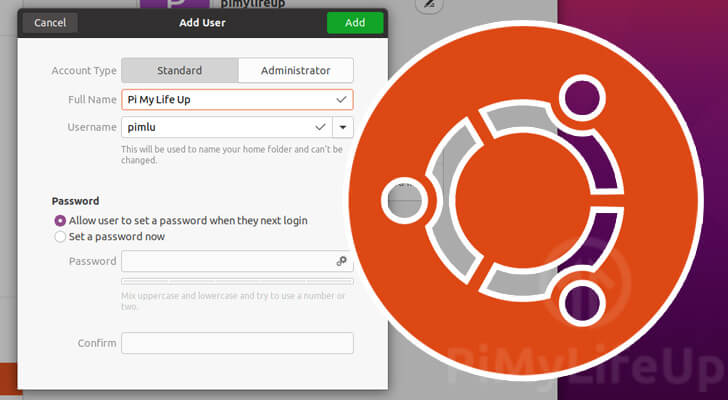
7. We can now set up your new user for Ubuntu 20.04 by using this dialog.
This dialog allows you to set a username, password, and full name for a user.
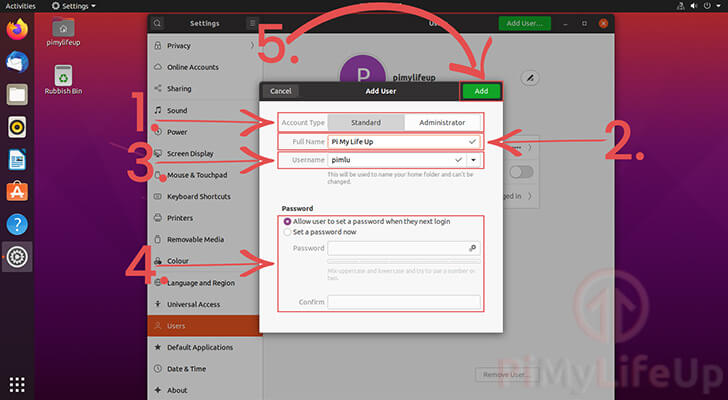
- The first thing you need to do is select the account type. You can either make this a “
Standard” or “Administrator” user.
An administrator is equivalent to a superuser, be careful what users you assign this type. You should set most users to “Standard“. - Next, you can specify the full name of your new Ubuntu user.
The dialog will automatically use this full name to guess what you would want the username to be. - If the automatically generated username is not what you want, you can manually set it.
Once the user has been created, it is not possible to change this value. The home folder will also be created using this name. - You can decide how you want this new user’s password to be set.
You can let the user set the password when they first login, or you can set a password. - Now, create this user by clicking the “
Add” button.
8. Your new user should now be created on your Ubuntu operating system.
Conclusion
At this stage, you should now understand how to add new users to your Ubuntu operating system.
We have shown you both the terminal and GUI steps for creating users.
It is a fairly straightforward process that you can complete in just a couple of steps.
After creating users, it is possible to adjust their details, such as their Ubuntu password.
If you have had any issues with creating a Ubuntu user, please post a comment below.
Be sure to check out some of our other Ubuntu guides and Linux tutorials.