In this tutorial, we will be showing you how to install Ubuntu Mate to your Raspberry Pi.
Ubuntu Mate is an open-source Linux distribution and is regarded as an official “flavor” of Ubuntu by Canonical. The main difference between Ubuntu and Ubuntu Mate is that the mate version makes use of the MATE desktop environment.
MATE is a fork of the GNOME 2 desktop interface, whereas the main branch of Ubuntu has now moved on to the GNOME 3 interface.
There are several reasons you might want to use Ubuntu Mate for your Raspberry Pi instead of Raspberry Pi OS. One of those reasons is that you gain access to the usually more modern packages available through Ubuntu.
Debian on which Raspberry Pi OS is built off traditionally sticks with older more tested and bug-free versions of applications
Ubuntu Mate is currently only available for the Raspberry Pi 2, 3 3B+, 4. So, make sure you’re going to use one of these before starting. Support for the Raspberry Pi 5 is likely to come in the future.
Equipment List
Here is all the equipment that I recommend for this Raspberry Pi Ubuntu Mate tutorial.
Recommended
Optional
- Raspberry Pi Case Amazon
Installing Ubuntu Mate to the Raspberry Pi
1. Before we begin making use of Ubuntu Mate on our Raspberry Pi, we must first download it from their website.
In a web browser, go to Ubuntu Mate’s download website.
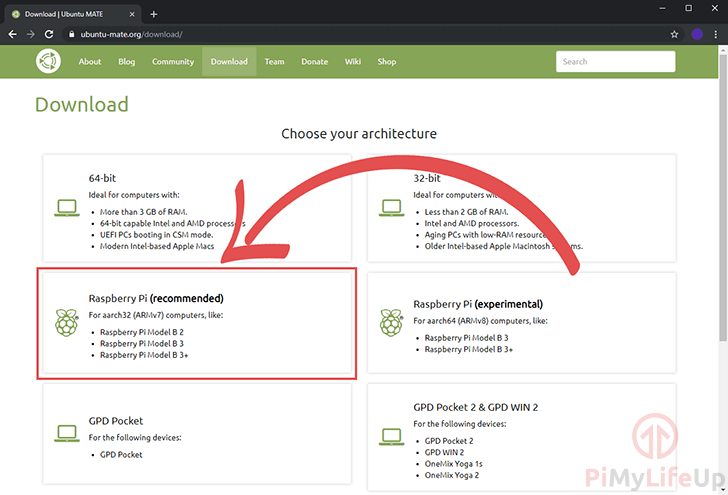
2. Once you are on the website, go ahead and click the version of Ubuntu Mate for the Raspberry Pi.
The team does offer a version of the operating system that uses a 64-bit kernel. However, at the time of writing those builds are experimental only.
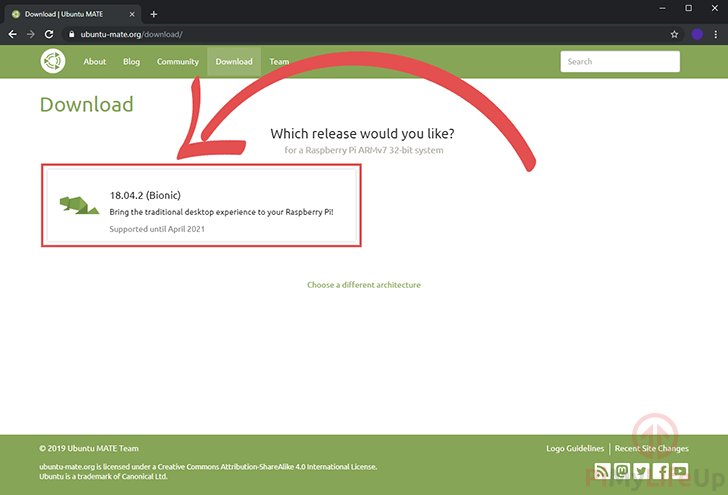
3. With the Raspberry Pi build selected, you will be asked what release of Ubuntu Mate that you will like to use.
For the Pi there is only one release available which is 18.0.4.2 (Bionic), click it to proceed to the download section.
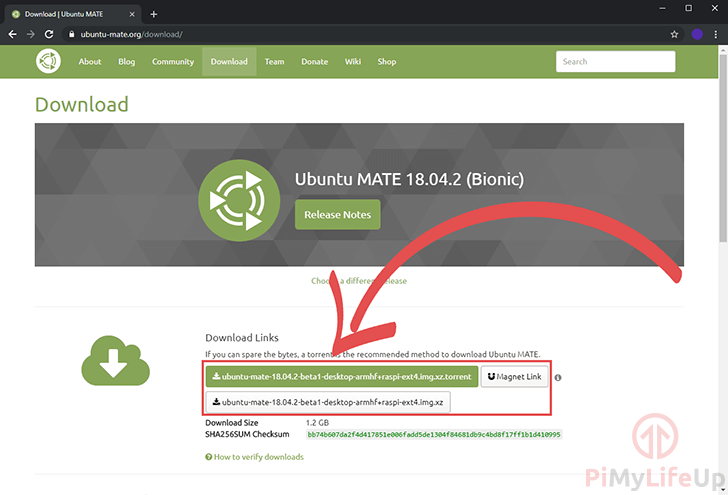
4. Finally, you can download the Raspberry Pi Ubuntu Mate image to your device.
You have the choice of either downloading the image using a torrent or from their website using your web browser.
5. Once you have the Ubuntu Mate image downloaded, we will need a tool to write it to an SD card.
For this tutorial, we will be making use of the tool called “Etcher“, you can download and install the Etcher software by going to the Etcher website.
6. With the Etcher software installed to your device and opened, go ahead and click the “Select Image” button.
This button will open a dialog that will allow you to select the Ubuntu Mate image that you downloaded in the earlier steps of this tutorial.

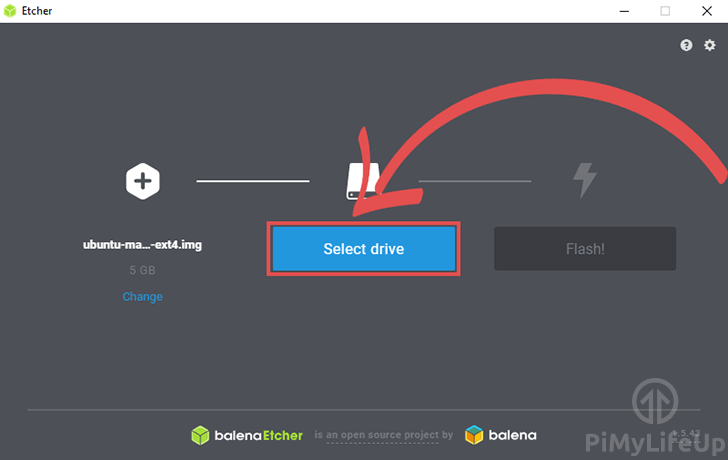
7. Once you have the Ubuntu Mate image selected, you can now proceed to choose the drive that you want to write it on.
Be careful with the drive that you select as all data on it will be erased when the Etcher software writes to it.
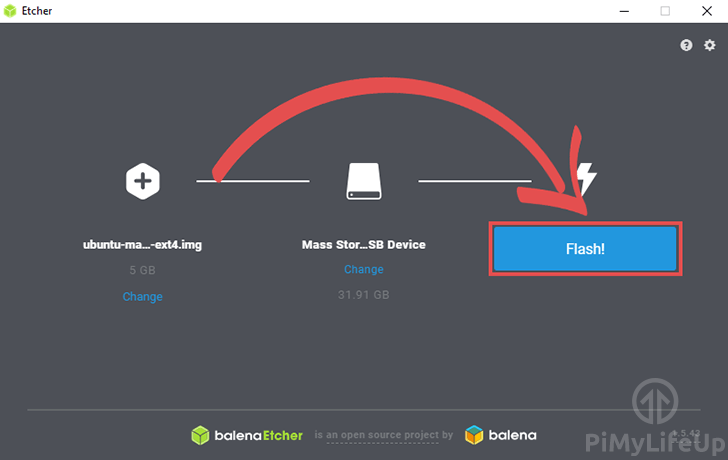
8. Finally, with everything set, go ahead and press the “Flash!” button to write the Ubuntu Mate image to your Raspberry Pi’s SD Card.
Please note that this process can take some time, so be patient.
9. Once done, you can insert the SD card into the Raspberry Pi and power it on.
First Setup of Ubuntu Mate on the Raspberry Pi
1. When you first set up Ubuntu Mate on your Raspberry Pi, you will be required to complete some initial setup steps.
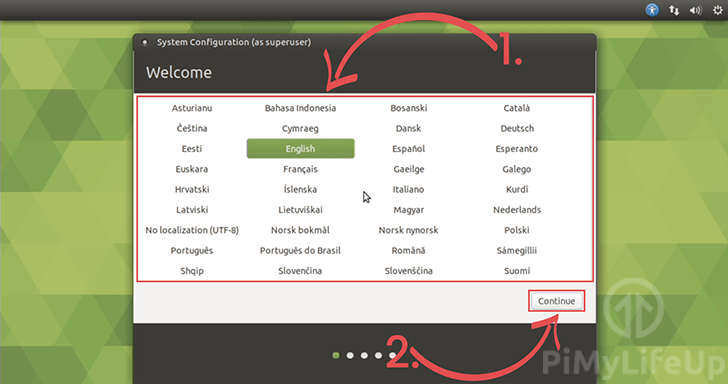
The first step you will be required to complete is to specify your language (1.)
Once selected, click the “Continue” button (2.) to proceed on with the setup process.
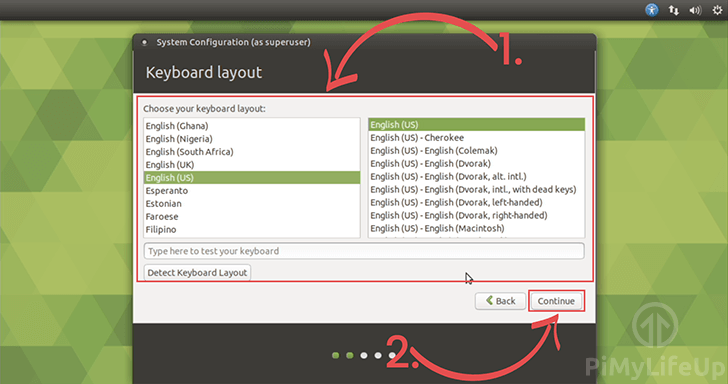
2. In the next step, you will be required to specify the layout of your keyboard (1.). The operating system will try to detect this automatically.
Once you are confident that you have the correct keyboard layout selected, you can click the “Continue” button (2.) to proceed to the next step.
3. In the next step, you will be asked where you are located, using the input box, select the nearest city to where you live (1.).
Ubuntu Mate needs to know this so that it can define the timezone that you live. This setting helps ensure the time that is automatically retrieved is correct.
Once done, click the “Continue” button (2.) to proceed.

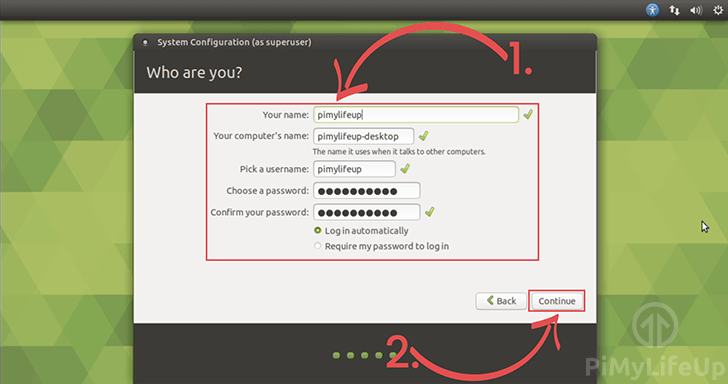
4. The final part of the setup process requires you to create an account.
Fill out all the available input boxes (1.) to generate a username. Also, define a name for your Ubuntu Mate computer.
Once you have filled out all the available input boxes, click the “Continue” button (2.) to proceed.
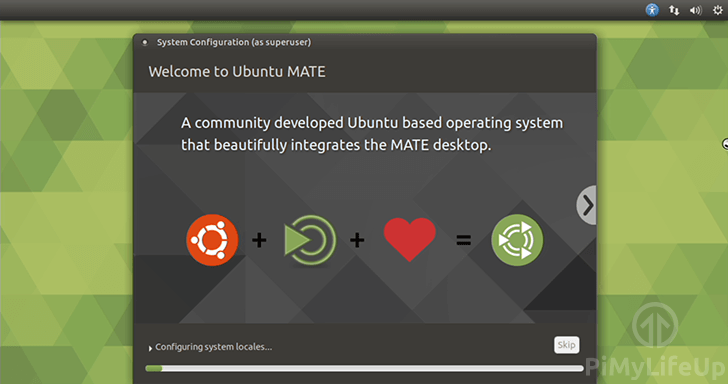
5. Once you have finished with the setup dialog, you will have to wait while it configures everything to your liking.
Please note that this process can take some time.
6. Once the setup process has completed, you will be greeted by Ubuntu Mates desktop interface. You will now be able to put your Raspberry Pi Ubuntu Mate device to use.
Over the next few sections, we will walk you through some additional information about Ubuntu Mate. We will also show you how to get SSH up and running.

If you go to the desktop and the toolbars are blank gray bars, right-click the bars, then click “Reset Panel“. Clicking this option should reset everything back to how it should be.
Opening the Terminal on Ubuntu Mate
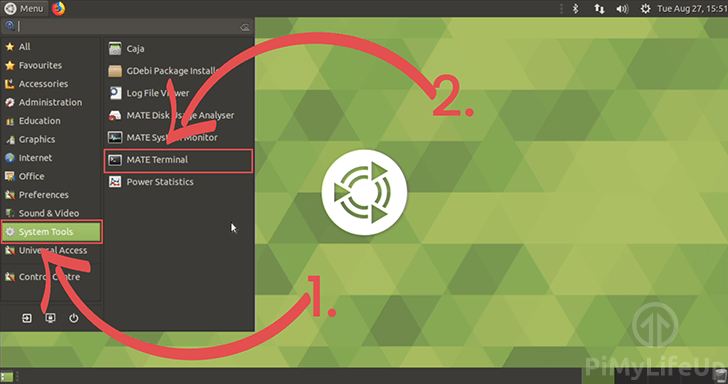
1. To open the terminal on your Raspberry Pi Ubuntu Mate installation, you will need to open the start menu.
The start menu is usually located in the top right-hand corner of the screen, as shown in the screenshot below.

2. Within the start menu, you will need to first hover over the “System Tools” sub-menu (1.). Hovering over this menu will show us a few more applications that we are interested in.
Within this sub-menu, you need to click “MATE Terminal” (2.) this option will launch the terminal application that we are after.
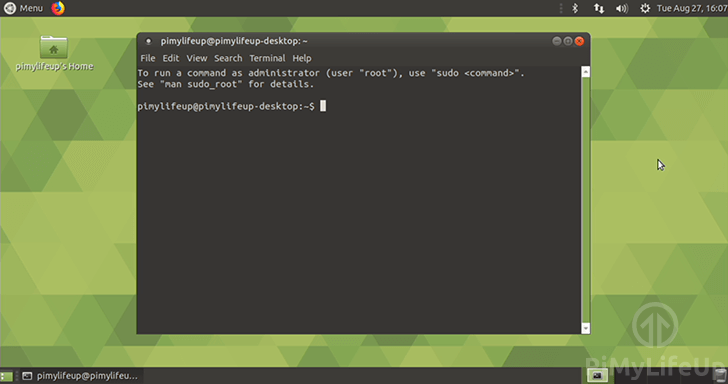
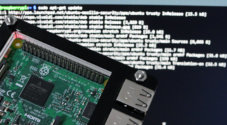
3. With the terminal open on your Pi’s Ubuntu Mate installation, you should have something like below on your screen.
You can interact with this terminal just like you would with the Raspberry Pi OS terminal. Ubuntu Mate and Raspberry Pi OS share a lot of similarities, so things like installing packages are the same.
Since there are similarities, you should be able to do some projects for the Raspberry Pi without having to make too many changes.
Setting up SSH on Ubuntu Mate
1. On a fresh installation of Ubuntu Mate, you will find that SSH is not installed by default, unlike Raspberry Pi OS where SSH is installed. Within this section, we will be walking you through the process of setting it up.
Before we begin, make sure that you open up the terminal application on your Raspberry Pi. If you are unsure of how to do this, read through our previous section.
2. Within the terminal application, run the command below to install the software needed to add SSH support to your Ubuntu Mate installation.
This piece of software is the openssh-server, and this application handles the SSH protocol. It will allow you to connect to your Raspberry Pi using SSH capable clients such as putty.
sudo apt install openssh-serverCopy3. Now with the SSH server installed, we should go ahead and install a piece of software called SSHGuard.
This software will help protect your Raspberry Pi from brute-force attacks by monitoring system logs and automatically blocking them using the system’s firewall.
sudo apt install sshguardCopy4. Our next task is to enable the SSH service so that it will start when Ubuntu Mate boots up.
We can do this by running the following command on the Raspberry Pi.
sudo systemctl enable sshCopy5. Finally, let’s go ahead and start up the SSH service by running the following command.
sudo systemctl start sshCopyWith the SSH service now started you will be able to access your Raspberry Pi running Ubuntu Mate remotely using SSH.
At this point, you should now have Ubuntu Mate running on your Raspberry Pi with the SSH service enabled. If you run into any issues or have any feedback, feel free to leave a comment below.


Can you have Raspbian Buster and Ubuntu Mate on the same Pi without conflicts?
Hi Tony,
As they are seperate operating systems you would need to setup dual-booting with your Raspberry Pi.
Cheers,
Emmet
I tried it, I liked Raspbian Buster better.