In this Raspberry Pi terminal sharing tutorial, we are going to show you how to utilize a software package called tmate so that you can share your terminal with other computers, even when you are behind a firewall.
While the Raspberry Pi comes with VNC which allows you to share your desktop with other computers, it does not come with any methods to just share access to the terminal. That can be an issue when you are running a headless system as VNC will not be of any use.
Our solution to this is to utilize a program designed to share the terminal. In our tutorials case, this is tmate.
This tmate application allows you to share access to the current terminal session with anyone you share the special key with regardless of if you are behind a firewall. Tmate works by relaying it through tmates own secure servers.
Equipment List
Below are all the bits and pieces that I used for setting up Raspberry Pi terminal sharing.
Recommended
- Raspberry Pi Amazon
- Micro SD Card Amazon
- Power Supply Amazon
- Ethernet Cable Amazon (Recommended) or Wi-Fi Amazon
- USB Keyboard Amazon
- USB Mouse Amazon
- HDMI Cable Amazon
Optional
- Raspberry Pi Case Amazon
Installing tmate on Raspbian
1. Before we get started with installing tmate on our Raspberry Pi, we must first ensure our Raspberry Pi is entirely up to date. To do this type in the two commands below into the terminal.
sudo apt update
sudo apt upgradeCopy
2. Now it’s our turn to install tmate, luckily unlike some other distributions tmate is already available in the Raspbian package repository, this is simple as running the following command on your Raspberry Pi.
sudo apt install tmateCopy3. Before we go ahead and run tmate we must first generate some SSH keys, the reason for this is that tmate uses them to encrypt the connections.
To generate an SSH key for your Raspberry Pi simply run the following command within the terminal. This command will create an SSH key based on the RSA encryption method with a size of 4096 bits.
ssh-keygen -t rsa -b 4096Copy4. Now that we have generated an SSH key for our Raspberry Pi we can now proceed to run tmate. To run tmate, you just need to run the following command.
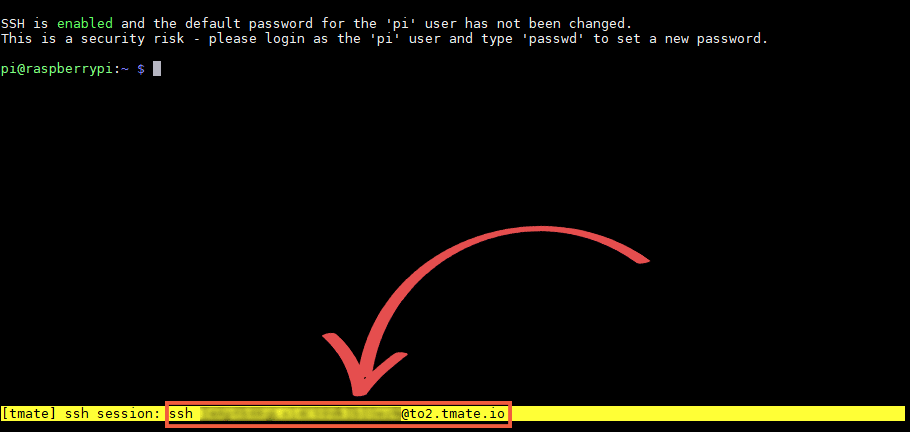
tmateCopy5. Upon running tmate, your SSH session should change, and you should see a clear session as we have shown below. You will also have a yellow bar that shows the current status of tmate.
As we have shown below, the initial connection should end up showing you a URL to utilize for the other computer to connect to the SSH session. We will show you over the page a couple of ways of utilizing it if you are unsure.
This URL should appear like “ssh xxxxxxxxxxxxx@to2.tmate.io“, where “xxxxxxxxxxxxx” is a random combination of letters and numbers. Copy the URL as you will need this later to connect to the tmate session.
6. Once you are finished with your tmate session, you can stop it by simply typing in “exit” and pressing the Enter key.
Utilizing tmate From Anywhere
1. One of the easiest ways to connect to a tmate session is to make use of their web terminal. To do this just take the URL you grabbed from creating your tmate session. The URL should be something like that we have shown below.
xxxxxxxxxxxxx@to2.tmate.io2. From this URL you will want to take everything before the @ symbol. So you should end up with something like below, where the x’s are your unique session ID.
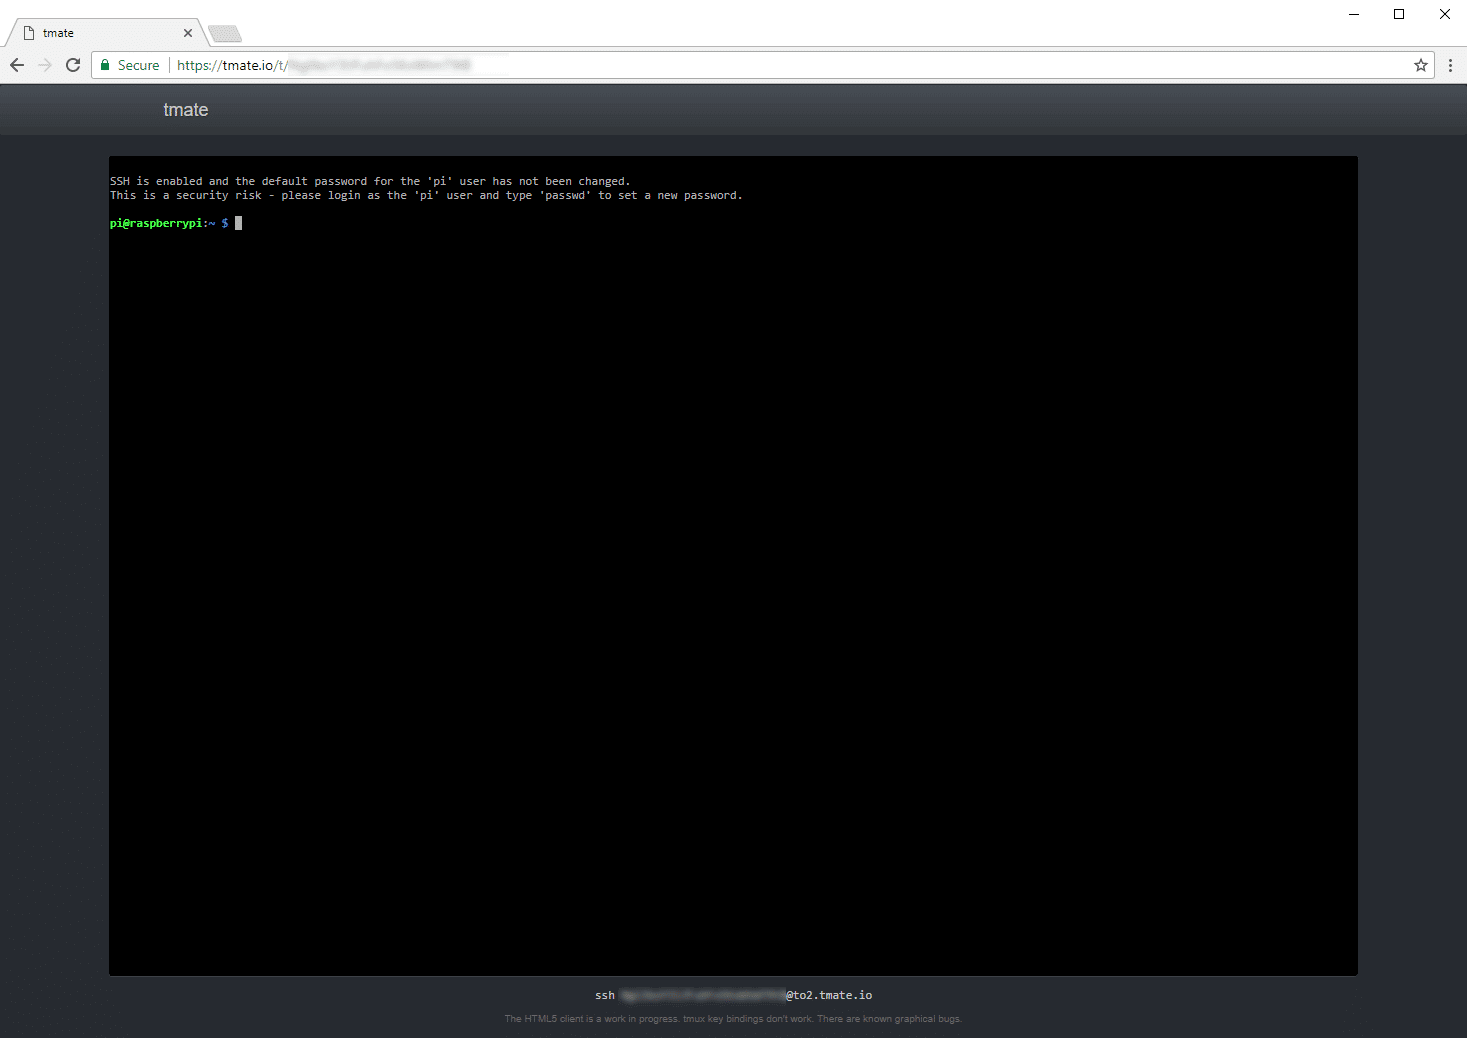
xxxxxxxxxxxxx3. Now with your unique ID in hand, all you need to do is just go to “https://tmate.io/t/” with your unique ID added to the end of it. So your URL should end up something like what we have shown below.
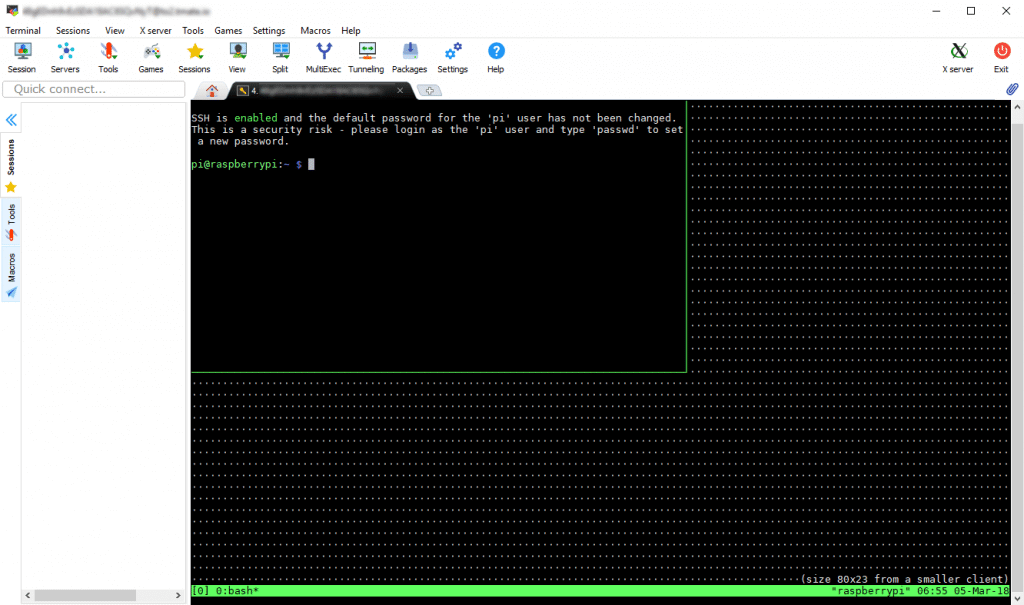
https://tmate.io/t/xxxxxxxxxxxxx4. You should see something like below appear in your web browser upon a successful connection. If it appears, then you are ready to start utilizing your remote connection.
One extra note that we should mention, we highly recommend that you change the default password of the Pi user before proceeding with this, for simplicity sake we did not do this in our tutorial.
Utilizing tmate from a Linux system
1. Utilizing tmate from a Linux based system is probably the second most straightforward ways to use tmate but is likely more of a secure solution then tmate’s web-based terminal. You can also use Windows 10’s Linux subsystem to do this as well.
To begin with, we must first generate an SSH key for the local user that we plan on using to connect to our remote tmate session. Without it, tmate will refuse the connection.
Start off by opening up a new terminal on your device and type in the following command. This command will generate a public/private RSA key pair and will be used to help secure the connection with tmate. If you already have created this in the past, then skip this step.
ssh-keygenCopy2. With the key now generated all we need to do to connect to the tmate session is utilize that URL that we obtained in the first section of this tutorial.
On the Linux based system of your choice simply type in “ssh” followed by the URL as we have shown below. This command will immediately make the connection to your remote terminal session.
ssh xxxxxxxxxxxxx@to2.tmate.ioCopy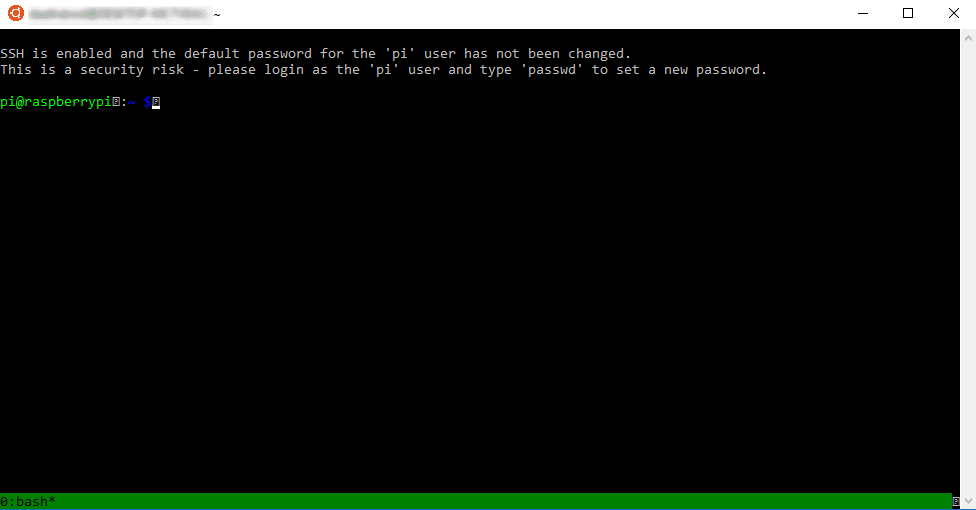
Utilizing tmate from a Windows system
Utilizing tmate from a Windows system is slightly more complicated as it currently does not have a built-in SSH client like Linux/Unix based systems. Now here you can use a program such as Putty or MobaXTerm.
In this guide, we are going to be showing you how to connect to your remote terminal session by utilizing MobaXTerm as that is our current SSH client of choice.
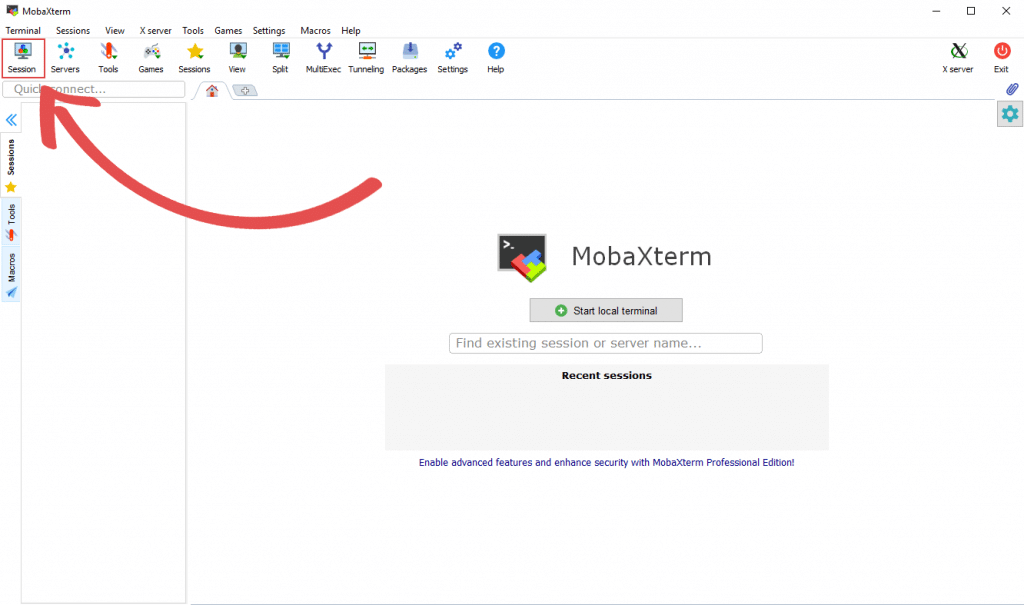
1. Begin by opening up MobaXTerm on your computer and click the “Session” button.
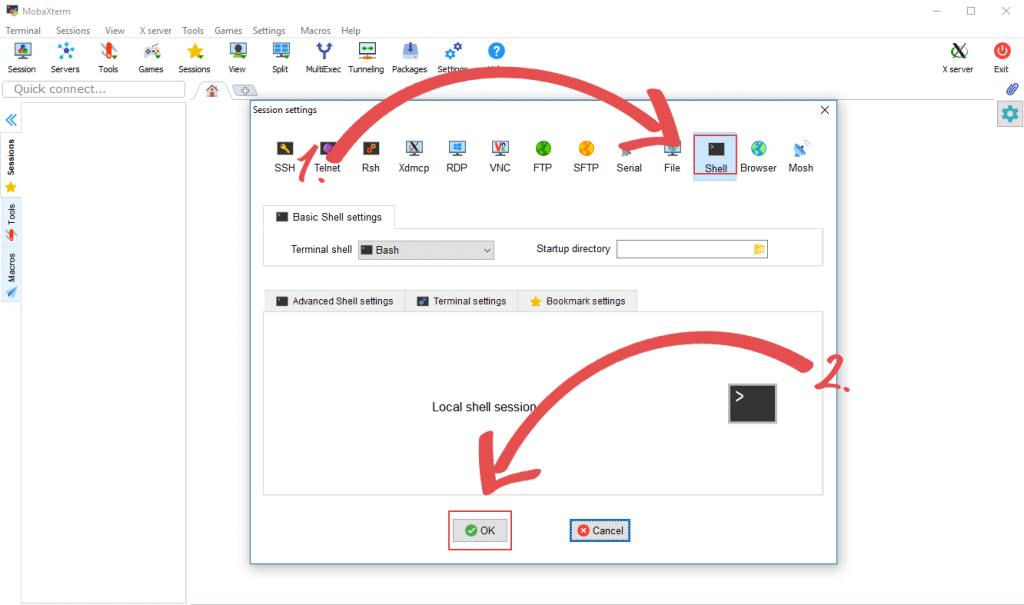
2. On this screen select the “Shell” tab (1.), then just click the “Ok” button at the bottom of the screen. There is no need to make any changes to any options on this screen.
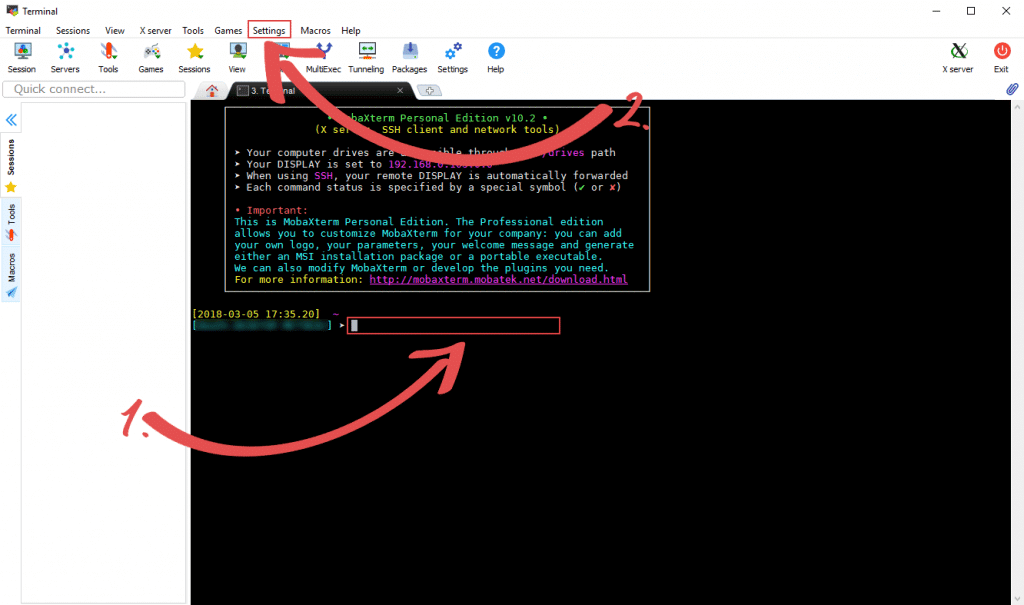
3. Now that we are in the local terminal we just need to enter the following command. Just type in ssh-keygen into the terminal (1.) and press ENTER.
This command will generate the SSH keys that we need. After you have done that you need to click “Settings” (2.) and then go to “Configuration.”
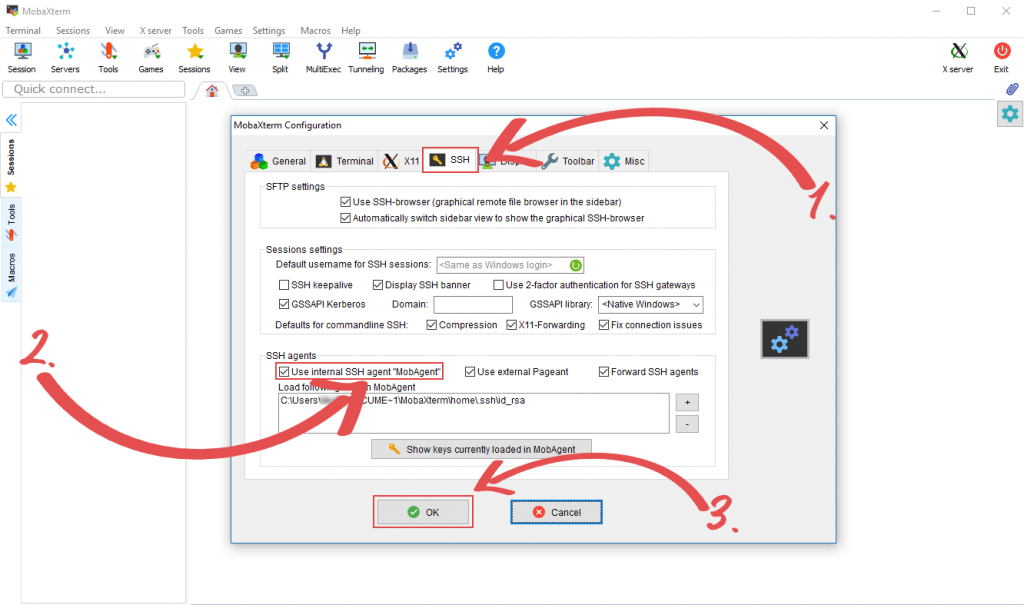
4. Now that we are in the configuration screen, we need to go to the SSH tab (1.)
Within here make sure “User Internal SSH agent” is checked (2.)
Finally, click the “OK” button (3.)
5. With the SSH key now generated and the internal SSH agent enabled we can now go ahead and connect to our tmate session. You just need to copy and paste the URL created for you into the remote host textbox (1.)
The tmate URL should look something like “xxxxxxxxxxxxx@to2.tmate.io“
With the URL entered into the text box all you need to do is click the “OK” button (2.).
Conclusion
Hopefully, by the end of this tutorial, you will have tmate up and running on your Raspberry Pi and have an idea on how to utilize it on various operating systems.
If you have any issues with this Raspberry Pi terminal sharing tutorial or have any feedback, feel free to drop a comment below.
We also have a wealth of other Raspberry Pi projects that are worth exploring.


This is really great, but for a headless system, how about focusing more on how to configure it to be launched at boot time, and less about how to access the client side of things? That seems to be the killer feature here, to access and maintain remote Pi appliances that might be outside your network – in my case, trying to use a Pi Zero as a cellular-to-ethernet bridge to be placed anywhere. It’d be nice (well, virtually essential really) to be able to access it through a TeamViewer-like service like this (and tmate seems to be a 100% TeamViewer-like experience but for terminal instead of GUI).
Great, if I can figure out how to get it geared up to run on startup at a predictable location!
Hi Matt,
Thank you for pointing out this particular use case. With the current way we are using it the session number is going to be randomly generated on every start.
It is actually possible to do what you want with tmate using its named sessions feature. This will allow you to have it automatically be accessible under that same name under every boot.
There are of course certain security considerations that you have to take in to mind.
I will hopefully look in to adding this as part of the guide over the next week or so.
Cheers,
Emmet
Works for me on Buster on a Pi Zero W
Hi Gus
tmate is not available on my pi I have Jessie installed
RS
Hi Romie,
Unfortunately this has only been tested for Raspbian Stretch. With that said, it should still be available for Jessie. I will need to look into this further.