In this tutorial, we will show you how to set up a system monitor on your Raspberry Pi.
A system monitor allows you to track the current status of your hardware by giving you an overview of information such as CPU and memory usage.
To set up a system monitor on the Raspberry Pi, we will use a piece of software called Glances. Glances is a self-hosted monitoring tool that gives you all the information you need to know about your system at a glance.
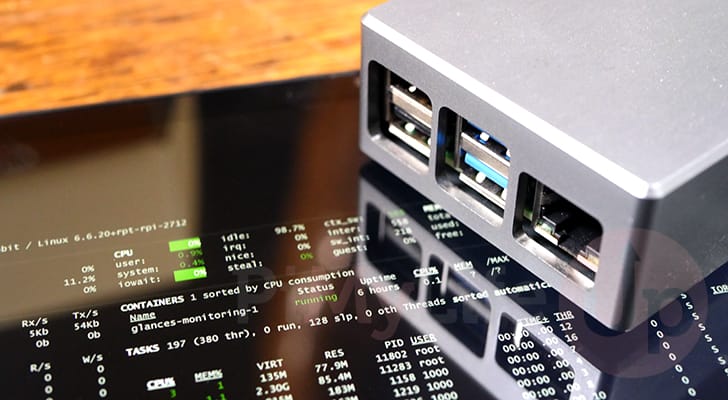
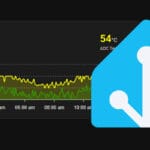
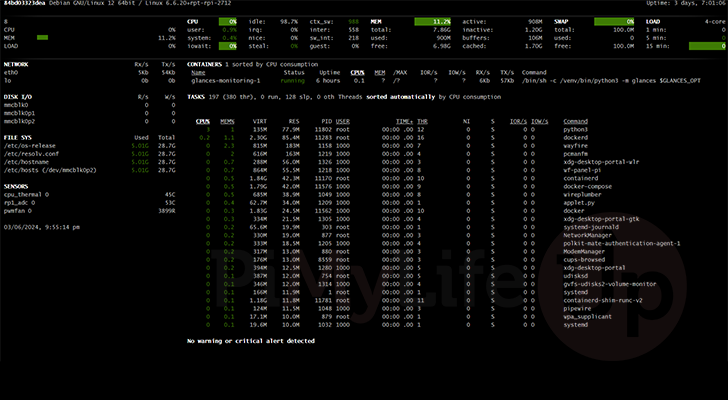
For example, this tool will tell you about your CPU and memory usage and show you the current temperature of your Raspberry Pi. It will also list the applications using your resources and give you network information.
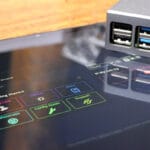
The Glances system monitor presents all this information within an easy-to-access web interface. You don’t even need a screen attached to your system to view the status of your system. You can still display this information on an attached screen if you want by setting up your Raspberry Pi as a kiosk,
Best of all, Glances is easy to set up on the Raspberry Pi, so you will be able to monitor your system in a few short steps. Please note for this tutorial to work, you must be running a 64-bit operating system.

Equipment
Below is a list of equipment we used when setting up a system monitor on our Raspberry Pi.
Recommended
Optional
This tutorial was last tested on a Raspberry Pi 5 using the latest version of Raspberry Pi OS Bookworm 64-bit.
How to set up a System Monitor on your Raspberry Pi
In the following steps, we will show you how to set up a system monitor on your Raspberry Pi using the Glances software.
To make Glances easier to set up, we will use its official Docker container.
Preparing your Raspberry Pi to run Glances
1. Before we can set up the Glances system monitor on our Raspberry Pi, we should update our operating system.
By running the following two commands, you will update the package list cache and upgrade any out-of-date packages.
sudo apt update
sudo apt upgrade -yCopy
2. With your system up-to-date, you must follow our guide on installing the Docker runtime on your system.
This guide will install the latest version of Docker, which we expect you to be running.
https://pimylifeup.com/raspberry-pi-docker/3. Once you have Docker installed, we can now create a directory to store the Docker Compose file for Glances.
You can create this directory by using the mkdir command. By using the “-p” option, we ensure the whole path is created if it doesn’t exist.
sudo mkdir -p /opt/stacks/glancesCopy4. After creating the directory, you must change to it using the cd command. We expect you to be in this directory f
cd /opt/stacks/glancesCopyWriting a Docker Compose File for the Glances System Monitor
5. We can now write a Compose file to launch and run the system monitor on our Raspberry Pi.
You can begin writing this file using the nano text editor, as shown below.
sudo nano compose.yamlCopy6. Glances doesn’t require any configuration to run on your Raspberry Pi, so all you need to do is fill out the following information.
These lines tell Docker what image to download, what ports to open, and also what volumes it should access
services:
  monitoring:
    image: nicolargo/glances:latest
    restart: always
    pid: host
    ports:
      - 61208-61209:61208-61209
    volumes:
      - /var/run/docker.sock:/var/run/docker.sock
      - /etc/os-release:/etc/os-release:ro
    environment:
      - "GLANCES_OPT=-w"Copy
7. After writing the Compose file, you can save and quit by pressing CTRL + X, Y, and then ENTER.
Starting the Glances System Monitor on the Raspberry Pi
8. With the Compose file now written, you can use the following command to start up the Glances system monitor on your Raspberry Pi.
After running this command, the tool will immediately begin actively monitoring your system and output information to its web interface in real time.
Since we are using the “-d” option, Docker will detach from the current terminal session once it has started the container.
docker compose up -dCopyAccessing your System Monitor’s Web Interface
9. To access the web interface for your Raspberry Pi system monitor, you will need your local IP address.
You can get your Pi’s IP address by using the hostname command.
hostname -ICopy10. Once you know the IP address of your Pi, go to the following address in your favorite web browser.
Ensure that you replace “<IPADDRESS>" with your IP.
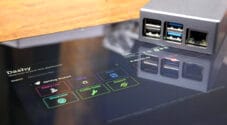
http://<IPADDRESS>:6120811. You should now have access to the web interface of your Raspberry Pi’s system monitor. This tool gives you all the information that you require to monitor your system.
You can even see the individual processes consuming your system’s resources at a glance. On a Raspberry Pi 5, you can even see the speed of the fan if you have one attached.
Updating the Raspberry Pi Glances System Monitor
One key advantage of using Docker to run the Glances system monitor on your Raspberry Pi is that updating to the latest release is a relatively simple process.
The next few steps will walk you through updating to the latest release of Glances.
1. Since we need the Compose file we wrote earlier in this guide to perform the update, we must change it to the “glances” directory that we created.
You can swap to this directory by running the following command.
cd /opt/stacks/glancesCopy2. Once we are in the correct location, we need to tell Docker to pull the latest version of the Glances container by using the following command on your Raspberry Pi.
This will download the latest release but won’t move the existing container to the new release.
docker compose pullCopy3. To move your existing Glances container over to the new version, you only need to use the command below.
Docker will detect that a new release has been downloaded and move the running container to the new version.
docker compose up -dCopyConclusion
Hopefully, you will have successfully set up your Raspberry Pi with a powerful system monitor at this stage.
The Glances software is one of the best solutions for monitoring any device. It provides you with all the information you will need at a quick glance. Best of all, it is accessible from a web interface, meaning it is still a great solution for monitoring a headless Raspberry Pi.
Please feel free to post a comment below if you have any issues getting this neat software to run on your Pi.
If you liked this tutorial, we highly recommend taking a look through our many other Raspberry Pi projects.


When i try to docker compose up -d, it show error:
no matching manifest for linux/arm/v8 in the manifest list entries
How can i fix that?
Hi Prasetya,
You must be running a 64-bit OS to run Glances on your Raspberry Pi. It has no support for 32-bit systems as indicated by the error you are seeing.
Kind regards,
Emmet