In this guide, we will be showing you how you can control the screensaver on a Raspberry Pi.
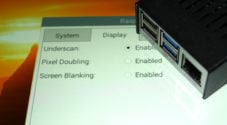
By default, Raspberry Pi OS uses screen blanking to hide the screen after a certain amount of time has passed. This method, simply put, stops video from being output by the Pi’s graphics processor.
If you prefer that your display remains on but still want the contents of the display hidden, you can use a screensaver.
A screensaver was originally designed to prevent burn-in from occurring on a CRT monitor by constantly changing what is being displayed. If you have ever looked into OLED displays, you will be familiar with burn-in as they face a similar issue.
In modern computers, screensavers are still used often, with users often using them for decoration, password protection, or privacy.
In the following guide, we guide we will be showing you how you can set up and use screensavers on the Raspberry Pi. We achieve this by installing a special package called “xscreensaver“.
Installing the Screensaver Software to the Raspberry Pi
To use a screensaver on your Raspberry Pi, we will need to use a piece of software called “xscreensaver“.
Using this software, you can control how the screensaver is displayed on your Raspberry Pi, including the ability to disable it altogether.
1. Before we get started, make sure your Pi is running up-to-date software.
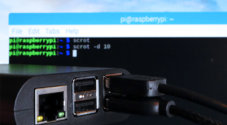
You can update the software on your Raspberry Pi by using the following two commands in your devices terminal.
sudo apt update
sudo apt upgrade -y
You can easily open the terminal on the desktop interface using the CTRL + ALT + T shortcut.
2. With your Raspberry Pi now running up-to-date software, you can install the screensaver software.
To install “xscreensaver” to your device, type in the command below.
sudo apt install xscreensaver3. Once the screensaver package finishes installing to your Raspberry Pi, you can use it through your devices desktop interface.
You can safely quit out of the terminal. XScreensaver uses a graphical interface for configuration, meaning we don’t need the terminal to use it.
Using XScreensaver on the Raspberry Pi
Once you have the screensaver software installed on your Raspberry Pi, we can now put it to use.
Don’t worry, as the software that we are using is straightforward to use, even for beginner users.
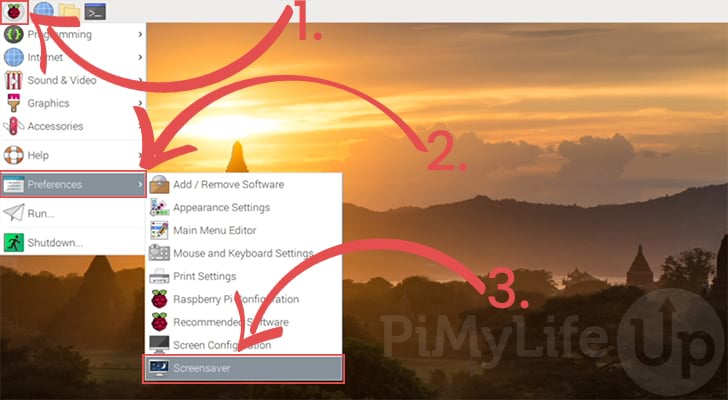
1. To find the “XScreensaver” software, you will need to click the Raspberry icon in the top-left (1.) to open the start menu.
Within this menu, you will need to hover over the “Preferences” option (2.) located near the bottom of the menu.
Finally, you should see “Screensaver” as an available option (3.), click it to open the software.
2. When you first open the screensaver preferences on your Raspberry Pi. you may be greeted with the following warning.
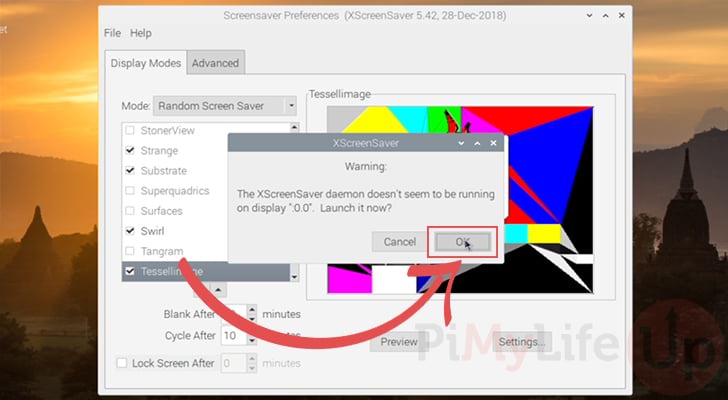
This warning tells you that the daemon isn’t currently running for the display and needs to be launched.
Please click the “OK” button to start up the screensaver daemon.
3. Within this application, you will find several different ways that you can control your screensaver.
We will quickly go over these settings so that you have an idea of how each option affects the screensaver.
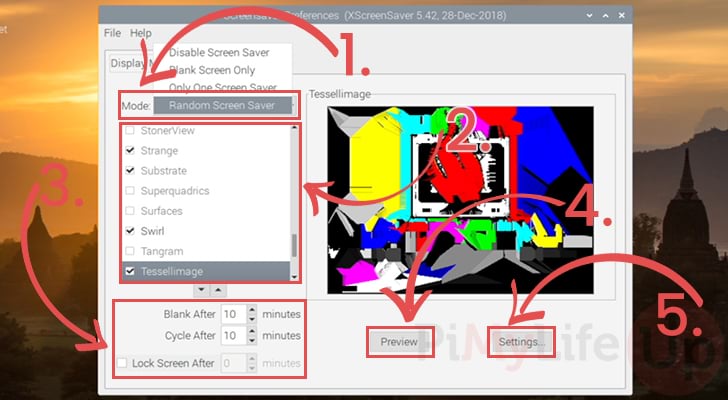
- Probably the most crucial option on here is the “
Mode” option. This option allows you to control the behavior of your Raspberry Pi’s screensaver.
Within this drop-down menu, you will find several different options.Disable Screen Saver– If you don’t want your Raspberry Pi to disable the screen, use this option.
This option will turn off both the screen blanking and the screensaver functionality.Blank Screen Only– If you select this option, your Raspberry Pi will display no screensaver, but the display output will still be blanked.
After the time has passed, the video output on your Raspberry Pi will be disabled until movement occurs.Only One Screen Saver– This option is helpful if you want to only display a single screensaver on your Raspberry Pi.
You can use the box below these options to select the screensaver that you want to be displayed.Random Screen Saver– The last option is also the default option.
By selecting this option, the screensaver software will automatically choose between any of your chosen screensavers. You can even have the software cycle between the many options.
- Directly below the mode options, you will find a list of all the screensavers that you can enable.
Use this menu to select a screensaver by clicking it. When selected, you will see a preview to the right side.
To enable a screensaver, you will need to tick the checkbox next to its name by clicking it.
Please note not all of the screensavers are installed by default. There is an additional package you will need to install to gain access to more. - The next options allow you to control when the screensaver is displayed on your Raspberry Pi’s screen.
To control how much time should pass before the screensaver is displayed, you can change the “Blank After” option.
You can also change how long before the next screensaver is shown by changing the “Cycle After” timer.
Finally, you can also set it so that screensaver will engage the lock screen after a certain amount of time has passed. All you need to do is click the checkbox next to the “Lock Screen After” option and set the timer. - To preview how your screensaver would look on your full display, you can click the “
Preview” button located under the mini-preview.
To quit out of the fullscreen preview, you can press any key or move your mouse. - Finally, each screensaver that you can use on your Raspberry Pi has its own settings page.
If you want to tweak the behavior of your chosen screensaver, you can click the “Settings” button.
4. Any changes that you make within this interface will be applied instantly.
So you can instantly enjoy your new screensavers running on your Raspberry Pi.
Installing Extra Screensavers
The base “xscreensaver” package only comes with a few select screensavers for your Raspberry Pi.
You can install some additional packages that will significantly increase the number of screensavers that you can choose between.
By the end of this section you should end up with access to roughly 200 different screensavers.
1. Before continuing, you will need to open up a new terminal window on your Pi.
The easiest way to open a new terminal window is to use the CTRL + ALT + T shortcut.
2. With the terminal open, type in the following command to all of the additional packages.
These packages contain a large number of different screensavers that aren’t included with the standard release.
sudo apt install xscreensaver-data-extra xscreensaver-gl xscreensaver-gl-extra
Please note that some of these screensavers will be more intensive on the Pi’s processor.
Conclusion
Hopefully, you will have learned how to get a screensaver running on your Raspberry Pi.
Screensavers have a variety of uses. While initially used to prevent burn-in on CRT monitors, it has grown to have different uses.
You can use a screensaver to improve security by auto-enabling a lock screen, acting as a decorative piece of a screen, or helping with privacy by quickly hiding what’s on display.
If you have had trouble getting a screensaver to run on your Pi, leave a comment below.
Be sure to check out our other great Raspberry Pi guides or some of our easy-to-follow projects.


I’ve seen screensavers, say in MSWindows, across the years, that have an overlay of the filename.
Anyone know of a particular screensaver that has this.
I want to set up one of my RPi’s as a learning tool for my myriad of students’ names here on the university campus. As, I find it hard to remember their names the first few weeks of school…and some, even 3.5 years in (their senior year) I’m still finding myself not remembering their names.
I want to copy their pics down from our roster system, and save their picture simple as .jpg….and have the RPi sit all day beside me cycling through pictures, thus refreshing my memory!
– Rob
Can i use xscreensaver only using command line from the terminal(without Graphical user interface)?
Note: I try doing this and I kept recieving the warning that the daemon isn’t currently running for the display.
Hi Adam,
The xscreensaver tool only talks / interacts with the X11 desktop interface. If you are running a terminal only session, then this will not work as X11 would not be running.
Cheers,
Emmet
Will xscreensaver and screen blanking work on Debian 11 Gnome using the same commands?
Hi Cars,
I believe that it should work, however, you may want to look into the GNOME default one called “GNOME Screensaver”.
Cheers,
Emmet