In this guide, we will be showing you how to install an operating system to your Raspberry Pi over the network by using the “Network Boot” bootloader.
With new versions of the Raspberry Pi 4’s bootloader, you can now install operating systems over a network connection.
This new functionality means you no longer need a separate computer to install an OS to your Pi’s SD card or USB. Instead, the device itself will now handle the whole process effectively allowing your Raspberry Pi to boot from the network.
You will need an active ethernet connection to utilize this functionality. Unfortunately, Wi-Fi is not supported by the Raspberry Pi’s network install functionality.
Additionally, you will need a blank SD Card for the network install functionality to work. If the Raspberry Pi detects a bootable USB or SD Card, it will boot straight into them.
Please note that this functionality is only supported on the Raspberry Pi 4 and newer. These supported devices include the Raspberry Pi 400.
Equipment
Below is the list of equipment we utilized when performing a network boot on our Raspberry Pi.
Recommended
- Raspberry Pi Amazon 4 or Newer
- Blank Micro SD Card Amazon
- Power Supply Amazon
- Ethernet Cable Amazon
- HDMI Cable Amazon
- USB Keyboard Amazon
- USB Mouse Amazon
Optional
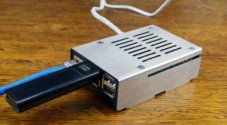
- Raspberry Pi Case Amazon
Enabling Network Boot Functionality on the Raspberry Pi
To use the network boot functionality on your Raspberry Pi 4, you must update the bootloader on your device to a compatible version.
Before proceeding further, install the latest bootloader to your Raspberry Pi by following our guide. When following the guide, you will need to make sure you install the “Netwoork Boot” release.
The Network Boot bootloader tells your Raspberry Pi that it should try connecting to the network when there is no bootable device attached.
Using the Raspberry Pi’s Network Install
Within this section, we will be showing you the basic usage of Raspberry Pi’s network install functionality. If you are familiar with the Raspberry Pi Imager tool, you will be very much familiar with this interface.
You will need your Raspberry Pi, a blank SD Card, keyboard, mouse, and a monitor for this section.
1. Before proceeding further, make sure that you have installed the network boot bootloader to your Raspberry Pi.
Other versions of the Pi 4’s bootloader do not contain the required network install functionality that we will be utilizing.
2. For the next step you will need to start with your Raspberry Pi turned off.
You will need to ensure that the USB or SD Card that you have inserted into your device doesn’t already have an OS. The Raspberry Pi will boot straight into the installed operating system if it is.
Additionally, you are required to have an ethernet cable plugged into the Pi. You will need an active internet connection to use the network install software.
A Wi-Fi connection will not work for booting your Raspberry Pi over a network as the drivers are unavailable within the bootloader.
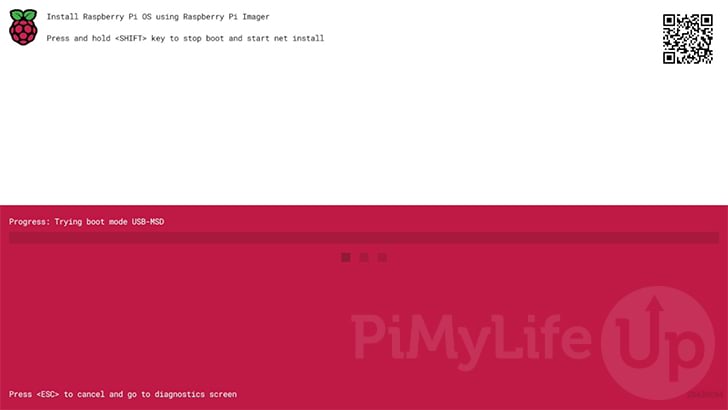
3. After turning your Raspberry Pi on, you will be greeted by the screen that we have shown below.
This screen informs you that it hasn’t found a bootable device and is waiting for one to become available.
Press and hold the SHIFT key on your keyboard to change to the Raspberry Pi’s network install mode.
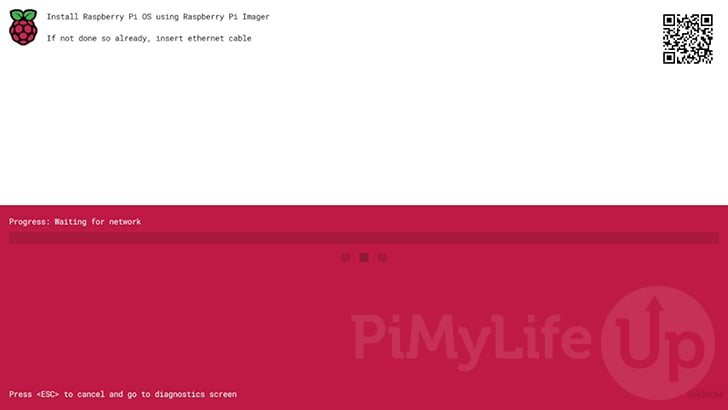
4. The Raspberry Pi will now attempt to connect to the internet through your network. This process might take a minute to complete so please be patient.
This connection is what your Raspberry Pi will use to perform the network install over.
If you haven’t already, you will need to plug an ethernet cable into your Pi. Remember, Wi-Fi is not supported within this tool.
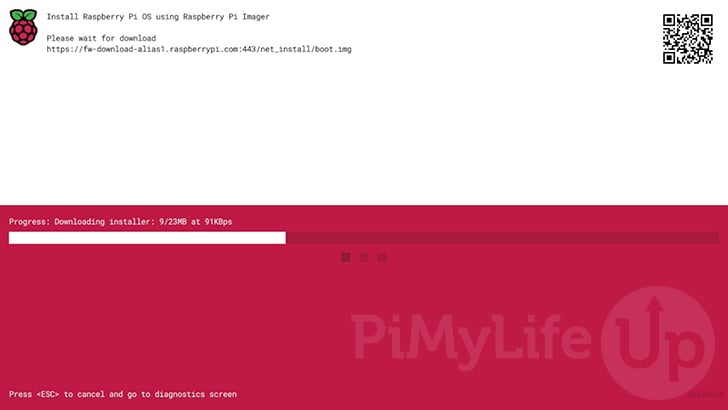
5. The device will download the network install software for your Raspberry Pi to boot into.
Once complete, the Raspberry Pi will boot into the downloaded image. The Pi will keep this boot image in memory, not relying on an available storage device.
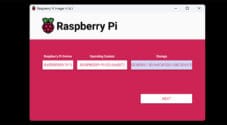
6. Once the Pi finishes downloading the imaging software, it will boot directly into it.
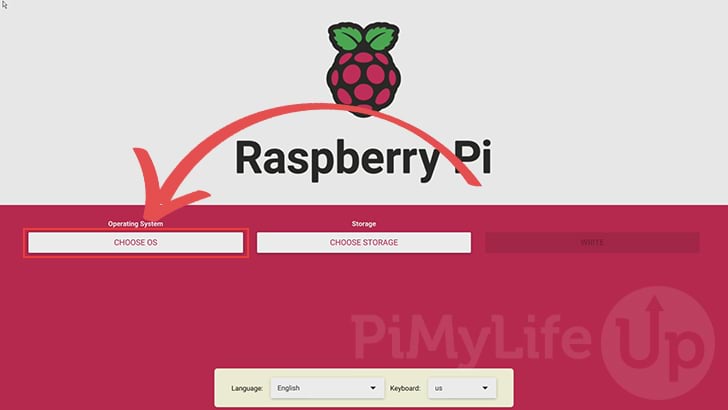
Below you can see the main screen of the Raspberry Pi imager. Using this software to install an operating system to your SD Card or USB drive.
You can start this process by clicking the “CHOOSE OS” button. The Raspberry Pi will install and boot into any OS using your network connection.
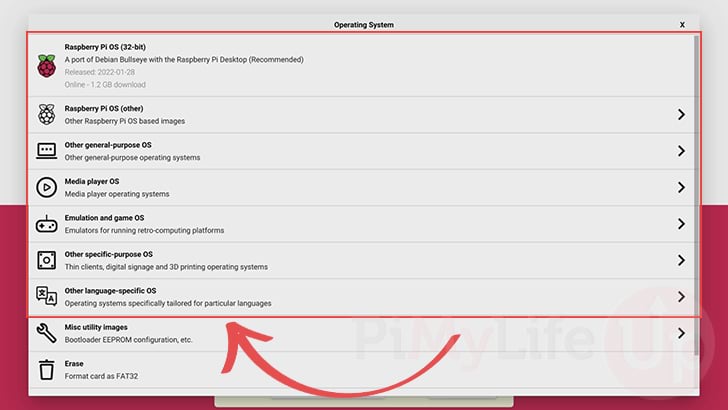
7. Upon clicking the “CHOOSE OS” button, you will be greeted with a list of supported operating systems.
You can search through this list for the OS you want to install over your network connection.
For our example, we will be selecting the top result, “Raspberry Pi OS (32-bit)“.
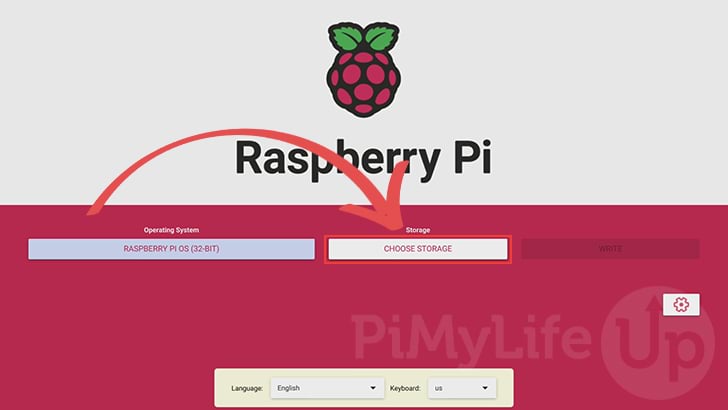
8. After selecting an OS for the Pi to install, you will need to click the “CHOOSE STORAGE” button.
If you look at the button to the left, you can see the operating system you have selected to install over the network.
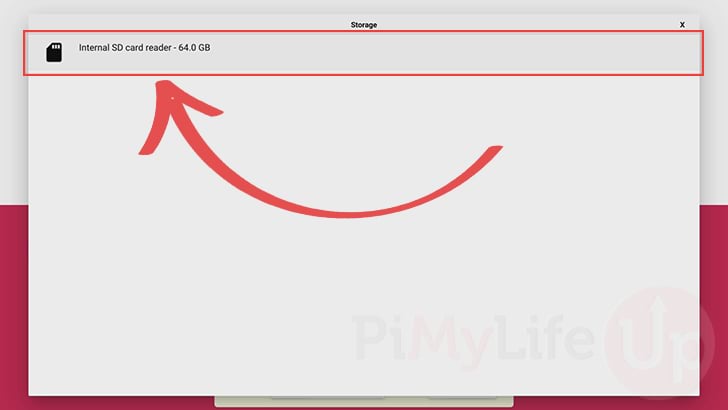
9. The list shown on your screen now shows all available storage devices. In our case, we only have the internal SD card reader available to us.
Click the storage device you want to install your Raspberry Pi’s operating system to.
10. Finally, we can begin installing the operating system over the network.
You can verify your chosen operating system and storage device by looking at the button to the “WRITE” button’s left.
To begin the network install process, you need to click the “WRITE” button.
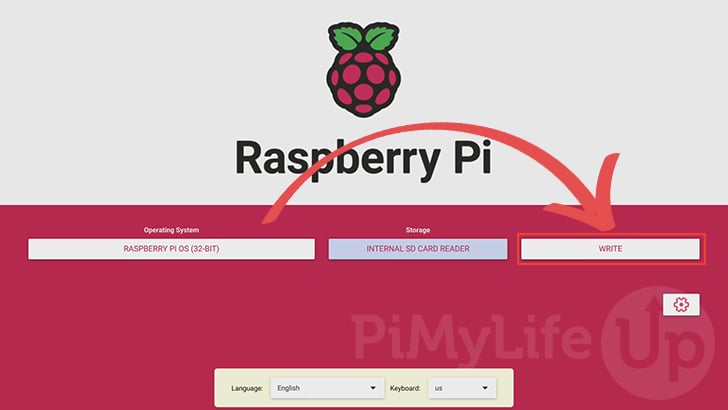
The writing process can take some time as the OS needs to be downloaded over your network before being written to your chosen storage device.
11. After writing is complete your Raspberry Pi should now boot directly into the operating system that was installed over the network.
Conclusion
Hopefully, at this point, you will now have learned how you can use the Raspberry Pi’s new network boot bootloader to install operating systems directly over your network.
The network install feature allows you to install an operating system to your SD Card directly on the device itself. So you don’t need another device to write the image.
If you have run into any issues using network install, please comment below.
Be sure to check out our other Raspberry Pi guides or our Raspberry Pi projects.


Hi to everybody !
I have a small recurent problem on USB boot may be due to a bad soldering around the USB ports) (accusation of USB “cable”)
Up to now when this occurred, the boot was less than perfect, but it restarted, and eventually succeeded.
Since the latest update && full-upgrade, when the OS is not found immediately, my RPi simply starts to download one OS ! Which one ? This weird dictatorial behavior terrorizes me and I extract the power cord plug at the soonest to save my system disk!
I visited the organization forum and got a way to disable the NET-INSTALL in the eeprom configuration file.
https://forums.raspberrypi.com/viewtopic.php?t=331971
I mention this for those it may concern . . .