In this guide, we will be showing you how to disable screen blanking on your Raspberry Pi.
When using the desktop flavor of Raspberry Pi OS, you will notice that the screen will be automatically put to sleep after a certain amount of time of inactivity.
A part of how the Raspberry Pi achieves this is to blank the video device connected to your screen. Basically, by blanking the output, the display will stop receiving video output and typically put itself to sleep.
We will show you how you can easily disable the screen blanking behavior using both the desktop and command-line interface within the next few steps.
The Raspberry Pi provides a couple of tools that allow us to very easily control this behavior without having to set up custom scripts or continually type in new commands.
Disabling Screen Blanking using the Raspberry Pi Desktop
The desktop interface for Raspberry Pi OS gives you a simple configuration menu that you can use to disable screen blanking.
For this section, you will need at least a monitor and a mouse. You can turn off the screen blanking without a keyboard.
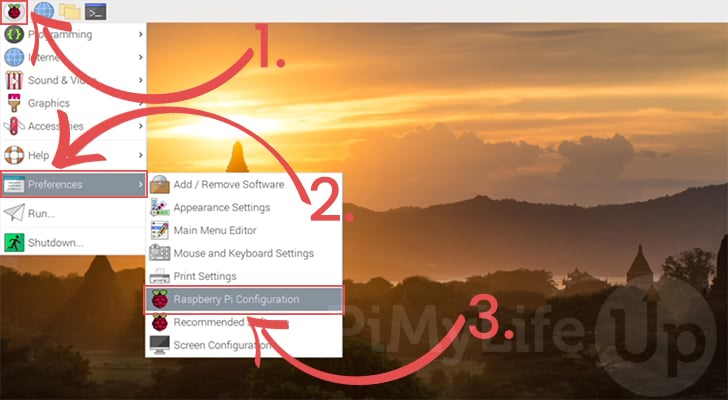
1. Once you have your Raspberry Pi started, you need to get into the configuration menu.
You can get to this menu by clicking the raspberry icon in the top-left corner (1.).
With the start menu opened, you need to hover over the “preferences” option near the bottom of the menu (2.).
Finally, click the “Raspberry Pi Configuration” option (3.).
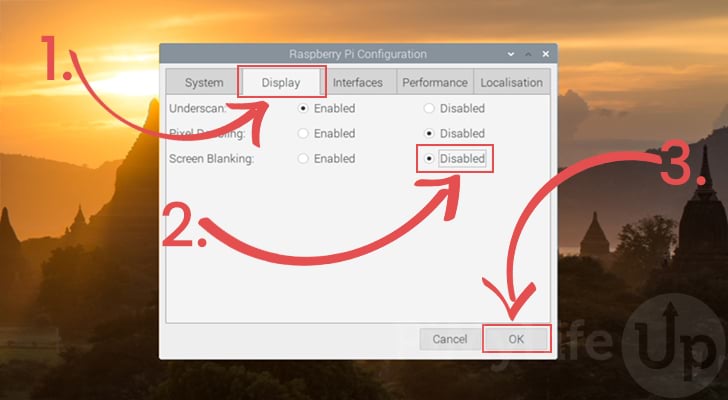
2. With the Raspberry Pi Configuration menu opened, you will need to first change to the “Display” tab (1.).
Within this tab, you should see the option named “Screen Blanking“, click the “Disabled” button next to the option (2.).
Once the option is disabled, click the “Ok” button to apply the change (3.).
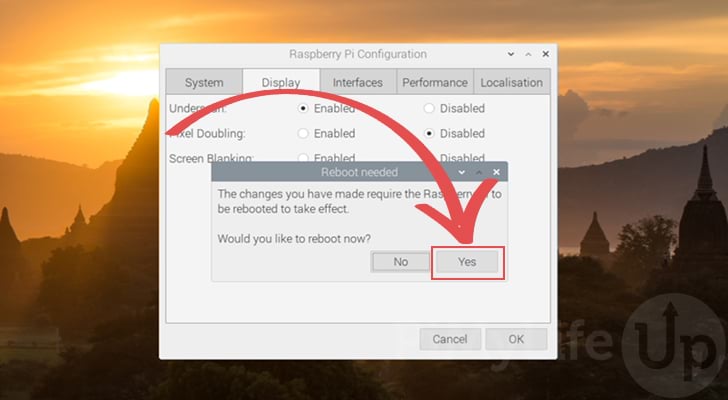
3. After exiting the configuration menu, you will be asked to reboot your Raspberry Pi for the changes to take effect.
To turn off the screen blanking, you will need to click the “Yes” option.
Disable Screen Blanking using the Raspberry Pi Configuration Tool
To disable screen blanking on the Raspberry Pi using the command line, we will be utilizing the Raspberry Pi configuration tool.
This tool makes the process of disabling screen blanking very straightforward, especially if you are using SSH to manage your Pi.
Using this tool to disable screen blanking will copy a configuration file from the “raspi-config” directory to a path where the OS will load it on startup. This file will set all of the blanking options to 0, effectively disabling screen blanking.
1. In the terminal, you can open the Raspberry Pi configuration tool by using the following command.
This tool allows us to reconfigure our device without having to edit files manually.
sudo raspi-config2. Within this tool, we need to change to the “Display Options” page.
You can navigate to this option by using the ARROW keys, then select it by pressing ENTER.

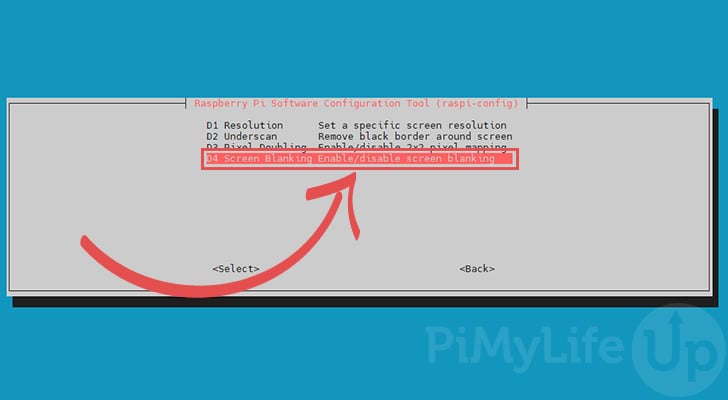
3. Now that we are in the display options menu, you must find and select the “Screen Blanking” option.
This option is what will allow us to disable the screen blanking behavior on the Raspberry Pi.
4. When prompted if you would like to enable screen blanking, ensure that you select the “<No>” option.
By selecting “No“, we are telling the configuration tool we want this feature disabled.

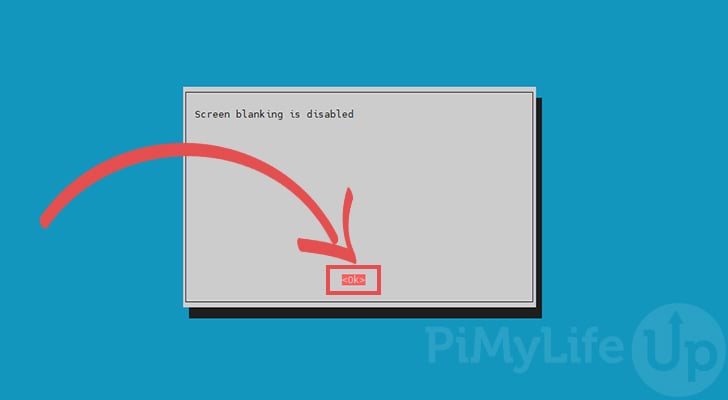
5. If you have selected the correct option, you will be greeted with the following message telling you that screen blanking is now disabled on your Raspberry Pi.
To proceed, you can press the ENTER key.
6. You can now quit out of the Raspberry Pi configuration tool by pressing the ESC key.
If you are asked if you want to restart, select the “<Yes>” option.

For the changes to take effect, you will need to restart your Raspberry Pi. Screen blanking will remain enabled until after you restart the device.
Simple Commands to Turn Off Screen Blanking
If you only want to turn off screen blanking on your Raspberry Pi temporarily, we can use a tool called “xset“.
Using the “xset” command, we can control change some of the behaviors of “xserver”. XServer is the windows system display server utilized by Raspberry Pi OS.
We use these commands for our Raspberry Pi Chromium kiosk script to stop the display from being switched off.
Please note that none of these commands are not permanent. Once your Pi restarts everything will be returned to their original settings.
1. To turn off screen blanking on your Raspberry Pi, you can run the following command
This command uses the “s” option to set a screen saver setting to “noblank“.
xset s noblankCopy2. Using this same tool, you can also disable other features of the Raspberry Pi that may turn off your display.
One of these features is called DPMS (Display Power Management Signaling). This feature is used to enable the power-saving feature of your monitor when the Pi is not in use.
You can disable this feature by using the following command on your Pi.
xset -dpmsCopy3. In addition to everything else, “xserver” also has a screensaver that might also affect your display.
Using the “xset” tool is an easy way to disable this functionality, as all you need to do is run the following command.
xset s offCopyConclusion
Hopefully, by now, you will have gotten an idea of how you can turn off the screen blanking functionality of your Raspberry Pi.
There are a few different ways to disable screen blanking, whether using the desktop interface, the command line configuration tool, or using the “xset” command.
If you have had any issues with getting screen blanking disabled on your Pi, please comment below.
Be sure also to check out our numerous other Raspberry Pi guides or our easy-to-follow projects.


The last command should not contain “-“:
xset s off
(as it appeared earlier)
Thank you
Thank you!