This guide will show you how to set up an on-screen keyboard for your Raspberry Pi.
An on-screen keyboard can be incredibly useful for your Raspberry Pi in a variety of different cases.
For example, if you are using your Raspberry Pi with a touchscreen display, using an on-screen keyboard is one of the best ways of adding keyboard input.
Additionally, if you are running a Pi that does not have a keyboard connected and only a mouse, then using an on-screen keyboard will allow you to type still.
Installing an on-screen keyboard to your Raspberry Pi is a straightforward and quick task.
We will also be showing you how to add an icon to the taskbar to quickly toggle the virtual keyboard on and off.


Equipment List
Here is a list of the equipment we recommend for this guide on setting up an on-screen keyboard on your Raspberry Pi.
Recommended
- Raspberry Pi Amazon
- Micro SD Card Amazon
- Power Supply Amazon
- Ethernet Cable Amazon or Wi-Fi Amazon
- HDMI Cable Amazon
- Monitor Amazon
- USB Mouse Amazon or Touchscreen
Optional
This guide was tested on a Raspberry Pi 4 running Raspbian Pi OS. This guide should work successfully on older versions of Raspbian as well.
Installing the On-Screen Keyboard Software to your Raspberry Pi
1. Before we can install the on-screen keyboard, we must first update our Raspberry Pi.
To upgrade the packages, we need to run the following two commands.
sudo apt update
sudo apt upgradeCopy
Depending on how long it has been since you last updated, this process can take some time, so be patient.
2. Now that we have updated our Raspberry Pi, we can go ahead and install the software we want.
Raspberry Pi 1, 2 and 3
To install the virtual keyboard software, all we need to do is run the following command.
sudo apt install matchbox-keyboardCopyWe chose to use the matchbox-keyboard package as it’s the most stable for the Raspberry Pi while also not chewing up too much of the Pi’s limited resources.
You can now move onto the rest of the tutorial.
Raspberry Pi 4 or 5
If you are using a Raspberry Pi 4 or 5, it is likely you will be using the new Wayland display system rather than X11. Unfortunately, matchbox does not work out of box with Wayland, so we will need to install a different package.
sudo apt install wvkbdCopyNow skip down to the section on launching the wvkbd keyboard from your terminal.
Opening the Virtual Keyboard on the Raspberry Pi
In this section, we will be showing you how to open the on-screen keyboard using both the terminal and the desktop menu.
Using the Desktop to Open the On-Screen Keyboard
This section is only relevant if you installed the match-box keyboard. If you are using wvkbd, you will need to launch it using the terminal.
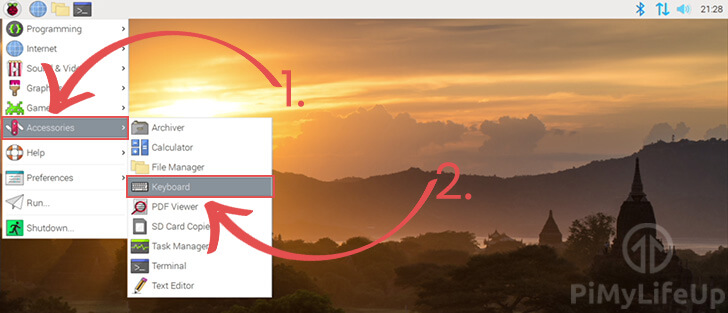
1. Once you are on the desktop of your Raspberry Pi, click the icon in the top-left hand corner of the screen.
This icon will bring up the start menu for the operating system.
2. Next, hover over “Accessories” (1.), this will bring up an additional menu
Within this new menu, click “Keyboard” (2.) to launch the software.
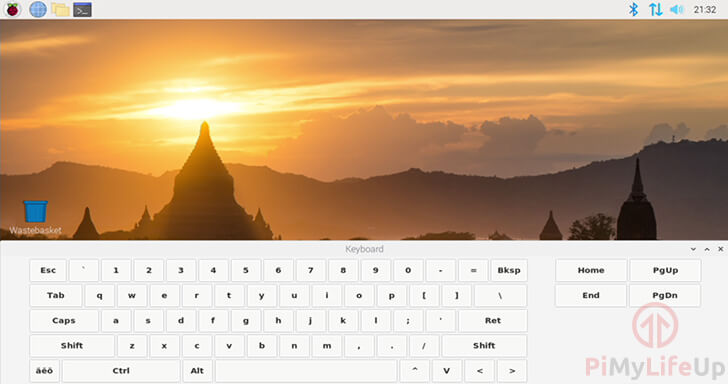
3. The virtual keyboard should now be displayed on your Raspberry Pi’s desktop.
You can click/tap the letters to type into any textbox.
Using the Terminal to Launch the Virtual Keyboard
If you can’t find the keyboard option within the start menu, you can also use the terminal to launch the software.
Using the wvkbd keyboard
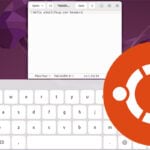
1. Open the terminal on your Raspberry Pi.
2. Run the following command in your terminal to launch the keyboard.
wvkbd-mobintlCopyUsing the -h flag will allow you to view some of the options that you can use with the command. For example, resizing the font or the size of the keyboard.
wvkbd-mobintl -hCopyUsing the matchbox keyboard
It is also possible to complete this section using SSH if you have no keyboard to connect to the Pi itself.
1. Start by opening up a terminal session on your Raspberry Pi whether that be over SSH or on the Pi itself.
2. Now within this terminal session, run one of the following commands.
The command you need to use differs if you are using SSH or running it directly on your Pi.
The reason for this is that we need to specify the display we want the virtual keyboard to display on when using SSH.
On the Raspberry Pi
matchbox-keyboardCopyOver SSH
DISPLAY=:0 matchbox-keyboard &This command will load up the on-screen keyboard software on your Raspberry Pi.
Adding a Virtual Keyboard Toggle to the Taskbar
This section of the guide will show you how you can modify Raspberry Pi OS so that you can add a keyboard toggle to your taskbar.
We will be making it so that when you click this button, it will automatically open and close the on-screen keyboard software.
This section may not currently work on the latest version of the Raspberry Pi OS.
1. We will start by creating the bash script that will toggle the matchbox software.
Begin writing this script in the “/usr/bin/” folder by running the following command.
sudo nano /usr/bin/toggle-keyboard.shCopy2. Within this file, enter the following lines of code.
#!/bin/bash
PID="$(pidof matchbox-keyboard)"
if [  "$PID" != ""  ]; then
  kill $PID
else
 matchbox-keyboard &
fiCopy
This script is relatively straightforward. It first tries to grab the id of the virtual keyboard software and stores it in a bash variable called PID.
If it gets a process id, then the script will kill the currently running on-screen keyboard.
Otherwise, if there was no process id for the software, it will start it up by running the matchbox-keyboard command.
3. Once done, please save the file by pressing CTRL + X, then Y, followed by ENTER.
4. With our script created, we need to give everyone the execute privileges so that they can run it.
You can read more about permissions in linux with our file permissions in Linux guide.
To add the execute permission, run the following command.
sudo chmod +x /usr/bin/toggle-keyboard.shCopyIf you would like to learn more about this command, check out our basics of chmod guide.
5. Next, we need to create the file which the taskbar will read to load our toggle button.
Begin creating this file by using the command below.
sudo nano /usr/share/raspi-ui-overrides/applications/toggle-keyboard.desktopCopy6. Within this file, enter the following lines.
[Desktop Entry]
Name=Toggle Virtual Keyboard
Comment=Toggle Virtual Keyboard
Exec=/usr/bin/toggle-keyboard.sh
Type=Application
Icon=matchbox-keyboard.png
Categories=Panel;Utility;MB
X-MB-INPUT-MECHANISM=TrueCopy
This text tells the operating system how it should display the entry, as well as telling it should execute the script we wrote when clicked.
7. Now, please save the file by pressing CTRL + X, then Y, followed by ENTER.
8. Next, we need to copy over the default configuration file over to our pi user’s config folder.
We will be modifying this file to add our on-screen keyboard button.
cp /etc/xdg/lxpanel/LXDE-pi/panels/panel /home/pi/.config/lxpanel/LXDE-pi/panels/panelCopy9. Finally, we need to modify the configuration for the pi user so that the icon is added to the taskbar.
Run the command below to begin modifying the panel configuration.
nano /home/pi/.config/lxpanel/LXDE-pi/panels/panelCopy10. To the bottom of this file, add the following text.
Plugin {
  type=launchbar
  Config {
    Button {
      id=toggle-keyboard.desktop
    }
  }
}Copy
This bit of text creates an entry in the taskbar. It tells the taskbar to utilize the toggle-keyboard.desktop file we created earlier on in this section to display our toggle button.
11. Once added, please save the file by pressing CTRL + X, then Y, followed by ENTER.
12. To show our new button in the taskbar, we need to restart our Raspberry Pi by running the following command.
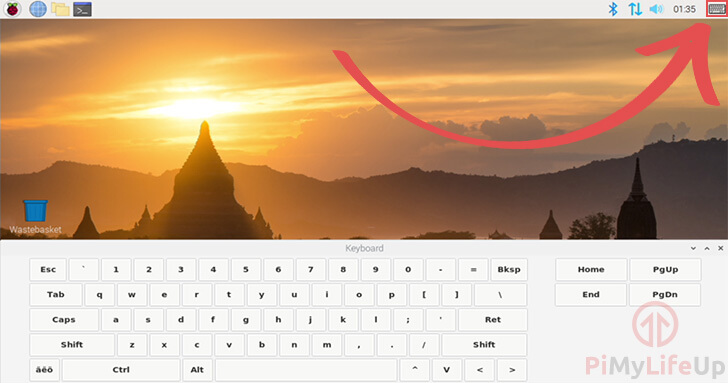
sudo rebootCopy13. When your Raspberry Pi finishes rebooting, you should now see the keyboard icon in the top right-hand corner of the screen.
By clicking this icon, you can toggle the on-screen keyboard on your Raspberry Pi on and off.
Conclusion
Hopefully, at this stage, you have now successfully set up an on-screen keyboard on your Raspberry Pi.
If you have had any trouble with the virtual keyboard software, feel free to drop a comment below.


I know this tutorial has been up for a while, etc…
However, I just tried it with a Pi5 and it kind’ve works (I need to investigate further). First thoughts are that the wvkbd keyboard doesn’t seem to be endowed with a ‘+’ key. Am I missing something?
Hi Peter,
wvkbd definitely leaves a lot to be desired but is unfortunately still one of the better options for Wayland. THe Raspberry Pi foundationd does now offer squeekboard as a solution but I havent found the time to properly install and test it out ot see if it provides the same leve lof functionality.
Its been awhile since i’ve had to use the keybaord but looking it up you can access some of the missing keys by utilizing the following keyboard combinations.
Press Cmp + . to access more punctuation
Press Cmp + – or , to access ‘mathematical’ symbols (+,-,=,etc)
Press Cmp + ‘ or 0 or 9 to access more brackets and quotes
Press Cmp + q to access emojis
Press Cmp + space to access list of keyboard layouts
Hopefully this helps you.
Kind regards,
Emmet
Thank you