When you first set up your Raspberry Pi, it will default to the UK (GB) keyboard layout.
In this guide, we will be walking you through the process of changing the keyboard layout setting for your Raspberry Pi.
One thing you may have noticed is that countries can have different key layouts. Not all countries use the QWERTY layout, then even with countries that do, not all symbols are located in the same place.
When the layout doesn’t match your keyboards, it can make it incredibly difficult to type, especially when entering commands using the terminal. None of the keys you type will correspond to what is interpreted by the system.
For example, the at (‘@‘) symbol on my US based keyboard will come across as a double quote (‘"‘) when used with Raspbian’s default UK layout.
This guide, will show you three different methods that you can use to change the system’s keyboard layout.
Two of these methods are more specific to the official Raspberry Pi OS distribution. However, our third method should work on most Debian / Ubuntu operating systems.
Equipment List
Below we have listed some of the equipment we used when changing the keyboard layout for our Raspberry Pi.
Recommended
Optional
When testing this guide, we used the latest version of Raspberry Pi OS (Buster) running on a Pi 4.
Changing the Raspberry Pi’s Keyboard Layout on Desktop
This section will show you how to change the keyboard layout on your Raspberry Pi when you are using a desktop version of Raspbian.
This method is probably the easiest to follow, as you can reconfigure the layout using a couple of clicks.
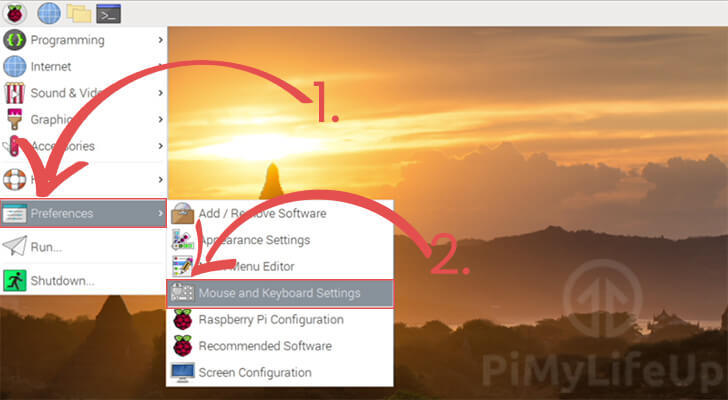
1. On the desktop, you need to click the Raspberry icon in the top-left corner of your screen.
Clicking this icon will bring up the systems start menu.

2. Within the start menu, you need to hover over “Preferences” (1.).
Then you need to click the “Mouse and Keyboard Settings” option (2.).
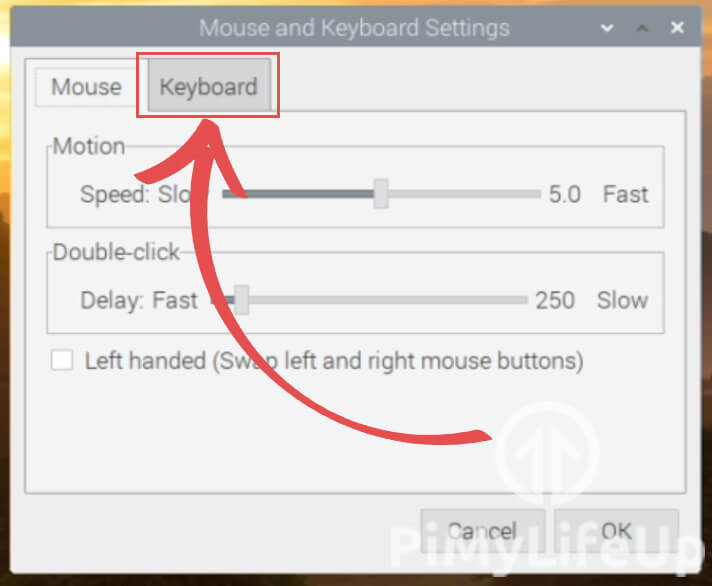
3. Within this settings dialog, you need to click the “Keyboard” tab.
This tab is located at the top of the dialog box.
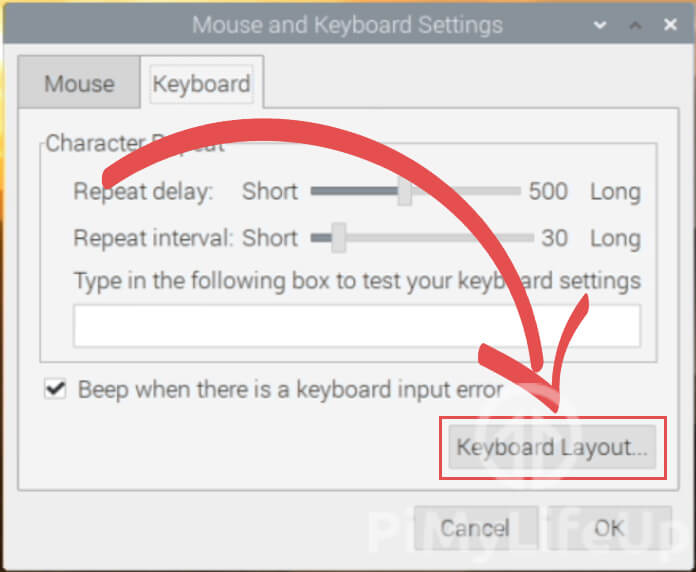
4. On this tab, click the “Keyboard Layout...” button to bring up the keyboard layout dialog.
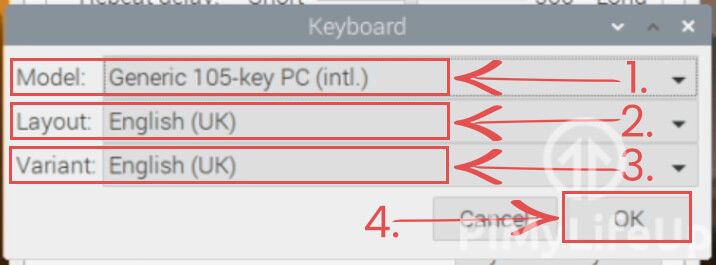
5. Using this dialog, you can modify your keyboard layout settings for your Raspberry Pi.
There are three different options that you can configure within this dialog.
The first is the model. For the most part, you should safely ignore this option unless you have a specific need (1.).
The layout is the important option that you are after. Change this setting to reflect the layout of your country (2.).
Lastly, the third option is the variant. This option is useful if you have a particular keyboard layout for your country (3.).
Once you have configured these options for your required keyboard layout, you can save the options by clicking the “OK” button (4.).
6. While your Raspberry Pi applies your new keyboard layout, you will be greeted by the following message.
Once it disappears, your new settings should now be successfully set.
Changing the Raspberry Pi’s Keyboard Layout using the Terminal
In this section, we will show you two different methods for changing the keyboard layout on your Raspberry Pi.
For these methods you only need to have terminal access to your device, so using SSH is perfect for these steps.
Using the raspi-config Tool
The first method will only work on operating systems that implement the Raspberry Pi Configuration tool.
This tool makes the process of changing your keyboard using the terminal relatively straightforward.
1. Before we change our Raspberry Pi’s keyboard layout, we should first ensure we have the latest version of the raspi-config package.
We need to run an update and an upgrade on our device by using the following two commands.
sudo apt update
sudo apt upgrade
2. Once the update has completed, you can type in the command below to bring up the tool.
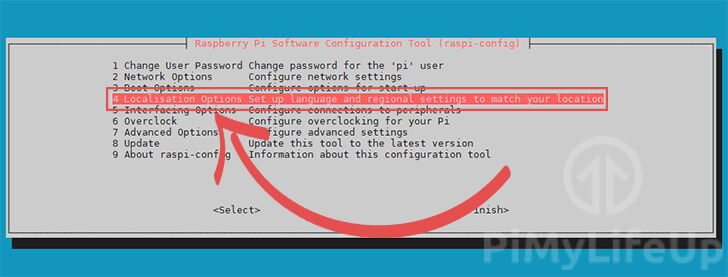
sudo raspi-config2. While within this tool, you can use the ARROW keys to navigate and the ENTER key to select.
Navigate down to the “4 Localisation Options” option and select it.
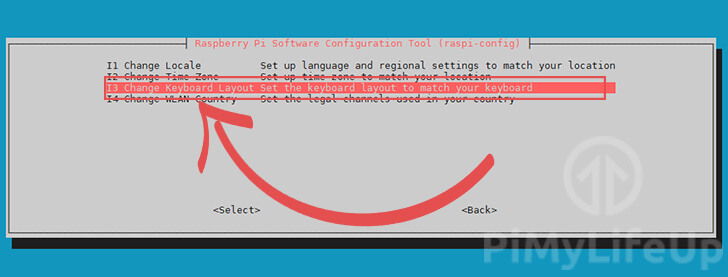
3. Within this menu, you need to find the “I3 Change Keyboard Layout” option.
This option will allow us to modify the layout of our keyboard as well as a few other options.
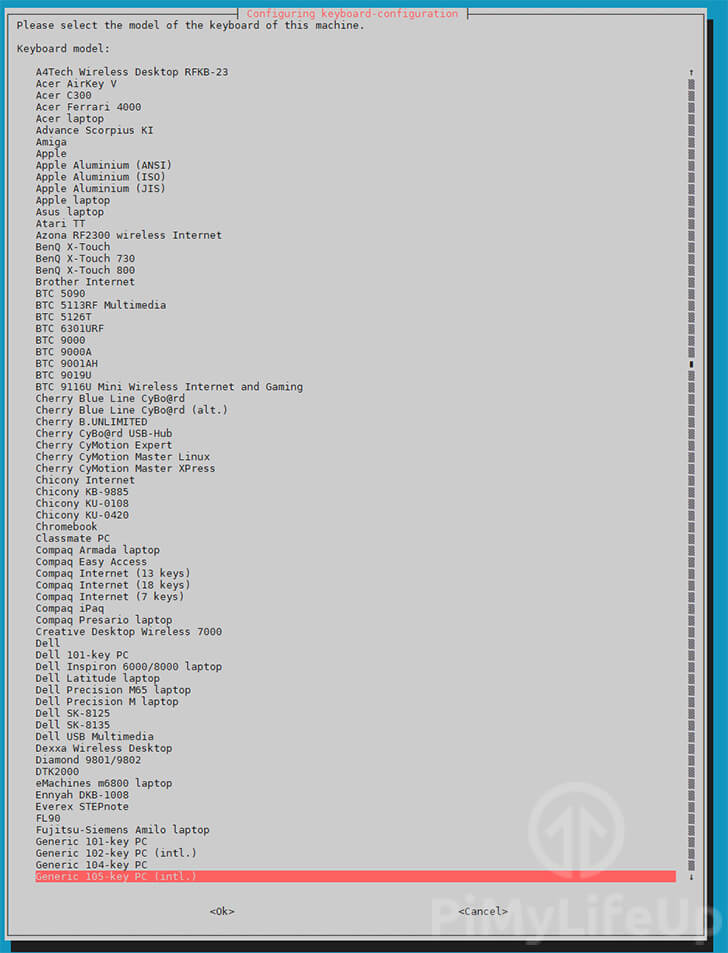
4. First, you will be greeted with an extensive list of potential keyboard models.
Unless you are using a special keyboard, it is safe to select the default option “Generic 105-key PC (intl.))”.
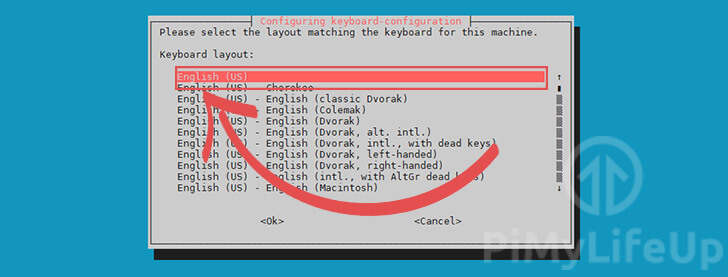
5. Finally, you can select the keyboard layout for your Raspberry Pi.
There are quite a few choices on the list, so find the one that suits the keyboard that you are using.
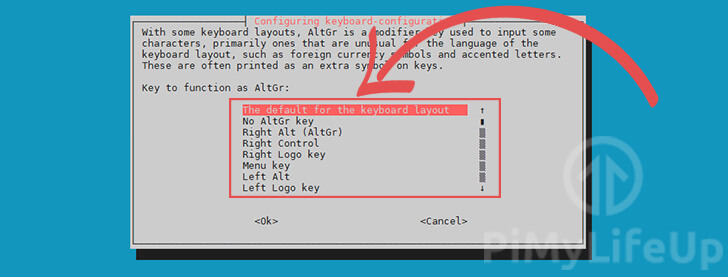
6. Now we will need to go through some additional keyboard layout settings.
Typically it is safe to select the default for your chosen keyboard layout. However, if your keyboard uses a different AltGr key, you can use this screen to select it.
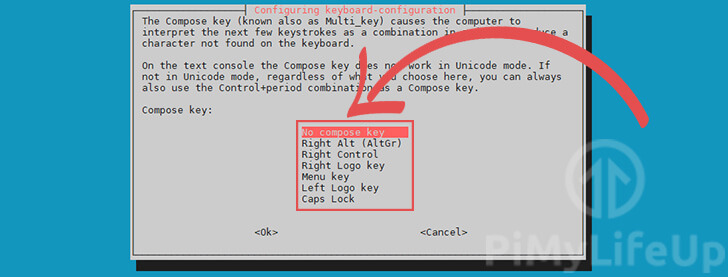
7. This next option allows you to set up a compose key.
This key tells the system that the next few keystrokes should be used as a combination to produce a character. This is useful for languages that have characters that aren’t available on the typical keyboard layout.
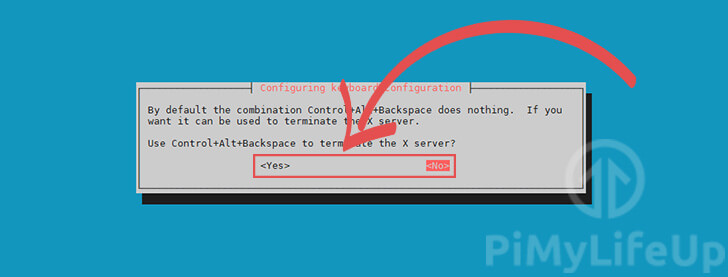
8. The final option allows you to enable a special key combination to terminate the X server (What is used to display Windows on Raspbian).
This key combination is CTRL + ALT + BACKSPACE.
For this guide, we will be choosing the “<No>” option, but if it is something you need, you can enable this option by selecting “<Yes>“.
9. At this point, you should now have changed the keyboard layout for your Raspberry Pi.
Modifying the Keyboard Setting File
Our final method will be showing you how to modify the configuration file yourself.
This is the most complicated method as you will need to work out the correct layout setting yourself.
1. Begin modifying the default keyboard layout configuration on your device, run the following command.
To edit this file, we will be using the nano text editor.
sudo nano /etc/default/keyboard2. Within this file, you should see text, as we have below.
# KEYBOARD CONFIGURATION FILE

# Consult the keyboard(5) manual page.

XKBMODEL="pc105"
XKBLAYOUT="us"
XKBVARIANT=""
XKBOPTIONS=""

BACKSPACE="guess"
If you wanted to find out more about this file, you can read about it using the man command.
3. To change your keyboard layout, you need to modify the following line.
Replace the text within the double quotes to change your layout. This code is typically the two-character code for your country.
XKBLAYOUT="us"For example, if we wanted to change the keyboard layout to Australia, we would use the country code “au“
XKBLAYOUT="au"4. Once done, you can save the file by pressing CTRL + X, then Y, followed by the ENTER key.
Hopefully, by the end of this guide, you will have successfully changed the keyboard layout on your Raspberry Pi.
If you have run into any issues with this, feel free to leave a comment below.