In this tutorial, we will be showing you how to set up the NGINX Web Server on your Raspberry Pi.
It is a better alternative to Apache for the Raspberry Pi due to a few different reasons.
Some of the reasons NGINX is better on the Raspberry Pi is that it has a much lower memory usage and generally a lower CPU usage meaning you can get more out of your Raspberry Pi’s limited resources.
We will also show you how to configure NGINX to utilize PHP-FPM, this requires a slight bit of extra configuration to get up and running unlike PHP for Apache.
While NGINX has a bit more leg room then Apache, still don’t expect it to run any serious amount of traffic or perform any significant amount of PHP work.


Equipment List
Below are all the bits and pieces that I used for this Raspberry Pi NGINX tutorial.
Recommended
- Raspberry Pi Amazon
- Micro SD Card Amazon
- Power Supply Amazon
- Ethernet Cable Amazon or a Wi-Fi Amazon
Optional
- Raspberry Pi Case Amazon
This tutorial was last tested using the latest version of Raspberry Pi OS Bullseye running on a Pi 400.
Setting up NGINX on the Raspberry Pi
1. Before we get started with setting up the NGINX web server on the Raspberry Pi, we must first make sure our Raspberry Pi is up to date by running the following two commands on it.
sudo apt update
sudo apt upgradeCopy
2. We should also run the following command to uninstall Apache2 since there is a chance that it is pre-installed on your system.
Failing to do so can cause the installation to fail since it automatically starts up and utilizes port 80 since we intend on using NGINX as a web server we choose to remove it from the system.
You can skip this step if you are certain Apache2 isn’t already installed on your Raspberry Pi.
sudo apt remove apache2Copy3. With the packages now up to date and Apache 2 removed we can proceed on with the tutorial.
Finally, let’s install NGINX onto our Raspberry Pi by running the following command on your Raspberry Pi.
sudo apt install nginxCopy4. Now with NGINX installed, we can now start up the software.
Type the following command into terminal to start up the web server on your Raspberry Pi.
sudo systemctl start nginxCopy5. With the NGINX web server now started up we should now grab our local IP address.
We do this so we can test whether our web server is working from a separate web browser.
Utilize the hostname command to grab your Raspberry Pi’s local IP address.
hostname -ICopy6. Now that we have our Raspberry Pi’s local IP address handy, let’s open the address within any web browser.
Just go to the local IP Address that you obtained using hostname -I. In my case, I would go to http://192.168.0.143.
http://YOUR PI's IP ADDRESS7. Once you browse to the address you should see something like below.
Do not be worried if this shows an Apache page as sometimes NGINX does not overwrite the Apache default index page.

Configuring NGINX for PHP
1. Unlike Apache, NGINX won’t be automatically set up for use with PHP. We instead must make changes to its configuration files to get it to load in.
We will also have to utilize PHP-FPM and not standard PHP due to the way NGINX works.
2. Before we get started with configuring PHP for NGINX, we need to go ahead and install PHP it and some recommended PHP modules that will make it easier when dealing with more extensive PHP scripts.
You can install everything by running the command below.
sudo apt install php8.2-fpm php8.2-mbstring php8.2-mysql php8.2-curl php8.2-gd php8.2-curl php8.2-zip php8.2-xml -yCopyIf you run into a “package not found” error, then this version of PHP isn’t available on your current version of Raspberry Pi OS. However, you can work around this error by adding a third-party PHP repository to your operating system.
3. With PHP-FPM now installed we can make the required modifications to the default NGINX configuration file.
To begin editing the default configuration file run the following command on your Raspberry Pi.
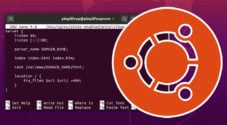
sudo nano /etc/nginx/sites-enabled/defaultCopy4. Within this file, find and replace the following lines.
Find
index index.html index.htm;CopyReplace With
index index.php index.html index.htm;CopyHere we need to add index.php to the index line, and this tells NGINX to recognize the index.php file as a possible index, adding it first in the list means it will be selected over an index.html file.
Find
#location ~ \.php$ {
        #       include snippets/fastcgi-php.conf;
        #
        #       # With php5-cgi alone:
        #       fastcgi_pass 127.0.0.1:9000;
        #       # With php5-fpm:
        #       fastcgi_pass unix:/var/run/php5-fpm.sock;
        #}
Copy
Replace With
location ~ \.php$ {
               include snippets/fastcgi-php.conf;
               fastcgi_pass unix:/var/run/php/php8.2-fpm.sock;
        }Copy
This code sets up NGINX to process .php files by passing them through to PHP-FPM.
Once done, you are able to save and exit by pressing CTRL + X and then pressing Y and then ENTER.
5. Next, in this Raspberry Pi Nginx server tutorial, we will need to tell NGINX to reload its configuration by running the following command.
sudo systemctl reload nginxCopy6. Finally, let’s test the PHP setup by writing a very simple index.php file in our /var/www/html directory. Run the following command to create and begin editing our index.php file.
sudo nano /var/www/html/index.phpCopy7. To this file, add the following line of code.
<?php phpinfo(); ?>CopyOnce that is all done, we can save and exit by pressing CTRL + X then Y and lastly ENTER.
8. Now like earlier in the tutorial you can go to your Raspberry Pi’s IP address, this time however you should see a page showing all the information about your version of PHP and what modules are currently active. It is a good indication that your PHP installation is up and running correctly.
If you want to go one step further, then you can look at setting up an MYSQL database to go with it. It is pretty straightforward and perfect for anyone who needs a good database software.
Conclusion
Hopefully, by now you have successfully set up your Raspberry Pi with a fully functional NGINX web server with PHP working correctly.
If you have run into any issues with this Raspberry Pi Nginx tutorial or just want to post some feedback, then feel free to drop a comment below.


hello,
I bought a domain name and want to attach it to my nginx web server so I can reach my web server over the internet. I see several ways to do this. Any suggestions?
Hi Kris,
This can be a bit of a tricky question to answer. At a very basic level you could do the following:
On the networking side, you will need to ensure that you have port 80, and port 443 forwarded to your Raspberry Pi. Then, update that domain name to point to your public IP address. If you have a dynamic IP, you can set up a dynamic DNS provider (We would personally use Cloudflare).
Now with NGINX, there is a few ways you can handle this. By default, the “
default” configuration file within “/etc/nginx/sites-enabled/default” will automatically serve content to anything connecting to your domain name.If you want to serve something unique to your domain name, then you will need to write a separate site configuration file. A very basic example of this is shown below. Here you domain name is specified by the “server_name” option. NGINX will read this and pass anything with your specified domain name to this particular “server”.
Please let me know if you need any specific clarification.
Kind regards,
Emmet
Thank you so much, great guide.
Thanks for the tutorial! (2/26/23) For others using this, may find lighttpd daemon on your pi rather than apache, which is already bound to port 0.0.0.0:80. `sudo systemctl stop lighttpd`
Hi. I have followed the tutorial and love it! However, I can’t log in to Bitwarden as it says failed to fetch? I use self signed certificate if that is any help. Cheers
Hi Lukas,
Is this through the web interface or through one of the many apps?
Cheers,
Emmet
This is through the official Bitwarden widows app.
Hi Lukas
It is highly likely that the Bitwarden windows app is enforcing SSL cert verification.
The only ways to work around this is to add the custom cert to Windows, or by getting a domain name and getting a free signed SSL cert using letsencrypt.
Cheers,
Emmet
Excellent, worked flawlessly for me to install nginx and php on my raspberry pi 400. After experimenting, I’ve found php commands are interpretted correctly from .php files but not from .html files. Previously I’ve had a configuration that sent .html files for php preprocessing – would I need to edit something in the php configuration files or in nginx file to get .html files preprocessed with php? Thanks again, very clear and thorough.
Hi DaveP,
Typically PHP should only really be configured to handle processing of “.php” files. HTML can be written within these .php files and will be handled accordingly.
However, if you have a particular reason why you would want your “.html” files to also be processed by PHP then it requires modification of your NGINX config file.
Within the config file find the following configuration block.
Replace that with the following.
Basically, what we are changing here is the regex that selected “
.php” so that it will pick both “.php” and “.html“.Hopefully this changes NGINX to process .html files through PHP. Please let me know if you are still having issues getting it to work.
Cheers,
Emmet
Thank you very much for this very good tutorial. Everything explained and everything worked directly. Keep up the excellecnt work!
This is a very thorough tutorial, and, except for the missing index,php file on my Pi, worked flawlessly. I previously wasted half a day re-imaging my Pi because a previous tutorial purporting to do the same thing sent the whole OS off into parts unknown. Good job!
Is PHP 7.3 still ok to use? If not can you please update commands?
Hi Gabriel,
It is perfectly fine to use PHP 7.3! In fact it is the latest version that is available through the standard package repository on Raspberry Pi OS Buster.
PHP 7.3 will continue to have security updates until later this year.
If you do want to use newer versions of PHP we can create an additional guide showing the best way of doing this.
Cheers,
Emmet
It is necessary to change the php install command to:
sudo apt-get install php7.4-fpm php7.4-mbstring php7.4-mysql php7.4-curl php7.4-gd php7.4-curl php7.4-zip php7.4-xml -y
The command given in this tutorial has ONE instance of “7.3” remaining.
Hi Stephen,
Thank you for pointing that out. I have fixed up the command. I had not realized I missed that last one.
Cheers,
Emmet
thanks for sharing. I have trouble when configuring nginx. when installing php 7 with code:
sudo apt-get install php7.0-fpm
it returns this:
Reading package lists… Done
Building dependency tree
Reading state information… Done
E: Unable to locate package php7.0-fpm
E: Couldn’t find any package by glob ‘php7.0-fpm’
E: Couldn’t find any package by regex ‘php7.0-fpm’
and when i continue following your tutorial, until configuring index.php and try to open IP in browser, i got this error:
502 bad gateway
i use latest rapbian, version 10 (buster).
Hi Rizal,
We have now updated the Nginx tutorial so it will now work with Raspbian Buster.
Cheers,
Emmet
I had this exact problem. try typing ‘sudo apt-get update’. when that’s done, re-install php via the step 3 above. Worked for me.
hostname -I gives me 127.0.0.1
This is not correct!
Hi Dave,
Make sure you are using a capital ‘I’ when you use the command hostname -I.
It may also indicate your Raspberry Pi isn’t connected to a network or isn’t being designated an IP address.
So once this is all setup, am I able to clone the MicroSD card to replicate the whole setup on another RPi?
Hey Tim,
Yes it should be possible.
Cheers,
Gus
I installed nginx and everything worked fine. Built myself a website and was happy, until I needed some php code.
So I installed php5 like described above. After restarting the webserver I can’t browse to the site anymore. Somehow my browser gets redirected to another internal IP, where nothing happens, of course.
This is the message:
192.168.178.38is unreachable.Where can I correct this?
Same problem occurs with me dude, i need an urgent solution …
Running the following command should give you an insight into why Nginx is failing to start.
Hello,
first of all thanks for your good tutorial.
My comment is more of a request because I am no expert.
If I am right, seems to me that the tutorial to install mysql and phpmyadmin is with apache and not nginx. Hope some day that would be inclueded.
Thanks.
Good tutorial. I wait a tutorial with NGINX and Owncloud or Pydio, in order to replace Apache for personal Cloud task.
I add Nextcloud to my desire
I’m going to try this and then learn what to do with it.
I like what you’ve done, but I do want to point out MySQL is not what it used to be. Since the transfer of Sun to Oracle, MySQL is no longer fully free. I would suggest using PostgeSQL as it doesn’t have the same licensing issues.