This tutorial will show you how to set up and use NFS shares on Ubuntu.

NFS stands for Network File System and is a protocol used to share files and folders over a network. These shared directories can be mounted as a remote directory on a client device.
It is an excellent solution for sharing files across a network and is known for being very fast and easy to set up. Additionally, it is built out of the box to understand Linux permissions. If you are dealing with Linux systems like Ubuntu, NFS is a great alternative to the SMB protocol.
In this guide, we will show how you can set up an NFS share and how easy it is to mount the share on an Ubuntu system.
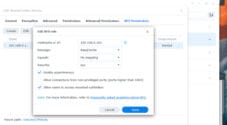
For the best experience dealing with NFS, we highly recommend setting a static IP address on both your client and server. Dynamic IP addresses will cause your remote shares to disconnect every time your server or client is assigned a new IP address.
Setting up an NFS Server on the Ubuntu Operating System
Over the following steps, we will show you how to set up your Ubuntu device to act as an NFS server. This will allow you to share directories with other systems using the NFS protocol easily.
Preparing your System for NFS Shares
1. We will need to update the package list cache before we can ensure that the NFS Kernel Server module is installed.
This cache is what keeps track of what packages can be installed on our Ubuntu system and where to download them.
sudo apt updateCopy2. Once the package list has been updated we can install the “nfs-kernel-server” package to our system.
This package will allow you to easily share directories using the NFS protocol on your Ubuntu device.
sudo apt install nfs-kernel-serverCopyCreating a Directory to Share
3. Next, you must know the directory you intend to share using NFS from your Ubuntu device.
For this example, we will create a directory called “/var/nfs/example“, but this directory can be any on your system.
To create this directory, we will be using the super useful mkdir command.
sudo mkdir -p /var/nfs/exampleCopy4. Since we created this directory using the root user, you will need to change its ownership to “nobody:nogroup“.
The reason for this is that the NFS Server on Ubuntu will perform what is called root squashing to stop a user from pretending to be the root user.
sudo chown nobody:nogroup /var/nfs/exampleCopySetting up your NFS Shares on Ubuntu
5. The directories you want to share using NFS on Ubuntu are all stored within the “/etc/exports” file.
You can begin editing the “exports” file by using the following command within the terminal. We use the nano text editor as it is super easy for beginners.
sudo nano /etc/exportsCopySyntax for Exports
6. The basic syntax for exporting an NFS share on Ubuntu is shown below.
Each line must start with the name of the directory you want to share, followed by the IP address of the device with which you want to share this directory.
The allowed IP address can be an entire subnet if you desire by using the CIDR notation.
Finally, each line ends with a list of options to apply to an NFS share.
<DIRECTORY_TO_SHARE> <CLIENT_IP>(share_option,...)Example of Adding NFS Shares
7. To give you an example of exporting an NFS share on Ubuntu, we will add the following line to the file.
With this line, we are exporting the directory “/var/nfs/example” and will allow access from the “192.168.0.72” IP address
/var/nfs/example 192.168.0.72(rw,sync,no_subtree_check)rw: A client computer can read and write to your specified directory by setting this option.sync: The “sync” option forces the NFS server to write any changes to the disk before responding to a request.
This is the ideal behavior as it ensures that any response represents what actually exists on your server’s disk. The downside of forcing a sync is that read and write performance can be reduced.no_subtree_check: This option prevents the NFS server from performing subtree checking.
Subtree checking is a process where the host checks whether a file is available for every request.
Problems can occur when a file is renamed while a client has it opened. It is typically best to leave this option disabled unless you have a good reason to have it enabled.
Saving your Shares
8. Once you have finished adding the directories you want to share using the NFS Protocol on Ubuntu, you can now save and quit.
Since we use the nano text editor, you can press CTRL + X, Y, and then ENTER.
Updating your Available NFS Shares on Ubuntu
9. Any changes to the “exports” file will not be read until you restart the NFS server on your Ubuntu device.
Restarting the server is as simple as using the following command within the terminal.
sudo systemctl restart nfs-kernel-serverCopyConfiguring the Ubuntu Firewall to Allow NFS Connections
10. If you are using a firewall such as UFW on your Ubuntu system, it will block NFS connections by default.
While NFS is not listed as a UFW app, it is still specified within the “/etc/services” file. For best security practices, you should only allow access from the particular client you want to connect to your NFS share.
For example, to allow access from a client, you will want to use the following line. Just replace “<CLIENT_IP>” with the IP of the Ubuntu machine you plan on mounting the NFS share on.
sudo ufw allow from <CLIENT_IP> to any port nfsCopyMounting an NFS Share on Ubuntu
In this section, we will be showing you how straightforward it is to mount a remote NFS share on the Ubuntu operating system.
You will only need to install a single package to connect to and mount NFS shares on your system.
Preparing Ubuntu to Mount NFS Shares
1. Before we install the NFS package needed to mount NFS shares on Ubuntu you will need to update the package list cache.
Updating the package list cache ensures that Ubuntu can find and install our desired package.
sudo apt updateCopy2. After updating the package list cache, you will want to install the “nfs-common” package by using the command below.
This package contains all the software required for Ubuntu to connect to remote NFS shares.
sudo apt install nfs-commonCopyCreating a Folder to Mount your NFS Share
3. Next, you will want to create a directory to mount the remote NFS share on your system.
This directory can be anywhere, but we will create a folder for this example at “/nfs/example”.
sudo mkdir -p /nfs/exampleCopyMounting an NFS Share to Ubuntu
4. Mounting NFS shares on Linux-based systems like Ubuntu is a super simple process and can be done using the “mount” command.
The basic syntax for the command is as shown below. Here, you specify the IP address of where your NFS share is located, followed by the remote directory you want to mount. Finally, specify where you want to mount this directory locally.
sudo mount <HOST_IP>:<REMOTEDIRECTORY> <LOCALDIRECTORY>For example, if we wanted to mount an NFS share hosted at “192.168.0.132” to the local directory “/nfs/example” we would use the following command.
sudo mount 192.168.0.132:/var/nfs/example /nfs/exampleCopyUnmounting the NFS Share
5. Unmounting a remote NFS share is as easy as using the “unmount” command, followed by the path to where you mounted your share locally.
For example, if we wanted to unmount our “/nfs/example” NFS share on Ubuntu, we can run the command below.
sudo unmount /nfs/exampleCopyPermanently Mounting an NFS Share on Ubuntu
6. The problem with just using the mount command to mount NFS shares on is that they will not persist through restarts.
To get an NFS share to mount when Ubuntu boots, you will need to modify the fstab file by using the following command.
Be careful when editing the fstab file, as you can unintentionally break your system if you edit the wrong line.
sudo nano /etc/fstabCopy7. Below you can see the syntax for mounting an NFS share on Ubuntu using the fstab file.
<HOST_IP>: Replace this with the device’s IP address where your NFS share is located.<REMOTEDIRECTORY>: This value must be replaced with the remote directory you plan to mount.<LOCALDIRECTORY>: Finally, specify where the NFS share will be mounted locally on your Ubuntu device.
<HOST_IP>:<REMOTEDIRECTORY> <LOCALDIRECTORY> nfs auto,nofail,noatime,nolock,intr,tcp,actimeo=1800 0 0For example, if we wanted to mount our NFS share from earlier, we would need to add the following line to the bottom of the file.
192.168.0.132:/var/nfs/example /nfs/example nfs auto,nofail,noatime,nolock,intr,tcp,actimeo=1800 0 08. Changes made to the fstab file will not be taken into account until you restart your system. When the system boots, the drives specified within this file will be automatically mounted.
You can restart Ubuntu by using the following command in the terminal.
sudo rebootCopyConclusion
Hopefully, at this stage, you will now have an idea of how you can handle NFS shares on your Ubuntu device.
You will have seen how easily you can set up your Ubuntu device to host NFS shares. Additionally, we have walked you through the very simple process of temporarily and permanently mounting a NFS drive.
Please feel free to comment below if you have had any issues setting up or connecting to an NFS share.
If you found our tutorials helpful, please check out our many other Ubuntu guides.