In this guide, we will be showing you how you can update the bootloader on the Raspberry Pi 4 and newer.
A bootloader is what a device such as the Raspberry Pi uses to boot the system. It contains code that boots up the various components of the hardware and eventually loads the operating system.
Since the Raspberry Pi 4, the Pi’s began to utilize an EEPROM to store the system’s bootloader. This EEPROM is persistent storage that is located on the Pi’s mainboard.
The Raspberry Pi 4 is designed so that this bootloader can be updated easily, allowing new features to be implemented and bug fixes to be pushed. For example, the newer releases even have network install functionality built-in.
Older versions of the Pi relied on a “bootcode.bin” file existing within the boot filesystem. The advantage of using the EEPROM instead is that the Raspberry Pi 4 can perform tasks without needing any storage to be attached.
Over the next couple of sections, we will show you some of the Raspberry Pi 4 bootloader’s advantages and how to update it.
Equipment
Below is a list of the equipment you will need for upgrading the bootloader on a Raspberry Pi.
Recommended
- Raspberry Pi Amazon 4 or Newer
- Micro SD Card Amazon (You will need two if you don’t want to overwrite the existing OS)
- Power Supply Amazon
- Ethernet Cable Amazon or Wi-Fi Amazon
Optional
This tutorial was last tested on the Raspberry Pi 400. The terminal sections were tested while running Raspberry Pi OS Bullseye.
Table of Contents
The Raspberry Pi’s Bootloader Diagnostics
If your Raspberry Pi isn’t booting, there are a couple of ways that you can check to see if there is an issue with the bootloader. Using the information provided using these methods, you can tell why your device refuses to boot.
We will quickly touch on the bootloader diagnostics screen and the diagnostic light patterns in the following two sections.
Bootloader Diagnostics Screen
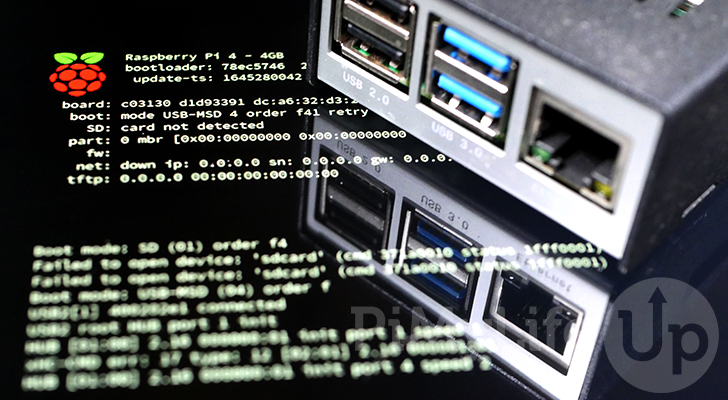
First off, newer Raspberry Pi 4 bootloader versions display easy-to-read diagnostic information when the boot fails to proceed.
Using this information, you can see why your device isn’t booting and various details about the system.
You can test this yourself by simply shutting down your Raspberry Pi, taking out the SD Card, and turning it on.
Plugging an HDMI cable into any of your Pi’s ports will display a screen like this one when a boot fails.
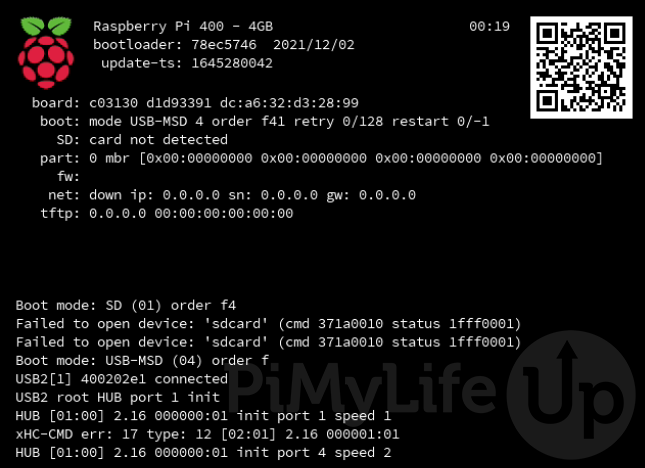
While within the diagnostics screen, the bootloader will continue to search for a viable boot method either in your SD Card slot or from a USB port.
For example, by plugging our SD Card back into our Pi 4, the bootloader will detect the card and boot it into the installed operating system.
Bootloader Diagnostic Lights
Before including the bootloader diagnostic screen, you used to have to rely on the power LED on the Raspberry Pi.
This light would flash a specific pattern when the boot failed. The pattern of flashes would correspond to a particular failure error. The pattern will be repeated after 2 seconds have passed.
If you are still running an old version of the Pi 4 bootloader, you can refer to the table below to see why your device fails to boot.
| Long flashes | Short flashes | Status |
|---|---|---|
| 0 | 3 | Generic failure to boot |
| 0 | 4 | start*.elf not found |
| 0 | 7 | Kernel image not found |
| 0 | 8 | SDRAM failure |
| 0 | 9 | Insufficient SDRAM |
| 0 | 10 | In HALT state |
| 2 | 1 | Partition not FAT |
| 2 | 2 | Failed to read from partition |
| 2 | 3 | Extended partition not FAT |
| 2 | 4 | File signature/hash mismatch – Pi 4 |
| 3 | 1 | SPI EEPROM error – Pi 4 |
| 3 | 2 | SPI EEPROM is write protected – Pi 4 |
| 3 | 3 | I2C error – Pi 4 |
| 4 | 4 | Unsupported board type |
| 4 | 5 | Fatal firmware error |
| 4 | 6 | Power failure type A |
| 4 | 7 | Power failure type B |
Updating the Bootloader of the Raspberry Pi
Within this section, we will walk you through a couple of ways that you can use to update or recover the bootloader on your Raspberry Pi 4.
Using the Raspberry Pi Imager
The first method recommended by the Raspberry Pi foundation is to install the updated bootloader using a micro SD Card.
You can update your bootloader using this method even if the main operating system won’t load, assuming there is no critical hardware damage.
For this section, you will need a spare Micro SD Card as the software we are using will overwrite the drive’s contents.
1. Before proceeding further, you will need to download and install the Raspberry Pi Imager to your device. This software has support for Windows, macOS, and Ubuntu.
You can also install it on a device running Raspberry Pi OS by using the following command.
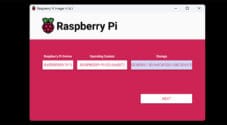
sudo apt install rpi-imagerCopy2. Once you have the Raspberry Pi imager installed, open it and click the “CHOOSE OS” button.

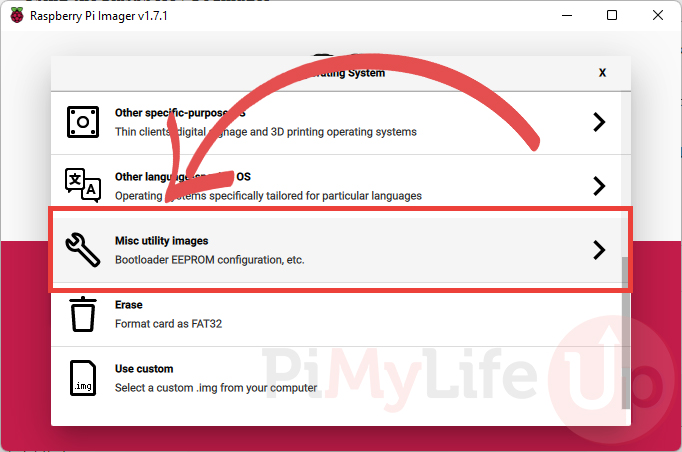
3. Within the menu that pops up you will need to scroll down until you see the category called “Misc Utility Images“.
Once you have found it, click the entry to go into that category.
4. Here, you have two choices, you can either use the standard “Bootloader” (1.) or the “Beta Test Bootloader” (2.).
For the most stable bootloader for the Raspberry P 4, we recommend that you stick with the “Bootloader” category.

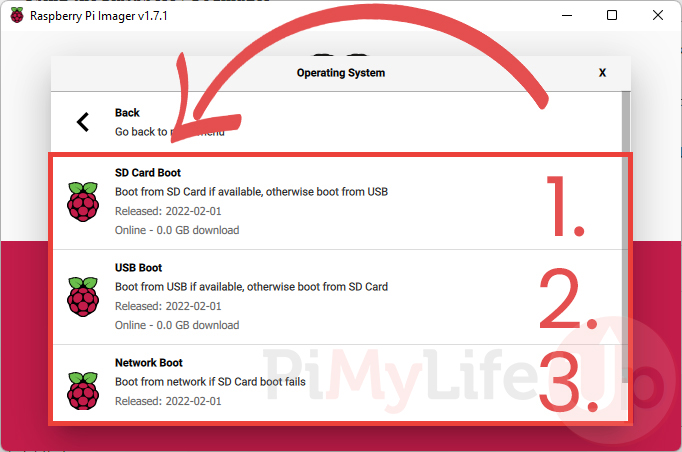
5. Once you select which release of the bootloader you want to use, you will be greeted by another three options.
Let us quickly go over the three options that you have. We will be sticking with “SD Card Boot” for our example.
SD Card Boot– This version of the Raspberry Pi’s bootloader will boot from the SD Card if available.
If no SD Card is plugged in, it will attempt to fall back to a connected USB device.USB Boot– This is a modified version of the bootloader that will prefer a USB device if it is available.
If no USB device is available to boot from, the Raspberry Pi will boot from the SD Card.Network Boot– The newest of the three options, this bootloader version allows you to boot from the network if no SD Card is available.
Using this option, you can install a new operating system to your Raspberry Pi over the network. All you need is an ethernet network connection for your Pi.
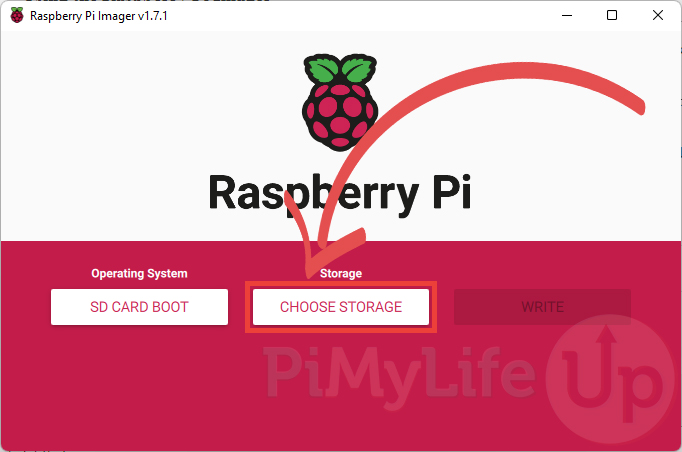
6. Once you have a bootloader selected, you will need to choose the storage device to write this data to.
You can choose the storage device by clicking the “Choose Storage” button.
7. Within the dialog that popped up, you will be given a choice of all mounted, usable storage devices.
We only have a single SD card plugged into our computer in our example. Select the correct device to proceed.
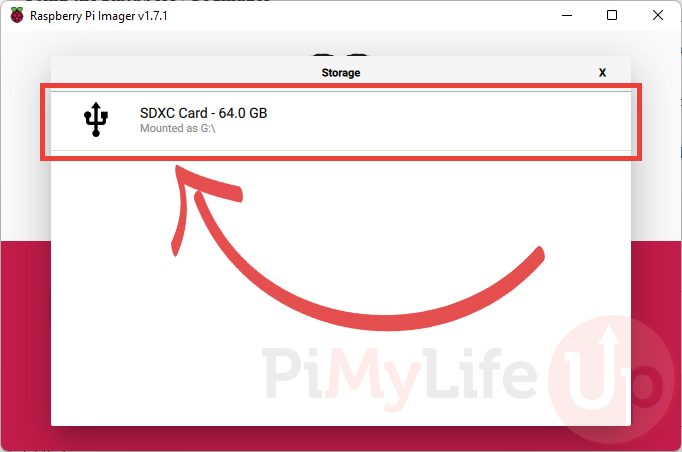
Please note that whichever device you pick, the imager will wipe the original contents on it.
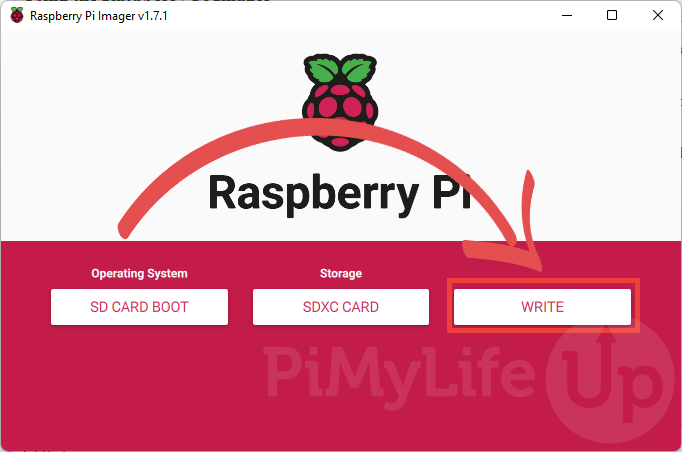
8. Finally, you can begin the writing process by clicking the “Write” button.
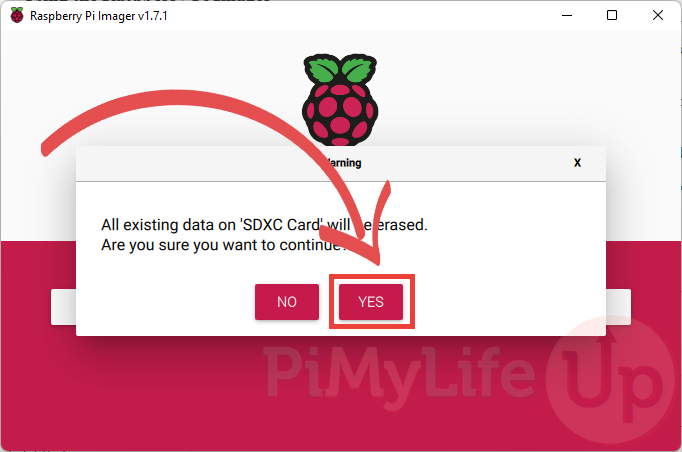
9. The Raspberry Pi imager will warn you that the imager will erase the existing content on your SD card.
To continue, you must click the “Yes” button.
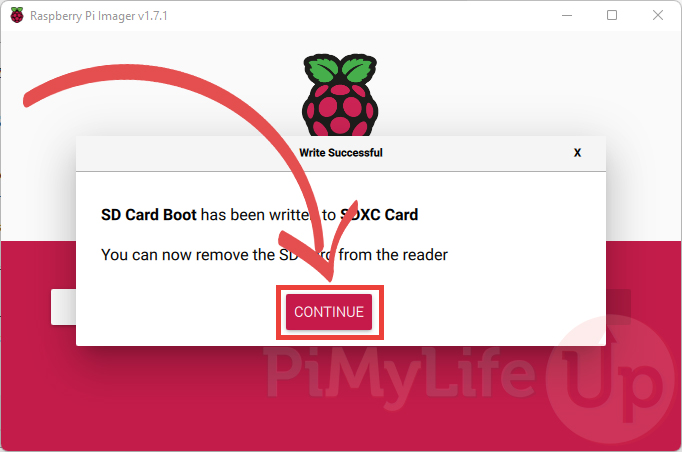
10. The writing process will only take a few minutes at most. Once it completes, you will see a message like as shown below.
This indicates that the Raspberry Pi 4 bootloader has been successfully written to the SD Card, and you can now remove it from your device.
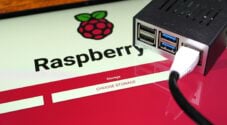
11. At this point, you will need to have your Raspberry Pi powered off and its original SD card removed.
If you haven’t performed either of these tasks, please do them now.
12. With your Pi ready, plug in your newly formatted SD card and power it on. The Raspberry Pi 4 will read the contents of the SD card and install the new bootloader.
Wait at least 10 seconds before proceeding to the next step.
13. You can tell that your Raspberry Pi’s bootloader has been successfully updated by two indicators.
First, the power LED on your Raspberry Pi will constantly be flashing in a consistent pattern.
Secondly, if you have an HDMI cable plugged in, the Raspberry Pi should display a green square on your screen.
If you see either of these, you can now unplug your Raspberry Pi and insert your original SD card.
Updating the Bootloader using the raspi-config Tool
You can use the raspi-config tool to install the latest version of the bootloader to your Raspberry Pi.
Using this method, you will need to have the latest bootloader downloaded to your device. As long as you use Raspberry Pi OS, the bootloader is included as a default package.
1. Our first step is to perform a package upgrade on our Raspberry Pi. Doing this will ensure that we have the latest releases of the bootloader downloaded to our device.
You will need to run the following two commands within the terminal to perform an update.
sudo apt update
sudo apt upgrade -yCopy
2. Once the upgrade completes, we can now start up the Raspberry Pi configuration tool using the command below.
Using this tool, we can tell the Raspberry Pi to install the latest stable release of the bootloader.
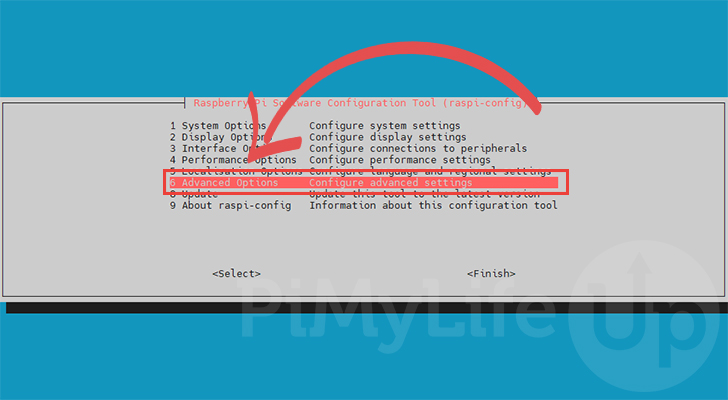
sudo raspi-configCopy3. You can navigate this tool using the ARROW keys on your keyboard. To select an option, press the ENTER key.
Start by selecting “Advanced Options“.
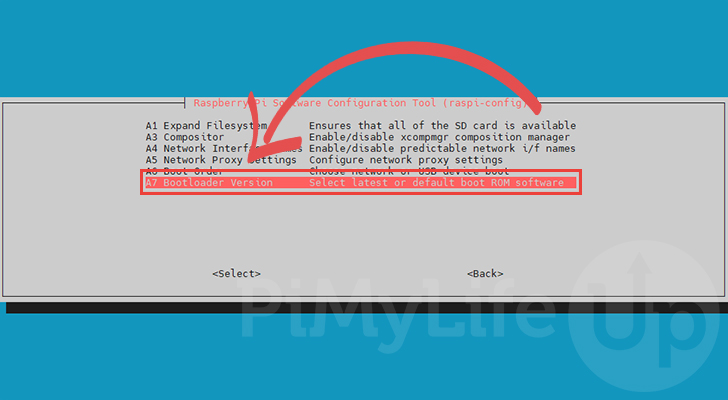
4. In the next screen, select the “Bootloader Version” option.
This option will take us to where we can select which release of the bootloader to install to the Raspberry Pi.
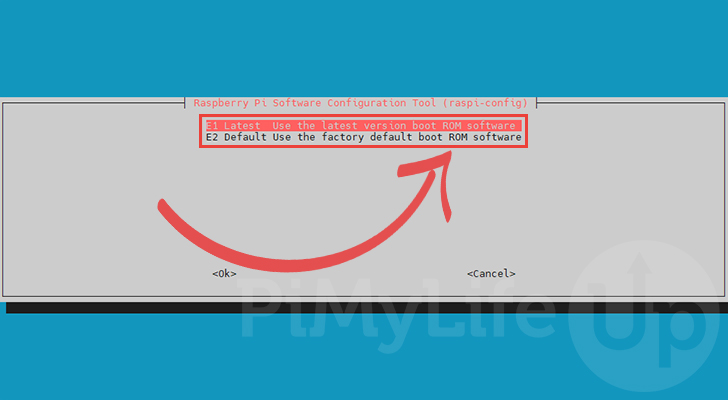
5. You now have the option between two different releases. For this example, we will be installing the latest release.
E1 Latest– This option will give you the latest version of the bootloader. If you want the latest fixes and features, select this option.E2 Default– By selecting this option, the Raspberry Pi will revert to the original bootloader that the device shipped with.
You will notice that you can’t select the beta bootloader or variant by using this option.
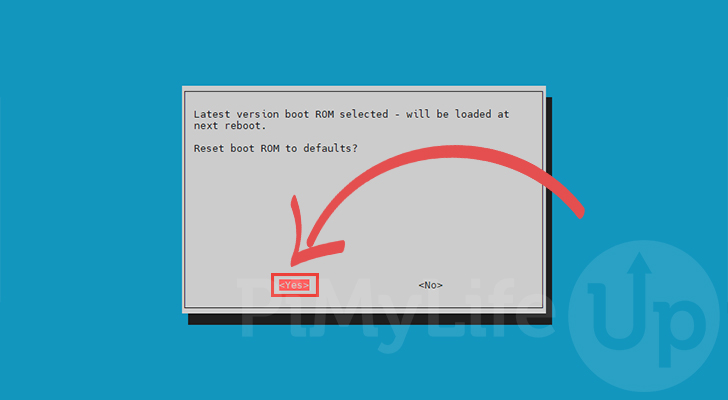
6. This screen will inform you which version of the bootloader will be installed on your Raspberry Pi.
You can choose to reset any boot configuration changes back to their defaults. For our example, we will be selecting the “<Yes>” option to reset them.
7. For the new bootloader to be installed, you must restart your Raspberry Pi.
You can either do this when prompted by the configuration tool or by using the following command on your device.
sudo rebootCopyUpgrade the Raspberry Pi 4 Bootloader using the Command Line
You can upgrade the Raspberry Pi 4’s bootloader by utilizing a specific command. Like with the raspi-config tool, you should always perform an update before proceeding.
1. Before proceeding, the first thing you should do is install the latest version of your packages.
Doing this ensures you will install the latest release of the bootloader to your Raspberry Pi
sudo apt update
sudo apt upgrade -yCopy
2. Once the update completes, we can now perform an update by using the following command.
By utilizing the “-a” option, we are telling the “rpi-eeprom-update” tool to automatically install any bootloader and USB (VLI) EEPROM updates.
sudo rpi-eeprom-update -aCopy3. After running this command, it will tell you the status of the bootloader.
If an update is available, you will now see the text “*** INSTALLING EEPROM UPDATES***” at the top of the output.
*** INSTALLING EEPROM UPDATES ***

BOOTLOADER: update available
   CURRENT: Thu  3 Sep 12:11:43 UTC 2020 (1599135103)
    LATEST: Thu  2 Dec 11:08:03 UTC 2021 (1638443283)
   RELEASE: stable (/lib/firmware/raspberrypi/bootloader/stable)
            Use raspi-config to change the release.

  VL805_FW: Using bootloader EEPROM
     VL805: up to date
   CURRENT: 000138a1
    LATEST: 000138a1
   CURRENT: Thu  3 Sep 12:11:43 UTC 2020 (1599135103)
    UPDATE: Thu  2 Dec 11:08:03 UTC 2021 (1638443283)
    BOOTFS: /boot

EEPROM updates pending. Please reboot to apply the update.
To cancel a pending update run "sudo rpi-eeprom-update -r".
4. To complete this update, you will need to restart your Raspberry Pi.
To restart your device, you need to run the following command within the terminal.
sudo rebootCopyInstalling a Beta Version of the Pi Bootloader using the Command Line
To install the beta version of the Raspberry Pi 4 bootloader to your Raspberry Pi, you need to perform a few extra steps. The command-line tool we use to update the bootloader will use the stable channel by default.
1. Before we get started, we should ensure that we have the latest bootloader downloaded to our Raspberry Pi.
We can achieve that by using the following two commands within the terminal.
sudo apt update
sudo apt upgrade -yCopy
2. For our next step, we need to modify the default file belonging to the “rpi-eeprom-update” tool.
Begin modifying this file using the nano text editor by running the command below.
sudo nano /etc/default/rpi-eeprom-updateCopy3. Within this file, you need to find the following line.
This line defines the release version that the EEPROM update tool will download.
FIRMWARE_RELEASE_STATUS="stable"
Copy
Replace that line with the following. You will notice we changed “stable” to “beta“.
FIRMWARE_RELEASE_STATUS="beta"Copy4. After making this change, you will need to save the file.
You can save and quit from the file by pressing CTRL + X, then Y, followed by the ENTER key.
5. Now, when we run the EEPROM update tool on our Raspberry Pi, it will download the latest release from the “beta” branch.
To upgrade the bootloader to the latest beta release, run the following command on your device.
*** INSTALLING EEPROM UPDATES ***

BOOTLOADER: update available
   CURRENT: Tue  8 Feb 17:24:46 UTC 2022 (1644341086)
    LATEST: Wed 16 Feb 21:59:51 UTC 2022 (1645048791)
   RELEASE: beta (/lib/firmware/raspberrypi/bootloader/beta)
            Use raspi-config to change the release.

  VL805_FW: Using bootloader EEPROM
     VL805: up to date
   CURRENT: 000138a1
    LATEST: 000138a1
   CURRENT: Tue  8 Feb 17:24:46 UTC 2022 (1644341086)
    UPDATE: Wed 16 Feb 21:59:51 UTC 2022 (1645048791)
    BOOTFS: /boot

EEPROM updates pending. Please reboot to apply the update.
To cancel a pending update run "sudo rpi-eeprom-update -r".
6. For the new EEPROM to be installed, you will need to restart your device.
Restart the Raspberry Pi by using the following command in the terminal.
sudo rebootCopyConclusion
We have shown you how to update the bootloader on a Raspberry Pi throughout this guide.
Since the Raspberry Pi 4, this bootloader has been located on the EEPROM. By following this guide, you will have learned how you can update the bootloader stored within this persistent memory.
The bootloader is a critical part of computing devices like the Pi.
If you have had any issues updating the bootloader on your device, please comment below.
Be sure also to check out our many other Raspberry Pi guides and Pi tutorials.


Excellent, thanks for this guide. As an ignorant of Linux systems in general, and RPi in general, it gives me a nice perspective on some of the basics.
FYI: If you look at this page in reader view on a Mac, in step 1 of the ‘Using the Raspberry Pi Imager’ section is says:
You can also install it on a device running Raspberry Pi OS by using the following command.
sudo apt install rpi-imagerCopy
Which causes an error because it doesn’t exist
Hi Paul,
This is an unfortunate side effect of the reader views in browsers like Safari and Edge. There is nothing we can do to tell the reader to hide the “Copy” element when using the reader.
Cheers,
Emmet
Super useful and detailed, thanks!