In this Raspberry Pi boot from USB guide, we will be showing you how it is possible to boot your chosen operating system from a USB storage device instead of the standard SD card.
We will walk you through the steps required to activate the USB boot mode in the one-time programmable (OTP) memory. You will need a newer Raspberry Pi to complete this tutorial correctly (see below).
There are various reasons why you might want to utilize a USB storage device to boot from instead of an SD Card. One of these reasons is just how much cheaper USB storage tends to be SD Cards. The other is that they tend to be easier to deal with when needing to swap out storage devices often.
Using a USB drive might come in handy if you want to want to run a retro game emulator, NAS (network attached storage) or other projects that require a lot of room to be useful.
Please note that this guide will only work with the Raspberry Pi 2B v1.2 and the Raspberry Pi 3B, 3B+, 3A+. Older Raspberry Pi’s sadly lack the ability to boot from the USB.
If you are using the Raspberry Pi 4 or newer, then you need to update the bootloader to boot from the USB instead of the MicroSD card.
Equipment List
You will need the following equipment for this guide on booting your Raspberry Pi from a USB storage device.
Recommended
- Raspberry Pi Amazon 2B to 3B+
- Micro SD Card Amazon
- Power Supply Amazon
- Ethernet Cable Amazon (Recommended) or Wi-Fi Amazon
- USB Drive Amazon
Optional
Setting up the Raspberry Pi for USB Booting
Before you begin, make sure that you are following this tutorial on a Raspberry Pi 3B, 3B+, 3A+ or a Raspberry Pi 2B v1.2. Other models of the Raspberry Pi do not properly support USB boot.
If you have a Raspberry Pi 3B+, you can skip to the next section of the tutorial as the USB boot bits are already set within the one-time programmable (OTP) memory on the device.
1. To begin this part of the guide, you will need to start off with an SD card with Raspberry Pi OS installed.
For the purposes of this guide, you can just use Raspberry Pi OS Lite as we only need the command line.
2. Once you have your Raspberry Pi booted up into the operating system go ahead and enter the following command into the terminal.
These commands will ensure that the Raspberry Pi is entirely up to date and has all the features that we require.
sudo apt-get update
sudo apt-get upgradeCopy
3. With Raspberry Pi OS up to date, we can now enter the following command into the terminal.
This command writes the text program_usb_boot_mode=1 to the boot configuration file so that when the Raspberry Pi boots up, it knows that it needs to write data to the OTP for USB boot mode.
echo program_usb_boot_mode=1 | sudo tee -a /boot/firmware/config.txtCopy4. With the correct data added to the /boot/config.txt file we need to restart the Raspberry Pi by running the following command.
sudo rebootCopy5. Once the Raspberry Pi has finished rebooting, we can verify that the OTP has been written to by running the following command.
We utilize the Raspberry Pi’s vgencmd tool to provide a dump of the OTP, and from the result of this, we use grep to see if the text 17: can be found within the returned data.
vcgencmd otp_dump | grep 17:Copy6. If everything has worked correctly, you should see the following text appear in your command line from the previous command.
17:3020000a7. Now before we go and move onto setting up our USB with Raspberry Pi OS, we will remove the line that we added earlier to the config file by running the following command.
sudo sed -i 's/program_usb_boot_mode=1//g' /boot/firmware/config.txtCopy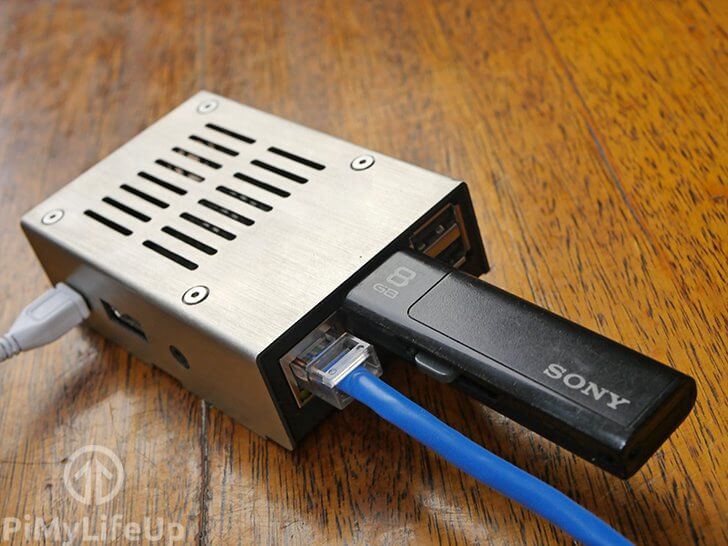
Booting the Raspberry Pi from a USB
1. Setting up a USB for your Raspberry Pi is extremely simple to do, and it’s just like installing Raspberry Pi OS to an SD Card, instead of selecting your SD Card reader you will choose the USB storage device that you want to format.
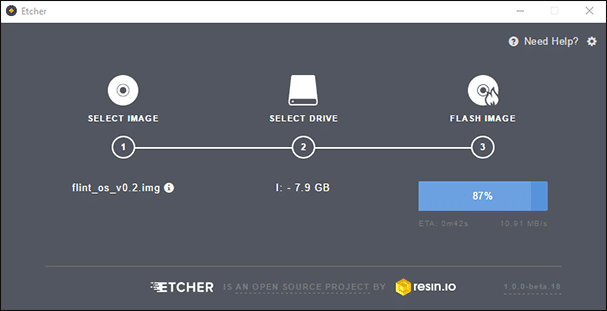
Below we will do a quick run through of using Etcher to write to your USB device.
2. Start off by grabbing the version of Raspberry Pi OS that you want your Pi to boot from your USB device.
You can find all three versions of the operating system by going to the Raspberry Pi OS download page. Download the version that best suits your needs.
3. Now that you have the image that you want, you will need to grab Etcher to be able to write the image to your USB device.
You can find the download for the Etcher tool by going to Etchers websitse.
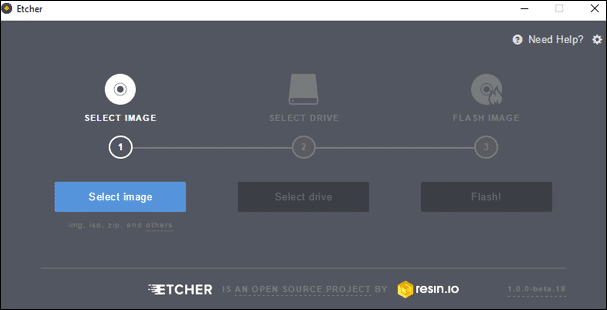
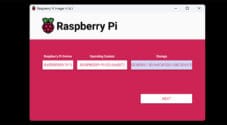
4. Once you have Etcher downloaded and installed to your computer, launch it and press the Select Image button.
Within this menu browse to where you downloaded your copy of Raspberry Pi OS and select it.
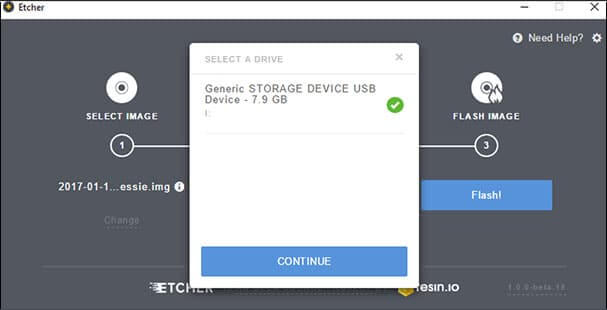
5. Next, click the Select Drive button. In the prompt that appears find your USB storage device that you want to use as your boot drive for the Raspberry Pi and click the “CONTINUE” button.
Be warned that this drive will be wiped during the imaging process. Ensure you make a backup of any data that you want on this drive as it will be erased and will be unrecoverable.
6. Finally, click the Flash! button to begin the flashing process. This process can take some time.
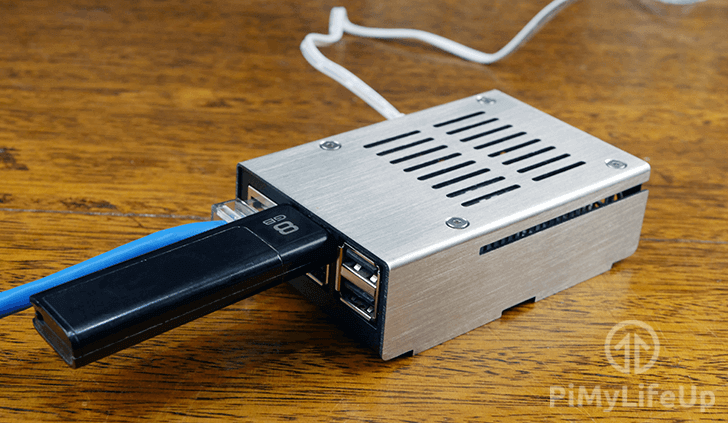
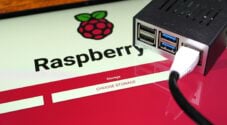
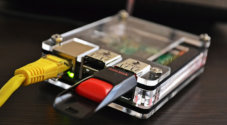
Once completed, take out your USB Drive and place it into a USB port on your Raspberry Pi.
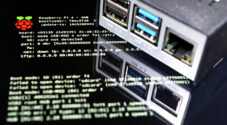
7. You should now be able to start up your Raspberry Pi without having an SD card placed in it. The Raspberry Pi should automatically utilize your USB as the boot device.
Please note that it can take the Raspberry Pi ten to twenty seconds for it to pick up the USB device and begin the process of booting from it, so don’t be alarmed if you have longer boot times.
Conclusion
I hope this Raspberry Pi boot from USB tutorial has shown you how easy it is to set up your Raspberry Pi so that it can boot the operating system from a USB storage device instead of the Micro SD Card.
If you have any feedback on this guide on booting from a USB device, then feel free to post a comment below.

Further to my earlier comment today regarding the change to add “firmware” to the path the config.txt file in commands on steps 3 and 7, I have now changed the USB drive from an unpowered Sandisk external SSD drive to a powered (old) 2.5″ Western Digital laptop drive in an old USB enclosure. It works!
Hi Mark,
Glad to hear that you got it to work!
Thank you for taking the time to comment to mention the out-of-date path. I have updated the tutorial to reference the newer “/boot/firmware/” path.
Kind regards,
Emmet
Command in Step 3 should now be
echo program_usb_boot_mode=1 | sudo tee -a /boot/firmware/config.txtCommand in Step 7 should now be
sudo sed -i 's/program_usb_boot_mode=1//g' /boot/firmware/config.txtI get the correct code (17:3020000a) but it won’t boot from the USB SSD drive (no lights)
Raspberry Pi 3B rev 1.2 (1 GB)
Any ideas?
This may be obvious to others, but it would be nice if this guide included a warning that writing an OS to a flash drive will delete the data on that drive. I just lost all my audiobooks because I didn’t know that. Don’t be like me, back up your files first!
Hi Purp,
Sorry to hear that happened! It’s definitely something that you kind of become blind to the more you are used to what happens when flashing an OS. I have updated the tutorial to include a warning so others won’t run into that same issue. For the future, it might be a good idea to set up some sort of offsite backup as well to help ensure you have something you can restore down the track. Something like Google Cloud could be a decent solution but of course comes with a monthly price tag.
Most OS imaging software do throw up a warning message about it wiping data, however, I havent used Balena in some time and now typically just use the Raspberry Pi imager.
Kind regards,
Emmet
Thank you for this , it works brilliantly on my Fave board the Pi 3 A+
Greetings! I’m hoping this tutorial post is not so old that no one will read my comment and be able to help/reply.
I don’t think I’m the only person who wants to attempt (or has attempted) this, but after many Google searches and much time researching, I am no closer to an answer, so I am hoping someone out here can offer assistance and/or the solution.
My setup: Raspberry Pi 4 Model B, 4GB; Argon ONE v2 case with Argon ONE M.2 Expansion Board (NVME).
My question: can I boot from USB with BerryBoot installed on my NVMe SATA SSD (connected via USB 3.0) and have multiple Linux distros restricted to ONLY the data partition but have the rest of the SSD as NTFS storage?
I have successfully made bootable FAT32-formatted micro-SD cards for Raspberry Pi OS 64-bit, BerryBoot, and PINN. I want to be able to boot from and use my NVMe SATA SSD (connected via the USB 3.0 port) with BerryBoot or PINN.
The problem with BerryBoot and PINN is that when run, they automatically create 2 partitions (boot and data), and I’m guessing that the BOOT partition will not change, and the DATA partition stores the OS-es the user chooses from the BerryBoot menu.
So, if I want to use BerryBoot to make the data partition large enough to house my 3-4 distros and not have it “fill remaining space” on the SSD (-OR- have it do that), am I able to re-partition that remaining space so that the end result will be with my USB-bootable SATA SSD:
Partition 1: FAT-formatted with the boot loader and kernel files
Partition 2: ext4-formatted for the BerryBoot distros installed
Partition 3: NTFS for general data
Is this possible? If so, HOW do I accomplish this? Any assistance, help, and suggestions are most welcomed, so please let me know, and thanks in advance!!
Hi Gus
I tried this on a Pi 4 and after the process the grep result is 17:000008b0. The pi still boots from sd
Any suggestions?
Hi Erhardt,
As an alternative you can try replacing the bootloader the Raspberry Pi 4 is using. We have a guide that covers updating the bootloader of the Raspberry Pi that I personally would recommend.
Within this guide you will see that there are three different options for updating the bootloader of your device. One of those changes the boot behaviour so that it will attempt to boot from the USB first instead of the SD card.
Please let me know if that helps you out with the issues that you are having with getting your Raspberry Pi to boot from USB.
Cheers,
Emmet
Followed the instructions to the ‘T’ and booted from USB drive as advertised. Thank you Sir, love your site and youtube channel. Kudos to you for branching out and making Linux, Ubuntu Server and Python tutorials.
What usb drives can you do this with?
I did this exactly, but it didn’t work. I have a Monster Digital COLORS 16GB Usb 2.0, And A Raspberry Pi 3B. Do those work???
Hi Charles,
As far as I know most drives should work without any issues as long as it has sufficient size for the OS image.
There are two possibilities that could be causing issues. One is that the drive is taking to long to start up, if the drive takes longer then 2 seconds to respond the Raspberry Pi will try to boot with the SD Card instead.
Secondly is that some flash drives are very strict protocol requirement before it starts that isn’t handled by the Raspberry Pi’s boot loader. In that case you would need to use a different USB drive.
It might not hurt to try using a different USB drive just to see if that works without any issues.
Additionally, have you verified that the USB Boot mode has been enabled by using the following command.
You should get back the following result if it has been successfully enabled.
Cheers,
Emmet
Have a look in raspi-config and the boot options.
Yup, Definitely A Usb Problem. The otp_dump returns the right result. I’ll Try With A Different Drive.
could you use other operating systems to do this? I was thinking of putting an android os on there.
Hi Jensen,
I believe you should be able to. From memory the USB boot is programmed into the Pi’s own memory so it shouldn’t matter what OS is on the USB as long as it is supported by the Raspberry Pi’s hardware.
Cheers,
Emmet
After this change, I stil can use SD card for booting, just in case?
Hi Marcelo,
Yes you should stil be able to use your SD card for booting, the Raspberry Pi should automatically fall back to it.
Cheers,
Emmet
Why don’t they ship RPis with this setting on by default?
Who wants to buy a sd card just to set this one setting?
Everyone owns a flash drive … they are cheaper, faster & last longer.
the sd card adds cost to the over all ownership of something ment to be inexpensive & available for low income children’s education … its a no brainier…
Hi Robert,
The Raspberry Pi foundation has actually started shipping Raspberry Pi’s with this enabled by default.
The Raspberry Pi 3B+ and the Raspberry Pi 4 both have USB booting enabled right off the bat.
Cheers,
Emmet
This was a great tutorial and worked like a charm! I never knew RPI had made a hardware modification to allow this. I would suggest that anyone performing this get the fastest USB device they can for performance reasons.
The USB device can be USB drive, I assume?
Of course 🙂