For this Raspberry Pi Kiosk tutorial, we will be showing you how you can set up your Pi as a Kiosk using the popular web browser, Chromium.
We utilize Chromium as it is one of the best-supported web browsers and openly supports the functionality to act in a kiosk mode.
It is also easy to control through key presses which we can simulate using the xdotool that we install during this guide.
This guide will give you a good idea on how to use autologin tasks and simple bash scripts to perform numerous tasks.
Please note to do this tutorial you will need to be running the full version of Raspbian as this relies on the GUI that comes with it to properly operate.
Equipment List
The entire list of all the pieces of equipment that we made use of for this Raspberry Pi Kiosk tutorial is listed below.
Recommended
- Raspberry Pi Amazon 2, 3, 4 or newer
- Micro SD Card Amazon
- Power Supply Amazon
- TV or Monitor Amazon
- HDMI Cable Amazon
- Ethernet Cable Amazon or Wi-Fi Amazon
Optional
- Raspberry Pi Case Amazon
Video Tutorial
In this video, we show you the process of setting up your Raspberry Pi to operate as a Chromium powered kiosk as well as showing you how to get it to start at boot.
If you prefer a written and more thorough explanation, then check out our written guide below.
Setting up the Raspberry Pi Kiosk
1. Before we get started with this tutorial, we will be first removing some packages that we don’t need for our Raspberry Pi kiosk.
Removing these packages will free up some much-needed memory and reduce the number of packages that will be updated every time you update your Raspberry Pi.
To do this just run the following three commands on your Raspberry Pi. We have split these into three different commands to make them easier to copy and write out.
sudo apt purge wolfram-engine scratch scratch2 nuscratch sonic-pi idle3 -y
sudo apt purge smartsim java-common minecraft-pi libreoffice* -yCopy
2. Now that we have removed these numerous packages from our Raspberry Pi Kiosk we will need to run some cleanup commands.
To remove any unnecessary lingering packages and to clean out the local repository of retrieved packages run the following two commands on your Raspberry Pi.
sudo apt clean
sudo apt autoremove -yCopy
3. Now that we have removed the bulk of the unnecessary applications, we must now make sure that our installation of Raspbian is up to date. Also, make sure you have SSH enabled as it is very handy if you need to edit any files later on.
We can use the following two commands within the terminal on our Raspberry Pi to update all the packages to their latest versions.
sudo apt update
sudo apt upgradeCopy
4. We now need also to install xdotool. This tool will allow our bash script to execute key presses without anyone being on the device. We also install the unclutter package, this will enable us to hide the mouse from the display.
Just run the following command on your Raspberry Pi to install the package.
sudo apt install xdotool unclutter sedCopy5. Now that those packages have been installed we can now proceed to the next stage of this tutorial. That is setting up Raspberry Pi OS to auto login to our user. Having to log in every time for a kiosk would be an annoyance.
Desktop autologin is the default behavior but if for some reason you have changed it follow the next few steps to switch it back. Otherwise, skip to step 6 of this tutorial.
5a. Run the following command on your Raspberry Pi to load up the Raspi-config tool. We will be using this tool to enable auto login.
sudo raspi-configCopy5b. Now within the tool go to 1 System Options -> S5 Boot / Auto Login -> B4 Desktop Autologin
5c. Desktop autologin should now be enabled and you can safely quit out of the raspi-config tool.
6. Now that we have enabled desktop autologin we need to go ahead and write our kiosk.sh script.
Writing the Raspberry Pi Kiosk Script
The kiosk script will handle the bulk of the work for our Raspberry Pi Kiosk, including launching Chromium itself and also simulating key presses.
1. Begin writing our kiosk bash script by running the following nano command on the Raspberry Pi.
nano ~/kiosk.shCopy2. Within this file enter the following lines of code, we will explain the important parts of the script so you can better bend it to your needs.
#!/bin/bashCopyThe very first line defines what the command line interpreter (CLI) should use to try and execute this file.
This is useful for cases where you don’t want to have to specify the specific application required every time you run the script.
xset s noblank
xset s off
xset -dpmsCopy
These three lines are pretty important as they help us stop the Raspberry Pi’s display power management system from kicking in and blanking out the screen.
Basically, these three commands set the current xsession not to blank out the screensaver and then disables the screensaver altogether.
The third line disables the entire “display power management system” meaning that the desktop interface should never blank out the screen.
unclutter -idle 0.5 -root &CopyThis line runs the program we installed earlier called unclutter.
This application will hide the mouse from the display whenever it has been idle for longer then 0.5 seconds and will remove it even if it is over the root background.
You can adjust the idle timer to the number of seconds you want with each decimal place being a fraction of a second.
If you would prefer to remove the mouse instantly, then remove the -idle 0.5 from the command.
sed -i 's/"exited_cleanly":false/"exited_cleanly":true/' /home/$USER/.config/chromium/Default/Preferences
sed -i 's/"exit_type":"Crashed"/"exit_type":"Normal"/' /home/$USER/.config/chromium/Default/PreferencesCopy
These two lines of the script use sed to search through the Chromium preferences file and clear out any flags that would make the warning bar appear, a behavior you don’t really want happening on your Raspberry Pi Kiosk.
If Chromium ever crashes or is closed suddenly, the lines above will ensure you don’t have to get hold of a mouse and keyboard to clear the warning bar that would typically appear at the top of the browser.
/usr/bin/chromium-browser --noerrdialogs --disable-infobars --kiosk https://pimylifeup.com https://www.adafruit.com &CopyThis line launches Chromium with our parameters.
We will go through each of these parameters so you know what you can modify, and how you can modify it.
--kioskCopyThis flag sets Chromium to operate in Kiosk mode, this locks it into a particular set of features and only allows limited access to both the web browser and any other OS functionality.
Chromium’s kiosk functionality takes full control of the screen, maximizing Chromium to the full size of your screen and stops user input from being accepted by the OS, effectively trapping the end user within a sandbox.
--noerrdialogsCopyThis option tells Chromium that it should not display any of its error dialogs to the end user.
It is crucial if you don’t want the end user to know if anything has or is going wrong with Chromium, this goes alongside our code to clear the “exited_cleanly” and “exit_type” state earlier in the code.
--disable-infobarsCopyWe use this to disable Chromium from displaying its info bar to the end user.
The info bar can be used by Chromium to notify them of certain things such as that Chromium is not their default web browser.
Of course, as we are using this as a kiosk, we don’t need the user to know any information that Chromium might want to display.
https://pimylifeup.com https://www.adafruit.comCopyThese are the two web pages that the script will open, each will be opened in a new tab.
You can add additional web pages/tabs by adding to this list by separating each one with a space.
while true; do
         xdotool keydown ctrl+Next; xdotool keyup ctrl+Next;
      sleep 15
doneCopy
These lines run a very simple infinite while loop that uses xdotool to mimic pressing CTRL + Pgdn. Making Chromium switch to the next tab. “Next” is a alias for the “PG DN” key.
After xdotool has executed its key presses, it then puts the loop to sleep for 15 seconds.
To change how long the loop sleeps for before it executes the xdotool command again just change the sleep 15 command.
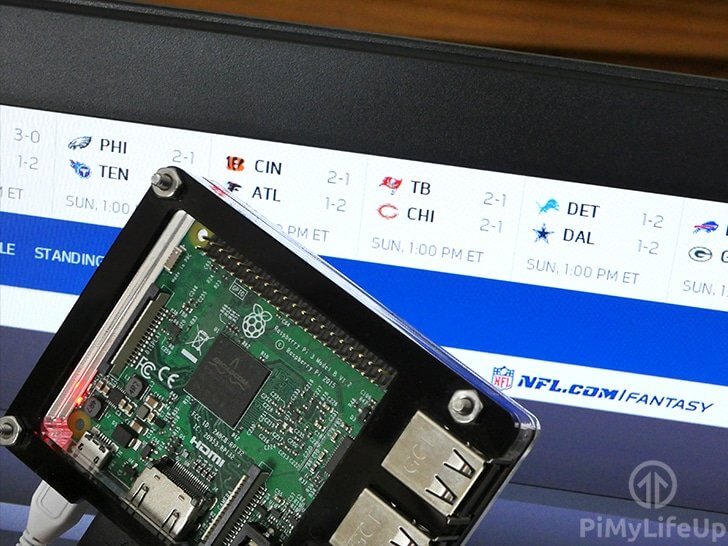
You can also use this method to add a screen refresh, this may be important when you want to display live scores.
The command for this should look something like what we have shown below.
xdotool keydown ctrl+r; xdotool keyup ctrl+r;Copy3. Once you have entered all the code for our Raspberry Pi kiosk script, it should look somewhat similar to what we have displayed below.
#!/bin/bash
xset s noblank
xset s off
xset -dpms

unclutter -idle 0.5 -root &

sed -i 's/"exited_cleanly":false/"exited_cleanly":true/' /home/$USER/.config/chromium/Default/Preferences
sed -i 's/"exit_type":"Crashed"/"exit_type":"Normal"/' /home/$USER/.config/chromium/Default/Preferences

/usr/bin/chromium-browser --noerrdialogs --disable-infobars --kiosk https://pimylifeup.com https://www.adafruit.com &

while true; do
   xdotool keydown ctrl+Next; xdotool keyup ctrl+Next;
   sleep 10
doneCopy
4. Once you are sure everything is correct, save the file by pressing CTRL + X then Y and finally ENTER.
5. After creating this script we should make sure that our user has execution privileges for it.
You can give the user that owns the script execution privileges by running the following command.
chmod u+x ~/kiosk.shCopySetting up the Raspberry Pi Kiosk to start at boot
1. Before we get started we need to first utilize the following command to work out what the current display value is.
This value is used for the operating system to know what screen to display the Chromium kiosk to, without it the kiosk will either fail to load or load up on the incorrect screen.
Run the following command to print out the value of the “$DISPLAY” system variable. This command must be run directly on your Raspberry Pi and not over SSH.
echo $DISPLAYCopyMake sure you remember this value as you may need it in step 3 of this section.
2. To get our Raspberry Pi Kiosk to start at boot we will need to go ahead and create a service file by running the command below.
This service file will tell the operating system what file we want to be executed as well as that we want the GUI to be available before starting up the software.
sudo nano /lib/systemd/system/kiosk.serviceCopy3. Within our kiosk service file, enter the following lines of text.
These lines are what will define our service kiosk service, and that we want to run our kiosk.sh script when the system loads into the operating system.
While entering these lines you may have to modify the “Environment=DISPLAY=:” line, replacing the “0” with the value that you retrieved from the command you used in step 1 of this section.
Additionally, you will need to make sure you replace “pi” with the name of your user. For example, with the username “pimylifeup“, the path “/home/pi/kiosk.sh” would become “/home/pimylifeup/kiosk.sh“.
[Unit]
Description=Chromium Kiosk
Wants=graphical.target
After=graphical.target

[Service]
Environment=DISPLAY=:0.0
Environment=XAUTHORITY=/home/pi/.Xauthority
Type=simple
ExecStart=/bin/bash /home/pi/kiosk.sh
Restart=on-abort
User=pi
Group=pi

[Install]
WantedBy=graphical.targetCopy
Once you have entered everything into the file, save the file by pressing CTRL + X followed by Y then ENTER.
4. Now that we have created the service file for our Raspberry Pi Kiosk we can go ahead and now enable it by running the following command.
By enabling the service, we will allow our Chromium Kiosk to start up at boot automatically and will enable the systemd to service manager to monitor it.
sudo systemctl enable kiosk.serviceCopy5. With the Kiosk service now enabled you can either choose to restart the Raspberry Pi or start the service now by running the following command.
sudo systemctl start kiosk.serviceCopy6. If you ever want to check the status of your Raspberry Pi Kiosk’s service, you can run the command below.
This command will return various information about the service, including previously returned lines from the software which can help you debug what’s going wrong when the service is failed.
sudo systemctl status kiosk.serviceCopyIf this command shows the status as “Active: active (running)” then everything is now working as it should be, and your Raspberry Pi Chromium Kiosk should be up and operating correctly.
7. Now with everything up and running correctly, if there is for any reason you want to stop the service from running, you can utilize the following command.
sudo systemctl stop kiosk.serviceCopyBy stopping the kiosk service, the service manager will kill off all processes associated with it.
This command will stop our kiosk.sh script from running while also terminating the open Chromium browser.
8. Finally, if you ever want to disable your Kiosk, you can utilize the following command.
sudo systemctl disable kiosk.serviceCopyThis command will stop the Kiosk service from running on boot until you re-enable it.
Enforcing the Resolution on a Raspberry Pi Kiosk
1. One thing you might want to do is to enforce the resolution that the Raspberry Pi is going to use. Setting the resolution can be quite handy as the Raspberry Pi’s built-in detection can sometimes be a bit flakey.
To begin setting the resolution, we must first load up the Raspberry Pi configuration tool by running the following command.
sudo raspi-configCopy2. Within the configuration tool, you will want to start by going to “7 Advanced Options“.
3. Now that we are in the advanced options section you should see an option labeled “A5 Resolution” select that option.
4. Within here find and select the resolution that best fits your screen and press ENTER.
5. With your resolution now set you will need to restart the Raspberry Pi. Do this by first exiting out of the configuration tool by pressing ESC, then entering the following command into the Raspberry Pi’s terminal.
sudo rebootCopy6. Your Raspberry Pi should now restart and be running at the specified resolution.
Conclusion
There are so many ways you can extend this tutorial. For example, you can set up a web server on the Raspberry Pi and have it serve local web pages to be displayed on your Kiosk.
It’s perfect if you want the results of a competition or basically any other sort of information you want to be displayed.
By now you should have your Raspberry Pi successfully booting into the Kiosk mode of Chromium. If you have any issues with this Raspberry Pi kiosk tutorial or want to leave feedback, then feel free to leave a comment below.


Has anyone had experience in updating the scripts for use with the new Wayland interface in Bookworm, rather than using X11?
Hi Antonio,
Wayland so far has proven to be a bit of a pain with performing certain tasks. Would definitely be keen to see if anyone else has had a better experience with it as well.
Tried looking up tools to replace the functionality of like xdotool but it seemed to be a bit of a mess of what would actually work.
Kind regards,
Emmet
Script wasnt working for me when using an url with user and encrypted password. so i had to make some changes.