This project will show you how to install and use Cockpit on your Raspberry Pi.
Cockpit is a web-based tool for managing devices such as a Raspberry Pi without needing to connect using SSH or physically interacting with the device.
This tool is designed to be easy for anyone to use, making it a great solution for remotely managing your Pi’s.
There is a considerable amount you can do with this tool. You can use it to configure your firewall, download and run containers, upgrade packages, and even use it to track the performance of your system.
Additionally, Cockpit is really easy to set up and run and is even included in the official Debian package repository.
Equipment
In the list below, you will find the equipment we used to set up Cockpit on our Raspberry Pi.
Recommended
Optional
We last tested this tutorial on a Raspberry Pi 5 running the latest version of Raspberry Pi OS Bookworm.
How to Install Cockpit on Your Raspberry Pi
In the following sections, we will walk you through the super simple process of installing Cockpit on your Raspberry Pi.
While we could install Cockpit from the official Raspberry Pi repository, we will choose to use the “Backports” repository instead. This repository includes newer versions of software such as Cockpit that have been ported for your current operating system.
Running an updated version of Cockpit means you will get access to all of the newer features and improvements.
We have embedded a video below that will walk you through the process of installing Cockpit to your Raspberry Pi. If you prefer to go at your own pace, you can always follow our written steps that we have included below.
Preparing your Raspberry Pi
1. Before you install Cockpit on your Raspberry Pi, let’s prepare the operating system.
To update the package list and upgrade any out-of-date packages, use the following two commands within the terminal.
sudo apt update
sudo apt upgrade -yCopy
2. A system management tool like Cockpit will work best with your device when you have a static IP address.
You want to avoid having to figure out your Pi’s IP address every time you want to access the Cockpit web panel.
The best way to set up a static IP address is to use DHCP reservation, but if you don’t have access to your router, there are ways around this,
Adding the Debian Backports Repository
3. In this section, we will add the Debian backports repository to your Raspberry Pi. This repository contains newer versions of software, such as Cockpit that will still run on your current Raspberry Pi OS release.
To add this repository, we must first populate the terminal with a few extra variables. The one we are after in particular is the “VERSION_CODENAME” variable.
You can populate the current terminal session with this information by using the following command.
. /etc/os-releaseCopy4. Now that we have access to the codename of your operating system, we can easily add the correct backports repository.
To add the backports repository, simply run the command below within the terminal.
echo "deb http://deb.debian.org/debian ${VERSION_CODENAME}-backports main" | sudo tee /etc/apt/sources.list.d/backports.listCopy5. Since we added a new repository, we must update the package list cache using the following command.
If we don’t do this, our operating system will be unaware it can download packages from this new source.
sudo apt updateCopyInstalling Cockpit on the Raspberry Pi
6. With the backports repository added to our Raspberry Pi, we can move on to installing Cockpit.
We must use the “-t” option to tell the apt package manager to download Cockpit from the backports repository. If we exclude this, you will end up downloading the older release included in the standard repository.
sudo apt install -t ${VERSION_CODENAME}-backports cockpitCopyAccessing the Cockpit Web Interface
7. After installing Cockpit on your Raspberry Pi it will be automatically started. This means you can immediately start checking out its web interface.
Before you can access the web interface, you will need to know your Pi’s IP address. If you don’t know it, you can easily obtain it using the hostname command.
hostname -ICopy8. Once you know the IP address of your Raspberry Pi, you will want to go to the following address in your favorite web browser.
Ensure that you replace “<IPADDRESS>" with the IP of your Pi.
https://<IPADDRESS>:9090Please note that since Cockpit uses a self-signed certificate, you will see a warning about being unable to verify the certificate when you first access the web interface.
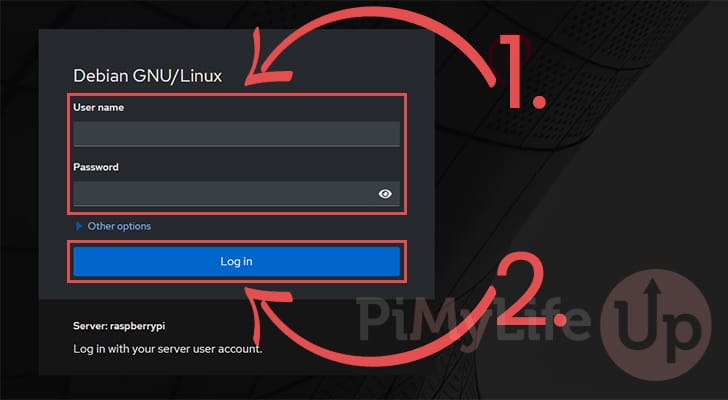
9. To utilize Cockpit to manage your Raspberry Pi, you must log in using a system user (1.). For example, if your user was called “pi” and had the password “raspberry” you would use those to login.
After filling out the details of your user, click the “Log in” button (2.) to access the dashboard.
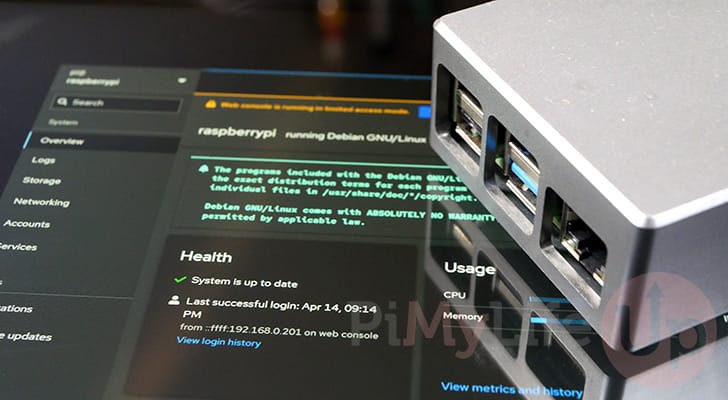
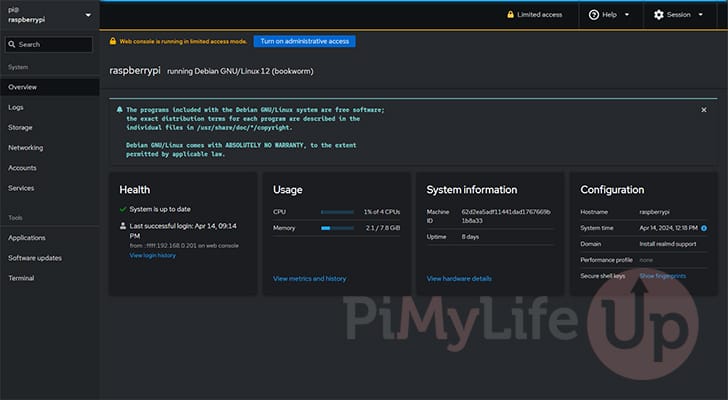
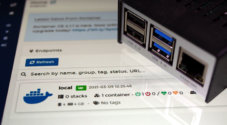
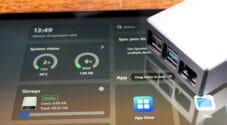
10. Below, you can see the Cockpit dashboard running on our Raspberry Pi.
This dashboard gives you a quick overview of your system including its current usage as well as its configuration.
There is a wealth of different tools included within this interface, For example, if you look at the left-hand side you can see there is even a web-based terminal you can utilize.
Conclusion
By this point in the tutorial, you will have hopefully got the Cockpit management tool installed to your Raspberry Pi.
This tool is incredibly powerful and useful way to remotely managing your devices. You can control many aspects of your Pi using Cockpit’s web interface and even send terminal commands.
You can even add multiple Raspberry Pi’s added to the one Cockpit interface, allowing you to control multiple devices from one easy-to-access place.
Please feel free to leave a comment below if you have any questions about running this software on your Pi.
If you found this tutorial to be useful, please check out our many other Raspberry Pi projects.


Ok, works nicely. I’d like to use samba file sharing and the option is greyed out. Looks like there is a plugin, but only for ubuntu.
This could be due to apt update resulting in…
The following signatures couldn’t be verified because the public key is not available: NO_PUBKEY 0E98404D386FA1D9 NO_PUBKEY 6ED0E7B82643E131
Reading package lists… Done
W: GPG error: http://deb.debian.org/debian bullseye-backports InRelease: The following signatures couldn’t be verified because the public key is not available: NO_PUBKEY 0E98404D386FA1D9 NO_PUBKEY 6ED0E7B82643E131
E: The repository ‘http://deb.debian.org/debian bullseye-backports InRelease’ is not signed.
N: Updating from such a repository can’t be done securely, and is therefore disabled by default.
Hi Ronald,
Sorry to see that you are having issues with getting the backports repository to work. Can you please try adding the missing keys by using the following commands on your Raspberry Pi.
Kind regards,
Emmet
“sudo apt install -t ${VERSION_CODENAME}-backports cockpit” results in “E: The value ‘bullseye-backports’ is invalid for APT::Default-Release as such a release is not available in the sources” for me.