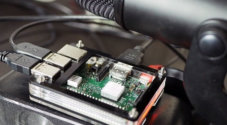
In this tutorial, we will be exploring how to set up a Raspberry Pi AirPlay Receiver.
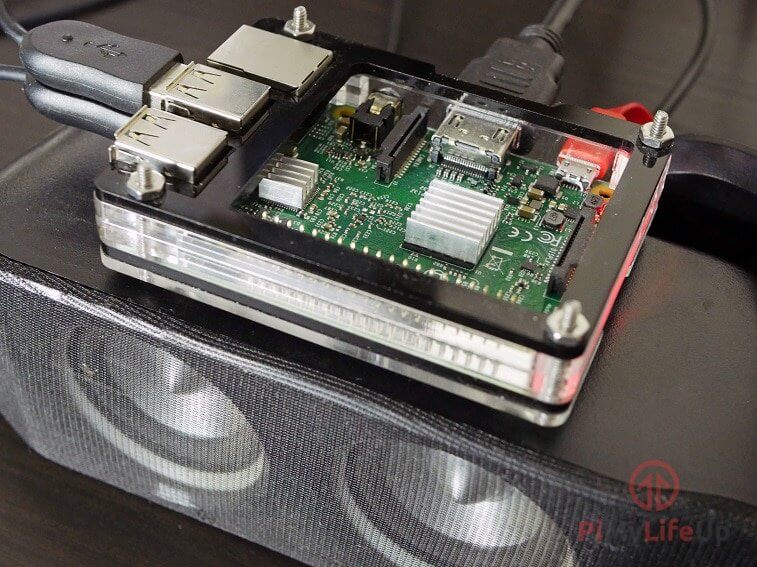
This tutorial primarily involves you connecting your Raspberry Pi to your speakers then installing software so that it becomes recognized as an AirPlay receiver on your internet network. To set up your AirPlay Receiver, we will be making use of the open source software called Shairport Sync.
This software allows the Raspberry Pi to act as an AirPlay receiver by implementing Apple’s proprietary protocols so that it can receive music from those devices.
This setup will allow you to play music from any AirPlay-enabled device to your Raspberry Pi meaning you can use almost any iPhone product and even some Android products with a compatible app installed.
A Raspberry Pi AirPlay Receiver is very simple and cost-efficient way to setup wireless speakers without the huge cost of buying a set of wireless speakers. It can easily help you modernize your speakers and help cut the cord.
As a bonus, this tutorial works perfectly alongside our Raspberry Pi Alexa tutorial and is excellent for bringing in music support to the tutorial.
Equipment List
Below are all the bits and pieces that I used for this Raspberry Pi AirPlay Receiver tutorial, you will need an internet connection to be able to complete this tutorial.
Recommended
- Raspberry Pi Amazon
- Micro SD Card Amazon
- Power Supply Amazon
- Ethernet Cable Amazon or Wi-Fi Amazon
- Speakers Amazon
- AirPlay Enabled Device Amazon
Optional
- Raspberry Pi Case Amazon
Setting up an Apple AirPlay Receiver
Setting up your Raspberry Pi AirPlay receiver is an incredibly simple task, as long as you have a good internet connection and a set of speakers to connect your Raspberry Pi to it is a relatively straightforward process.
1. Before we get started let’s first run an update and upgrade on our Raspberry Pi to ensure we are running the latest software.
sudo apt update
sudo apt upgrade
2. Once that has completed we need to install several different packages, run the following commands on your Raspberry Pi to install all of the packages that we need.
sudo apt install autoconf libtool libdaemon-dev libasound2-dev libpopt-dev libconfig-dev
sudo apt install avahi-daemon libavahi-client-dev
sudo apt install libssl-dev
3. We will now clone the shairport-sync source to our Raspberry Pi. Shairport-Sync is the best fork of the original Shairport code and allows syncing across multiple rooms.
Run the following commands on your Raspberry Pi to download the source code to your Raspberry Pi.
cd ~
git clone https://github.com/mikebrady/shairport-sync.git
4. Now that we have cloned the Shairport-Sync repository to our Raspberry Pi we can now build and install the Shairport software.
Before we get started, we must first move into the shairport-sync folder and configure the system. To do this, we must run a few commands on our Raspberry Pi.
cd shairport-sync
autoreconf -i -f
./configure --with-alsa --with-avahi --with-ssl=openssl --with-systemd --with-metadata
The autoreconf command setups the basic config file. The configure command further sets up the build system, telling it to utilize the ALSA audio backend, the Avahi network and set it to use OpenSSL for encryption.
5. With the configuration process now completed we can finally compile Shairport-sync and install it.
We can run the two make commands below on our Raspberry Pi to compile and install Shairport-Sync to the device. This process will set up numerous things including the autostart script.
make
sudo make install
6. To enable the Shairport Sync software to start automatically at system startup you need to enter the following command into the terminal on the Raspberry Pi.
sudo systemctl enable shairport-sync7. Finally, we can start up the Shairport software immediately by running the command below on our Raspberry Pi.
sudo service shairport-sync startYou should now be able to play audio files through your Raspberry Pi AirPlay Receiver using any AirPlay-capable device. If you are using a non-apple device such as an Android device, then there are few apps that allow you to utilize Airplay.
On your AirPlay-enabled device your Raspberry Pi AirPlay receiver should appear as RaspberryPi in the devices list, please note that this name will be the same as your devices hostname.
If you would like to know how to change your Raspberry Pi’s hostname, you can check out our raspi-config guide.
Improving the Analogue Audio Output
With our Raspberry Pi AirPlay receiver now setup. There are several different things we can do to improve it. The first of these is to change the Raspberry Pi so it will utilize a newer version of the audio driver.
To run this improved audio driver and get the benefits of it fully then there are a few changes we will have to make. If you would like to read about the audio driver, you check out this topic on it on the Raspberry Pi forums.
1. Firstly we need to update the Raspberry Pi’s firmware, and we can do this by running the following command, it can take some time. Make sure your Raspberry Pi doesn’t lose power during this.
sudo rpi-update2. Once the firmware update has completed, turn off your Raspberry Pi and take out your SD Card.
Once you have removed your SD Card, insert the SD Card into a reader connected to a computer. The reason for this is that we need to modify the Raspberry Pi’s boot config file
The file we are after is located at /boot/config.txt on the SD Card, open it up with your favorite text editor. Add the following new line to this file.
audio_pwm_mode=2Once you have edited this file, you can save it and place the SD Card back into your Raspberry Pi and power it back on.
3. With your Raspberry Pi powered back on, there are two more things we need to do before the improved analog audio driver works well with Shairport. The next step is to set it, so the analog jack is the main audio out and not the HDMI output.
We can utilize the following command in the Raspberry Pi’s terminal to do this.
amixer cset numid=3 14. Now there is one final thing we must do to finish improving our Raspberry Pi AirPlay device, and that is to modify the volume db Range that Shairport uses. We can modify the range by changing it in the configuration file.
Run the following command to begin editing the configuration file.
sudo nano /usr/local/etc/shairport-sync.conf5. Within this file make the following changes.
Find
// volume_range_db = 60 ;Replace with
volume_range_db = 30;We can now save the file by pressing CTRL + X then pressing Y and then ENTER.
6. Now to make sure all these changes are properly loaded in, we will restart the Raspberry Pi by running the following command.
sudo rebootImproving your Raspberry Pi AirPlay Receivers Wi-Fi Performance
1. To improve the Wi-Fi performance of your AirPlay device, you will want to disable the Raspberry Pi’s WLAN adaptor power management. This reason for this is that it can prevent Shairport from being visible on your list of Airplay devices due to it powering down the Wi-Fi adaptor.
Luckily it is easy to stop the Raspberry Pi from doing this with most adaptors. The way to do this is by modifying the network interfaces file. We can open the file by using the following command in terminal.
sudo nano /etc/network/interfaces2. Within this file, we need to locate and add the following text to the interfaces file. This edit will tell the Raspberry Pi not to manage its wireless power and will not turn it off to save power.
If you have upgraded to Raspbian Stretch then wlan0 may be called something different. If you’re unsure which one is the correct one to use, then use the ifconfig command to see what the new name is.
Find
iface wlan0 inet manualAdd Below
wireless-power offWe can now save the file by pressing CTRL + X then pressing Y and then ENTER.
3. Now to make sure all these changes are properly loaded in, we will restart the Raspberry Pi by running the following command.
sudo rebootYou should now hopefully have a fully working Raspberry Pi AirPlay receiver. If you have any issues or feedback, then feel free to drop us a comment below. If you enjoyed this tutorial, then be sure to check out our other projects.


Does this, or will this support AirPlay 2? Looking to deploy multiple on same network and then have “multiroom” functionality.
Thanks in advance.
Hey RV,
This does not currently support AirPlay 2 but looking at the Github page for the software we are using they do intend on adding support for AirPlay 2 but haven’t got their hands on it at this stage since its only in a beta form. You can view the issue on the Github page to see more about this, https://github.com/mikebrady/shairport-sync/issues/535
The current version of Shairport-sync should already support playing audio in multiple rooms.
Cheers
Thanks for the great tutorial. It took only a few minutes from a fresh image to getting sound out of it!
I have a problem with the installation, and its obviously me seeing as everyone is pleased with the current instructions.
I get to step 5 and it all seems to work on the make, then I try the install:
sudo make install
and it bombs out with:
[ -f /shairport-sync.service ] || cp scripts/shairport-sync.service
cp: missing destination file operand after `scripts/shairport-sync.service’
Try `cp –help’ for more information.
Makefile:977: recipe for target ‘install-exec-hook’ failed
make[3]: *** [install-exec-hook] Error 1
make[3]: Leaving directory ‘/home/pi/shairport-sync’
Makefile:910: recipe for target ‘install-exec-am’ failed
make[2]: *** [install-exec-am] Error 2
make[2]: Leaving directory ‘/home/pi/shairport-sync’
Makefile:854: recipe for target ‘install-am’ failed
make[1]: *** [install-am] Error 2
make[1]: Leaving directory ‘/home/pi/shairport-sync’
Makefile:525: recipe for target ‘install-recursive’ failed
make: *** [install-recursive] Error 1
I have no idea at this level of cleverness. Tried the install twice, same result.
I am however using an original PI model B. Don’t know if this could be the issue.
Any ideas?
Great tutorial. Thanks, Gus.
My friend and I can both use my iPad at the same time. I can listen to music from Spotify on my headphones and he can read his digital newspaper in another room.
Would it be possible to set up a RPi Airplay receiver for video? (like a replacement for an Apple TV)
+1 for this. I’d love to have that functionality
Great tutorial, worked really nice! My volume was not very loud in the beginnen but I changed that using “alsamixer”.
Hello it is a nice project I did it myself and it works nice for playing music, but in case of music the audio delay is really annoying. Is there any way to reduce the audio delay?
Excellent tutorial! Worked like a charm. I have been trying to find a good solution for this without buying another Apple device, and being able to use a Pi I had lying around was perfect.
Thanks for this tutorial! I had already installed shairport but the sound quality had disappointed me.
With the settings you propose it is perfect!
Hey, ive got this working perfectly when connected to my laptop, but when i connect with my iPad i dont get any audio?
I made this and it works perfect every time I added it to the voice activated Google assistant so when I have music playing via AirPlay I can ask google questions. The only problem I came across was the voice assistant would not talk over the music with the updated audio drivers.
Hello,
nice project! But will it work on a raspberry zero W? I would like to try it
Hey Lukas,
I haven’t tested it myself, but I can’t see why it wouldn’t work on a Pi Zero W, you will just need some sort of audio out.
Cheers
Yes, it works fine and reliably plays for hours. I’ve followed a similar setup as the one above.
I don’t know what I missed, but on step 3 of “Setting up an Apple AirPlay Receiver” I’m being asked for a Username and Password.
I must have done something wrong, since when I checked the GitHub Support page it literally said to do what you said without providing a username or password.
Nevermind, I’m a dummy. For others, make sure you don’t have any typing errors in the URL or else you’ll get my issue
I love having this functionality.
The GIT mentions the ability to go a few steps further and be able to:
1) display cover art and track title etc, in say, PHP page
2) initiate track skip, pause, volume control from the Pi to the device!!
I’ve looked for some guides on this but drawn blanks… Any help would be super!
Will it work (well) on a raspberry pi zero W?
It should, playing an audio stream shouldn’t be an big deal for the zero. Give it a try and tell us how it goes.
This is absolutely fantastic! Thanks for putting this together! If you follow the instructions to the letter it works excellent. The only think I did beyond this was
“amixer set PCM — 100%” which set the volume to 100%.
I wonder if git should be installed?
Git is installed by default unless you’re using Raspbian lite.
Hi,
I am trying to get the airplay receiver working on my raspberry pi. I have got all the steps in the tutorial done but I am not able to search for the raspberry pi on my iphone. It isnt discoverable for some reason and hence I cannot connect. Also when I type shairport-sync on the command line, it gives me an error : could not establish a service on port 5000 — progam terminating. Is another instance of Shairport Sync running on this device?
I spent a few evenings trying to get Airplay to work following instructions on a multitude of other sites… couldn’t get it to work.
I tried your tutorial / instructions… worked without issue!
This was actually one of the main reasons I bought the Pi, and now I get to use it as I intended!
Thank you so much!!
Thanks, must have missed an error along the way. I re ran the instructions from the beginning and yes, the packages from Step 2 were missing.
Up and running now
thanks
Great idea!! thanks, but i Ran in to many issues when setting this up the
make
sudo make install
did not execute
pi@Pixelpi:~ $ makemake: *** No targets specified and no makefile found. Stop.
pi@Pixelpi:~ $ sudo make install
make: *** No rule to make target 'install'. Stop.
pi@Pixelpi:~ $
Hi William,
It appears you may be in the wrong directory. The directory you should be in is called “shairport-sync” this is specified in step 4.
after running step 4
pi@Pixelpi:~/shairport-sync $ ./configure –with-alsa –with-avahi –with-ssl=openssl –with-systemd –with-metadata
— CLIPPED —
configure: error: Package requirements (libdaemon) were not met:
No package ‘libdaemon’ found
It appears you’re missing packages that are installed during step 2, to ensure everything is installed correctly, follow the tutorial from step 1.
Tried this today, get same make error
make: *** No targets specified and no makefile found. stop.
Some of the files referenced in step 2 were noted that “already newest version, not upgraded” WOuld that matter?
Hey Hugh,
That is odd, can you make sure your in the “shairport-sync” folder when you run that command and have run the configuration script before running make.
On the note about the packages already being installed, no that should be no issue at all.
Cheers
This was working great but it now does not show up on my Iphone
I tried reinstalling it and still does not show up
any suggestions ?