In this CrowPi review we will be showing off a brand new device from STEM (Science, Technology, Engineering, and Mathematics) focused manufacturer Elecrow. For those who do not know who Elecrow are, they are a Chinese manufacturer based out of Shenzhen.
The CrowPi is an education-focused Raspberry Pi Kit that has been built into a very easy to handle and rugged case. We have previously covered the CrowPi kit in a Raspberry Pi news article but were lucky enough to receive a kit for free.
Elecrow is currently running a Kickstarter campaign for the CrowPi, and we highly recommend that if you are interested in this device that you check out their campaign as it is currently the only way to purchase it.
In this review, we will be diving into our thoughts on how the CrowPi holds up, how useful the device can be, the general build quality of the device and what extra bits of functionality it brings to the Raspberry Pi. For the purposes of this review, we are using an early production model of the CrowPi sent to us for review purposes by Elecrow.
The Case & Build Quality
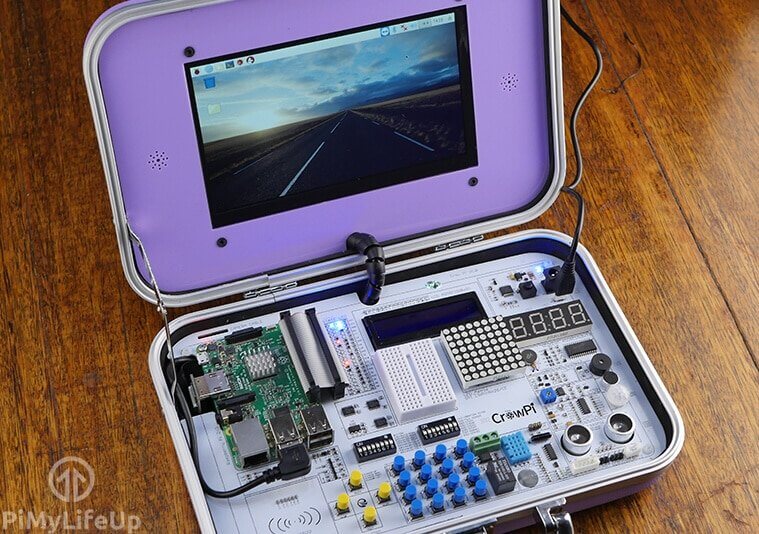
The first thing you will notice after receiving your CrowPi is the briefcase design that has everything contained within. Our observations found it to be a pretty robust case that can very take some very big hits and keep all of its contents safe and secure.
It is a case that is more than sturdy enough if you’re someone that travels around a lot and is worried about it possibly breaking when thrown around. For those who are in the IT education field, then this device seems like it will be a perfect fit for students, as it is strong and not something that they can easily break.
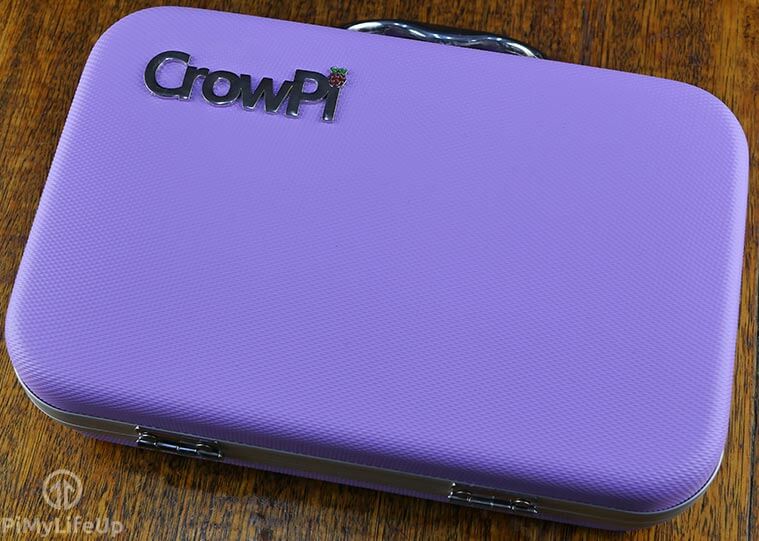
The look of the device is quite nice, even though pink is not a color for us, the CrowPi logo sits nicely on the top of the case and the metal trim just suits the whole check design. The general feel of the case and doesn’t feel cheaply made, and this will hopefully satisfy if you’re looking for a solid quality case. There are three more colors for the Crow Pi, and these are blue, yellow and black.
Upon opening the case you are presented with a touchscreen on the top half of the case, accompanied by decorative holes on either side of the screen. You will also see a cable that goes from the top half of the case down to the bottom. This cable is what will take the data and power for the screen from the Raspberry Pi.
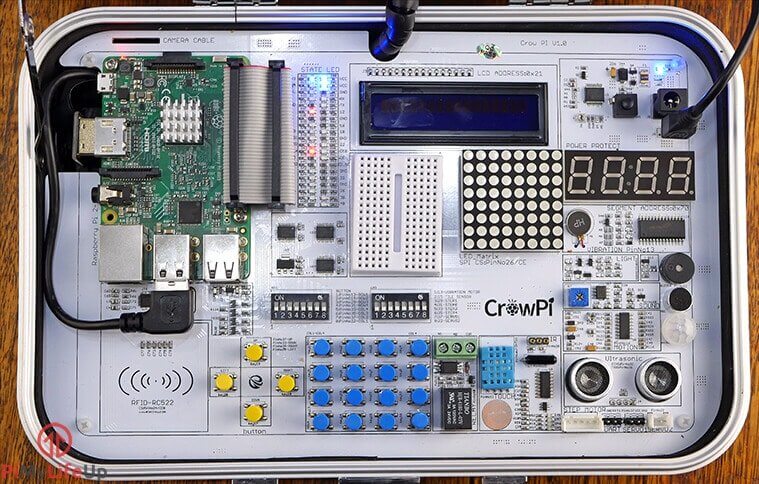
On the bottom half of the case, you will find all the various pieces that you can interact with and utilize from your Raspberry Pi’s GPIO pins. We will go into all the parts that are included with the device in our “Sensors and Power” section below. All the parts seem to be well placed on the circuit board, with none of them coming loose with a bit of prodding and pulling. They are also all well spaced apart, so nothing feels too cramped on the bottom.
The layout is excellent as you have a wide range of sensors in a tidy, easy to use package. It’s perfect if you find yourself continually losing sensors due to a messy work area. It’s also great for kids as it is tough to lose or break the kit, especially when it is sealed.
Assembly
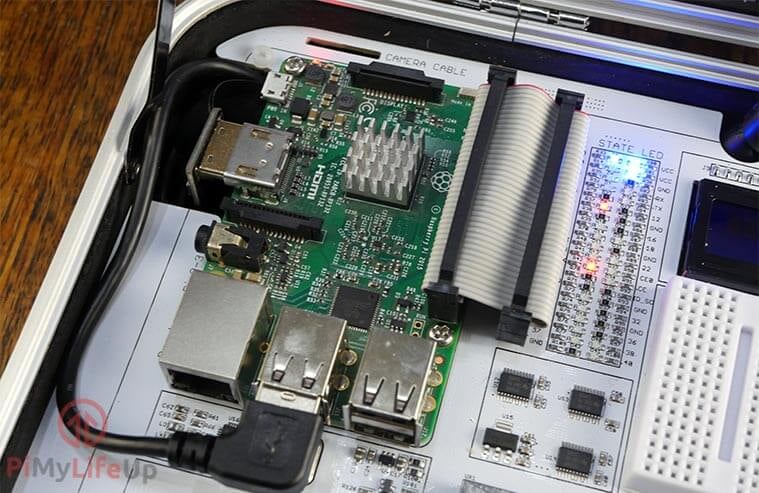
In this CrowPi review we found that while most of the build came across as well thought out, we ran into issues when it came to attaching our Raspberry Pi to the board. The first issue being that the provided screws felt like they were one size too large. While they secured the Raspberry Pi very firmly to the board, it felt like we had to use way too much force to screw them in.
The second issue we found, was that access to the micro SD slot on the Raspberry Pi 3 is pretty difficult once it is fully attached. We found to remove the micro sd card properly we had to release the tight screws from the board.
If we wanted to nitpick, we would like there to be labeled on the touch screen USB cables to note which one is for the Raspberry Pi and which one is for the Raspberry Pi Zero. While the manual makes a note of this if you are like us, you will mindlessly plug the micro-USB touchscreen cable into the power socket on the Raspberry Pi.
CrowPi’s Touchscreen
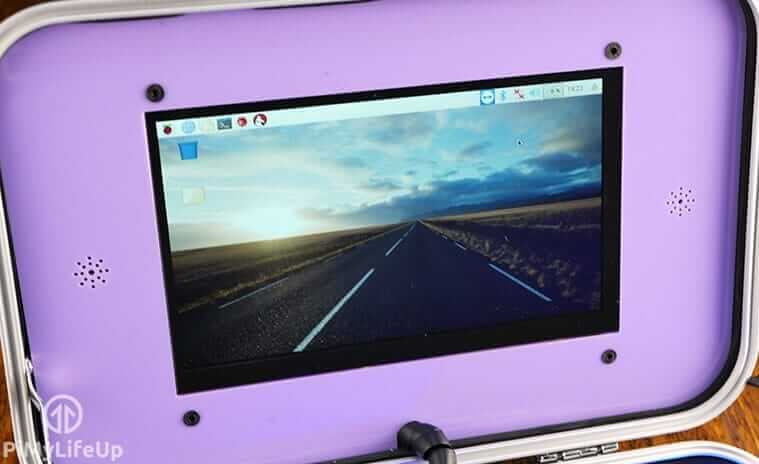
The CrowPi comes with a 7-inch touchscreen that we are finding is now a standard inclusion with these sorts of devices like the RasPad. It is great as an easy way to access your device, but you will find that a keyboard is essential to make the most of your device. As an on-screen keyboard can be very tedious to use and we feel a 7-inch touch screen is just a tad too small for typing on.
However, the colors from the screen are good and the touch screen seems very responsive, making it good for dealing with interfaces that don’t rely on commands or typing.
Lack of Speakers
Probably the most disappointing thing with the CrowPi is the lack of any inbuilt speakers. Despite there being holes in the upper half of the case for where the speakers would have gone there is nothing behind them. These holes are purely just decorative.
The lack of speakers stops the device from being a true all-in-one STEM platform as to hear any sounds requires you to either install speakers into the device itself or to carry around a set to plug into the device which makes the device a lot less portable if having sound is essential to you.
Sensors & Power
One of the key features of the CrowPi is the number of peripherals that it comes with. It is jam-packed with a ton of different sensors, buttons and LED feedback devices such as a LED Matrix and a seven segment display. The addition of so many different addons allows you to do quite a bit right off the bat.
In the top right of the board, you will find the power circuit for the board, this is where you can plug in your power supply. This power setup provides an easy way for power to be distributed to all the required components. This power distribution includes providing powering devices such as the relays featured on the board, the touchscreen and also the Raspberry Pi.
In addition to the above power features, it also features a reset power button which can be incredibly handy if your Raspberry Pi freezes for any reason, this saves having to yank the power cable out. Keep in mind it can be unsafe to quickly remove power from the Raspberry Pi quickly, to shut down the Pi safely first run the following command.
sudo shutdown -hCopy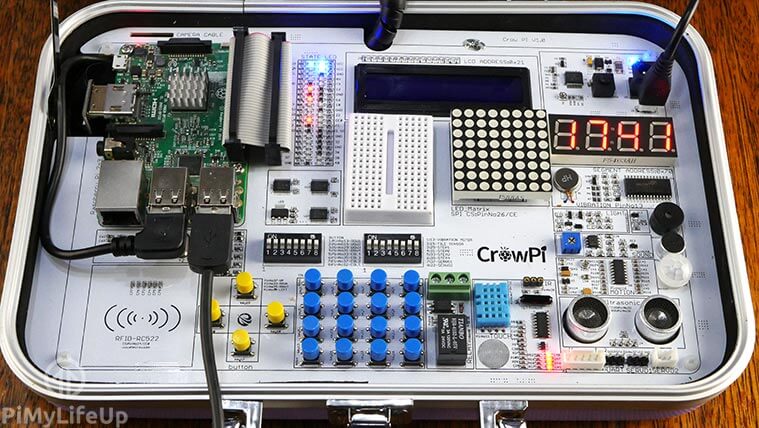
All of the peripherals featured on the circuit board are all completely accessible through the GPIO pins that Elecrow provide a bridge to connect to. Some of these require you to use the small switches featured on the center of the board to switch on or off, however the vast majority of features on the board are activated by default.
In our testing, we made use of several of these components and found that the CrowPi allowed easy access to all of them both physically and through code.
Below is a list of all the components that are inbuilt into the CrowPi.
- An RFID RC522 Module for reading specific NFC chips
- An 8 x 8 LED Matrix
- Ultrasonic Sensor
- Push buttons and a 4 x 4 push button matrix
- Breadboard designed to help interact and extend the included circuits
- Humidity and temperature sensor
- Vibration Sensor
- Light Sensor
- Relay
- Sound Sensor
- Touch sensor
- Tilt Sensor
- 7 Segment Display
- Small LCD Display
- Buzzer
- Servo controller
In addition to all the inbuilt components, the board also features a very small breadboard, this allows for some quick and easy prototyping by adding additional components.
Operating System
To utilize the CrowPi you can either download their own modified version of the Raspbian operating system or use the official release. However, the official version will be missing any drivers and packages that are required for the CrowPi to work.
CrowPi currently doesn’t provide any instructions on what the missing packages are, so you can’t compile them yourself without having to do some digging, so, for now, it is easier to use their already modified version of Raspbian. You can download their version of Raspbian from Elecrow’s website.
Please note that since CrowPi’s image size is currently 16gb, you can not use an 8gb SD Card for this, you will require a 16gb or 32gb SD card to be able to write the image to the SD card. We are hoping in the future that Elecrow resolves this and only provides a version of the Raspbian operating system that only includes used memory and not free memory as well.
Other than the installation of packages that their components rely on, we can not see any significant changes to the operating system. This means that the operating system should operate just like your average installation of Raspbian.
Getting started with the CrowPi
The CrowPi is fairly simple to get started with, in fact, they even provide both a manual for setting up the device and getting everything running. In addition to this, they have also provided an 81-page tutorial book to get you started with the device and to showcase how you can utilize the various components that they provide with the CrowPi.
The CrowPi is very easy to get up and running and didn’t require extra things to be done after installing their modified version of Raspbian. It was as simple as installing the Raspberry Pi, inserting the SD card and then turning the device on.
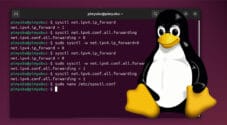
If you intend on utilizing the CrowPi’s touch screen to type, we recommend that you install an on-screen keyboard. You can do this by entering the following four commands within a terminal session. Alternatively, you can easily plug in a keyboard and mouse.
sudo apt-get update
sudo apt-get upgrade
sudo apt-get install
sudo apt-get install matchbox-keyboardCopy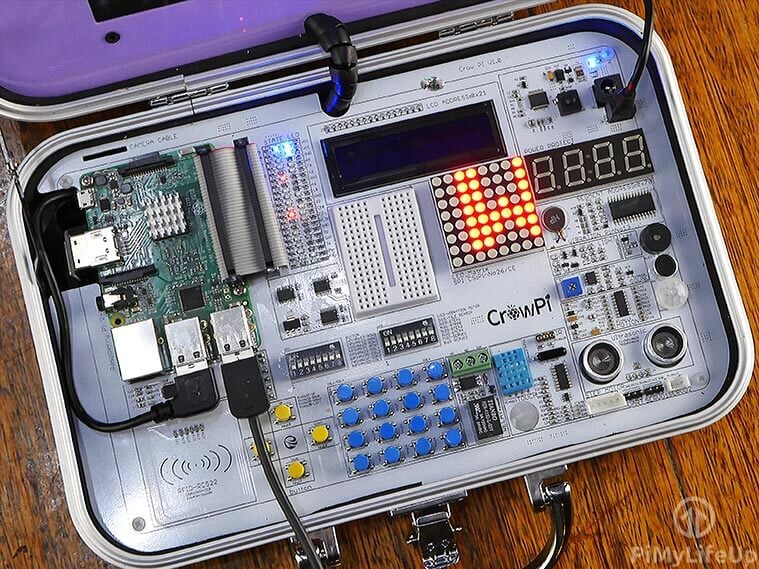
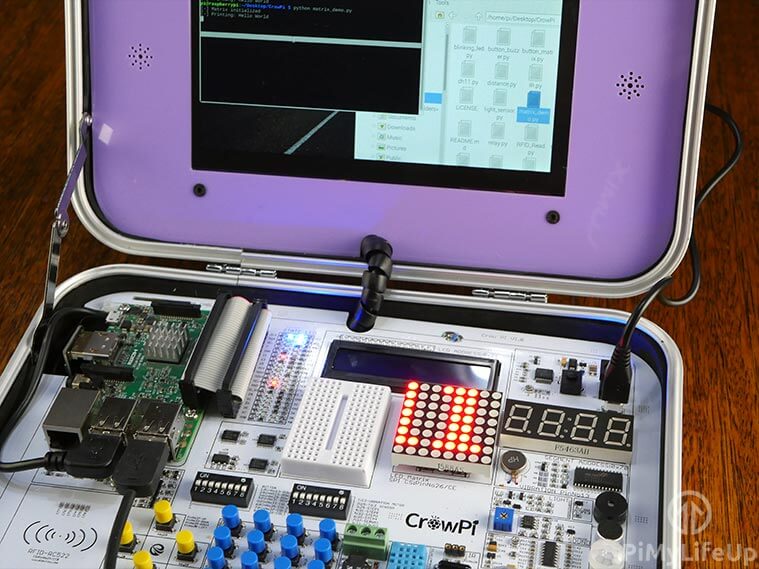
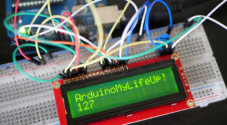
The pre-packed Raspbian OS that you can download for the Crowpi comes loaded with scripts to help you learn about the vast amount of sensors included.
Below are a few examples of the scripts:
- LCD Display: The lcd.py script will display the time on the LCD on the CrowPi sensor board.
- Touch Sensor: The touch.py script will show an example of how to detect pressure on a pressure pad.
- RFID: The RFID_Read.py will take you through the steps to reading data from an RFID chip.
These scripts can be found in the following folder.
/home/pi/Desktop/CrowPiCopyThey can also be downloaded from their GitHub.
git clone https://github.com/Elecrow-keen/CrowPi.gitCopyThe CrowPi comes with two different manuals, the first is to guide you through setting up the device and the pieces that come in the kit.
The second is a lesson guide that contains twenty lessons at the time of writing this review. Each lesson will take you through the steps of using a specific sensor and writing code for it. These lessons are super helpful if you’re new to the world of electronics.
CrowPi Price
The CrowPi has a couple of different prices, the first, is just the basic kit for $229 USD ($149 USD On Kickstarter). This basic CrowPi kit comes with just the CrowPi itself with no Raspberry Pi, and this is the kit that you would want to choose if you already have a spare Raspberry Pi lying around somewhere. It is the most affordable version of the CrowPi.
Two additional versions come with either the Raspberry Pi Zero or the Raspberry Pi 3 B+. These are priced $269 USD ($179 USD On Kickstarter) for the Pi Zero edition, and $299 USD ($209 USD On Kickstarter) for the Raspberry Pi 3B+ edition. In addition to the Raspberry Pi’s they also include a basic Bluetooth wireless keyboard.
Finally, they also provide an “Advanced” edition of the CrowPi, this is their most jam-packed version of the CrowPi and comes with a through extra peripherals in addition to a Raspberry Pi 3B+. These additional peripherals a USB Serial adapter, two game controllers, and a wireless keyboard and mouse kit. This advanced CrowPi kit will set you back $369 USD ($249 USD for Kickstarter)
CrowPi Review Summary
Overall the CrowPi is a great device that is fantastic for those who are just getting started with the Raspberry Pi or are interested in STEM education. It proves itself as a good platform thanks to its large amount of inbuilt sensors, buttons and output devices.
In addition to these features, the GPIO monitor is a nice addition as it gives you a visual indicator on what is happening over the GPIO pins, making it a great tool for teaching people how everything works.
While the CrowPi is a fantastic education tool, it does have some downsides. The most prominent of these is the lack of speakers, while the case features holes where they would go, Elecrow decided not to include them. This missing feature alongside the lack of a battery stops the device from being a truly all-in-one portable education tool.
Below is a summary of our pros and cons of the CrowPi from our review.
Pros:
- A well-built case, great for those who travel a lot.
- Decent touchscreen with multi-touch support.
- A great device for those teaching STEM or wanting someone to get into STEM.
- Package contains a ton of sensors, buttons and more that can be easily used.
- Highly Portable education tool.
Cons:
- Lack of inbuilt battery impedes portability, you will need to bring either a USB battery pack or the mains charger to utilize the device.
- Provided screws are a little too tight.
- Lack of a speaker hurts the portability of the device.
If you are interested in buying the device after reading our CrowPi review, then we highly recommend that you check it out on Elcrow’s CrowPi Kickstarter Campaign. (Get in quickly as it has almost finished)
Disclaimer: This device was provided to us for review purposes by Elecrow.


This kit is ok however again I ask is there a compartment for tools, extra parts purchased by the user/owner.
Also when you add up the cost of the included items, one may find it a lot cheaper to home build a similar unit with parts that the owner actually wants and need.
There isn’t any compartment for extra tools. I can definitely see where you’re coming from in regard to cost and limited range of items.