In this tutorial, we will show you how to set up a simple NAS on your Ubuntu system.
NAS stands for network-attached storage and is essentially a way for you to provide access to files on your Ubuntu device. Other computers can attach this storage device and write files to it as if it were a physical drive, except, of course, the data is going over a network connection.
Setting up a NAS is incredibly useful when you need files easily accessible from other computers. A common usage of a NAS on Ubuntu is to access media files or a central place to store your documents.
While there are better solutions for setting up a NAS, such as Unraid, TrueNAS, and OpenMediaVault, sometimes these are too complicated for some users. They also mean giving up your device to run purely as a NAS.
Luckily, there are other super straightforward solutions you can use to set up your Ubuntu devices as a NAS. The easiest way to achieve this is to use Samba shares.
These shares have various advantages including that they are supported out-of-the-box by numerous operating systems including Windows and macOS.
Using Samba, you can get a very simple NAS setup in minutes, especially if you are already running Ubuntu.
Setting up a Simple NAS using Samba on Ubuntu
The following sections will teach you how to set up a super simple NAS on your Ubuntu system.
As mentioned earlier, we will be achieving this by using Samba. It is super easy to use and is supported by most operating systems.
Preparing Ubuntu to Run as a NAS
1. Before you set up your Ubuntu device as a simple NAS, there are a few tasks that you will want to complete. These tasks will make using your NAS a much simpler process in the future.
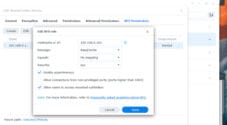
First, you must set up your Ubuntu device with a static IP address. The best way to do this is to use DHCP reservation on your device.
However, we have several guides that show you how to set a static IP address, whether using Ubuntu Netplan or through the Ubuntu desktop interface.
The reason you want a static IP address is so that you can easily access your Ubuntu NAS. If the IP address constantly changes, it can make it difficult to utilize and break devices using it as a connected drive.
2. The other thing you will want to do before continuing is ensure you have chosen where you want files for your NAS to be stored on your system.
For example, you might store them in your home directory in a folder called “NAS“. Alternatively, you might want these saved to a separate drive, or you might even want to partition your drive to isolate the NAS part of your Ubuntu device.
Whatever you decide, you must know the full path to that location. For example, we will use “/home/pimyubu/nas/” as our storage location.
Installing Samba for your NAS
3. Your first step is to ensure you have an updated package list cache. While we are at it, we can also upgrade any out-of-date packages using the following two commands within the terminal.
The package list cache is what the package manager uses to see what packages it can install and check for any available updates.
sudo apt update
sudo apt upgrade -yCopy
4. Once your Ubuntu system is updated, we can install Samba by running the following command.
We will be using Samba to set up a NAS on Ubuntu. It allows us to create network shares with just a few edits of the Samba configuration file.
sudo apt install samba samba-common-binCopySetting up your NAS Shares on Ubuntu
5. With Samba now installed, we can move on to setting up our first network share on Ubuntu.
This share will act as your networked storage. You can begin editing the Samba configuration file using the nano text editor by running the command below.
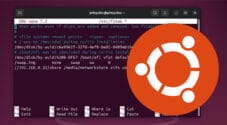
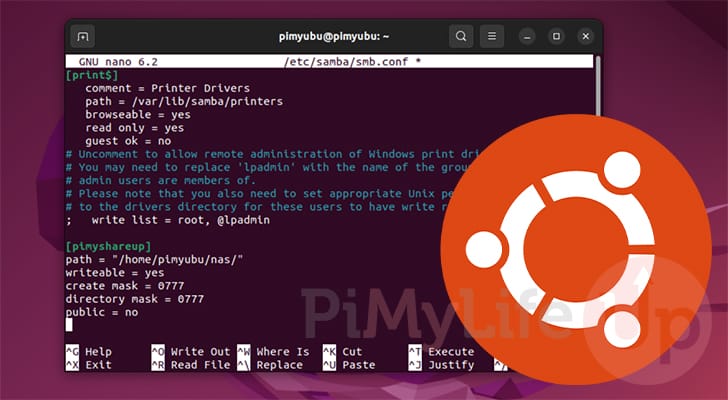
sudo nano /etc/samba/smb.confCopy6. Within this file, you will want to add the following lines to the bottom. These lines set up the Samba share.
[<SHARENAME>]
path="<PATHTOSHARE>"
writeable=yes
create mask=0777
directory mask=0777
public=noCopy
Below is a quick overview of how to use this configuration to control your Ubuntu NAS shares. You can add as many of these as you would like.
[<SHARENAME>]– The start of every new Samba share must start with this block. Using this line, you define the name of the network share on your Ubuntu NAS.
For example, by setting this share name to “pimylifeup“, you would access your share through like “//<IPADDRESS>/pimylifeup“.path– With this option, you define where your Samba share will be located on your Ubuntu device.writeable– You can decide whether this share should be writeable or read-only.yes– Setting this option to yes will allow users to save files to your Ubuntu NAS.no– By typing in “no“, you will make this share read-only. This is useful when you want users only to be able to access files without deleting or changing them.
create mask– This sets the maximum allowed permission for newly created files on this share.
Any permission bit not set in this mask will be stripped from the file when it is created.directory mask– Like the above option but purely for new directories.public– You can also choose whether this share is publicly accessible.yes– With this share set to “yes” then anyone can access this share without logging in.no– If you set “public” to “no“, you will need to log in to a user to access these files.
7. After making these changes to the Samba configuration, you can save and quit by pressing CTRL + X, then Y, followed by the ENTER key.
Creating a Samba User for your Ubuntu NAS
8. If you are setting up a non-public share, you must set a Samba password for your user. With a password, you can access your private NAS’s network shares.
To add a user to SMB and assign that user a password, you will want to use the following command within the terminal.
Just ensure you replace “<USERNAME>” with the user you want to use to access your Ubuntu NAS.
sudo smbpasswd -a <USERNAME>CopyRestarting the Samba Service
9. You will want to restart the Samba daemon for all these changes to take effect.
You can restart this service by running the following command below.
sudo systemctl restart smbdCopyAccessing your Simple Ubuntu NAS
10. You should now be able to access the Samba shares running on your Ubuntu NAS. There are two ways you can access these shares.
Locally, you can use the hostname assigned to your Ubuntu device. You can also use the local IP address you assigned to your device.
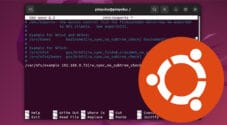
If you want an easy way to get the IP of your Ubuntu NAS, use the hostname command.
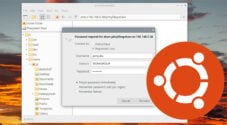
hostname -ICopy11. How you connect to your NAS using Samba differs from operating system to operating system.
Some operating systems allow you to connect using an address like the following.
smb://<IPADDRESS>/<SHARENAME>Others, like Windows, allow you to connect a Samba share as a network drive, or alternatively, you can enter the following into the file explorer.
\\<IPADDRESS>/<SHARENAME>Conclusion
Hopefully, you will now have your Ubuntu device set up as a simple NAS.
We achieved this by setting up Samba shares that allow you to set up any directory as a shared directory easily. You can even control whether users can write to these folders.
Please comment below if you have issues setting up your device as a simple NAS.
If you found this tutorial helpful, we highly recommend checking out our many other Ubuntu tutorials.