In this tutorial, we will be showing you how to format a disk on the Ubuntu operating system.
For a new disk to function with any operating system, including Ubuntu, we must format it first. This formatting dictates how the operating system stores and reads data on the disk.
A disk format can change things significantly, and it’s important to note not every format is equal. For example, you would use the NTFS or exFAT formats if you need to retain compatibility with Windows. However, on the flip side, these two disk formats don’t give you the best experience on Ubuntu. Instead, you would want to use a format like ext4, BTFRS, or ZFS.
Out of the box, Ubuntu supports several major disk formats. There are advantages to each of these formats, but we won’t be covering that within this guide. For most basic use cases, you will stick with the “ext4” format when formatting a disk on Ubuntu.
There are a couple of different ways that you can format a disk. You can use the “Disks” application that comes with Ubuntu’s desktop flavor or install the more powerful GParted application. We will also show you how to format a drive on Ubuntu from the terminal.
Format a Disk on Ubuntu Desktop
In the following two sections, we will show you a couple of ways you can format a disk on the desktop variant of Ubuntu.
The first method uses the built-in “Disks” app to format your drive. This method is convenient as you don’t have to install additional software to format your disks.
Our second method will show you how to use GParted to format a disk on Ubuntu. This tool gives you much better control over formatting your disk. This tool is also great if you ever need to resize a partition.
Using the Disks App to Format a Disk
This section will show you how to use the pre-installed “Disks” application to format your disk on Ubuntu.
This tool is great for basic usage or in cases where you can’t install any additional software. However, if you need a more full-featured disk management tool, skip to our section on GParted.
Opening the Disks App on Ubuntu
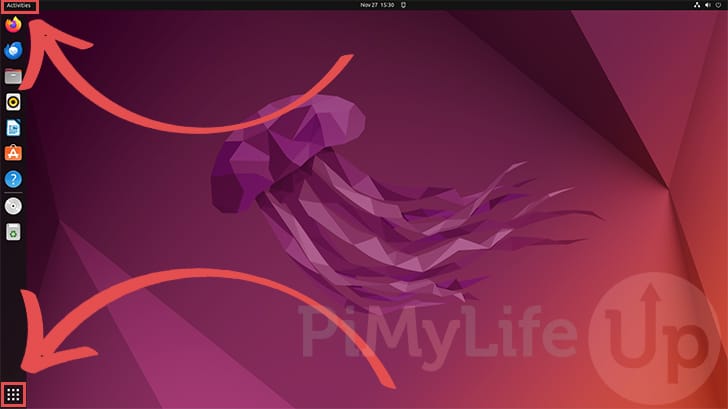
1. Your first step is to open the activities screen. This screen will allow us easy access to the “Disks” app.
You can click the bottom or top left of the screen to open the activities screen.
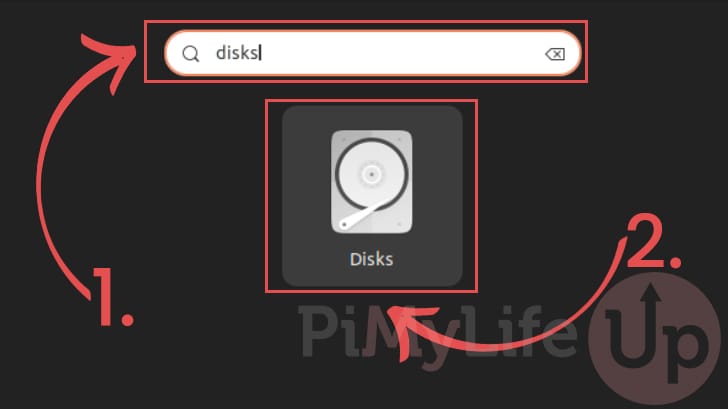
2. With the activities screen open, use the search box and type “disks” (1.).
After typing in the search bar, you should see the “Disks” application appear within the list. Click this application (2.) to open it.
Beginning to Format your Disk on Ubuntu
3. Now, with the Disks application open on Ubuntu, click the disk you want to format (1.).
Once selected, click the cogs under the “Volume” (2.).
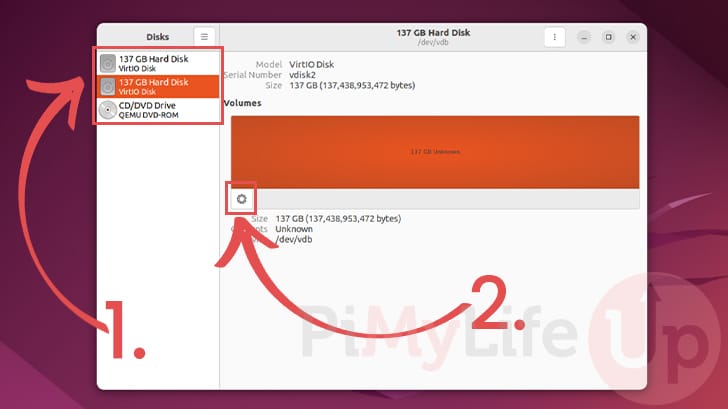
4. A context menu will appear on your screen after clicking the cog icon.
Find and click the “Format Partition...” option to begin formatting this drive on Ubuntu. On older versions of Ubuntu, sometimes this is just labeled as “Format“.

Configuring How Ubuntu Formats the Disk
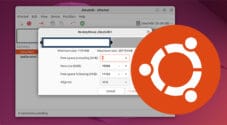
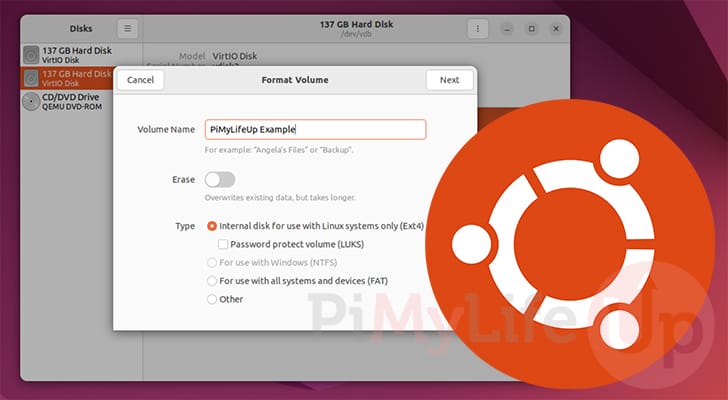
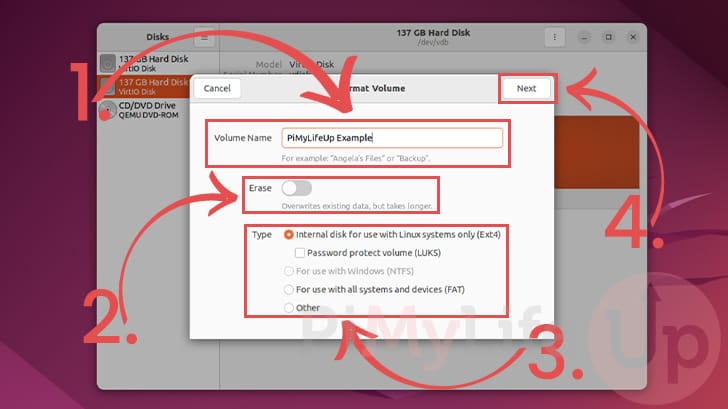
5. You will now be given a chance to set some options for your disk before Ubuntu formats it.
- First, you can give this new volume a name (1.).
Typically, you will want to set a name based on what you plan on storing on this partition. - Next, you must decide if you want to erase the disk’s contents (2.). This option ensures that any existing data will be unrecoverable by writing empty data over the entire partition.
If you aren’t worried about old data being recoverable, you can keep this option disabled. The new formatting and data will just be written over the top. - The third option allows you to select the format type (3.) you want Ubuntu to use for this partition. If you plan on just using this drive with Ubuntu, you can stick with the default “
EXT4” option.
However, if you want the drive to work with Windows, use NTFS, FAT, or exFAT.
You can also select the “Other” option to pick a different format entirely. For example, you would choose “Other” if you want to use XFS on your drive.
Finally, once everything is set, click the “Next” button (4.) to proceed.
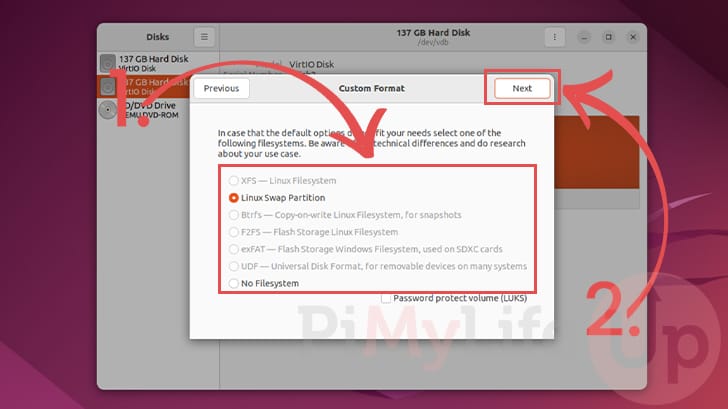
6. If you select the “Other” option you will be greeted with the following screen. Skip this step if you picked any of the others.
Using this screen, you can select a few different format types for your drive (1.). You must install additional packages for Ubuntu to format your drive using these formats. If the required package is unavailable, the option will be greyed out.
After selecting the format type for your drive, click the “Next” button (2.).
Finalizing the Format
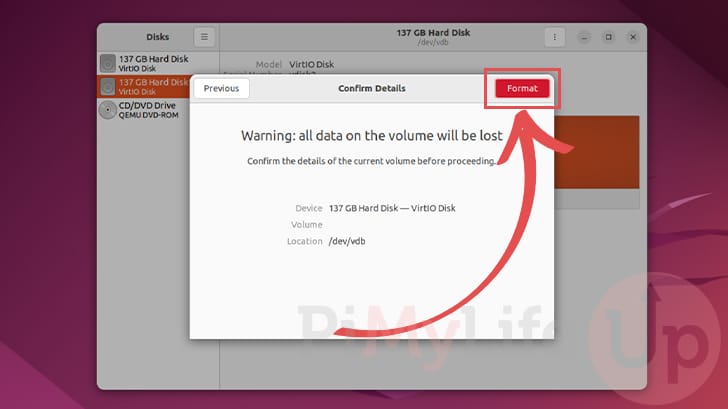
7. Ubuntu will warn you that any data on your drive will be erased when formatted.
To proceed with formatting your drive, click the “Format” button.
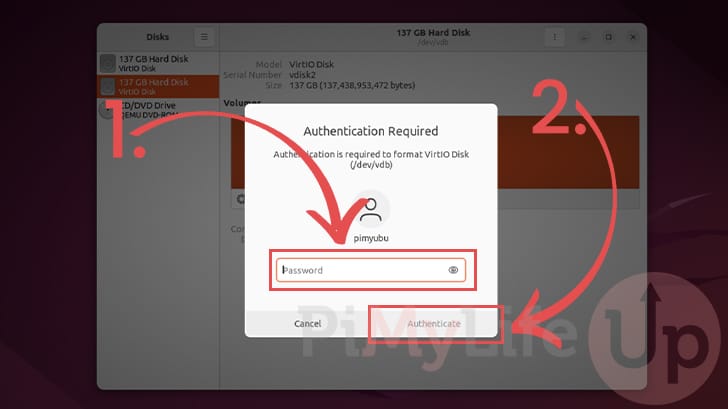
8. Before Ubuntu formats your drive, you must authenticate yourself by typing in the password for your account (1.).
After typing in your password, click the “Authenticate” button (2.).
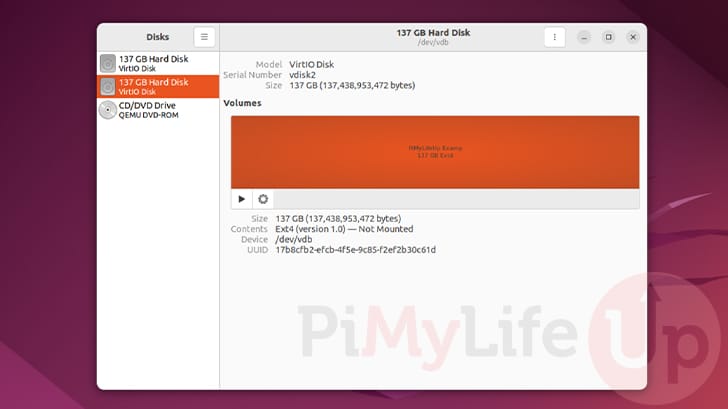
9. Below, you can see that we have successfully formatted our disk using the Ubuntu disks application.
One of the downsides of using this application is that it doesn’t create a partition table by default, so you are stuck with a single partition.
Using GParted to Format a Disk on Ubuntu
The GParted application is one of the best ways to format your disk when using the Ubuntu operating system. It gives you an easy-to-use yet powerful graphical interface to use.
You can use this same tool on Ubuntu to easily resize partitions. Additionally, you can use GParted to set up a partition table if one is missing.
Installing and Opening GParted
1. GParted is, unfortunately, not a core part of the Ubuntu operating system, meaning we must install it to use it.
To do this, you must open the terminal on your Ubuntu system. One of the easiest ways to do this is to press CTRL + ALT + T on your keyboard.
2. Before we can install any packages, we need to ensure our package list cache is current.
You can update this cache by using the following command in the terminal.
sudo apt updateCopy3. Once the update is complete, you can install GParted to your Ubuntu system by running the command below in the terminal.
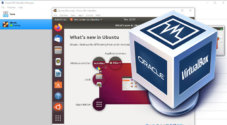
sudo apt install gpartedCopy4. Since we are still in the terminal, we can easily launch GParted using the command below.
You can soon format a disk on Ubuntu in a few short steps.
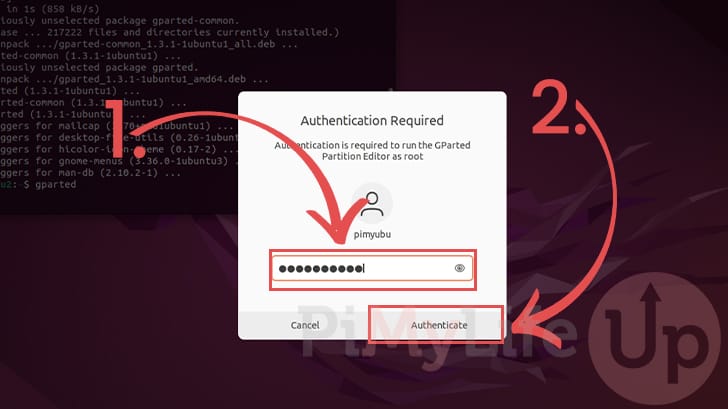
gpartedCopy5. To use GParted you will be required to authenticate yourself.
Type in the password for your account (1.), and then click the “Authenticate” button (2.) to proceed.
Creating A Partition Table on the Drive You Want to Format
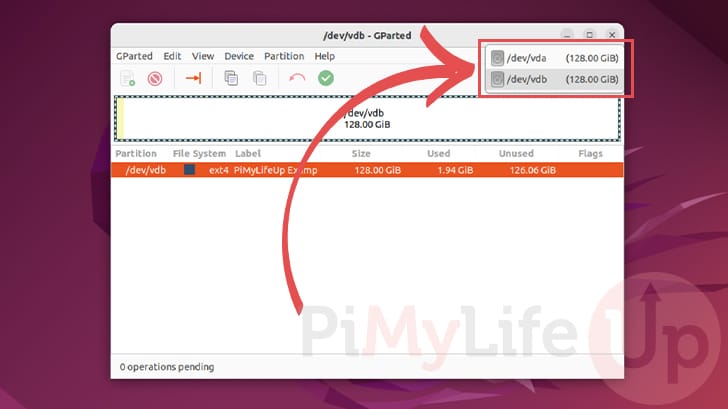
6. Once you have GParted open, you will want to select the drive you want to format.
You can select the drive by clicking the select box in the window’s top right corner.
7. After selecting the drive you want to format, click “Device” in the toolbar (1.). Please note that you can skip to the next section if your disk already has a partition table.
In the pop-up menu, click the “Create Partition Table...” option (2.).

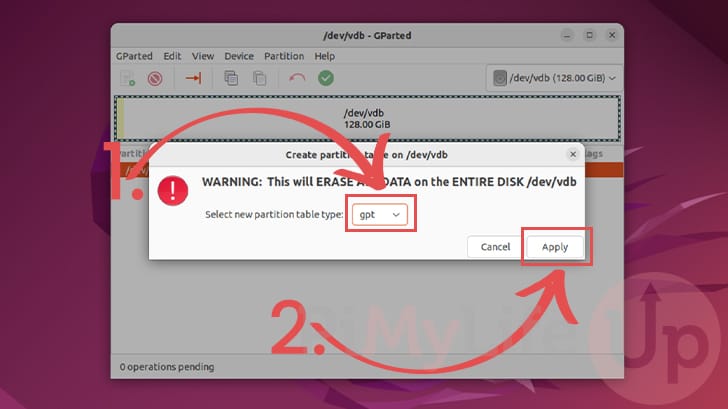
8. You will now get to select the partition table type for the disk you are formatting. For most use cases, you will want to choose the “gpt” option (1.).
After selecting the partition type, click the “Apply” button (2.) to get Ubuntu to format the disk.
Formatting a Disk Partition on Ubuntu using GParted
9. With the partition table created, we can now format a partition on our disk using Ubuntu.
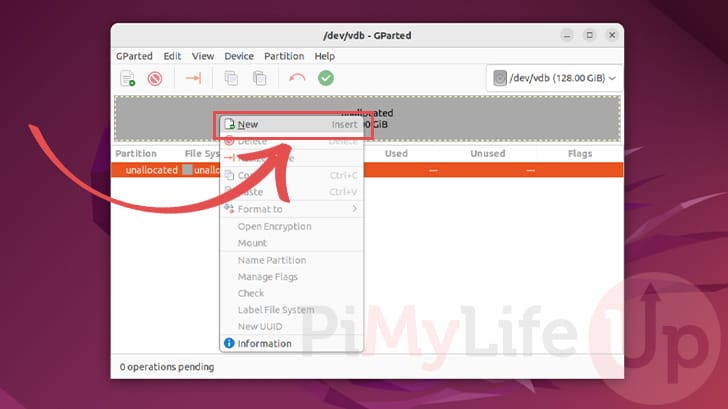
To begin formatting the disk, right-click the “unallocated” space.

10. In the context menu that appears, click the “New” option to begin creating a new partition on your disk.
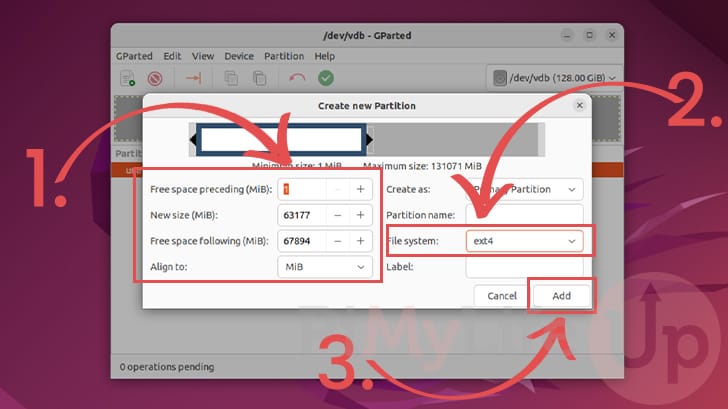
11. You can now use this screen to format a new partition on your Ubuntu disk.
First, you will want to select the partition size on your disk (1.). You can even choose where this partition should be placed on your disk.
After choosing the partition size, you will want to select the file system type (2.). By default, the file system will be set to “ext4“, which is fine for most people.
Finally, once you are happy with your settings, click the “Add” button (3.).
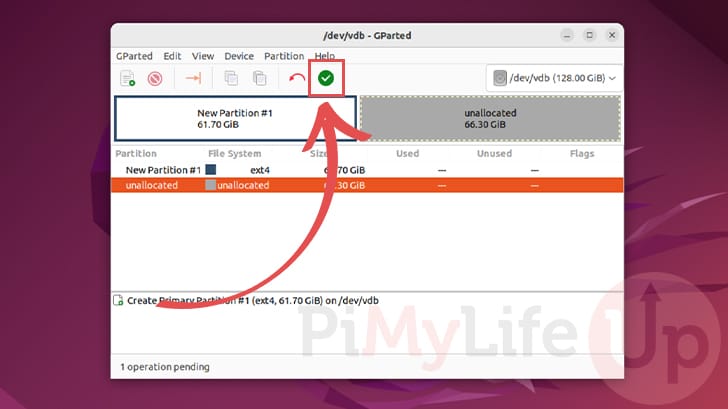
12. GParted doesn’t format a disk on Ubuntu till you approve the changes. Each change you make is listed at the bottom of the screen, meaning you can create multiple partitions in one action.
Once you are happy to proceed, click the green tick in the toolbar.
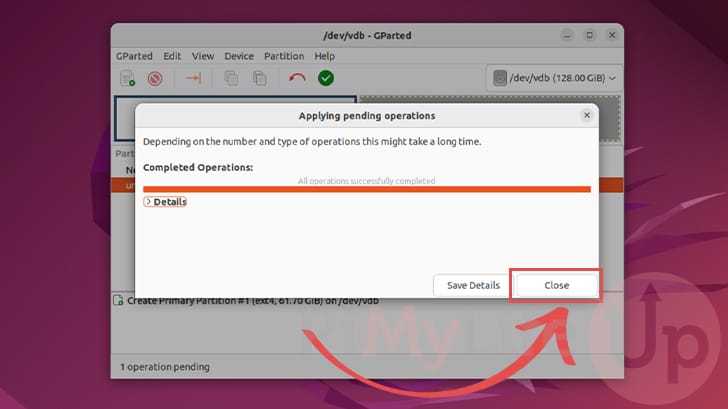
13. GParted will show you the progress of the format. On most drives, this process shouldn’t take too long.
Once it has completed, you can click the “Close” button.
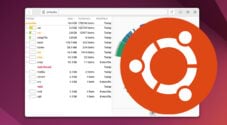
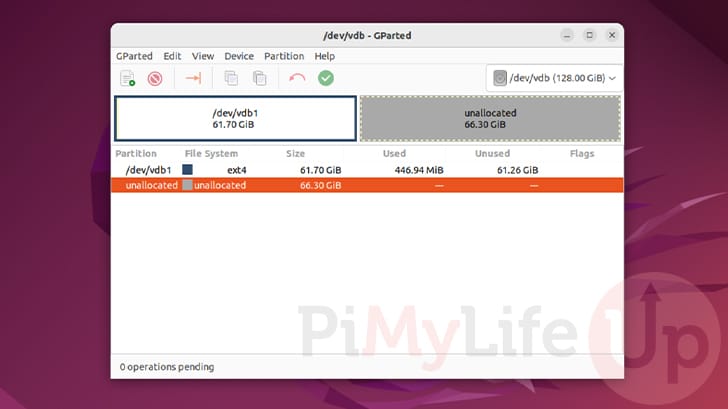
14. Below, you can see GParted formatted our disk on Ubuntu using the options we specified.
Using the Terminal on Ubuntu to Format a Disk
If you are using a variant of Ubuntu without a desktop interface, you can utilize a couple of built-in tools from the terminal.
In the following section, we will show you how to format a disk on Ubuntu using the terminal. The main tool we will use to format your disk from the terminal is “parted”.
Listing the Disks to Format
1. Before we start, we need to know the device address for the disk you want to format.
One of the easiest ways to do this is to use the parted tool to list all disks it can find. We have to run this using sudo so that it can traverse the device stack.
sudo parted -lCopy2. There are a few ways that you can identify our drive. If it is a brand-new one, it likely doesn’t have a partition table or a valid disk label.
Like our example below, The drive likely won’t have any partitions. Before continuing to the next step, note the disk location. In our example below, it is “/dev/vdb/“.
Additionally, we can see that the partition table is “unknown” meaning it likely hasn’t been created or is invalid.
Error: /dev/vdb: unrecognised disk label
Model: Virtio Block Device (virtblk)
Disk /dev/vdb: 131GB
Sector size (logical/physical): 512B/512B
Partition Table: unknown
Disk Flags:
Creating a Missing Partition Table
3. If your disk does not have a partition table, we must create one before proceeding any further. However, if your disk already has a partition table, skip to the next step.
We can use parted to create this table by using the following command. With this command, we created a new label using the “gpt” format. GPT is the go-to partition table for most modern systems.
Ensure you replace “<DISKPATH>” with the path you found in the previous step.
sudo parted <strong><DISKPATH></strong> mklabel gptCopyFormatting a Drive on Ubuntu using the Terminal
4. With the partition table created, we can now use the terminal to format the drive with a new partition. Here is where things get slightly messy.
With the command below, we create a new partition on your drive using the “ext4” drive format. You will need to specify a few things for this command to work.
- “
<DISKPATH>“: This is the device path to the disk you want to create the new partition using the terminal. - “
<START>“: Partitions can start anywhere on the disk. First, you must specify where this new partition starts. It can not overlap with any existing partitions on your disk.
If you want this partition to start at the beginning of the drive, type in0for the start position. - “
<END>“: You must also specify the ending position for the new partition. The end position lets you control how big the partition is on your drive.
If you want this partition to expand over the whole drive, set this to the size of your drive. For example, for a 131 GB drive we can use “131G” for this option.
sudo parted <strong><DISKPATH></strong> mkpart primary ext4 <strong><START></strong> <strong><END></strong>CopyFor example, we formatted our drive with a partition that spanned the entire length of our disk by using the following command.
sudo parted /dev/vdb mkpart primary ext4 0 131GCopyChecking your New Partition
4. Finally, we will want to use the Ubuntu terminal to ensure we correctly formatted the drive.
We can do this using the parted command to print out details of the specific drive to which we made changes. Replace “<DISKPATH>” with the path you got earlier.
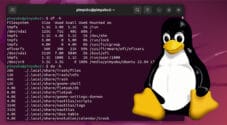
sudo parted <strong><DISKPATH></strong> printCopyBelow, you can see our virtual disk now has a partition table set and a partition that expands the whole drive.
Model: Virtio Block Device (virtblk)
Disk /dev/vdb: 131GB
Sector size (logical/physical): 512B/512B
Partition Table: gpt
Disk Flags:

Number  Start   End    Size   File system  Name     Flags
 1      17.4kB  131GB  131GB               primary
Conclusion
Hopefully, at this stage, you will have a good understanding of how you can format a disk on Ubuntu.
We have covered how to format a disk using the desktop and terminal interfaces. The desktop process is significantly faster thanks to the Disks and GParted applications.
Please feel free to comment below if you have had any issues formatting your drive.
If you found this tutorial to be helpful, we highly recommend checking out our other Ubuntu tutorials.