This tutorial will show you how to set up and run a Factorio server on Ubuntu.
Factorio is a popular construction and management simulation game that allows you to host games with numerous players.
While you can host a server directly from within the game, setting up a dedicated server allows you to run your server 24/7 without running the full game on your Ubuntu device.
As this is a headless server, you don’t even need a screen connected to be able to utilize it.
Setting up and running the Factorio server on Ubuntu is a relatively straightforward process we will cover in the following sections.
Preparing Ubuntu for the Factorio Server
Let us start by preparing our Ubuntu device to run the Factorio server. Over the following steps, we will create a user to run the Factorio server under and install any required packages.
1. Our first step is to update the package list on Ubuntu and upgrade any out-of-date packages.
We can perform both tasks by using the commands below within the terminal.
sudo apt update
sudo apt upgrade -yCopy
2. We can now install the required packages to run the Factorio server on our Ubuntu system.
Install all of the packages we will be utilizing by running the command below within the terminal.
sudo apt install wget tar screenCopyIf you are interested, here is a quick rundown of the packages that we are installing in the above step.
wget– This package allows us to easily download files from a provided URL.tar– The Factorio server we are downloading is saved within a tar archive, so we must ensure the “tar” package is available to us.screen– We will use the “screen” package to allow us to interact with the server’s command line interface even when it is being ran as a service.
3. With the packages now installed, our next step is to use the useradd command to create a user named “factorio“.
By using the “-m” option, as shown below, the command will generate a home directory when it creates the user.
sudo useradd -m factorioCopy4. Next, we need to modify our current user and add the “factorio” user to its list of groups.
By using the “-a” option, we tell the usermod command that we want to add an attribute. The “-G” option will tell the command that we want to add a group, which in our case will be “factorio“.
sudo usermod -a -G factorio $USERCopy5. As we changed our user’s groups, we must log out and log back in for the change to take effect.
All you need to do to log out is use the following command within the terminal.
logoutCopy6. Finally, our next step is to create the directory to store the Factorio server on Ubuntu using the mkdir command.
sudo mkdir -p /home/factorio/serverCopyInstalling the Factorio Server to Ubuntu
In this section, we will show you how to install the Factorio server onto your Ubuntu device.
These steps involve downloading the Factorio server, extracting it, and correcting the permissions.
1. First, let us ensure that we are in the correct directory to download the Factorio server.
Use the cd command to change into the “/home/factorio” directory.
cd /home/factorioCopy2. Now that we are in the correct directory, we can use the “wget” package we installed earlier to download the Factorio dedicated server onto our Ubuntu device.
Use the command below to download the archive into the current directory saving it with the name “factorio_headless.tar.xz“.
sudo wget https://factorio.com/get-download/stable/headless/linux64 -O factorio_headless.tar.xzCopy3. With the Factorio dedicated server downloaded, we need to extract it into the “server” directory we created earlier in this guide.
You can extract this archive by using the command below within the terminal.
sudo tar -xf factorio_headless.tar.xz --strip-components=1 -C /home/factorio/serverCopy4. With the archive extracted, we no longer need it, so we can clean up our installation a bit by removing it.
Use the rm command to remove the Factorio server archive from your device, as shown below.
sudo rm factorio_headless.tar.xzCopy5. The last thing we need to do before we run the Factorio server on Ubuntu for the first time is to ensure our “factorio” user owns the file and directories.
To claim ownership of the server for the “factorio” user, we will need to use the chown command.
sudo chown -R factorio: /home/factorioCopyRunning the Factorio Server
Now with the Factorio server all installed on our Ubuntu device, we can show you how to run it. Before running the server, you must generate a save game or provide one you created previously.
Our tutorial will show you how to generate a new Factorio map using the default settings.
1. Before continuing, we should change to the “factorio” user using the command below.
Using this user ensures we can create a new save and run the server without correcting permissions again.
sudo -u factorio -sCopy2. Now that we are operating as the “factorio” user, you can use the following command to create a new Factorio save file on your Ubuntu device.
This command will generate a new save and place it into the “/home/factorio/server/saves/” directory. If you have a save that you want to use, you can skip this step.
~/server/bin/x64/factorio --create ./saves/my-save.zipCopyAlternatively, you can pass settings to the Factorio server on Ubuntu to tell it how you should generate the map.
You can find examples of both the “map-gen-settings” and “map-settings” within the “~/server/data” directory.
~/server/bin/x64/factorio --create ./saves/my-save.zip --map-gen-setting my-map-gen-settings.json --map-settings my-map-settings.jsonCopy3. Finally, you can run the Factorio server on your Ubuntu device by passing in the “--start-server” option followed by the path to your save game.
We use the save we created in the previous step with the name “my-save.zip“.
~/server/bin/x64/factorio --start-server ./saves/my-save.zipCopy4. Now, you successfully have the dedicated Factorio server running on your Ubuntu device.
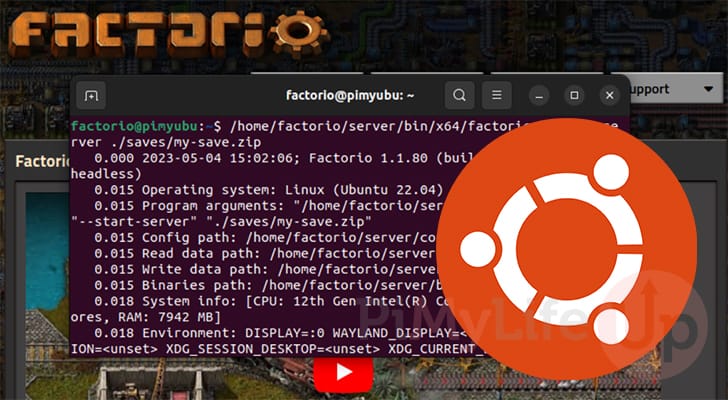
You should see a message similar to what we have shown below within your terminal. You can use this to interact with the server, including sending messages.
0.000 2023-04-30 20:15:55; Factorio 1.1.80 (build 60618, linux64, headless)
0.015 Operating system: Linux (Ubuntu 22.04)
0.015 Program arguments: "/home/factorio/server/bin/x64/factorio" "--start-server" "./saves/my-save.zip"
5. If you want to stop the current server, you can press CTRL + C to send a kill command to it.
You can also now safely quit out of the “factorio” user by typing “exit” into the command line.
exitCopyIn the next section, we will show you how to set the Factorio server up as a service to make it easier to manage.
Getting the Factorio Server to Start at Boot on Ubuntu
This section will show you how to create a service for your Factorio server. This service will allow you to easily manage your Factorio server, including allowing it to start at boot.
We will split this into a couple of smaller sections as we will also write a script that will automatically download and extract the latest version of Factorio when it starts.
Additionally, we need a script that will cleanly stop the server when the service is stopped. This should help reduce the chance of losing your data upon a clean shutdown.
Creating our Start Server Script
1. Let us write a script to start the Factorio server on our Ubuntu device.
This script will also download the latest version of the dedicated server during start-up.
sudo nano /home/factorio/start_server.shCopy2. You will want to add the following lines within this file.
These lines will download the latest Factorio server release, extract it and then run the server using the specified save file.
The commands are run within a screen named “factorio“. A screen allows us to bring the Factorio server out of the background to interact with it.
#!/usr/bin/env bash

wget https://factorio.com/get-download/stable/headless/linux64 -O /home/factorio/factorio_headless.tar.xz

tar -xf factorio_headless.tar.xz --overwrite --strip-components=1 -C /home/factorio/server

rm -f /home/factorio/factorio_headless.tar.xz

/usr/bin/screen -dmS factorio /bin/bash -c "/home/factorio/server/bin/x64/factorio --start-server-load-latest"
/usr/bin/screen -rD factorio -X multiuser on
/usr/bin/screen -rD factorio -X acladd rootCopy
3. With the code written into the file, you can now save and quit.
As we are using nano, this can be done by pressing CTRL + X, followed by the Y key, then ENTER.
4. With the script written, we need to ensure that it has execute privileges so that our service can run it.
sudo chmod +x /home/factorio/start_server.shCopyWriting a Script to Stop the Server
5. Our next step is to write a straightforward script that will cleanly stop the Factorio server running on our Ubuntu device.
To begin writing this script, use the command below within the terminal.
sudo nano /home/factorio/stop_server.shCopy6. In this file, write the following lines of bash. This script is incredibly simple and sends a message to the screen session with the command “/quit“.
This command tells the server it should save and stop running.
#!/usr/bin/env bash
/usr/bin/screen -Rd factorio -X stuff "/quit \r"Copy
7. With the script now written, save and quit by pressing CTRL + X, then Y, and then ENTER.
8. Finally, with this script written and saved, we must also give it execute privileges using the command below.
sudo chmod +x /home/factorio/stop_server.shCopyFixing Permissions
9. With everything written, we must ensure that the “factorio” user owns the entire “/home/factorio” directory.
To take ownership of the files, you must run the following command within the terminal.
sudo chown -R factorio: /home/factorio/CopyWriting a Service for the Factorio Server on Ubuntu
10. We can finally begin writing our service for our Factorio server on Ubuntu.
This service allows us to manage the server easier and allow it to start at boot.
sudo nano /etc/systemd/system/factorioserver.serviceCopy11. You will want to enter the following lines within this file. These lines tell the system service manager how to run and stop the Factorio server.
[Unit]
Description=Factorio Server
Wants=network-online.target
After=network-online.target

[Service]
Type=forking
User=factorio
Group=factorio
ExecStart=/usr/bin/bash /home/factorio/start_server.sh
ExecStop=/usr/bin/bash /home/factorio/stop_server.sh
WorkingDirectory=/home/factorio/
Restart=always
TimeoutStartSec=600

[Install]
WantedBy=multi-user.targetCopy
12. With the service file written, save and quit by pressing CTRL + X, followed by Y, then the ENTER key.
13. With our service now created, we can use the command below to enable it.
By enabling the service, Factorio will automatically be started when your Ubuntu service powers on.
sudo systemctl enable factorioserverCopy14. Even though we enabled the service it won’t be started immediately.
If you want to put your Factorio server to use immediately, use the following command to start the service.
sudo systemctl start factorioserverCopyManaging your Factorio Server on Ubuntu
To get the Factorio server to start immediately, you will want to use the following command within the terminal. If the server is already running, this command won’t do anything.
Starting the Factorio Server on Ubuntu
To get the Factorio server to start immediately, you will want to use the following command within the terminal. If the server is already running, this command won’t do anything.
When the service runs, it will trigger the “start_server.sh” script we created earlier.
sudo systemctl start factorioserverCopyStopping the Server
It is possible to stop the Factorio server on Ubuntu using the following command in the terminal. This command will stop the server if it is running. Otherwise, it will do nothing.
When you run this command, this will execute the “stop_server.sh” script we referenced within the service manager.
sudo systemctl stop factorioserverCopyGetting the Factorio Server to Start on Boot on Ubuntu
By enabling the Factorio server on Ubuntu, it will be automatically started when your device powers on.
sudo systemctl enable factorioserverCopyStopping Factorio from Starting on Boot
If you no longer want the Factorio server to start at boot, you can use the following command to disable the service.
sudo systemctl disable factorioserverCopyAccessing the Ubuntu Factorio Server’s Command Line Interface
One of the advantages of running the Factorio server within a screen is that we can easily access its command line interface.
1. o access Factorio’s command line interface, you can run the below command.
This command restores a screen with the name “factorio” which the “factorio” user started.
sudo screen -r factorioCopy2. You can now interact with the Factorio command line and send commands to the server.
When you are done using this screen, you must detach it again to be able to re-attach it.
To detach from the Factorio screen, press CTRL + A, followed by CTRL + D.
Conclusion
By this point in the tutorial, you should hopefully have the Factorio server up and running on your Ubuntu device.
Running a dedicated server for Factorio is a quick and straightforward process and allows you to have a central place to run your servers from.
Please comment below if you have any questions about getting the Factorio dedicated server running.
If you found this tutorial to be helpful, please check out our many other Ubuntu projects.


Hey there, this tutorial helped me pretty well. However, I noticed that when using sudo systemctl stop factorioserver, the server does not get the time to save the game. And the logfile shows the following:
611.689 Received SIGTERM, shutting down
611.689 Received SIGHUP, shutting down
611.689 Quitting: remote-quit.
611.689 Info MainLoop.cpp:435: Saving map as /home/jelle/factorioserver/saves/freeplay.zip
611.690 Received second SIGTERM, terminating immediately
Do you have any idea what causes this?
Thanks in advance
Hi Jelsie,
I believe this is happening as the system manager doesn’t wait for the Factorio server to actually stop. It will immediately terminate after the save command is sent and not give the server a chance to cleanly shut down
We can try working around with by modifying the stop script by using the following command.
To the bottom of this file, add the following line. The number at the end of this command represents how long the script should sleep before continuing. In this example, we will sleep the server for 10 seconds to give it plenty of chances to cleanly save. You may need to increase this timer the larger your map becomes, but on decent hardware this should remain long enough.
Please let me know if you continue to have issues.
Kind regards,
Emmet
Yep, that did the trick. Thank you very much.
Quick question – at point 5 of initial setup, after logging out who should we be logging back in to as this just kills the session of the initial account I had logged in to
Hi Andrew,
You should log back in to your initial account. I have tried to make a slight adjustment to make it more clear fore in the future.
Kind regards,
Emmet
Thank you for your hard work; 2 small edits in the start_server.sh script that worked better for me:
tar -xf factorio_headless.tar.xz –overwrite –strip-components=1 -C /home/factorio/server
/usr/bin/screen -dmS factorio /bin/bash -c “/home/factorio/server/bin/x64/factorio –start-server-load-latest”
Hi Tyler,
Thank you for those suggestions. I have updated the start server script to use your adjustments.
Kind regards,
Emmet
How do i connect to the created server from another computer? Does it exist under Ubuntu’s IP port 34197?
Hi Jakub,
If you want to connect from another computer on your network then you are correct. You can just connect to your Ubuntu’s local IP address using port 34197.
Cheers,
Emmet