In this guide, we will be showing you how to get your local and external IP address on the Ubuntu operating system.
An IP address is a unique address that identifies your device within your local network or the wider internet.
Every device on a network, including your Ubuntu device, is given an IP address so others can access it on the network. You can think of an IP to be kind of a unique identifier for your device.
Over the following sections, we will be showing you how you can easily find the IP Addresses that have been assigned to your Ubuntu device. You can use either the terminal or desktop to get these addresses.
We will also show you how you can use the terminal to get your external IP address from the Ubuntu terminal.
If you are finding that your local IP address changes often, you will probably want to configure Ubuntu to use a static IP address.
Getting the Local IP Address on Ubuntu using the Terminal
These sections show you how to get the IP addresses that a router assigned to your Ubuntu device.
We will show two different commands to best showcase getting the IP address. Both are easy to use but provide differing levels of information.
The first command is the hostname command. This command is the easiest to use as it only reveals the IP addresses themselves.
The second command is the ip command. You will want to use this command when you want to see what network adapter is assigning that IP address.
1. If you are using a desktop variant of Ubuntu, you will need to open the terminal first.
One of the fastest ways to open the terminal is to press CTRL + ALT + T on your keyboard.
Get the IP Address on Ubuntu using the Hostname Command
2. With the terminal open, you can easily find the IP address using the hostname command. The advantage of this command is it will only give you IP addresses.
Using the “-I” option, we are telling the command to print all IP addresses assigned to your host.
hostname -ICopy3. After running this command, you will get the IP addresses assigned to your Ubuntu device.
For our example, you can see that we were only assigned a single local IP address.
192.168.0.43Using the ip Command to get the IP Address on Ubuntu
2. Once the terminal is open, you can utilize the ip command to get your Ubuntu device’s IP addresses. You should use this command when you want to see what IP addresses are being assigned to individual network devices.
To list the IP addresses assigned to you, use the following command within the terminal.
ip show addrCopy3. Immediately, you will see that this command dumps you with a ton of information. It includes various details about your network adapters, including the mac address of each network device.
First, you can ignore the first network device (1: lo:). This device is the loopback device (127.0.0.1) and is used for Ubuntu to talk to itself.
Within each network adapter, you need to look for “inet” for the IPv4 address and “inet6” for the IPv6 address. The address is referenced immediately after that.
1: lo: <LOOPBACK,UP,LOWER_UP> mtu 65536 qdisc noqueue state UNKNOWN group default qlen 1000
    link/loopback 00:00:00:00:00:00 brd 00:00:00:00:00:00
    inet 127.0.0.1/8 scope host lo
       valid_lft forever preferred_lft forever
    inet6 ::1/128 scope host
       valid_lft forever preferred_lft forever
2: eth0: <BROADCAST,MULTICAST,UP,LOWER_UP> mtu 1500 qdisc mq state UP group default qlen 1000
    link/ether dc:a6:32:d3:28:99 brd ff:ff:ff:ff:ff:ff
    inet 192.168.0.43/24 brd 192.168.0.255 scope global dynamic noprefixroute eth0
       valid_lft 65118sec preferred_lft 51345sec
    inet6 fe80::f9c9:e82d:97d2:185/64 scope link
       valid_lft forever preferred_lft forever
The above example shows that our “eth0” adapter had two IP addresses assigned to it. One IPv4 address and one IPv6 address.
We can see that the IPv4 Address of our Ubuntu device is “192.168.0.43” and that our IPv6 address is “fe80::f9c9:e82d:97d2:185“.
Finding the Local IP Address in the Ubuntu Desktop Interface
It is also possible to get the IP address of your Ubuntu device through the desktop interface.
All you need is access to the settings on your device, and you can easily find both the IPv4 and IPv6 addresses.
While the following screenshots and steps are based on Ubuntu 22.04, these steps will be fairly similar for older and newer releases.
1. We will need to open the settings app before starting this section.
The easiest way to open the settings on Ubuntu is to click the top-right of the desktop interface (1.). Once the menu pops up, click the “Settings” page (2.).

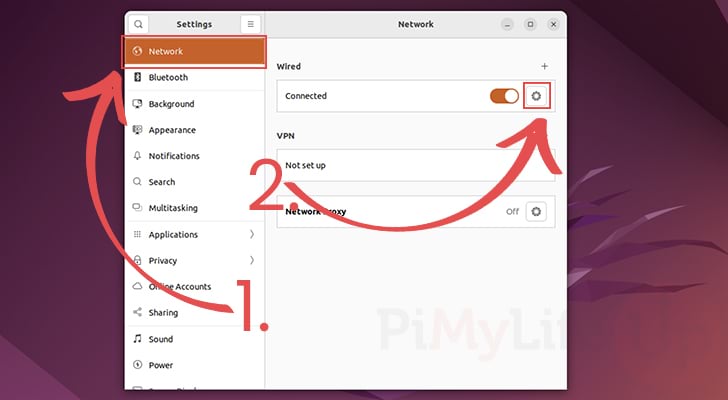
2. You need to change to the “Network” tab within the settings application (1.).
Once you are on the correct tab, you will see a list of network adapters available on your Ubuntu device.
Identify the adapter you want to get your IP address from, then click the cog icon next to it (2.).
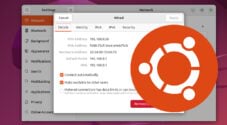
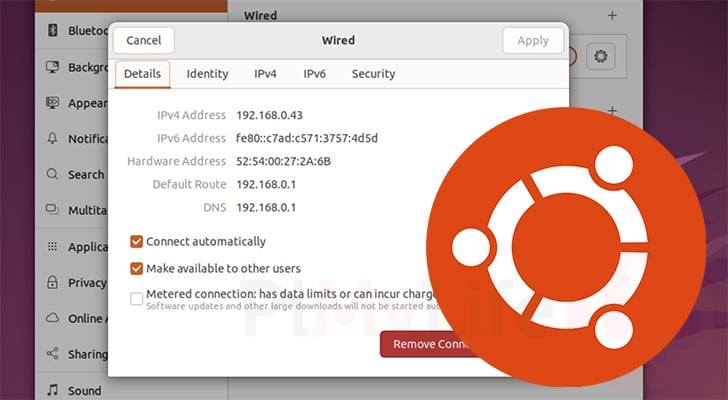
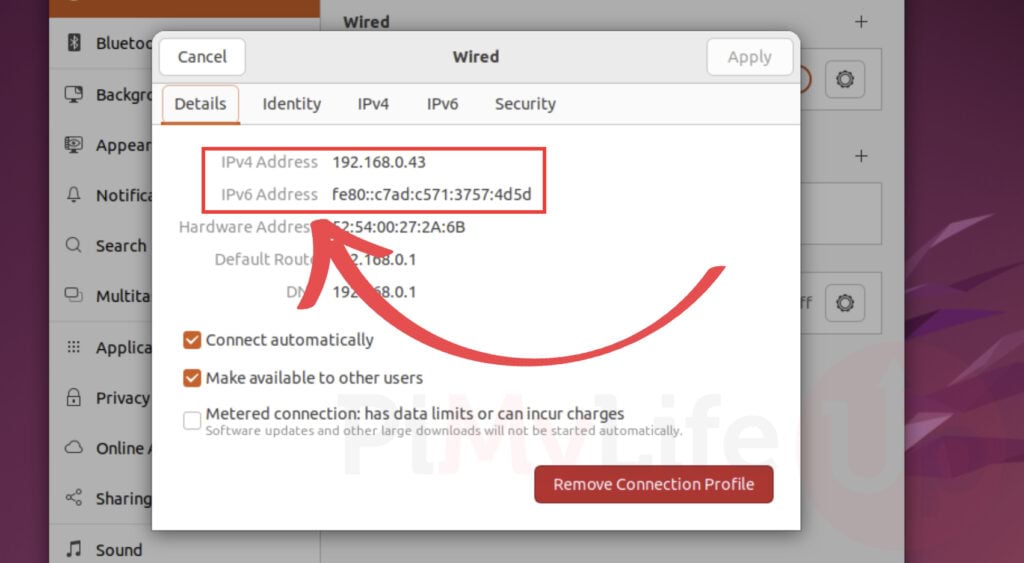
3. You should now be greeted by the various details of this network adapter.
These details include your Ubuntu device’s IPv4 and IPv6 addresses.
How to Find your External IP Address on Ubuntu
The IP addresses your Ubuntu device shows through both its interface and terminal is typically your local IP address. That is unless your router is handing you an external one like it would be doing in a hosting providers environment.
If you need to get your Ubuntu device’s external IP address, there is a quick command you can use within the terminal.
1. Before continuing, you must make sure you have “curl” installed on Ubuntu. Curl is an application that allows us to make a web request easily from the terminal.
To install this tool, you need to run the following two commands. The first command updates the package list, and the second installs curl.
sudo apt update
sudo apt install curlCopy
2. Now that we know curl is installed on Ubuntu, we can use it to fetch your external IP address.
There are two ways that we can use this tool to get your IP addresses. The reason for this is that your device can have both an IPv4 and an IPv6 external address.
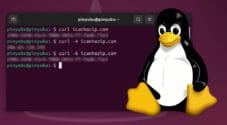
a. This first command will fetch the IPv4 address that has been assigned to your Ubuntu machine. We achieve this by making a get request to the “api64.ipfy.org” endpoint. You can read more about ipfy from their official website.
We use the “-4” option to tell curl to fetch this website using the IPv4 protocol.
curl -4 api64.ipify.orgCopyb. With this second command, we can grab our IPv6 address of our machine. This is very similar to the previous command, but this time we are using the “-6” option to tell curl to fetch using the IPv6 protocol.
curl -6 api64.ipify.orgCopy3. After running the above command, you should get your Ubuntu device’s external IP address in your terminal.
The service that we are making the request to will provide either an IPv4 or IPv6 address, depending on what was used during the connection.
If you only want an IPv4 address, replace “api64” with “api“.
XXX.XXX.XXX.XXXConclusion
Throughout this tutorial, we showed you a few different ways you can get your IP address on Ubuntu.
An IP address is a unique way of identifying your specific device on a larger network.
Please comment below if you have any questions about getting your IP address.
We also have numerous other Ubuntu tutorials that you can check out. Also, be sure to check out our general Linux guides.