In this tutorial, we will be showing you how to set up Domoticz on the Raspberry Pi.
Domoticz is an home automation system that is designed to let you monitor and configure various devices around your home.
For example, using the Domoticz software on your Raspberry Pi, you can control devices such as lights and switches.
You can also use it to monitor data from sensors. For example, you can read the temperature, rain, wind, UV, and more from any compatible sensor.
As a bonus, the Domoticz software has been designed to work with embedded systems like the Raspberry Pi.
Equipment List
Below is a list of the equipment that we recommend you have for using Domoticz on your Raspberry Pi.
Recommended
Optional
For this tutorial on setting up Domoticz, we utilized a Raspberry Pi 4 running the latest available version of Raspbian Buster.
Before proceeding with this tutorial we highly recommend that you set up your Raspberry Pi with a static IP address.
Installing Domoticz on your Raspberry Pi
In this section, we will be walking you through the process of installing the Domoticz software to your Raspberry Pi. Luckily for us, this is a reasonably straightforward process.
Preparing to Install Domoticz to your Raspberry Pi
1. Before we install Domoticz, we need to upgrade the packages that we already have installed.
To update everything, we need to run the following two commands on the Raspberry Pi.
sudo apt update
sudo apt upgrade
2. Our next step is to run the Domoticz install script straight from the website.
We can do this by making use of the curl tool and the pipe (|) operator.
curl -L https://install.domoticz.com | bashYou can verify the contents of the script we are about to run by going directly to the install Domoticz website.
Running through the Domoticz Installation Process on your Raspberry Pi
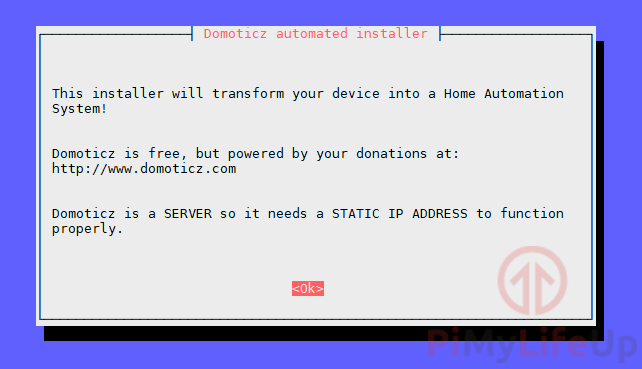
1. After the script has finished preparing Domoticz, you will need to complete some necessary configuration steps.
To continue, press the ENTER key.
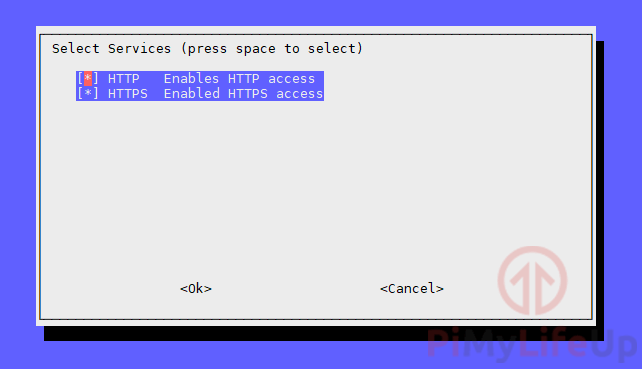
2. Here you will be asked what services you want Domoticz to operate on.
If you want to disable HTTP or HTTPS, use the arrow keys to hover over them and then use space to select or unselect them.
For our guide, we will be leaving both of these on. However, for some cases, you may want to disable access through HTTP so that all users have to use the much more secure HTTPS.
Press the ENTER key to proceed with the setup process.
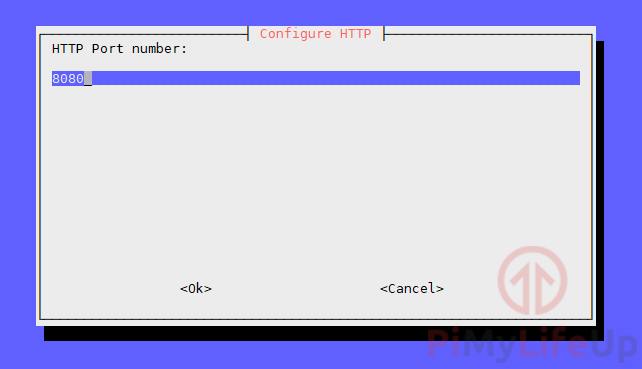
3. If you have enabled HTTP, you will be asked what port you want Domoticz to utilize for HTTP.
By default this port will automatically be set to 8080.
Press ENTER to continue.
4. Next, if you have HTTPS enabled. You can now set the port number you want to for HTTPS.
The default port for HTTPS is 443.
Press ENTER to continue.

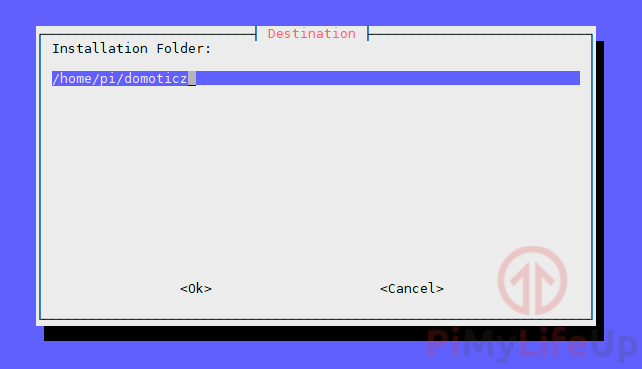
5. You can now set the installation folder for Domoticz.
By default, the installation script will automatically try to install Domoticz to the current user’s home folder.
Press ENTER to continue with the installation.
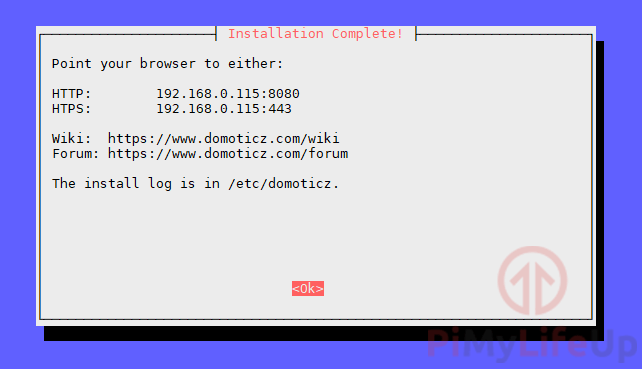
6. Domoticz has now been installed to your Raspberry Pi successfully.
This final screen shows you some details that will prove helpful such as the two IP addresses that you can point to.
Press the ENTER key to finish up the installation process.
Getting to the Domoticz Web Interface
In this section, we will be showing you how to gain access to the Domoticz web interface. This interface is where you will configure the Domoticz software
1. If you don’t have your Raspberry Pi’s local IP address, you can make use of the following command to retrieve it.
hostname -IThis command returns the IP address that your router has assigned to your Raspberry Pi’s network device.
2. With your Raspberry Pi’s IP address in hand, you can now go to the following address in your favorite web browser.
We are assuming that you have kept HTTP enabled and kept it to the default port of 8080.
http://[IPADDRESS]:8080Make sure that you replace [IPADDRESS] with the IP you retrieved in step 1 of this section.
3. You should now have access to the Domoticz web interface that is running on your Raspberry Pi.
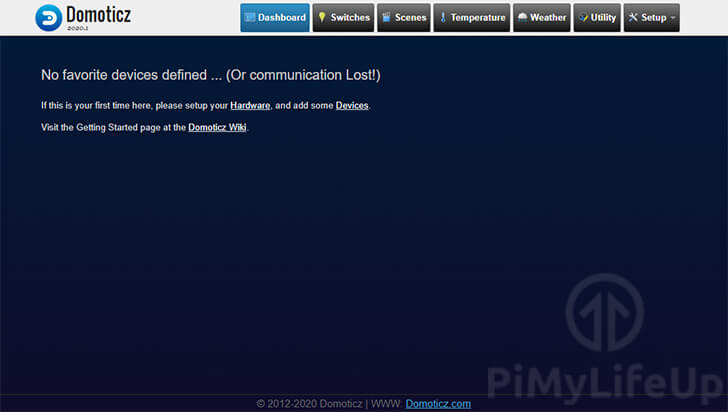
Using this interface, you will be able to add and monitor your various devices.
At this stage, you should now have successfully installed the Domoticz software on your Raspberry Pi.
If you have run into any issues with this tutorial then feel free to leave a comment below.