In this guide, we will be exploring how you can power your Raspberry Pi using Power over Ethernet (PoE).
The PoE standard is a neat way to power devices without needing to plug them in physically to a power point. Power is instead delivered over your ethernet connection, this is super useful if you have to run an Ethernet cable to your Raspberry Pi anyway.
Powering over ethernet can also be done pretty affordably; you can get PoE-enabled switches for a reasonable price if you shop around without needing to invest in more expensive hardware from companies like Ubiquiti.
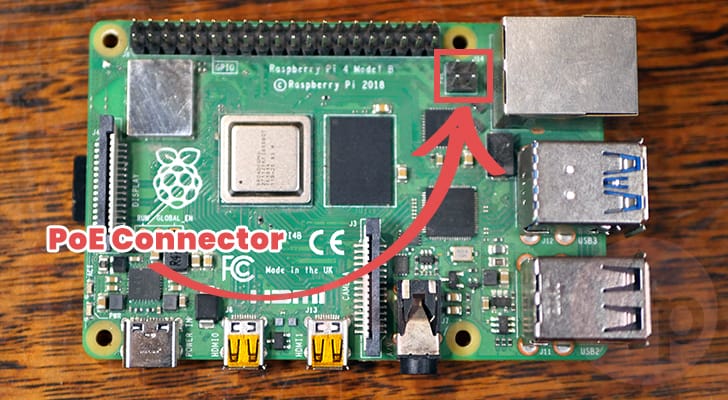
With the Raspberry Pi 3, the Pi team introduced functionality for PoE onto the Raspberry Pi boards. The one catch to this is that you have to invest in a HAT to add the power over ethernet functionality. The board simply exposes the power pins from the Ethernet port so that they can be utilized.
The reason this hardware needs to be a separate HAT comes down to two main reasons. The first is the addition of these extra parts would significantly increase the price tag of the Raspberry Pi. Secondly, the hardware required to convert the power over the Ethernet connection into something the Raspberry Pi can use takes up a lot of space and can require active cooling.
Please note that before you purchase anything, only the main line Raspberry Pi’s since the Pi 3B+ has support for PoE. Older variants and products like the Model A, Zero and 400,500 series lack the required hardware to facilitate power over Ethernet.
You Might Also Like


Selecting a PoE Hat for the Raspberry Pi
You must invest in a PoE HAT and a PoE injector to add proper support for power over ethernet to your Raspberry Pi. The hardware included on your Raspberry Pi is more just there to expose the functionality. The HAT is what will convert the power from your Ethernet cable
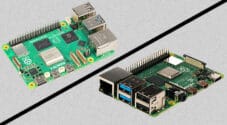
What PoE hat you want to buy depends on the Raspberry Pi you are using. All of the mainline Raspberry Pis since the Raspberry Pi 3 have been able to be powered over ethernet, including the Raspberry Pi 4 and Raspberry Pi 5.
All of the PoE Hats that you get are basically just plug-and-play. You line up the socket with the pins on your Raspberry Pi, press the HAT down gently, and you will be ready to go. Once you plug in your Ethernet, the Raspberry Pi will immediately begin to receive power.
One thing that you must be aware of is that a PoE HAT designed for the Raspberry Pi 4 or 3 will not work with a Pi 5. Likewise, a power over ethernet HAT for the Raspberry Pi 4 or 3 will not work with the Raspberry Pi 5. This is due to the different positions of the PoE pins as well as the different power requirements of the devices.
No matter which Raspberry Pi you are using, you will want to invest in either a PoE injector or a switch that is 802.3af or 802.3at compatible. We personally use a UniFi 24 POE (Amazon Link) switch, as well as a MERCUSYS MS108GP 8-port Gigabit switch (Amazon Link). One is much more affordable than the other, but both are more than capable of providing power to the PoE hats we use with our Raspberry Pi.
Choosing a PoE HAT for your Raspberry Pi 4 or 3
If you are running a Raspberry Pi 4 or 3, you will have more options when choosing a PoE HAT. You can choose the official Raspberry Pi version of the HAT or a third-party one from a manufacturer like Waveshare.
The official Raspberry Pi POE HAT is always a good choice as you know it will always be properly supported. However, for a slightly lower price, you can often get one from a company like Waveshare, such as the WS-19532 PoE HAT (Amazon Link).
Functionality-wise, most Pi 4 and 3 PoE Hats should offer the same functionality. Just pay attention to reviews, but as long as you stick with more renowned companies like Waveshare, you shouldn’t run into any problems.
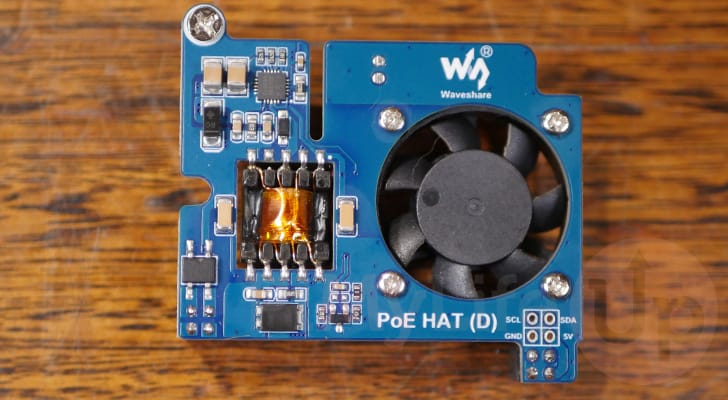
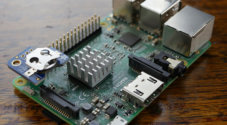
Personally, we have been using a Waveshare WS-19532 PoE HAT with one of our Raspberry Pi 4’s for a few months and haven’t run into any issues with power delivery.
Using a PoE HAT to Power your Raspberry Pi 5
With the Raspberry Pi 5, you have a few different choices when choosing a PoE HAT. Thanks to the addition of the PCIE connector, you can even get HATS that add both support for power over ethernet and an M.2 NVME drive. These are really nice as you can get two really useful bits of functionality.
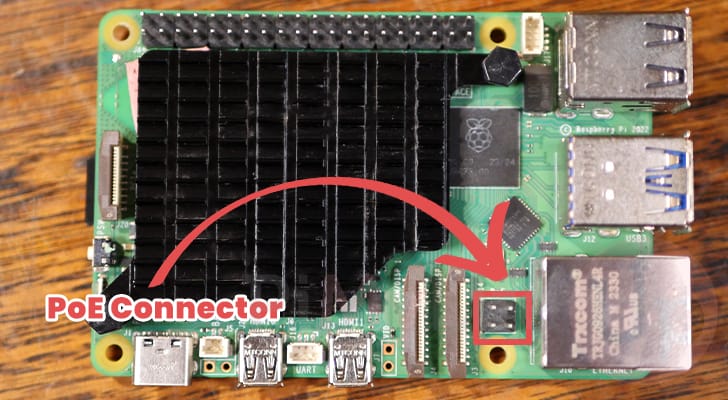
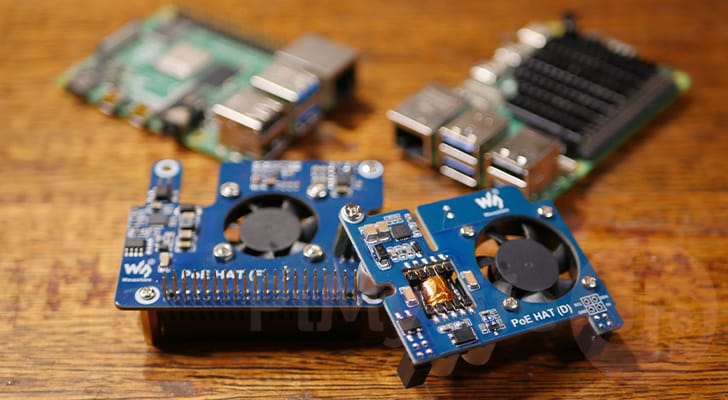
The two PoE hats we recommend for the Raspberry Pi 5 are the Waveshare WS-26399 PoE HAT (Amazon Link) and the Waveshare WS-28411 PoE and NVME HAT (Amazon Link). They are both from a somewhat reputable brand, and with no official PoE Hat, they are probably the most reliable options available at present.
They are super affordable HATs that add power over ethernet support to your Raspberry Pi; if you don’t need the NVME functionality, the version without is slightly cheaper; however, it doesn’t hurt to have NVME support there just in case you want to use it later on.
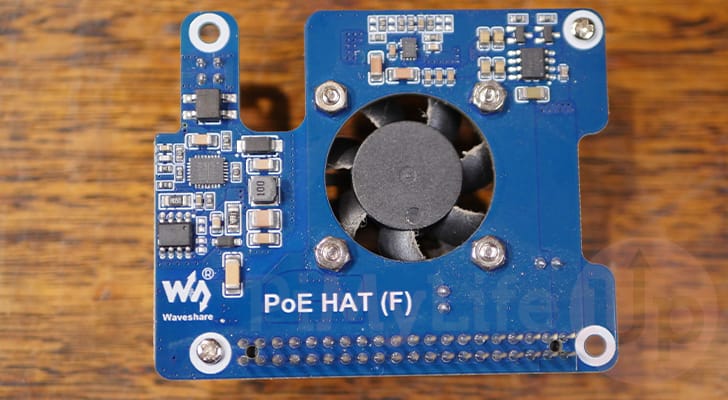
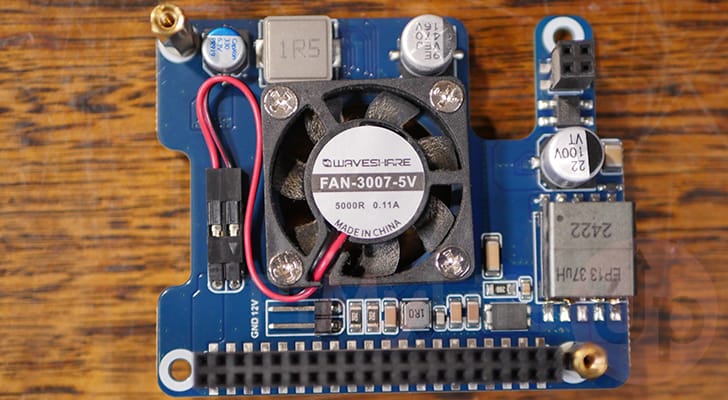
Personally, we have been running a Raspberry Pi 5 using the Waveshare WS-25399 PoE HAT (F) for several months without any issues. The device is powered properly, and we have never run into a low voltage warning. Most importantly, it has been super stable with no random power loss.
Another thing about the Waveshare PoE HAT is that it comes with a heatsink that can help spread the heat around and away from your Pi’s CPU.
Conclusion
Hopefully, by this point, you will now have a good idea of how you can power your Raspberry Pi over Ethernet,
Using PoE is one of the easiest ways to keep your Raspberry Pi powered, especially if you don’t mind investing a little bit of extra money to get it set up.
Please feel free to drop a comment below if you have any questions or concerns about setting up your Pi with PoE.
If you found this quick guide to be helpful, we recommend taking some time to explore some of our many other Raspberry Pi projects.