In this tutorial, we will be showing you how to use the tail command on a Linux-based operating system.

On Linux, the tail command allows you to print the last number of lines from a specified input. This input can be either a file or from data that has been piped to the command.
Being able to grab the last lines of a file easily is incredibly useful. For example, you can quickly see the last messages in a log file or grab the lines at the end of a particular file.
You can even use the tail command to follow a file, outputting any line added to the file to the output. Sometimes this behavior is described as a “live tail”.
Over the following sections, we will show you how you can utilize the functionality of the tail command.
Syntax of the tail Command
The tail command follows a somewhat simple syntax with two completely optional parameters.
When you don’t specify a file, tail expects the data to be passed in through the standard input (stdin). This way you will need to use a pipe (|) to pass in data this way.
Likewise, the tool will return the last 10 lines from the specified file or the standard input when no options are specified.
Below you can see the syntax for this command. Over this guide, you will learn how to use both parameters.
tail [OPTIONS]... [FILE]...CopyThe “[OPTIONS]” parameter is what lets you control the behavior of the Linux tail command. For example, you can change the number of lines printed, follow the changes in a file, and more.
The “[FILE]” parameter is simple and allows you to specify files from which you want to retrieve the ending lines. You can specify multiple files with this parameter. Just separate each filename with a single space.
During output the tail command will separate the results for each file that has been specified. It is possible to override this behavior using an option.
Basic Usage of the tail Command on Linux
The simplest way of using the tail command on your Linux system is to specify a file for the tool to read from.
Simply use “tail“, followed by the path to the file or files you want to retrieve the last lines of.
When not using any options, the tool will grab the last 10 lines of the file and return them.
tail [FILE]...CopyExample of Using tail on a Single File
For this example, we will be using the tail command to get the last 10 lines of our Linux systems syslog file.
All we need to do is use “tail” followed by the path to our file, which in our case is “/var/log/syslog“.
tail /var/log/syslogCopyFrom the response from the above command, you can see that tail returned only the last 10 lines of our syslog.
Mar 30 03:41:47 pimylifeup crontab[26643]: (root) REPLACE (www-data)
Mar 30 03:41:47 pimylifeup crontab[26643]: (root) END EDIT (www-data)
Mar 30 03:41:47 pimylifeup crontab[26649]: (root) BEGIN EDIT (www-data)
Mar 30 03:41:48 pimylifeup crontab[26649]: (root) END EDIT (www-data)
Mar 30 03:42:01 pimylifeup cron[481]: (www-data) RELOAD (crontabs/www-data)
Mar 30 04:09:01 pimylifeup CRON[26676]: (root) CMD (  [ -x /usr/lib/php/sessionclean ] && if [ ! -d /run/systemd/system ]; then /usr/lib/php/sessionclean; fi)
Mar 30 04:09:06 pimylifeup systemd[1]: Starting Clean php session files...
Mar 30 04:09:07 pimylifeup systemd[1]: phpsessionclean.service: Succeeded.
Mar 30 04:09:07 pimylifeup systemd[1]: Finished Clean php session files.
Mar 30 04:17:01 pimylifeup CRON[26734]: (root) CMD (   cd / && run-parts --report /etc/cron.hourly)
Copy
We can see that the root user made changes to the “www-data” users crontab. After that, various cron jobs were fired.
Example of Using tail on Multiple Files
You can also use the tail command to return the last lines from multiple files. All you need to do is specify one file after another.
For this example, we will be using our “syslog” file and the “boot.log” file on our device.
For this command, use tail followed by the name of the first file, followed by the name of the second file.
tail /var/log/syslog /var/log/boot.logCopyBelow is an example of the output after using tail on two separate files. In addition, you can see how the tail command uses headers to separate each file.
==> /var/log/syslog <==
Mar 30 03:41:47 pimylifeup crontab[26643]: (root) REPLACE (www-data)
Mar 30 03:41:47 pimylifeup crontab[26643]: (root) END EDIT (www-data)
Mar 30 03:41:47 pimylifeup crontab[26649]: (root) BEGIN EDIT (www-data)
Mar 30 03:41:48 pimylifeup crontab[26649]: (root) END EDIT (www-data)
Mar 30 03:42:01 pimylifeup cron[481]: (www-data) RELOAD (crontabs/www-data)
Mar 30 04:09:01 pimylifeup CRON[26676]: (root) CMD (  [ -x /usr/lib/php/sessionclean ] && if [ ! -d /run/systemd/system ]; then /usr/lib/php/sessionclean; fi)
Mar 30 04:09:06 pimylifeup systemd[1]: Starting Clean php session files...
Mar 30 04:09:07 pimylifeup systemd[1]: phpsessionclean.service: Succeeded.
Mar 30 04:09:07 pimylifeup systemd[1]: Finished Clean php session files.
Mar 30 04:17:01 pimylifeup CRON[26734]: (root) CMD (   cd / && run-parts --report /etc/cron.hourly)

==> /var/log/boot.log <==
         Starting /etc/rc.local Compatibility...
         Starting OpenBSD Secure Shell server...
         Starting Permit User Sessions...
[  OK  ] Started /etc/rc.local Compatibility.
[  OK  ] Finished Permit User Sessions.
[  OK  ] Started Authorization Manager.
         Starting Modem Manager...
         Starting Light Display Manager...
         Starting Hold until boot process finishes up...
[  OK  ] Started OpenBSD Secure Shell server.Copy
Controlling the Number of Lines Output by tail
The tail command allows you to control the number of lines you want it to retrieve from the end of the specified file.
To choose the number of lines returned by tail, you can utilize the “-n LINES” or “--lines LINES” option. This option expects you to specify the number of lines you want to be retrieved.
The syntax for changing the number of output lines is shown below.
fail -n [+]LINES [FILE]...CopyIf you prefix the number of lines with the plus symbol (+), then tail will output every line after that line. So, for example, if you used 5, it will output every line after line 5.
Example of Setting the Number of Lines with the tail Command on Linux
For this example, we will use the tail command on Linux to only output the last 3 lines of a file. Our example file is going to be our systems syslog.
All we need to use is tail, followed by the “-n” option, the number of lines 3, followed by the path to our file.
tail -n 3 /var/log/syslogCopyAfter running this, you will quickly see that tail returned only the last three lines of your file to the output.
Mar 30 05:39:07 pimylifeup systemd[1]: Starting Clean php session files...
Mar 30 05:39:07 pimylifeup systemd[1]: phpsessionclean.service: Succeeded.
Mar 30 05:39:07 pimylifeup systemd[1]: Finished Clean php session files.Copy
Example of Outputting Lines After a Specific Line using the tail Command
The other functionality that the “-n” option provides is to let you pick a line to output all lines after. This is useful when you want to ignore a certain amount of lines from a file.
To use this functionality of the tail command, you need to use the “-n” option, but use the plus (+) symbol in front of your line number.
Below is the syntax for outputting lines after a specific line in the specified files.
tail -n +LINES [FILE]...CopyFor this example, let us output every line of our syslog file after the first 500 lines.
tail -n +500 /var/log/syslogCopyLimit tail Command Output by Number of Bytes
While the tail command on Linux is typically used to print lines, you can also limit it to a specific number of bytes by using the “-c BYTES” option.
Selecting the number of bytes that the tail tool returns has a variety of use cases, such as dealing with binary files.
Below is the syntax of limiting tails output to a particular number of bytes. First, you need to use “tail“, followed by the “-c” or “--bytes” option, the number of bytes, then optionally the filename.
tail -c [+]BYTES [FILE]...CopyLike limiting the number of lines, tail also lets you use the “-c” option to grab all lines after a certain number of bytes.
You need to use the plus symbol (+) in front of the number of bytes, for example, “+BYTES“.
Example of Limiting the tail by Bytes
For this example, we will use the tail command on our Linux system to get the last 32 bytes from our syslog file.
To do this, we use “tail“, followed by the “-c” option, the number of bytes (32), and finally, the path to our syslog file (/var/log/syslog).
tail -c 32 /var/log/syslogCopyAfter running this, you can see that tail returned only 32 bytes of data to the output.
arts --report /etc/cron.hourly)CopyAs we only ended up with 32 bytes from the end of the file, we only ended up with a part of the text.
Example of Outputting Data after a Certain Number of Bytes
Like the “-n” option you can also use the “-c” option, so tail outputs all data after a certain number of bytes.
This functionality is especially useful if you want to strip out the header of a file where you know the exact amount of bytes it consumes.
To use this, you need to add the plus (+) symbol to the front of your number of bytes. The simple syntax of using this functionality is shown below.
tail -c +BYTES [FILE]...CopyFor example, you would use the following command to get every byte of data after the first 256 bytes of our syslog file.
tail -c +256 /var/log/syslogCopyFollowing a File using the tail Command on Linux
One of the most useful features of the tail command on Linux is its ability to follow a file.
By following a file, the tool will output any data appended to the end of the file. Sometimes this behavior is described as a “live tail”.
One behavior of this command that you need to look out for is that it will never return. When you are done with the follow, you must press the CTRL + C to interrupt the live tail.
To follow a file and start a live tail, you need to use the “-f” or “--follow” option as we have shown below.
tail -f [FILE]...CopyExample of Following a File using tail
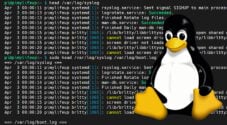
For this example, we will use the follow (-f or --follow) option to check for new error messages being added to one of our log files.
The log file for this example belongs to NGINX running on our local Linux server.
To follow this file, we need to use “tail” followed by the “-f” option, then the path to our NGINX error log (/var/log/nginx/error.log).
tail -f /var/log/nginx/error.logCopyInitially, tail will show the specified number of lines from the file (10 by default). After this, it will start to output any additional lines appended to the log file.
This behavior is helpful for actively monitoring for any new errors occurring on your system. You can quickly see what is happening in real-time without constantly closing and reopening the file.
Printing Headers on tail Output
By default, the tail command will only print the filename header when using more than one file with the command.
However, you can include this even for a single file by utilizing the “-v” or “--verbose” option. This tells tail to always output headers regardless of the number of files.
tail -v [FILE]...CopyExample of Printing Headers on tail output
We will be using the “-v” option for this example while using the tail command on our Linux devices “syslog“.
For this, we need to use “tail” followed by “-v” or “--verbose“, then finally, the path to our file.
tail -v /var/log/syslogCopyBelow you can see that after running this command, tail displayed the header, despite only using tail on a single file.
==> syslog <==
Mar 31 09:33:48 pimylifeup rngd[592]: stats: Time spent starving for entropy: (min=0; avg=0.000; max=0)us
Mar 31 09:39:08 pimylifeup systemd[1]: Starting Clean php session files...
Mar 31 09:39:08 pimylifeup systemd[1]: phpsessionclean.service: Succeeded.
Copy
Removing Filename Headers from the tail Command
The tail command has an option that allows you to silence the headers that it outputs completely. It is useful when you need a clean output when dealing with multiple files
The option that changes this behavior is called “quiet” and can be enabled by using either “-q“, “--quiet“, or “--silent“.
tail -q [FILE]...CopyExample of Using the Quiet Option with the tail Command
For this example of using the quiet option with the tail command on Linux, we will be using a file located at “/var/log/syslog” and another located at “/var/log/boot.log“.
To use this option, we start with “tail“, then the “-q” option, followed by the path to our two examples files.
tail -q /var/log/syslog /var/log/boot.logCopyBelow is an example of how the output would look when using the quiet option. You can see that tail displayed no headers for the two files.
Apr  1 11:01:46 pimylifeup brltty[1065]: screen driver not loadable: a2
Apr  1 11:01:51 pimylifeup brltty[1065]: /lib/brltty/libbrlttyxa2.so: cannot open shared object file: No such file or directory
Apr  1 11:01:51 pimylifeup brltty[1065]: cannot load screen driver: /lib/brltty/libbrlttyxa2.so
[  OK  ] Started /etc/rc.local Compatibility.
[  OK  ] Finished Permit User Sessions.
[  OK  ] Started Authorization Manager.
         Starting Modem Manager...
         Starting Light Display Manager...
         Starting Hold until boot process finishes up...
[  OK  ] Started OpenBSD Secure Shell server.
Copy
Conclusion
Hopefully, you will have learned how you can use the tail command on the Linux operating system.
Tail is a useful tool for retrieving the last lines of a file. You can even use it to follow a file and print any new additions to the file.
If you have any questions about how you can use tail, please leave a comment below.
To learn more about dealing with a Linux system, be sure to check out our Linux command guides.