In this article, we will explore a product from Sunfounder for the Raspberry Pi called the PiPower.

The PiPower is a relatively inexpensive UPS from Sunfounder designed with the Raspberry Pi and its form factor in mind. At just $29 USD (At the time of publishing), the PiPower gives you everything you need to operate a UPS connected to your Raspberry Pi.
For those who do not know, UPS stands for Uninterruptible power supply and is a device designed to keep a device powered even when mains power goes off.
When you lose mains power, the PiPower will seamlessly switch from using mains power to its connected battery. When power finally comes back, the PiPower will switch to using mains power and begin charging its battery.
A UPS like the PiPower is an excellent solution when you don’t want downtime with something critical running on your Raspberry Pi. For example, if you are using Home Assistant, you will likely want to use a UPS to keep that online. Additionally, it will help prolong the lifespan of your SD Card, sudden power losses can cause data corruption.
The SunFounder PiPower is an impressive device for its price. It allows you to affordably add a UPS to your Raspberry Pi with very few drawbacks. The main disadvantage of this UPS is that monitoring its status from your Raspberry Pi requires you to wire from the PiPower to the Pi’s GPIO pins.
Before we begin, we should note that we were sent the PiPower V2 UPS from Sunfounder. All they asked for in return was our honest thoughts on the product.
Equipment
Before we get started let us quickly go over all the parts we used when reviewing the Raspberry Pi PiPower UPS.
Recommended
- Raspberry Pi Amazon
- Micro SD Card Amazon
- Power Supply Amazon
- Sunfounder PiPower AmazonSunfounder
- Ethernet Cable Amazon or Wi-Fi Amazon
Optional
Additionally, we verified everything while using both Raspberry Pi OS Lite and Raspberry Pi OS Desktop Bullseye.
Key Features of the Raspberry Pi PiPower UPS
Let us start by exploring the Raspberry Pi PiPower UPS’s key features, as Sunfounder’s specification sheet claims.
- Output: USB Type-A connection. Outputs 5V/3A
- Input: USB Type-C connection. Requires 5V/2A input.
- Pass-Through Charging: Can power your Raspberry Pi while charging its backup battery.
- Power Switch: Allows you to cut power to the Raspberry Pi and PiPower UPS without pulling out the USB connection.
- Battery Capacity: 7.4V 2000mAh. Enough battery life to last 3 – 4 hours depending on load.
- Battery Protection: Built-in technology to prolong the lifespan of the battery.
- Overcharge/Discharge protection
- Balance Charging
- Overheat Protection
- Power Indicator: Monitor whether the PiPower is outputting power or not.
- Battery Indicator: Four LEDs that allow you to physically see how much power your Raspberry Pi UPS has remaining.
- Charge Indicator: Monitor whether the PiPower is currently charging the battery. This indicates whether the UPS is receiving mains power or not.
- IO Pins: When wired to your Raspberry Pi, these pins allow you to check the status of the PiPower UPS. For example, you can use this to see whether your Pi is running off the battery.
Sadly, these are also the only way to talk with the PiPower UPS from your Raspberry Pi.
The PiPower UPS IO Pins
Looking at the PiPower UPS module, you will notice it has nine pins missing a header with labels next to it. You must attach a header to utilize these IO pins efficiently.
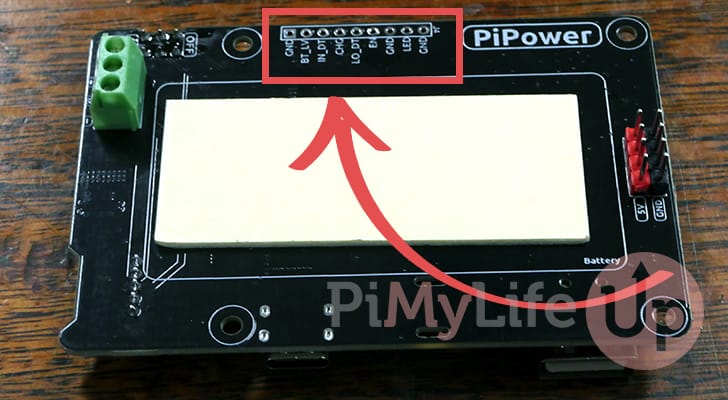
If you are interested in utilizing these, let us quickly review what each pin is meant to be used for.
- GND – Ground connection
- BT_LV – Battery voltage pin.
You must use an ADC with your Raspberry Pi interpret this result. The voltage should be equal to roughly 1/3 of the battery voltage. - IN_DT – Input Detection Pin
This pin outputs high if these is a valid USB power input. It will be low if no USB power is detected. - CHG – Charging Status Pin.
This pin outputs high if the battery is currently charging and low if not. - LO_DT – Low Battery Voltage Pin
This pin will output high when the battery is running low on voltage. When the battery is in a normal state, the value will be low. - EN – Switch Signal Pin.
Using this pin, you can control the power status of the PiPower. Put the pin to ground to turn off the PiPower. This pin does not override the physical switch. You must turn the physical switch on for this pin to work. - GND – An additional ground input pin
- LED – Power Indicator Pin.
Outputs 5V if the PiPower is currently switched on. You must add a resistor if you intend to use this pin. - GND – An additional ground input pin
Unboxing and Assembling the PiPower UPS
Now that we have gone over the key features of the Raspberry Pi PiPower UPS let us unbox and assemble the PiPower.
This process is relatively simple and involves piecing together a few simple parts and installing additional standoffs.
Unboxing the PiPower UPS
1. The PiPower UPS comes in a small box packed with everything you need to get it up and running.
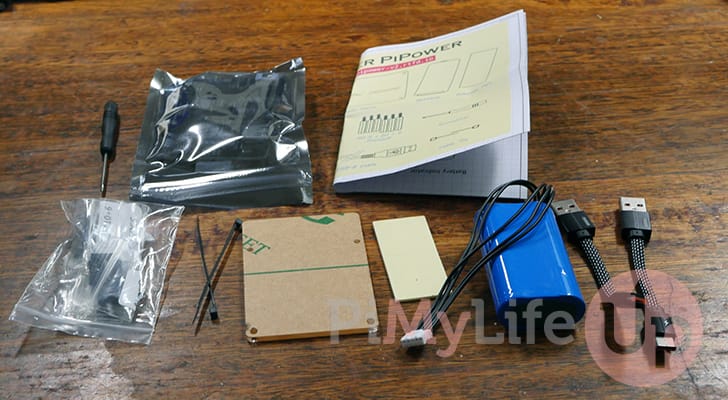
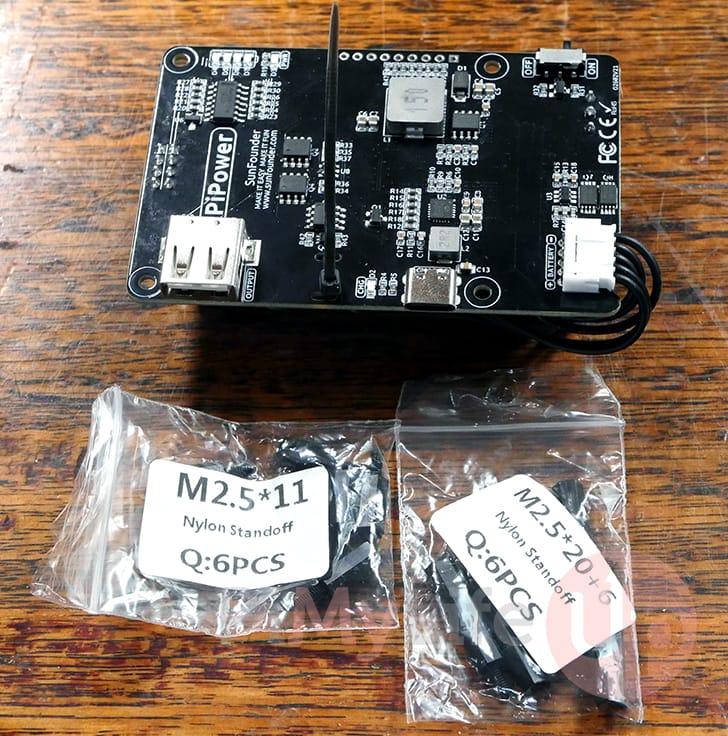
2. Taking everything out of the box, you can see it comes with the following components.
- PiPower Module – This is the brains of the UPS and is what will handle distributing the power to your Raspberry Pi.
- 7.4V 2000mAh Battery – The battery is where your backup energy will be stored and how your Raspberry Pi will be powered if you lose mains power.
- Adhesive Tape – Used to stick the battery to the PiPower module.
- Standoffs and Screws – These are all used to piece the PiPower together and attach it to your Raspberry Pi.
The Sunfounder team provides six of each standoff and screw, but you will only need four of each.- M2.5 x 11 Standoffs x 6
- M2.5 x 10 Standoffs x 6
- M2.5 x 20 Standoffs x 6
- M2.5 Screws x 6
- Screwdriver – A small M2.5 Phillips head screwdriver.
- Type-A to Type-C USB Cable – Used to connect your PiPower UPS to a Raspberry Pi 4 or newer.
- Type-A to Type-B USB Cable – Alllows you to connect the PiPower to an older Raspberry Pi.
- Cable Tie x 2 – These are used to tie the battery cable to the PiPower module. While not necessary, they help keep the cables clean and reduce strain.
- Acrylic Plate – This plate is used as the bottom piece of the PiPower and shields the batteries from touching whatever you place the Raspberry Pi and UPS onto.
Assembling the PiPower UPS with the Raspberry Pi and Overview
These next few steps will show you all the steps we followed to get the Sunfounder PiPower UPS connected to our Raspberry Pi.
Attaching the Battery to the PiPower Module
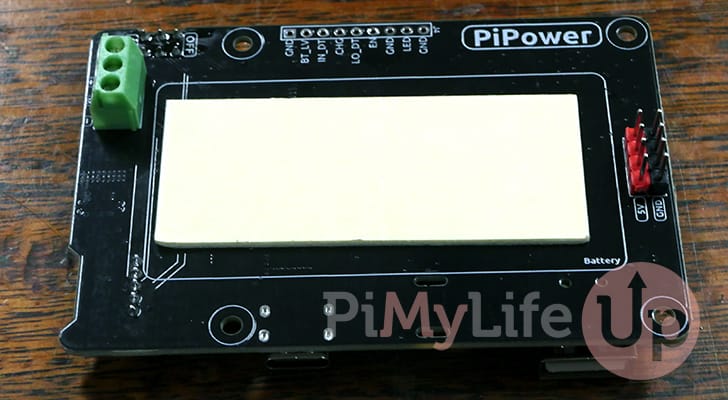
3. Once you have unboxed everything, you can start putting the PiPower UPS together.
Your first step is to attach the adhesive tape to the back of the PiPower Module. This is where there is a large blank space with a rectangular marking.
4. Next, attach the PiPowers battery to the board, and ensure the cable faces the battery port. The battery port is opposite the exposed 5V and GND pins.
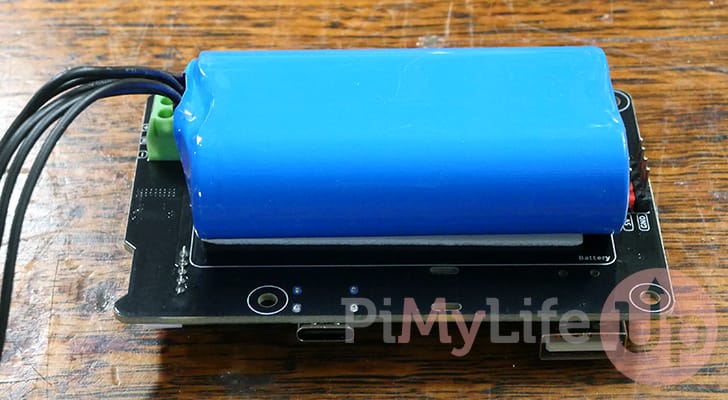
5. Once the battery is attached, plug it into the PiPower board.
You don’t have to worry about it powering on when you plug it in, as the board has a safety feature where it expects the mains power to be plugged in for its initial setup.
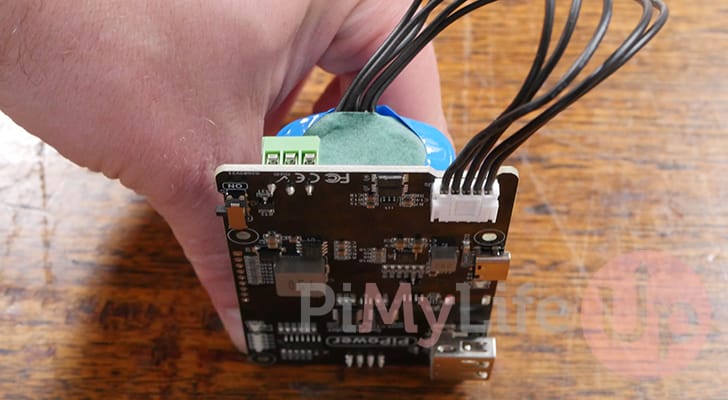
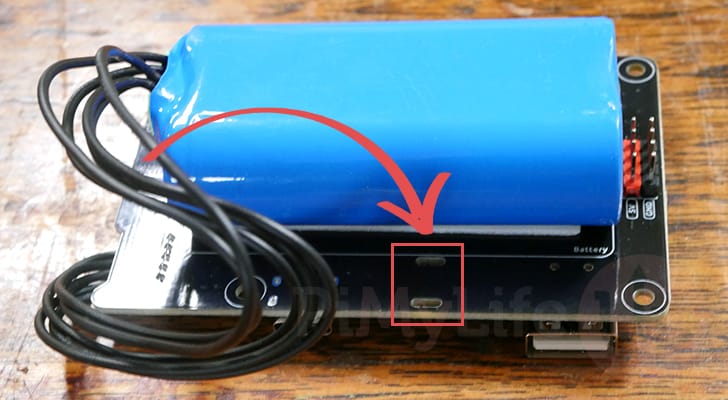
6. With the battery installed, you will now want to neaten up the battery’s cable. You can do this by pulling it towards the two slits on the PiPower module, as shown below.
Once pulled over to the slots, use the provided cable tire to tighten the cables to the board.
7. We found it a bit fiddly to get the cables pulled back nicely, but we still had enough to stop the battery cable from moving around too much.

Attaching the PiPower to the Raspberry Pi
8. Next, you will want to grab both the M2.5×11 and M2.5×20 standoffs.
The longer standoffs will go underneath the board where the battery is mounted, and the shorter ones will screw into them.
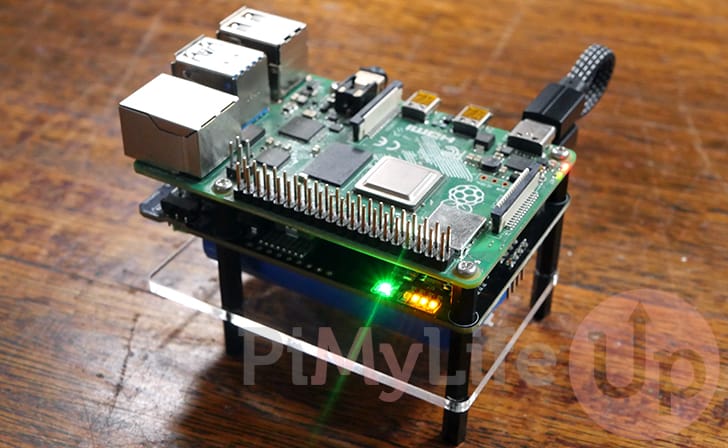
9. Once the standoffs are installed, your Raspberry PiPower UPS should look similar to what we have shown below.
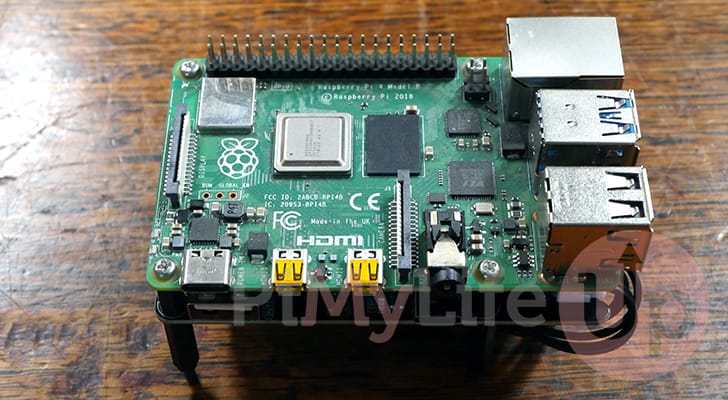
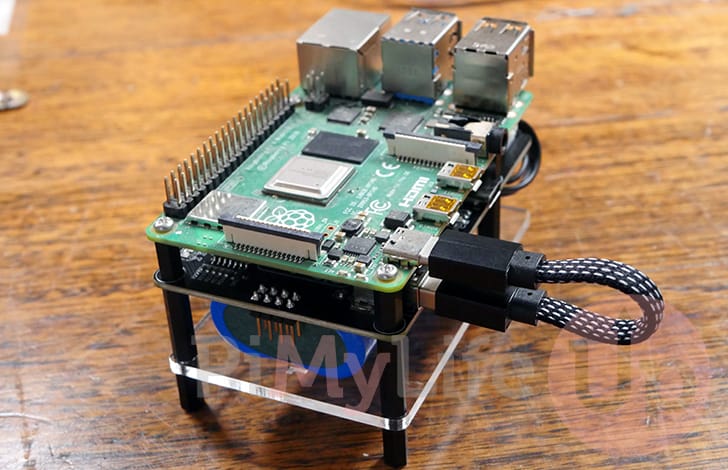
10. With the initial standoffs installed, you want to place your Raspberry Pi on top of the PiPower module and line up the holes.
You will then want to grab the M2.5 screws and screw them in through the Raspberry Pi.
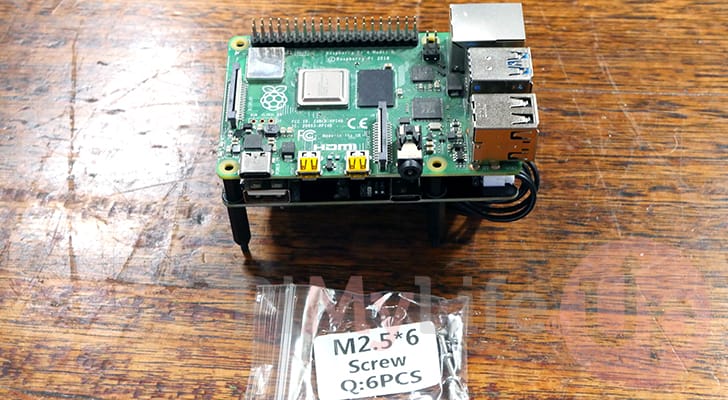
11. At this stage, your PiPower UPS and Raspberry Pi should be attached, as shown in the photo below.
Installing the Acrylic Bottom Plate
12. Next, grab the acrylic plate and remove the outer protective layer. If you are worried about aesthetics, try to be careful, as acrylic can damage easily.
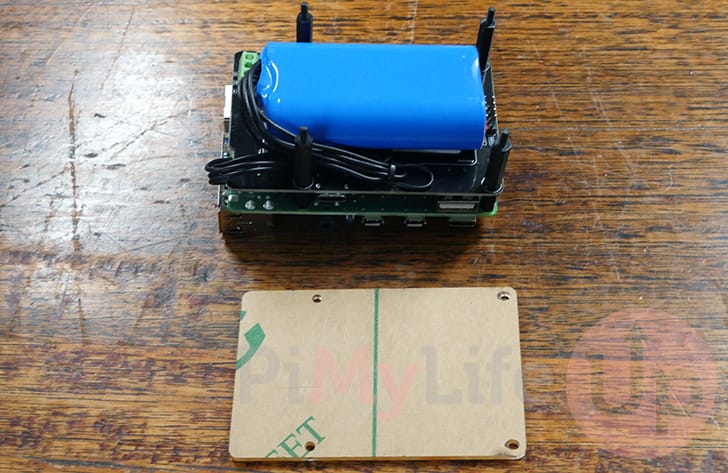
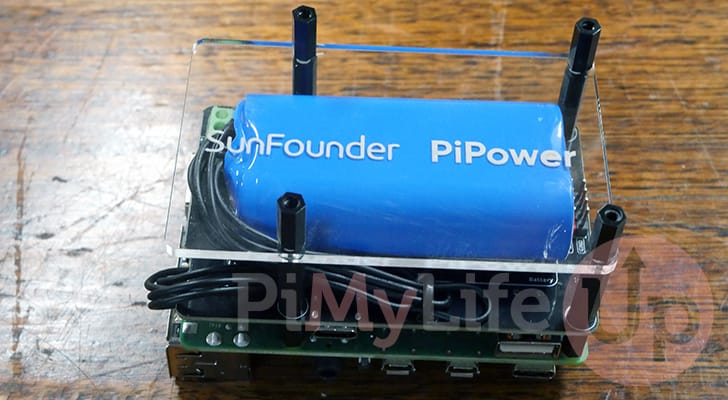
13. With the acrylic ready, line it over your PiPower and place it down.
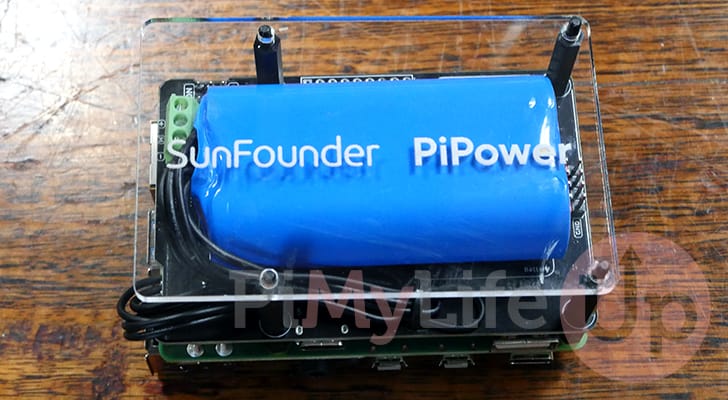
14. Finally, you will want to use the M2.5 x 10 standoffs to attach the acrylic to the rest of the PiPower UPS.
Powering on the PiPower and Raspberry Pi
15. You should now grab either the USB-A to USB-C cable if you are using a Pi 4 or the USB-A to USB-B cable.
Plug the USB-A cable into the PiPower UPS, then the other end into your Raspberry Pi. This cable is what the PiPower will use to send its power to your Raspberry Pi.
16. The final thing you need to do to complete the PiPower assembly is plug a USB-C power supply into it.
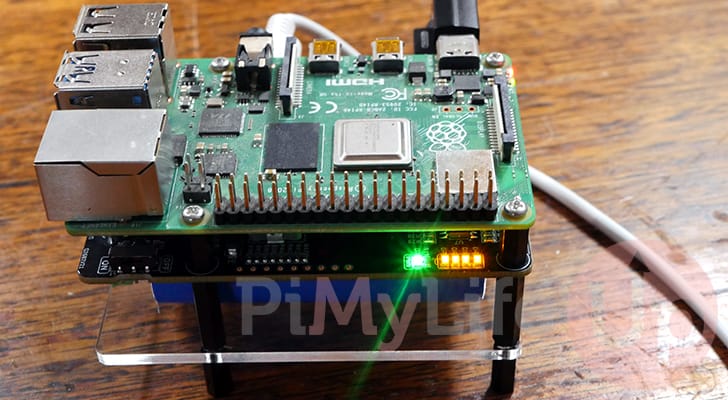
In our case, we are using an official Raspberry Pi power supply. If everything is working correctly, you should see the red “CHG” light indicating the PiPower is receiving power and charging the battery.
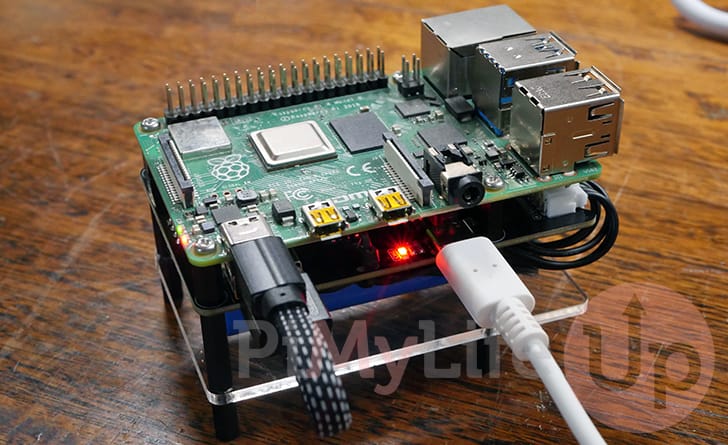
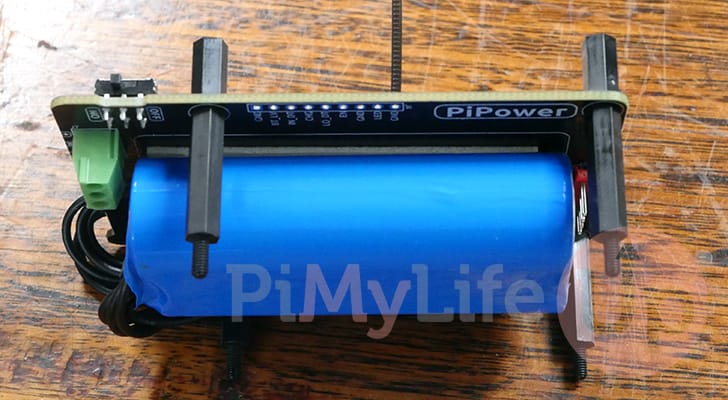
17. On the other side of the board, we can see the status of the PiPower itself. There should be a bright green light next to four other LEDS. The green light indicates your PiPower is receiving power and outputting it through the USB-A connection.
The four other LEDS are used to show the current charge status of your PiPower UPS. In our case the unit arrived to charge up enough that all four lights were lit.
From our testing these lights aren’t the most reliable indicator of the amount of battery life remaining. The first light can take ages to go out then the next two can switch off relatively quickly.
Our thoughts on the Raspberry Pi PiPower UPS
Now that we have the PiPower UPS attached to our Raspberry Pi let us review our thoughts on how this device operates.
The most obvious thing out of the box is that the Pi itself is entirely unaware that it is being powered through a battery backup. The PiPower does not communicate with the Pi without wiring the IO pins directly to the Pi and reading the values yourself.
While not a game breaker, it means you can’t do any automation or send warnings when the UPS battery runs low without additional work.
Overall, the quality of the rest of the device seems more then good enough, especially when you consider the low cost of the unit itself. The battery itself isn’t the biggest one so doesn’t expect insane times out of this UPS.

Testing the Power Failover
The quickest way to test the PiPower UPS’s ability to handle power failures was to take the USB-C power out from the main board.
Testing this a few times, the PiPower proved it could reliably failover from mains power to the battery.
You may briefly see a low voltage warning on your Raspberry Pi during the power changeover, but it never lost enough power for the device to get into a bad state. We assume the low voltage warning is caused by the slight delay between the power being removed and the PiPower detecting it.
By the end of our testing, nothing leads us to believe that the PiPower would have any trouble changing from mains to battery and back again.
Battery Lifespan
The other big thing with a UPS such as the PiPower is how long it will last being powered purely by the battery. Our expectations weren’t high going into this, considering Sunfounder claims a 3 – 4 hour battery life, and from our testing, you shouldn’t expect any more than this estimate under load.
We are lucky to live in a place where we have a stable power grid where power outages are rare, especially long ones. The 3-to-4-hour time frame would give us enough time to outlast most power outages or allow us to power down the device and prevent data loss safely.
After completely exhausting the power, you should expect it to take roughly 2 and a half hours to charge back to full.
Lite Usage
Starting off we tested the PiPower UPS on a Raspberry Pi 4 running Raspberry Pi OS Lite. We didn’t install any additional packages or setup any scripts. This is simply a test to see how long it would last under a best case scenario.
These tests found that the battery could last between five and five and a half hours. Of course, this means you attached a UPS to a device that isn’t doing anything.
Heavier Usage
Our next test was to install something that would add a constant will load to the Raspberry Pi and the PiPower UPS.
For this use case, we decided to install a Minecraft server and have a client continually move around the server. In this scenario, we aren’t giving the Raspberry Pi to sit idle and adding a continual real-world drain on our device.
Under these loads, the Raspberry Pi lasted just over 3 hours. The run time aligns with Sunfounders’ claims of 3 to 4 hours.
Conclusion
The PiPower by Sunfounder is an inexpensive UPS that attaches nicely to your Raspberry Pi.
Before purchasing this UPS, there are a couple of things that you should take into consideration.
First is that the UPS could be considered “dumb” in that it doesn’t communicate back with the Raspberry Pi. The only way to programmatically detect the power status is if you wire the IO connections to the Pi’s GPIO Pins. A nice-to-have feature would have been a USB connection or an easy-to-use GPIO header.
The second is how long the battery will last under load. For most people, the 3 to 4 hours you will likely see will be more than enough. However, it is something you should consider when buying this UPS.
With that all said, when you consider the $29 USD price tag, it makes it hard for other devices to compete. This device is a bargain if you are happy with a 3-to-4-hour battery life.
The PiPower comes with everything you need to get the UPS up and running, including the required batteries. Other purpose-built solutions require you to bring your battery and often come with a far heftier price tag.