In this guide, we will show you how to upgrade from Raspberry Pi OS Bullseye to Bookworm.

Let us start this guide by saying the process is incredibly risky, especially with the move to Bookworm. Raspberry Pi OS Bookworm introduced several significant changes that complicate the move from Bullseye.
While we can upgrade from Bullseye to Bookworm, you may be missing several changes after this upgrade. If you can, we highly recommend that you choose to start with a fresh installation of Bookworm.
Raspberry Pi OS Bookworm introduces a couple of significant changes. The first of these changes is the move to Network Manager for handling its networking. Second is the move from X11 to Wayland.
If you have decided to move to Bookworm, then be prepared to run through a few steps. Due to the renaming of the kernel packages this isn’t a straightforward upgrade process.
Like with any of our upgrade tutorials, ensure that you make a backup of your operating system before continuing. There is a significant risk core parts break during the upgrade process.
Equipment
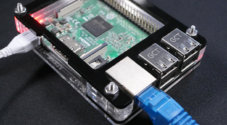
Below is a list of the equipment we were using when we upgraded Raspberry Pi OS Bullseye to Bookworm.
Recommended
Optional
This tutorial was test on a Raspberry Pi 400 that was running Raspberry Pi OS Bullseye 32-bit.
Upgrading from Raspberry Pi OS Bullseye to Bookworm
Over the following sections, we will walk you through a method of upgrading Raspberry Pi OS from Bullseye to Bookworm.
It is important not to miss any of these steps as it can cause significant problems later in the guide.
Preparing your Raspberry Pi for an Upgrade
1. Before you start, you must install Network Manager on your Raspberry Pi by following our guide.
Moving move to Network Manager before you upgrade the operating system will make the process significantly smoother. If you don’t, networking can be broken upon upgrading your Raspberry Pi’s operating system.
2. You may continue once you have installed Network Manager and confirmed your networking is working properly.
3. Our next step is to ensure our operating system is entirely up to date.
You can do this by running the following two commands within the terminal. We use “dist-upgrade” here to ensure the latest versions are installed. You don’t want any out-of-date packages when we attempt the upgrade to Bookworm.
sudo apt update
sudo apt dist-upgrade -yCopy
Updating the Raspberry Pi OS Repository from Bullseye to Bookworm
4. We are now at the point where we can change the official Raspberry Pi OS repositories to point to Bookworm instead of Bullseye.
Luckily, with some “sed” magic, we can do this with a couple of simple commands. This first command will replace any instances of “bookworm” in the “sources.list” file with “bullseye“.
sudo sed -i -e 's/bullseye/bookworm/g' /etc/apt/sources.listCopy5. Another change that has occurred with the move to Bookworm is that we must also now add “non-free-firmware” to the list instead of just “non-free“.
sudo sed -i 's/non-free/non-free non-free-firmware/g' /etc/apt/sources.listCopy6. Next, we must do the same to the “raspi.list” file located within the “/etc/apt/sources.list.d” directory.
sudo sed -i -e 's/bullseye/bookworm/g' /etc/apt/sources.list.d/raspi.listCopyUpgrading the Packages from Bullseye to Bookworm
7. At this stage, we can now upgrade all of the packages on our Raspberry Pi OS from their Bullseye version to Bookworm.
To perform this upgrade, use the following two commands in the terminal. Please note that this process can take some considerable time to complete.
sudo apt update
sudo apt full-upgrade -yCopy
During the update, you may be asked whether you want services to be automatically restarted during setup. Select the “<Yes>” option and press the ENTER key when you run into this prompt.
You will also get other prompts during this setup, so you will have to press ENTER to continue the upgrade process when the prompt pops up.
8. Once the upgrade has been completed, you can clean up any leftover packages using the following two commands.
sudo apt clean -y
sudo apt autoremove -yCopy
9. Finally, we must restart to ensure our Raspberry Pi is now using the Bookworm version of the packages.
To restart, all you need to do is use the following command.
sudo rebootCopyUpdating the Raspberry Pi OS Kernel from Bullseye to Bookworm
10. With the Raspberry Pi OS now using Bookworm packages, we must also upgrade the kernel.
Part of the problem here is that there has been a change in how the kernels are named. Please note that you must run the following commands in one sitting.
11. Our first step is purging the existing Raspberry Pi Bullseye bootloader and kernel using the following command.
We must remove these as they technically don’t exist on the Bookworm repository.
sudo dpkg --purge --force-depends raspberrypi-kernel raspberrypi-bootloaderCopy12. Our next step is to temporarily unmount the boot partition so that we can make some changes.
sudo umount /bootCopy13. Next, run a quick file system check on the boot partition while we have it unmounted. This will fix and repair any disk errors with the partition.
sudo fsck -y /bootCopy14. We now need to create a directory where the new firmware files. The position of these firmware files is moved with the upgrade from Raspberry Pi OS Bullseye to Bookworm.
sudo mkdir /boot/firmwareCopy15. We also need to re-adjust the “fstab” file so that it points to the new boot firmware location.
You can do this by using the following command.
sudo sed -i.bak -e "s#boot#boot/firmware#" /etc/fstabCopy16. With the changes we have made so far, we need to reload the system manager’s configuration running the command below.
sudo systemctl daemon-reloadCopy17. At this point we can now, remount the “/boot/firmware” directory by using the command below.
sudo mount /boot/firmwareCopy18. Finally, we can begin setting up the new Bookworm firmware.
You can re-install the firmware by running the following command.
sudo apt install raspi-firmware -yCopy19. The next step differs significantly depending on the version of Bullseye you are upgrading to Bookworm. Be careful you run the command relevant to your operating system; otherwise, this will stop your OS from booting.
a. The follow command is for those using a Raspberry Pi 3, 4 or 5 and are running a 64-bit operating system.
Do not use this command on a 32-bit operating system as these packages will be unavailable.
sudo apt install linux-image-rpi-v8 linux-headers-rpi-v8 -yCopyb. For those who are using a Raspberry Pi 4 and are running a 32-bit operating system then run the command below.
sudo apt install linux-image-rpi-v7l linux-headers-rpi-v7l -yCopy
c. If you are running a Raspberry Pi 2 or 3 and are using a 32-bit OS, use the command below in the terminal.
sudo apt install linux-image-rpi-v7 linux-headers-rpi-v7 -yCopyd. For those who are using a Raspberry Pi Zero, Zero W, Compute Module 1, or the Raspberry Pi 1, then you must use the following command.
sudo apt install linux-image-rpi-v6 linux-headers-rpi-v6 -yCopy20. Now that we have re-installed the kernel and firmware for our Raspberry Pi, there is one last task we need to do before restarting.
Our next task is to add the “auto_initramfs” option to the config file by running the command below. With this enabled, the Raspberry Pi will use the new “initramfs” file included with the move from Raspberry Pi OS Bullseye to Bookworm.
The initramfs file is used to prepare a Linux system during boot.
sudo sed -i.bak '$ a\auto_initramfs=1' /boot/firmware/config.txt Copy21. Finally, we can restart our Raspberry Pi, and the move from Bullseye to Bookworm should be complete.
sudo rebootCopyConclusion
Hopefully, you will have successfully upgraded Raspberry Pi OS from Bullseye to Bookworm at this stage.
This is one of the more intensive upgrade processes, with many things that can go wrong. We highly recommend that you start with a fresh Raspberry Pi OS Bookworm installation if you can.
Please feel free to comment below if you have any questions about upgrading to Bookworm.
If you found this tutorial to be useful, we highly recommend checking out our many Raspberry Pi tutorials.


Hello,
I was looking for a tutorial to upgrade bookworm to trixie, but I couldn’t find it…..
Hi Hendrik55,
I quickly tested some steps and have added a guide on how to upgrade from bookworm to trixie. Like all upgrades, there is some risk things don’t go quite right but it seems like a simpler process than from Bullseye to Bookworm.
Kind regards,
Emmet
Thank you so much for this tutorial!
It’s the one that helped me upgrade my RPI 2 Zero W.
Finally, I’ve done it smoothly.
Perfect manual. I went from Bullseye to Bookworm without any problems.
I have used manuals from https://pimylifeup.com before and as long as you follow them exactly, it actually always goes well.
Thank you very much.
Thank you so much for this step-by-step guide to upgrade from Bullseye to Bookworm. It worked like a charm on my Rpi4 with Raspberry Pi OS 32 bit.
Since My Rpi4 is 32bit, there were warnings about the “non-free-firmware” but no harm done to installation.
One thing I would like to add is in addition to update the ‘
raspi.list‘ in directory ‘/etc/apt/sources.list.d/‘ as stated in step 6, there may be other packages you might have installed, and they need to be updated the same way. In my case, I also havedocker.listandnodesource.listin that directory. As such, I would suggest using the following command instead:minor correction; the command should be:
Thanks a lot for this great step-by-step guide to upgrade. It worked like a charm on a Rpi4 with Raspberry Pi OS 64 bit.
I used it as well to upgrade a Rpi 1 with Raspberry Pi OS 32 bit. The only thing I noticed was that for the 32-bit version, step 5 seems not being needed (I figured out from the raspberry pi forum that the sources.list contains debian repositories for the 64-bit version, but not for the 32-bit version, hence the non-free-firmware addition gives a warning when running sudo apt update) – This is also what Hugh’s post above also highlights. Except this minor point, your guide works like a charm, and I thank you very much for having released it publicly!
Tahnk you very much! I updated my bullseye to bookworm successfully
Thank you for all the useful tutorials. I used many of them with great success. This one, however failed at the step 19 installing the kernel module. I found that the problem was that the boot sector on my pi3b+, which had been upgraded through multiple revisions, had a small boot partition (45M) which gave a disk full error. Increasing the size of the boot partition with gparted ran afoul of an issue on gparted dealing with small fat32 partitions. I ended up with a work around (not original with me) to first save the data from boot with tar, reformatting the partition as ext4, then expanding the partition to 512KM reformatting back to fat32 and finally restoring the data from the tar file. All this must be done on a separate linux machine. Not sure what the minimum boot partition size is, but I know that 45M is not enough and 512M is. I also have a second pi (pi4b+) that has a boot sector of 256K which upgraded successfully. You may wish to add a test early in the install process that checks for sufficient space in the boot partition to complete the upgrade.
This guide seemed to work flawless for me… so far anyway 🙂
Updating here after performing the update:
It went well, except for a minor hiccup:
The installation was stuck while installing some package related to Cron.
I had to SSH again and kill all Cron related processes for the installation to continue.
After installation was done, I couldn’t SSH to the pi anymore.
It said my password was wrong, even though it was correct.
After many searches, I finally found that I needed to remove a line and add another line to some SSH config.
The line removed was something like:
“allowGroups….”
The line added was something like:
“allowUsers pi”
I can look it up if needed…
The final “issue” I wanted to ask about was that many of the apt sources still contain bullseye in their names.
For example, php repo and security updates repo.
Is it OK, or should I change it?
If so, how?
Thanks again for the great instructions!
I figured out how to fix the wayfire boot. On sudo raspi-config, you go to 6 advanced options, A6 wayland, and choose openbox, go out, go back there and choose wayfire. All works.
But I still don’t have the networkmanager icon on the menu bar close to the clock, though.
does not work for me
Great guide… however, it does seem to leave you with only the 32bit kernel instead of both 32 and 64 like I had on Bullseye. On my Pi’s that are still on RaspOS Bullseye, they report via ‘uname -a’ that they are ‘aarch64’ but via ‘dpkg –print-architecture’ they are ‘armhf’. I believe this is known as 64bit Kernel and 32bit Userland. My config.txt does NOT have ‘arm_64bit=1’ in it, which according to this post is intentional by RaspOS (https://github.com/raspberrypi/firmware/issues/1795)
How do you get a 64bit kernel installed using this method?
Hi Steve,
That is actually a very good question, and I’m actually unsure how to go about this with some of the changes they made in the Bookworm release.
Will try and look into this a bit better but I haven’t found anything about this behaviour on Bookworm yet.
Kind Regards,
Emmet
The upgrade for the 64-bit version of Raspberry Pi OS worked without issue.
I ran into problems with the 32-bit version running on a Raspberry Pi 2. Following the update, the Pi would not boot.
After carrying out some research, I discovered:
linux-image-rpi-v6 is for RPi 1 & Zero
linux-image-rpi-v7 is for RPi 2 & 3
linux-image-rpi-v7l is for RPi 4
linux-image-rpi-v8 is RPi 4 64-bit
Changing “sudo apt install linux-image-rpi-v7l linux-headers-rpi-v7l -y” to “sudo apt install linux-image-rpi-v7 linux-headers-rpi-v7 -y” on a RPi 2 worked.
Hope this helps
Hi Paul,
Thank you for that! I have updated the guide to include the proper steps for the Raspberry Pi 2 and 3.
I made the mistake thinking that the 2 and 3 used the same “v7l” as the Pi 4.
Kind regards,
Emmet
Thanks for the tutorial!
Are there any steps that can be skipped if using the “Lite” version of Pi OS?
Hey Pi,
There aren’t any steps you should skip here. None are specific for the desktop variant and should all be relevant to the Lite release.
The two things we touch here are the way the firmware is set up, and the repository sources. I’m fairly sure the Bookworm version of Raspberry Pi OS Lite now uses network manager as well, but I don’t have one currently imaged to quickly check this.
Kind Regards,
Emmet
After the change, when updating the repository list, there’s a note:
“Repository ‘Debian bookworm’ changed its ‘non-free component’ value from ‘non-free’ to ‘non-free non-free-firmware'”
The following command should clear that message.
“sudo sed -i ‘s/non-free/non-free non-free-firmware/g’ /etc/apt/sources.list”
Hi Mark,
Thank you for that, I’ll add that extra step into the tutorial.
Kind regards,
Emmet
I think the non-free-firmware addition is only for 64 bit versions. On 32 bit I got an error after adding this. Otherwise these instructions worked perfectly!