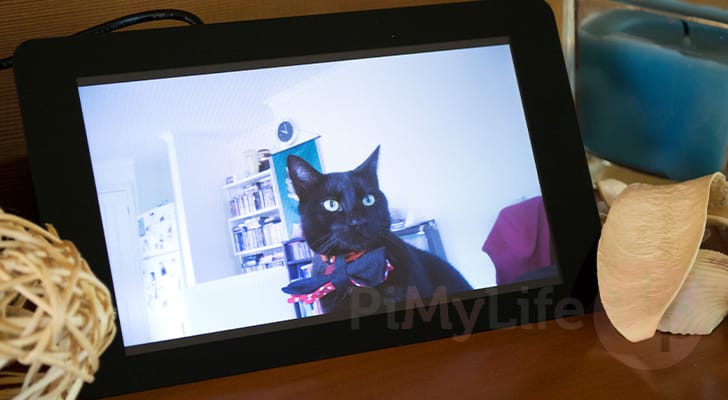
The Raspberry Pi photo frame is a perfect setup for anyone who wants to display photos of their loved ones, memories or anything else might want to display.
The Raspberry Pi makes a fantastic device to drive a digital photo frame thanks to it being a relatively low powered device. You can keep the digital frame running without having to stress to much about power usage.
This photo frame is very simple in that all it does is read from a folder on your Pi and display those images to your screen. Being so simple, you can get away with using a weaker and more power efficient Pi such as the Zero W series.
You could even expand this even further by synchronizing photos from cloud services such as Google Photos to have a constantly evolving photo frame.
For the best experience with setting up your Pi as a digital photo frame, we recommend you stick with the full desktop variant of Raspberry Pi OS. While you can get the lite variant to work, it just requires extra work we won’t be covering in our guide.
Equipment
Below you can find a list of equipment we used when setting up our Raspberry Pi as a digital photo frame.
Recommended
- Raspberry Pi Amazon
- Micro SD Card Amazon (8 GB+ Recommended)
- Ethernet Cable Amazon or Wi-Fi Amazon
- External Hard Drive Amazon or USB Drive Amazon
- Touch Screen Amazon or LCD screen
Optional
We last tested this tutorial using a Raspberry Pi 5 running the latest version of Raspberry Pi OS Bookworm 64-bit.
Hardware
For this project, I am just using the official Raspberry Pi touchscreen that I purchased earlier this year. However, you can use pretty much any screen that you can get your hands on. Just make sure you can hook it up to the Pi either over the DSI port, HDMI port or using a custom HAT.
If you’re looking for some 3D printable frames for either the official touch screen or just a spare screen you have, then Thingiverse has some pretty cool designs.
Setting Up the Raspberry Pi Photo Frame Software
To get this all setup correctly we are going to need to do a bit of setup on the software side of things.
Over the following sections, we will be walking you through the process of setting up your Raspberry Pi as a Digital Photo frame. To achieve this, we will be using the “imv” software to display images to our screen. This is a super simple, yet powerful tool.
Before you continue, there are a few things you might want to set up. To make adding photos to your digital frame a simpler process, you will want to consider setting up network shares on your Raspberry Pi. We have a guide that covers how to set up Samba shares on your Pi that we highly recommend.
In addition to this, we recommend that you have SSH set up on your Raspberry Pi. SSH is what will allow you to remotely access your digital photo frame. You will need this as the service needs to restart every time you add new photos to your frame.
Preparing your Raspberry Pi to act as a Digital Photo Frame
1. Before we begin to set up our Raspberry Pi to act as a digital photo frame, we need to ensure the operating system we are working off of is up-to-date.
You can update the package list and any out-of-date packages by using the following command.
sudo apt update
sudo apt upgrade -yCopy
2. Once your Raspberry Pi is up to date, we can now move on and install the “imv” package to our system. This package is what will enable us to easily display your photos on your connected display.
You can install this handy tool by using the following command in the terminal.
sudo apt install imvCopy3. With the “imv” package now installed, let us use the mkdir command to create a directory where we will store the script that will run our digital photo frame.
Create this directory at “/opt/digitalphotoframe” by using the following command.
sudo mkdir -p /opt/digitalphotoframeCopyWriting your Digital Photo Frame Script
4. Your next step is to write a really short bash script that will start up the imv software on your Raspberry Pi.
This software will handle all the hard work of displaying your digital photoframes, all we need to do is pass it a couple of options.
Begin writing this script by running the following command.
sudo nano /opt/digitalphotoframe/start_photoframe.shCopy5. Within this file you will want to type in the following two lines. The first line is simply something to help the terminal identify how it should run this file.
The second line is our call to the imv software we installed earlier and is the line that will actually run the digital photo frame software on your Raspberry Pi.
While typing out this line there are a few placeholders that you must replace.
<COMPOSITOR>: This first placeholder is where you specify the compositor your version of Raspberry Pi is using.wayland: If you are using a new version of Raspberry Pi OS, then this is the option you want to specify here. All new releases use Wayland by default.x11: Alternatively, if you are using a slightly older release of Pi OS, and are running a Raspberry Pi 3 or older, you will want to use this value instead.
<SCALING>: This option allows you to control how IMV will scale your photos. There are a few options for this.none: Setting to none with force IMV to display your photos as they exist.shrink: Images will be scaled down to fit your photo framefull: This will scale up or down your image so that it fits within the photo frame.crop: Crop will expand an image until it takes up the whole window regardless of whether parts of the photo will end up outside of the window.
<TIME>: With this placeholder you can specify how long the imv software should wait before changing the photo on your digital frame. This value is expressed in seconds.<DIRECTORY>: The final placeholder is where you will specify the directory where all of your photos are located. This needs to be an absolute path.
#!/bin/bash
/usr/bin/imv-<COMPOSITOR> -f -s <SCALING> -t <TIME> <DIRECTORY>Copy
For example, if you were running a new version of Raspberry Pi OS, and wanted 15 seconds between each of your photos and you photos are stored in the directory “/home/pi/Pictures” you would type out the following.
Additionally, we also set our photo frame to display our photos in full without cropping.
#!/bin/bash
/usr/bin/imv-wayland -f -s full -t 15 /home/pi/PicturesCopy
6. Once you have finished writing this short script, save and quit by pressing CTRL + X, Y, and then ENTER.
7. To ensure that our user can actually run this script, we will need to use the chmod command to give the script execute privileges.
sudo chmod +x /opt/digitalphotoframe/start_photoframe.shCopyTesting out your New Raspberry Pi Powered Digital Photo Frame
7. With everything now written, let us test that our Raspberry Pi powered digital photo frame is working correctly.
The easiest way to verify this is to simply run the script we wrote earlier.
/opt/digitalphotoframe/start_photoframe.shCopy8. If everything has been working correctly, you should now see your photos being displayed on your screen.
Starting your Photo Frame at Boot
9. Now if you plan on setting your Raspberry Pi up as a digital photo frame, you will want to have this script ran every time your Pi powers on. This section will cover how you can easily achieve this.
The first thing we must do is get the ID of your current user. In most cases this will likely be “1000” but we should make sure.
id -uCopyYou should get a value similar to the one below. Make a note of this as you will need it in the next step.
100010. With this next step, we can begin to write the Systemd service that will manage the digital photo frame on our Raspberry Pi.
We will be using Nano to write this file as it is relatively easy for beginners to get started with.
sudo nano /lib/systemd/system/photoframe.serviceCopy11. Within this file, fill out the following lines. These lines are pretty simple and basically tell your system to run the script we wrote earlier.
There are a couple of placeholders you will need to replace when typing out this file.
<USER>: Replace this placeholder with your username. For example, our user is called “pi” so we would type out “pi” here.<ID>: This placeholder must be replaced with the ID you got in the previous step. If you are using your original user, this will be “1000“.
[Unit]
Description=Photo Frame
Wants=graphical.target
After=graphical.target

[Service]
Environment=DISPLAY=:0
Environment=XAUTHORITY=/home/<USER>/.Xauthority
Environment=XDG_RUNTIME_DIR=/run/user/<ID>
Type=simple
ExecStart=/bin/bash /opt/digitalphotoframe/start_photoframe.sh
Restart=always
User=<USER>
Group=<USER>

[Install]
WantedBy=graphical.targetCopy
12. After you have finished writing the service file, save and quit by pressing CTRL + X, Y, and then ENTER.
Starting up the Custom Photo Frame Service
13. With the service now written, all we need to do to start up the digital photo frame on our Raspberry Pi is to run the following command.
This command actually performs two actions. First it enables the service so that it will automatically be started when your Pi starts. Secondly, thanks to us using the “--now” option, the service will be started immediately.
sudo systemctl enable photoframe --nowCopy14. If you have added new photos to your folder, you will need to restart the digital photo frame service to load in any new images.
Restarting this service can easily be done by using the following command within the terminal.
sudo systemctl restart photoframeCopy15. As the photo frame takes over the entire Raspberry Pi operating system, you will need to disable and stop the service to access the desktop.
This command disables the “photoframe” service from start at boot, the “--now” option stops the service immediately.
sudo systemctl disable photoframe --nowCopyConclusion
If you have got to this point in the tutorial, you should have successfully set up your Raspberry Pi as a digital photo frame.
The Pi makes a great tool for running your own digital photo frame. You can control how it works yourself and can pair it with any screen that you like.
Please feel free to leave a comment below if you have run into any issues with setting up a digital photo frame.
If you liked this project, we highly recommend that you take some time to explore some of our many other Raspberry Pi projects.


Does this software support sub folders or does it need a single flat directory structure? Thanks Chris
Hi Chris,
The software does support nested folders, but you will need to add the “-r” or “–recursive” option to the command. It should be a fairly straightforward edit.
Kind regards,
Emmet
Hope someone can help.
It runs for the first 5-6 JPG files successfully then displays
a 25% snap of the actual JPG (upper left corner) with with smears across the entire immediate left as a dozen straight lines (the color the pixel they stream from)
and
Smears down the left hand side as a dozen straight lines the color of the pixel they start from)
It will redisplay the image at 50% its size with the same smear, then hang.
I can Q out of the running image. I’ve tried different directories and file protections/ownership as broad as rwxrwxrwx.
I’m using X11 and have not changed to wayland yet….
is this a known problem?
—-hope someone sees this, am doing it as a Christmas present—
thanks,
Jo
Hi Jo,
Sorry to hear that you are having issues with this tutorial. I’m not entirely sure what would be causing that, “imv” definitely doesn’t seem as stable as the original software we used but the lack of Wayland support kind of forced us to move over.
There is a couple of things you could try. First is disabling the scaling behaviour to see if that resolves the issue by setting it to “none”.
Another is to try out the Wayland variant, there is a chance that might not run into the same issues but definitely not something I can guarantee.
I’m currently away from my Raspberry Pi’s so can’t test any workaround at the moment unfortunately.
Kind regards,
Emmet
Not sure if anyone is working with this anymore. I have made it to step 10 and everything has worked. I completed the steps but it will no start itself on startup. Not sure what I am doing wrong just learning very interesting project. I’m using a Pi5 8GB
Hi Frank,
Can you try checking on the status of the Photo frame service by using the following command.
Kind regards,
Emmet
This is what I got back
I’m not sure very new at doing all of this. I am using a hard drive with a lot of pictures on it. I’m wondering if after reboot I need to give the Pi some time to load pictures, before I try to run script.
Hi Frank,
Hmmm I’m not entirely sure why this wouldn’t be working, I’m assuming you set things like the user ID and username within the service file properly?
Getting the script to sleep before it runs might be a viable workaround and is always worth trying.
Open up the script for editing by running the following command.
Then within that file add the following to the top below the “
#!/bin/bash” line. It will basically make the script sleep for 10 seconds before proceeding.Kind regards,
Emmet
I’m having problems with this…I tried this on a Pi Zero W, but moved to a Pi 3B and still having issues.
When I test the program it displays the first photo, but running on the Pi Zero it didn’t progress to the next photo.
I switched to a Pi 3B – it displays the first photo, moves to the second after the prescribed time, but when it’s time to move to the third… it displays a shrunken version of the second in the upper left corner, the rest of the screen is blank and it will not go to the next photo.
Hi Craig,
First check, were you running the X11 or Wayland version of imv?
I’m not entirely sure why this would be happening as I haven’t managed to replicate this issue on my end. Can you manually move to the next image by attaching a keyboard and using the arrow keys.
One thing, we should also set is the scaling mode. I have updated the guide to now include this so let me know if those changes help with the issues you are running into.
Kind regards,
Emmet
Been a few minutes since someone posted here, so here’s my experience.
Followed all of the directions. Could not make things happen on boot. Finally, out of frustration, I set the sleep to 180, and waited. Voila!
Then 150, still worked.
Then 120, still works.
So it’s something in the Pi Zero W, the memory card I’m using, the pr the USB thumb drive I’m using that takes its own sweet time to get ready, maybe because I’m using an old slow USB drive for the photos, and it just needs some time to get things in order..
Hello, I realize this is an old post But it works perfectly for someone new to pi like me! I combined this with your Samba installation post and can now slideshow photos from my main computer to several monitors with a Pi ZeroW attached to them. A couple questions;
I find that I must leave atleast 1 image in the shared folder or else the slideshow stops before loading new images. I then need to “bash /home/pi/start-picture-frame.sh” again to restart it. Question 1, instead of reading from the shared folder, Is there a way to delete a whole folder of 60 or so images from the shared directory, then transfer a new folder of 60 or so images? and have the slideshow start displaying from the new folder after a period of time? this folder would be replaced with a new one every couple hours or so.
And question 2, is there a way for the name of this folder of images to be overlayed onto the slideshow images, like a water-mark?
Thank you! your information is clear and valuable!
I have expanded upon Gus’ original settings here as I ran into the same issue. I changed the script to archive any images that are older than 14 days to an Archive folder, if there are no images in the main folder.
I provided the script I use and you should be able to work off that. the
-mtimeparameter is set to 14 days for me which invokes a move of pictures to another folder. You could change it to delete any pictures over a certain period.One question, I am using the light version of the OS? Your instructions do not state which version.
Sorry about that, it’s using the full version of Raspbian since we need the GUI. I have it on the “to do” list to add a section for Raspbian lite, but could be awhile before we get to it.
Use “man feh” to see all the options for feh – one of them is –auto-rotate which will use the EXIF data to display images the right way up.
hey guys, ive got everything up and running to the point i can run the picture-frame.sh script my images are stored on the sd card in home/pi/Pictures. The only problem is some of my pictures appear upside down despite them looking correct in the file manager?
Hi! I’ve been trying to find out what I missed.
I am getting this line when I hit “enter” after typing bash /home/pi/start-picture-frame.sh
The line reads:
/home/pi/start-picture-frame.sh: line 2: DISPLAY:0.0: command not found
Thank you for sharing the wonderful tutorial.
Hi Michael,
I haven’t run into this issue before, what version of Raspbian are you running ?
I had this issue before. Did you install a lite version of raspbian ? You need to have a GUI running (startx). Or you didn’t install feh but that would be weird ;).
You will encounter many bugs actually. Because this tuto was made in 2015.
Good luck !
Looks like a typo to me: Try DISPLAY=0:0?
I can autorun if i boot directly into gui without any trouble, but booting to command just won’t do it. bummer. seems like a waste of memory through the gui.
Thanks so much for this project instructions. I created a frame for my coworkers and I know they will love it. I wonder if I can add a cron job, so it turns on and off at set times.
Good Job! It went successfully. Thank you so much for this tutorial.
I have one thing I really want to know. Is there any tools beside from “feh” to use transitions every picture? Really need your help tho
Hello,
Thanks a lot, I finally did it.
Can you please give your os version in your tutorial.
For the record, if you are using raspbian jessie PIXEL you need to use xfce4-power-manager to remove the screensaver/blank screen
sudo apt-get install xfce4-power-managerthen go to
menu>settings>power management.Have fun
Minam
How can I change the time between pictures?
I don’t my images randomize but continue scroll how it is possible plzzz tell me
Rohit, if you supply the feh command with the –randomize parameter, it will randomly show the photos
Type man feh to see the options.
Actually, -R isn’t randomize.
It’s reload and takes a parameter for how often to refresh the photo list. This is very handy, since you can drop a ton of photos into the folder via SAMBA and then delete the ones that don’t look great on the digital picture frame.
-z is the randomize option. I changed the option in the .sh file from -Z to -z and that worked to make them random. Capital -Z is supposed to zoom the pics to full screen, but it hadn’t been doing that prior to my edit. I don’t want zoom, so I’m not going to worry about why that was.
Follow up to myself:
Actually, the randomizing still isn’t working. I will try the spelled out flag, next time I log in to the picture frame.
Is there any way to pull the pictures off a website like imgur or an online repository instead of a local folder?
Jason, an earlier comment from Dan King suggested DakBoard could do this, so might be worth checking out.
So… I have sat as N00b trying to set up my Ras Pi 3 as a photo frame…
I have experience most of the issues everyone else has had.
One thing that really borked things was as it rebooted, feh wouldn’t start. I tried everything. bash su -pi -c gave me errors and I was about to headbutt the wall … then I watched the video.
One bit missing from the typed instructions is … sleep 10. Yes, watch the video realllly carefully and it is in there. I won’t spoil the fun, but it works.
Yep – I did that and bingo – worked first time.
I have now followed the instructions in the following forum to alter my HDMI settings as I am using a HDMI to VGA adapter to connect this to an old monitor. Obviously, the resolution from HDMI to old VGA is different so the image was squished up on the left.
https://www.raspberrypi.org/forums/viewtopic.php?p=269212
HDMI Safe sounds like something I didn’t want to alter, but it worked a treat to correct the resolution. (phew!)
For good measure I did CEA to find what my monitor was native at and changed the hdmi mode to match my monitor (23).
All in all, as a complete “never done this before” I am really proud that I have got my set up now working.