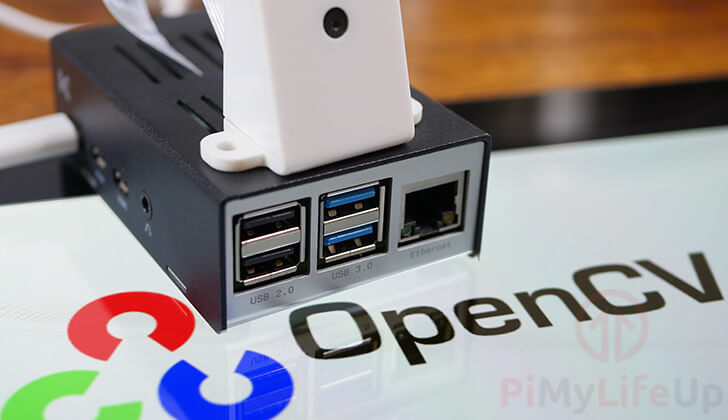
Throughout this guide, we will walk you through the process of setting up OpenCV on your Raspberry Pi.
We will explore a couple of ways to install OpenCV on your Raspberry Pi. The first and easiest way is to install it directly from the package repository. This gets you an older version, but it means you will be up and running in a few minutes.
The second and slightly more complicated way is to compile it directly from its source code. Using this method, you will have the latest version of OpenCV on your Pi, but you must be prepared to wait an hour for the library to compile.
For those who do not know what OpenCV is. It is a library of different programming functions that are aimed at dealing with real-time computer vision.
Using computer vision, you can interpret images and videos in real-time. Allowing you to perform tasks such as motion detection and facial recognition with relative ease.
The Raspberry Pi is an excellent platform for starting to learn OpenCV and also doubles as an affordable and small device.
Equipment List
Here is all the equipment that we recommend for setting open OpenCV on the Raspberry Pi.
Recommended
- Raspberry Pi Amazon
- Micro SD Card Amazon
- Power Supply Amazon
- Ethernet Cable Amazon or Wi-Fi Amazon
- Raspberry Pi camera Amazon or USB Webcam Amazon
Optional
This tutorial was tested using the latest version of Raspberry Pi OS Bookworm on a Raspberry Pi 5.
Installing OpenCV on your Raspberry Pi from the Repository
If you aren’t worried about running the latest version of OpenCV on your Raspberry Pi, you can install this library directly from the official package repository.
This method is significantly faster to get up and running, as you don’t have to wait for the library to compile. The disadvantage, of course, is that you could be running quite an old version of OpenCV.
If you want to run the latest version of OpenCV, follow our section on compiling this library from its source code.
1. Before we can install OpenCV we must ensure that our package list and packages are up to date.
The first command will update the package list cache. The second will upgrade any out-of-date packages it finds.
sudo apt update
sudo apt upgradeCopy
2. Once your system is up to date, all you need to do to install OpenCV to your Raspberry Pi is run the following command.
At the time of publishing, this will install OpenCV 4.6 to your Pi.
sudo apt install python3-opencvCopy3. Now that you have OpenCV installed, you can skip down to the testing OpenCV section.
Compiling OpenCV on the Raspberry Pi
Over the following sections, we will be walking you through the process of compiling the latest version of OpenCV on your Raspberry Pi.
While compiling from the source code is a slow process, it will give you access to all of OpenCV’s latest features on your Pi.
Alternatively, OpenCV is available through the Pi’s package repository. However, this version is typically significantly out of date.
Installing the Packages Required to Compile OpenCV on your Pi
1. Before proceeding, we should first update any preexisting packages.
You can update the currently installed packages by running the following two commands.
sudo apt update
sudo apt upgradeCopy
2. Now we can start the process of installing all the packages we need for OpenCV to compile.
To start, run the command below. This command will install the packages that contain the tools needed to compile the OpenCV code.
sudo apt install cmake ccache build-essential pkg-config git -yCopy3. Next, we are going to install the packages that will add support for different image and video formats to OpenCV.
Install these libraries to your Raspberry Pi with the following command.
sudo apt install ffmpeg libjpeg-dev libtiff-dev libpng-dev libwebp-dev libopenexr-dev -y
sudo apt install libopenjp2-7-dev libavcodec-dev libavformat-dev libswscale-dev libv4l-dev libxvidcore-dev libx264-dev libdc1394-dev libgstreamer-plugins-base1.0-dev libgstreamer1.0-dev -yCopy
4. Our next step is to install all the packages needed for OpenCV’s interface by using the command below.
sudo apt install libgtk-3-dev libqt5gui5 libqt5webkit5 libqt5test5 python3-pyqt5 -yCopy5. These next packages are crucial for OpenCV to run at a decent speed on the Raspberry Pi.
You can install these packages by running the following command.
sudo apt install libatlas-base-dev liblapacke-dev gfortran -yCopy6. The second last lot of packages thaat we need to install relate to the Hierarchical Data Format (HDF5) that OpenCV uses to manage data.
Install the HDF5 packages to your Pi by using the command below.
sudo apt install libhdf5-dev libhdf5-103 -yCopy7. Finally, we can install the final few packages by using the command below.
These last few packages will allow us to compile OpenCV with support for Python on our Raspberry Pi.
sudo apt install python3-dev python3-pip python3-numpy -yCopyBefore proceeding to the next section, make sure all the packages installed successfully.
Increasing your Pi’s Swap Size
8. With all the required packages to compile OpenCV on our Raspberry Pi now installed, we need to do some preparatory work before we can start the compilation process.
We will now need to temporarily increase the size of the swap space to help the process of compiling OpenCV on the Raspberry Pi.
The swap space is used by the operating system when the device has run out of physical RAM. While swap memory is a lot slower than RAM, it can still be helpful in certain situations.
Begin modifying the swap file configuration by running the following command.
sudo nano /etc/dphys-swapfileCopy9. While we are within this file, we need to find the following line that defines the size of the swap.
CONF_SWAPSIZE=100CopyOnce you have found the line above, adjust the “100” value to “2048“. This will create a swap file on your Pi’s SD card that is 2GB in size.
CONF_SWAPSIZE=2048Copy10. Once changed, save the file by pressing CTRL+X followed by Y then Enter.
11. As we have made changes to the swapfile configuration, we need to restart its service by utilizing the command below.
By restarting the service, we are forcing it to recreate the swap file.
sudo systemctl restart dphys-swapfileCopyCloning the OpenCV Source Code to your Raspberry Pi
12. Next, let’s go ahead and clone the two OpenCV repositories we need to our Raspberry Pi.
Running these two commands will retrieve the latest available version of OpenCV from their git repository.
git clone https://github.com/opencv/opencv.git
git clone https://github.com/opencv/opencv_contrib.gitCopy
As these repositories are quite large, they may take some time to clone to your Raspberry Pi.
Compiling OpenCV on your Raspberry Pi
13. Let’s start by creating a directory called “build” within the cloned “opencv” folder and then changing the working directory to it.
mkdir ~/opencv/build
cd ~/opencv/buildCopy
14. Now that we are within our newly created build folder, we can now use cmake to prepare OpenCV for compilation on our Raspberry Pi.
Run the following command to generate the required makefile.
cmake -D CMAKE_BUILD_TYPE=RELEASE \
    -D CMAKE_INSTALL_PREFIX=/usr/local \
    -D OPENCV_EXTRA_MODULES_PATH=~/opencv_contrib/modules \
    -D ENABLE_NEON=ON \
    -D WITH_OPENMP=ON \
    -D ENABLE_VFPV3=OFF \
    -D BUILD_TESTS=OFF \
    -D INSTALL_PYTHON_EXAMPLES=OFF \
    -D OPENCV_ENABLE_NONFREE=ON \
    -D CMAKE_SHARED_LINKER_FLAGS=-latomic \
    -D OPENCV_PYTHON_INSTALL_PATH=/usr/lib/python3/dist-packages \
    -D BUILD_EXAMPLES=OFF ..Copy
15. Once the make file has successfully finished generating, we can now finally move on to compiling OpenCV by running the command below.
We use the argument -j$(nproc) to tell the compiler to run a compiler for each of the available processors.
Doing this will significantly speed up the compilation process and allow each core on the Raspberry Pi to work on compiling OpenCV.
make -j$(nproc)CopyPlease note that the compilation process can take considerable time. On our Raspberry Pi 4, this process took about 1 hour to complete.
If the compilation process is failing to complete or appearing to get hung, there is a chance the CPU is getting locked up.
To get around this, you can try running a single make process. This should reduce the likely hood of issues but cause longer compilation times.
makeCopy16. When the compilation process finishes, we can then move on to installing OpenCV to our Raspberry Pi.
Luckily for us, this is a reasonably straightforward process and requires you to run the following command.
sudo make installCopyThis command will copy all the required files into there needed locations automatically.
17. Now we also need to regenerate the operating systems library link cache.
The Raspberry Pi won’t be able to find our OpenCV installation if we don’t run the following command.
sudo ldconfigCopyCleaning up after Compilation
18. Now that we have finished compiling OpenCV on our Raspberry Pi, we no longer need to have such a large swap file.
Let’s again edit the swap file configuration by using the following command.
sudo nano /etc/dphys-swapfileCopy19. Within this file, find the following line.
CONF_SWAPSIZE=2048CopyAfter finding the swap size line, change the value back to its default which at the time of publishing is “100“.
CONF_SWAPSIZE=100Copy20. When done, save the file by pressing CTRL + X followed by Y then Enter.
21. Now our final cleanup task requires us to restart the swap file service.
Restarting the service will downsize the file from 2GB to 100 MB.
sudo systemctl restart dphys-swapfileCopyTesting OpenCV on your Raspberry Pi
1. To test whether OpenCV is now installed to our Raspberry Pi, we will make use of our Python 3 installation.
Launch into the Python terminal by running the command below.
python3Copy2. While we are within Python, we can now import the OpenCV Python module using the command below.
By importing the module, we can first check to see if OpenCV will even load on our Pi.
import cv2Copy3. With the OpenCV module now imported, we should be able to retrieve its version.
To retrieve OpenCV’s version, use the following command.
cv2.__version__Copy4. If everything is now working as intended and OpenCV has been successfully installed to your Raspberry Pi, you should see text like the following appear in the command line.
'4.9.0'CopyConclusion
Hopefully, at this point you will now have OpenCV up and running on your Raspberry Pi.
This library gives you access to a wealth of free and open-source tools you can use to implement computer vision on your Raspberry Pi.
Please feel free to drop a comment below if you have you have run into any issues or have any feedback on this tutorial.
If you like this guide, we highly recommend that you check out our many other Raspberry Pi projects.


Thank you very much! I’ve been working on this for two days and at last, your instructions worked perfectly fine!
thanks for this. Your instructions are very clear. My Raspberry Pi 4 with Raspbian 32bit has Opencv.. I will learn Opencv from now. I found libjasper-dev is not on Raspbian-64bit. If so it will run faster with 64bit.
In addition I see your instructions for other stuff like Apache2 , … are easy to understand and simple. Dung-Le
Hi,
For some reason when I run
make -j$(nproc)
It gets stuck on 37%, even when I try running it with just make.:
and it stuck on 26% while using make
Hi Soham,
What Raspberry Pi are you trying to compile this on? The compilation process can take fairly long even on a Pi 4.
Cheers,
Emmet
I had the same problems with the build sticking at 97% etc. I found the free space on the card was the problem, the expansion of the temp drive (cache) to 2G had taken up all my free space. As it was a 16G image on a 32G card I just expanded the image and all was well.
thanks for replying. but the process worked when I used a third party heat sink case to cool down the pi. the compilation was done after another hour or so.
Hi,
For some reason when I run
make -j$(nproc)
It gets stuck on 97%, even when I try running it with just make.
Here is what it gets stuck on:
[ 97%] Building CXX object modules/python2/CMakeFiles/opencv_python2.dir/__/src2/cv2.cpp.o
I have also (for a different reason) recently tried this installation on a new image of raspbian, yet still with the same issue.
Thanks
Hi Luke,
There is a chance that some sort of race condition is occurring where all cores get locked up with processing that file.
You can try using the “
make” command without any arguments.Please let me know if that solves your issues.
Cheers,
Emmet
Hello, Congratulations on the tutorial!
I did the installation tested on the Visual Studio Code terminal, everything ok
But when I ran an application it gave the error message below:
pi @ systemalpr: ~ / Desktop / ALPR $ / usr / bin / python3 /home/pi/Desktop/ALPR/SystemALPR/camera_ip.py
Traceback (most recent call last):
File “/home/pi/Desktop/ALPR/SystemALPR/camera_ip.py”, line 3, in
from cv2 import cv2
ImportError: cannot import name ‘cv2’ from ‘cv2’ (/usr/local/lib/python3.7/dist-packages/cv2/python-3.7/cv2.cpython-37m-arm-linux-gnueabihf.so)
pi @ systemalpr: ~ / Desktop / ALPR $
In ImportError you are informing the address where Opencv is installed.
Would they have to be in the same directory as Python3?
The VSC shows that the Python3 path is in: usr / bin / python3
If so, how can I resolve this issue?
Or should my applications be in the same directory as Opencv?
I’m a Linux / Raspberry beginner
I will be very grateful to solve this problem.
Problem solved – disk space had dropped below 2GB.
This tutorial is awesome! easy and concise ! thankyou so much team!
a small comment, adding –depth=1 to the git clone commands can save a lot of time
Took a very long time but it worked. Thanks
all went smooth, thanks for the clear instructions and explanations
a very good tutorial, the best!!
Thank you! Thank you! Thank you!! I’ve tried 5 different installation instructions over the last week. Yours worked!! Thank you so much!!
Thank you so much. This tutorial was so helpful in the process of installing openCV on Raspberry PI 4
Thanks man! Works perfect.
It took about 3h to finish on RPi 3b+
Hi, in step 6 it says to run `sudo apt install libhdf5-dev libhdf5-103`, however when running that I get the response `E: Unable to locate package libhdf5-103`. After doing `apt search libhdf5-103`, it seems like that package doesn’t exist? Do you have any ideas on how to fix this problem? Thanks.
Hi Alexander,
Make sure that you are running Raspbian Buster or later. I’m uncertain if those packages are available on older versions of Raspbian.
Cheers,
Emmet
Hi,
I have just installed cv2 using you tutorial. It works fine. Thank you very much
Regards
I get this erro message on the last commands. Everything else, I’ve followed. RPY-4 w/ 4GRAM… CV2 still not working!
pi@raspberrypi:~/opencv/build $ python3
Python 3.7.3 (default, Dec 20 2019, 18:57:59)
[GCC 8.3.0] on linux
Type “help”, “copyright”, “credits” or “license” for more information.
>>> import cv2
Traceback (most recent call last):
File “”, line 1, in
File “/home/pi/.local/lib/python3.7/site-packages/cv2/__init__.py”, line 3, in
from .cv2 import *
ImportError: /home/pi/.local/lib/python3.7/site-packages/cv2/cv2.cpython-37m-arm-linux-gnueabihf.so: undefined symbol: __atomic_fetch_add_8
Hi Stephane,
I re-ran this tutorial last night on a Raspberry Pi running Raspbian Buster and everything compiled and installed correctly.
Make sure you do not have the pip version of OpenCV installed before running this tutorial.
Cheers,
Emmet
Thanks for nice tutorial. Worked like a charm.
Hello!
Very good tutorial. Just a small typo in the last portion of it:
sudo apt install pytohn3-dev python3-pip python3-numpy
the install says ” pytohn3-dev”, when it should actually be “python3-dev” .
Thanks for the tutorial!
Guilherme
Hi Guilherme,
I have fixed the typo! Thanks for pointing that out.