This tutorial will show you how to install and run Netdata on the Raspberry Pi.
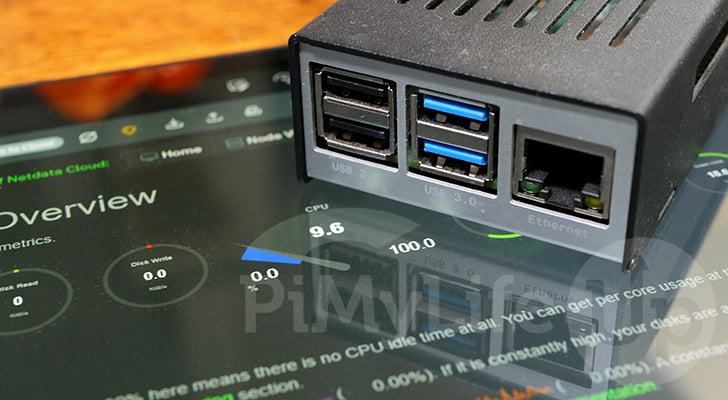
Netdata is an open-source tool that you can use to collect real-time metrics. These metrics include details such as CPU usage, disk activity, and more.
By using Netdata on the Raspberry Pi, you can quickly see how the system is being utilized.
This software is designed to minimize its impact on its system, which is perfect for low-performance devices like the Pi.
Best of all, Netdata provides all the data it collects in an elegant interface with easy-to-read graphs. It even has support for displaying all of its data in real time.
You can even use this metric tool to identify what software on your Raspberry Pi is causing high memory usage or consuming too much CPU time.
Over the following few sections, we will show you how to install and run the latest version of Netdata on your Raspberry Pi.
Equipment
Below is the list of equipment we used when running Netdata on our Raspberry Pi.
Recommended
Optional
This tutorial was last tested on a Raspberry Pi 400 running the latest version of Raspberry Pi OS Bullseye.
Installing Netdata to the Raspberry Pi
This section will show you how to install Netdata onto your Raspberry Pi in a couple of simple steps.
While we could install Netdata from the Raspberry Pi OS repository, this version of Netdata is outdated and not managed by the official Netdata team.
Preparing your Raspberry Pi
1. Before we proceed, let us ensure that Raspberry Pi is running up-to-date software by using the following two commands in the terminal.
sudo apt update
sudo apt upgradeCopy
2. Our next step is ensuring we have the software we need. In this case, we only need wget installed, as the Netdata script will handle the rest for us.
Use the following command to ensure wget is installed.
sudo apt install wgetCopyRunning the Netdata Install Script
3. With everything in place, we can run the following command to download and compile Netdata onto the Raspberry Pi.
wget -O /tmp/netdata-kickstart.sh https://my-netdata.io/kickstart.sh && sh /tmp/netdata-kickstart.shCopyThis command uses “wget” to download the “kickstart.sh” script from Netdata, store it in the “/tmp/” directory, then execute it using the “sh” shell.
4. Before the compilation process begins, you must agree to some terms and conditions and a list of changes Netdata will make during installation.
To proceed, type “y” and then press the ENTER key. If you want to abort installing Netdata to your Raspberry Pi, you want to type “n” instead.
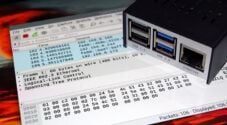
Please type y to accept, n otherwise:5. Once Netdata finishes installing to your device you should see the following message within the terminal.
Successfully installed the Netdata Agent.Accessing your Raspberry Pi’s Netdata Web Interface
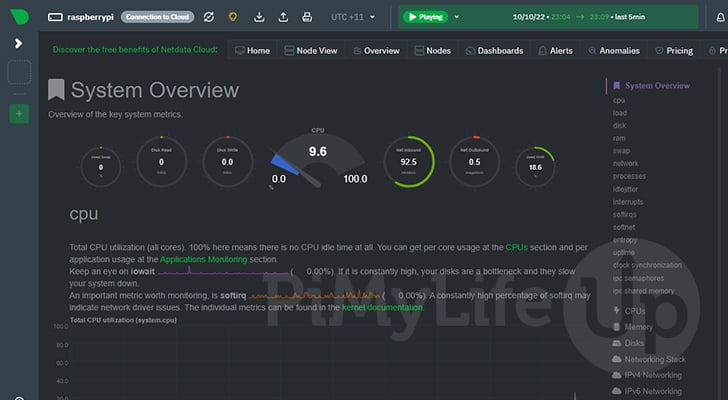
Now that we have installed Nedata on the Raspberry Pi let us show you how to access its web interface.
The web interface lets you view all of the statistics the agent retrieves about your system.
1. To access the Netdata web interface, you will need to know the IP address of your Raspberry Pi.
The easiest way to get the local IP address of your device is to use the hostname command within the terminal.
hostname -ICopy2. Once you know your IP address, go to the following address in your favorite web browser. From this address, you will notice that Netdata’s web interface operates on port “19999“.
Ensure that you replace “IPADDRESS” with the IP of your device.
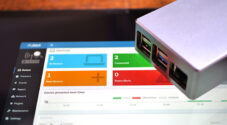
http://IPADDRESS:199993. You will now be greeted with the Netdata web interface. You can use this interface to see all the metrics the agent collects from your Raspberry Pi.
Have fun exploring this interface and exploring the wealth of data it has collected on your device. These graphs will update in real-time and allow you to scroll back through roughly three days of data.
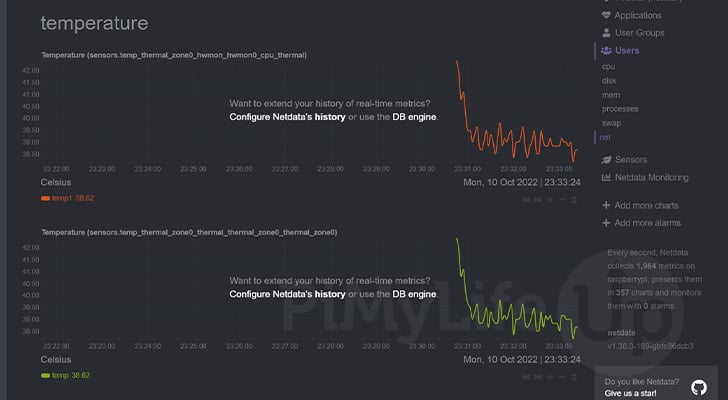
Monitoring the Raspberry Pi Temperature with Netdata
Netdata can record the temperature of your Raspberry Pi and present it in one of its many graphs.
For this functionality to work, however, we will need to enable the “temperature sensor” collector. A collector for this software is a script that retrieves data about the system.
1. To enable temperature monitoring within Netdata we will need to modify the “charts.d.conf” configuration file.
Before we can edit this file, we will need to change to the “/opt/netdata/etc/netdata” directory using the cd command.
cd /opt/netdata/etc/netdataCopy2. Now that we are in the right directory, we can begin editing this file by using the command below in the terminal.
Running this command will copy the config to the correct location and then allow you to begin editing it.
sudo ./edit-config charts.d.confCopy3. Within this file, you will want to find the following line.
# sensors=forceCopyOnce you have found the line, uncomment it by removing the hashtag (#) and space from in front of it.
sensors=forceCopy4. After making this change, you will need to save and quit by pressing CTRL + X, followed by Y, then the ENTER key.
5. Since we have changed Netdata’s configuration on our Raspberry Pi, we will need to restart its service by using the command below.
If we don’t restart the service, it will be unaware of any changes we have made.
sudo systemctl restart netdata.serviceCopy6. If you return to the dashboard, you should now see that Netdata is now logging your Raspberry Pi’s temperature.
This is an excellent way to see how the device’s temperature is affected by various factors throughout the day.
Conclusion
At this point in the tutorial, you should have Netdata installed on your Raspberry Pi, with it now collecting your systems metrics.
Netdata is an impressive piece of software that can collect data without significantly impacting the performance of your system.
Please comment below if you have issues getting this software to work on your Raspberry Pi.
If you liked this guide, check out our many other Raspberry Pi projects.


How can I remove this from my system
Hi Bjørn,
You should be able to remove Netdata from your Raspberry Pi by running the following command.
Cheers,
Emmet