In this project, we will show you how you can set up a multi-boot on your Raspberry Pi using PINN.
PINN is a modern version of NOOBS built with the purpose of providing multi-boot functionality to the Raspberry Pi.
Dual-booting operating systems can be useful in various cases, such as when software works only on one OS but needs to use a different one for other tasks.
This software that we are using essentially works by providing an installer that your Pi will built into. This installer will enable you to install as many operating systems as you would like on your Pi’s SD Card.
When running PINN, every time you start up your Raspberry Pi, you will be greeted with a list of all the operating systems you have installed. You can easily click which one to boot into; otherwise, PINN will automatically boot into the last operating system you used.
For the best experience with PINN, we highly recommend using an ethernet connection. However, the software does allow you to connect to a Wi-Fi network through its interface. Ethernet just enables you to get started immediately without having to plug in extra details.

Equipment
Below, you can find a list of some of the equipment we used to set up PINN on our Raspberry Pi and multi-boot different operating systems.
Recommended
- Raspberry Pi Amazon
- Micro SD Card Amazon
- Power Supply Amazon
- Ethernet Cable Amazon or Wi-Fi Amazon
- HDMI Cable Amazon
- Monitor Amazon
- USB Mouse Amazon
- USB Keyboard Amazon
Optional
- Raspberry Pi Case Amazon
This tutorial was last tested with a Raspberry Pi 5, running the latest version of Raspberry Pi OS Bookworm.
Easily Multi-Booting your Raspberry Pi with PINN
In the following sections, we will show you the easiest way of installing PINN on your Raspberry Pi and how you can use it to multi-boot on your Raspberry Pi.
Below, we have embedded a video that will walk you through the whole process of setting up PINN. As always, our written steps are included below.
Installing PINN to your Raspberry Pi
1. To make setting up multi-boot on your Raspberry Pi as easy as possible, we will be making use of the Raspberry Pi Imager.
Imager is the simplest and cleanest way of installing operating systems like PINN on either an SD card, USB drive, or NVME drive. Best of all, it supports most operating systems.
If you haven’t installed Raspberry Pi Imager on your Raspberry Pi, go to the link below to get the latest version and install it.
https://www.raspberrypi.com/software/Selecting your Raspberry Pi
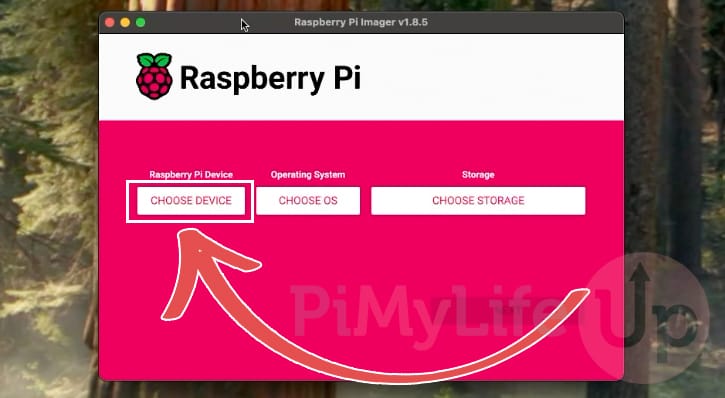
2. Once you have the Imager installed, open it up and click the “Choose Device” button.
This is an important step as it ensures the Imager will only grab images that are compatible with your Raspberry Pi.
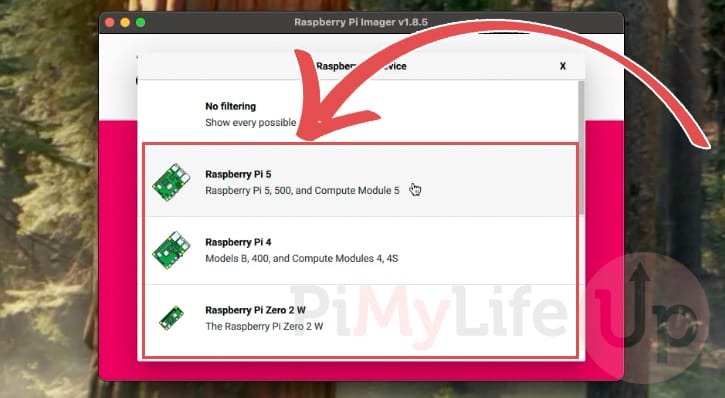
3. You will now see a list of the available Raspberry Pi models. Select the model that you are using.
For our guide, we are using a Raspberry Pi 5, so that is what we will be choosing.
Using Imager to Select PINN Multi-Boot
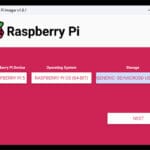
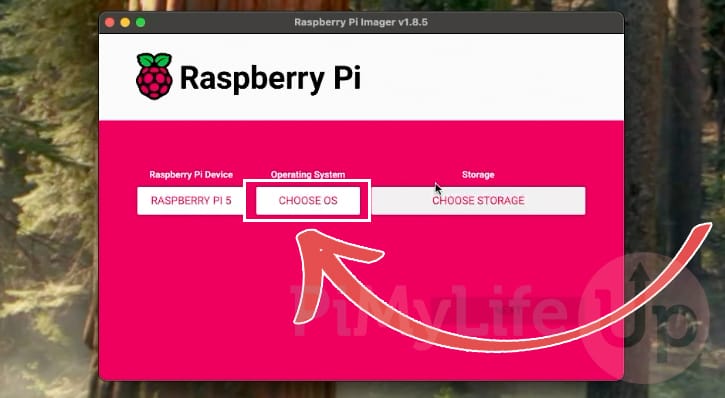
4. With your Raspberry Pi now selected, you will want to tell the Imager that you want to install the PINN multi-boot image to your device.
To find this option, you must click the “CHOOSE OS” button.
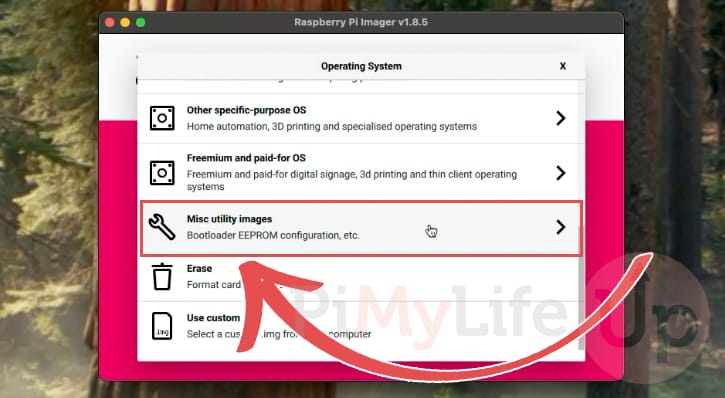
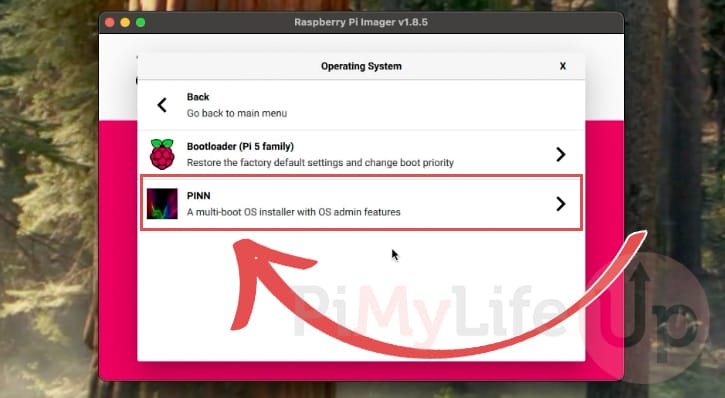
5. Scroll down this menu and select the option that is labeled “Misc utility images“.
6. Finally, you will see a couple of options. The one that you will want to select is the one called “PINN”. This is the tool that will enable you to multi-boot images on your Raspberry Pi.
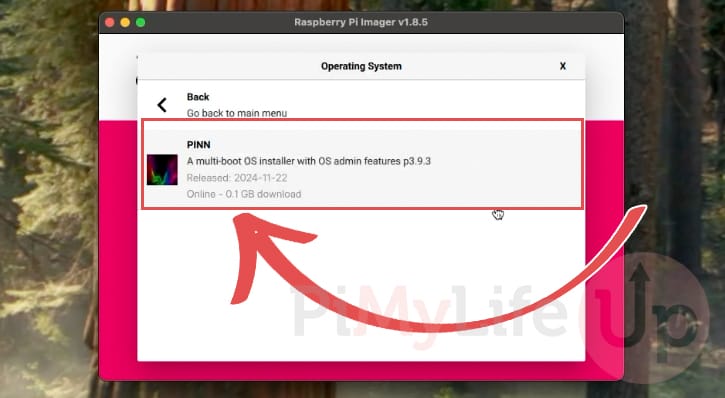
7. Clicking the previous option will take you straight into another menu; all you need to do is select “PINN” again.
Choosing Your Storage Device
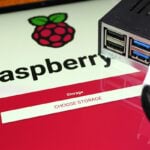
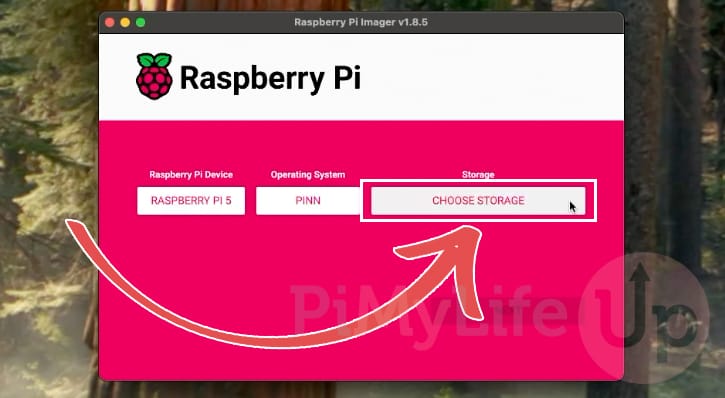
8. Once you have selected to install the PINN multi-boot image to your Raspberry Pi, you must select the storage device to install the software.
To select the storage device, click the “Choose Storage” button and follow the prompts. Remember that the drive you select will be completely wiped during the installation process.
Writing the PINN Multi-Boot Image to your Raspberry Pi
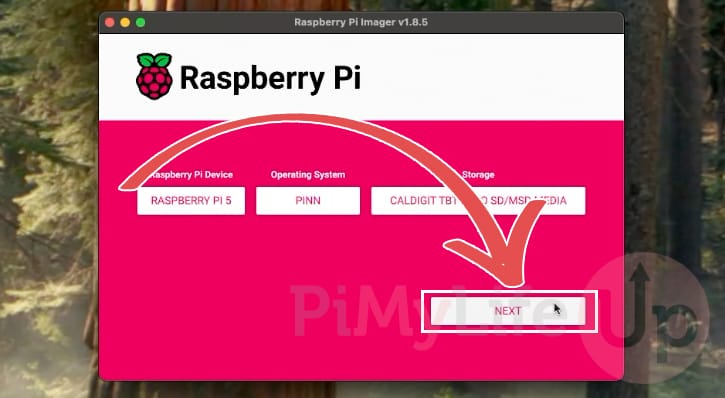
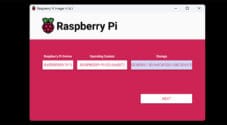
9. Now verify that all of your chosen options look correct.
Once you are happy, click the “NEXT” button to begin writing the PINN multi-boot image to your Raspberry Pi’s storage device.
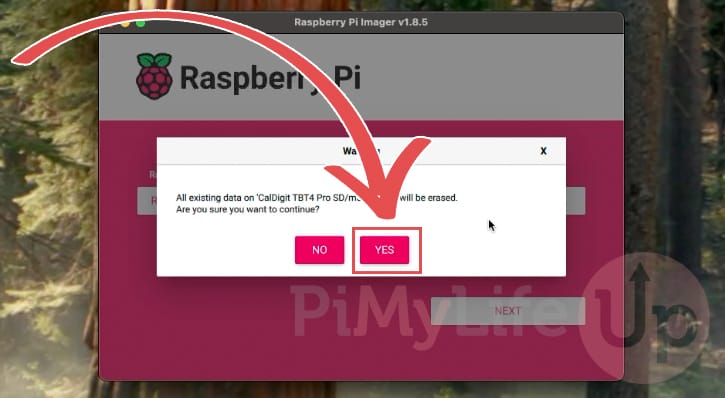
10. Before the image is written, you will see a warning that the storage device will be wiped. If you are certain you have selected the correct storage device, click the “YES” button.
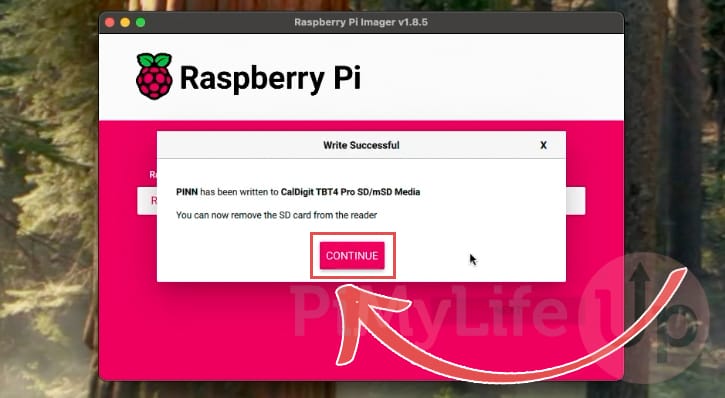
11. The writing process for PINN shouldn’t take very long as the base image is incredibly small.
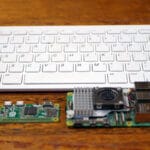
Once you see the success message, you can take your storage device out and plug it into your Raspberry Pi, and turn it on.
Installing Multiple Operating Systems using PINN
12. The first time you boot up your Raspberry Pi, you will be taken to PINN’s installation screen. This is the screen that enables you to install multiple operating systems to your Raspberry Pi and boot into them. It is also the one that will enable you to connect to your Wi-Fi network if you aren’t using Ethernet. You can connect to Wi-Fi by clicking Wi-Fi in the menu bar.
On this screen, you will want to scroll down and tick the check box next to any operating system that you want to run on your Pi (1.).
You can keep track of how much storage space is available in the bottom-left corner (2.), as well as how much space is required for the operating systems you intend on installing.
Please note that this does not include any extra storage space that you want available to your chosen systems.

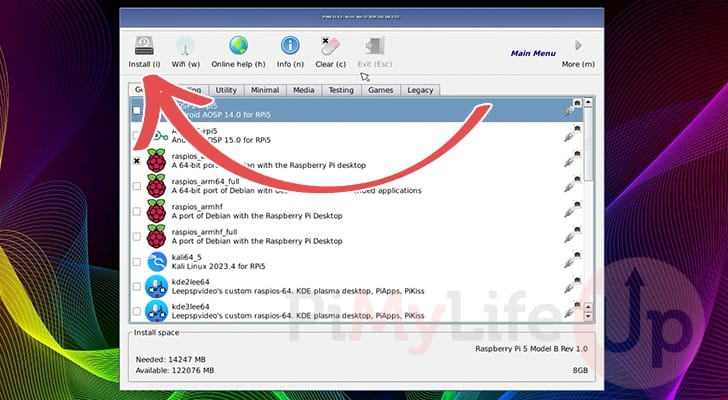
13. After selecting the operating systems that you want to multi-boot on your Raspberry Pi, you will want to install these by clicking the “Install” button in the top-left corner.
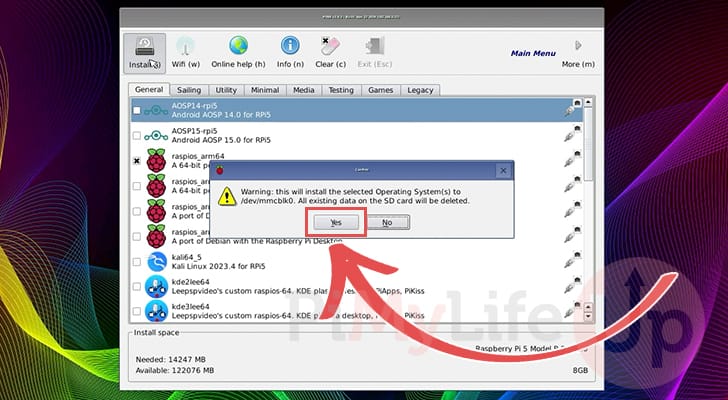
14. You will receive a warning that all data will be erased during the installation of your chosen operating systems.
If you are happy with this, click the “Yes” button to proceed with setting up your Raspberry Pi to multi-boot.
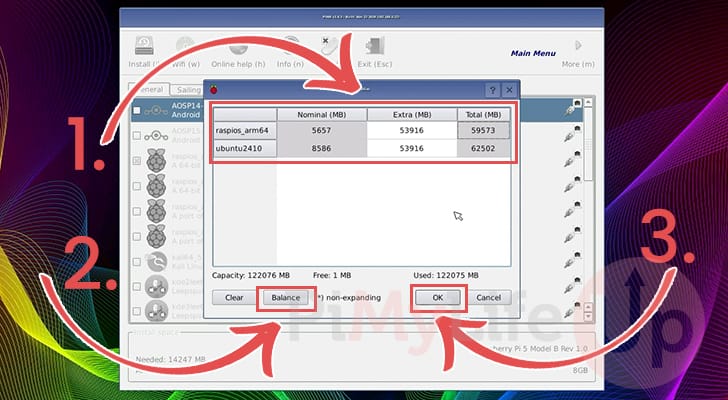
15. Before the operating systems are written, you will be asked how much storage space you want given to each of these operating systems (1.). The nominal column shows you how much storage the base OS requires. Extra is the amount extra you will be giving these operating systems access to.
If you want the remaining storage to be balanced equally between these two operating systems, click the “Balance” button (2.).
Once you are all happy to proceed, click “OK” to begin installing the operating systems that you want to multi-boot with on your Raspberry Pi (3.).
16. How long these operating systems take to install depends on a couple of factors: first is the speed of your internet connection, and second is the speed of your storage device.
Once everything has been completed, you should see a message saying “OS(es) Installed Successfully“.

Multi-Boot using PINN on your Raspberry PI
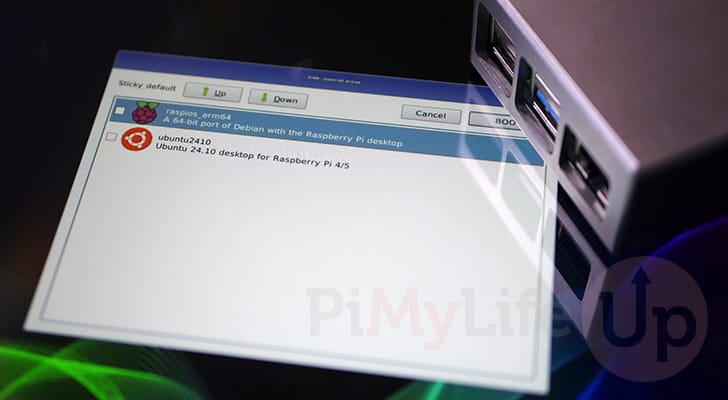
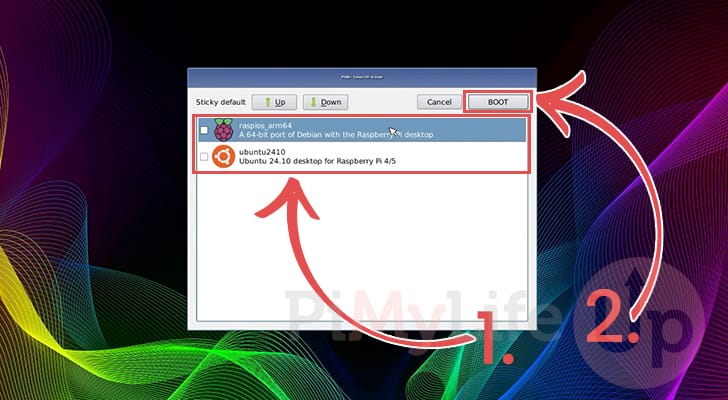
17. If everything has worked properly, you should now be greeted by PINN’s multi-boot screen on your Raspberry Pi. You will be greeted by this screen every time your Raspberry Pi starts up.
All you need to do is select the operating system you want to run (1.), and then click the “BOOT” button (2.).
For future starts, your Raspberry Pi will still boot into the PINN multi-boot screen, but after a couple of seconds it will start up the last operating system that you chose.
Conclusion
If you have reached this point in the tutorial, we hope that you have successfully installed the PINN multi-boot software on your Raspberry Pi.
This software is one of the only ways to boot multiple operating systems off one storage device on your Pi easily.
Please feel free to post a comment below if you have any questions about using this multi-boot tool to run multiple operating systems.
If you liked this guide, we recommend taking a few minutes to explore some of our many other Raspberry Pi projects. We have a wealth of guides and projects that should cover almost anything you might want.


There doesn’t seem to be a way to leave unallocated space on your device. When I try, it reallocates all the rest to the last OS. I ended up having to insert “project space”. I have no idea what that even means, though. For each OS it adds a 512MiB firmware partition and a -512MiB OS partition. But for “project space”, which I figured was just a way to leave unused space, it still adds a 512MiB firmware partition and then the project partition.
Overall it’s a great tool, but it could use some fleshing out.
Thank you.
Do you know if it is possible to have, in my setup, a dual boot with Windows 11 and Rasp Pi OS (Debian) or Ubuntu?
My setup:
– RPi 5 8Gb
– Raspberry Pi M.2 HAT+ (https://www.raspberrypi.com/products/m2-hat-plus/)
– Transcend MTS420S (https://www.amazon.es/dp/B076P63R3N?th=1)
Hi Ricardo,
While it would be possible I wouldn’t actually recommend dual booting Windows 11 on your Pi, there is a huge number of issues that make it basically useless. The better alternative would be to set up a Windows 11 VM on your Pi, you will still retain core functionality like network access that way.
Kind regards,
Emmet
Pinn is not noobs. Perfect. Classic name.
Thanks for the info!