In this project, we will be showing you how to monitor a website on the Raspberry Pi with Python.
This Python script will run on your Raspberry Pi and monitor a website, notifying you when the website either goes down or when a change has been made.
We achieve this by storing a simple copy of the website locally and checking to see when the changes differ.
As this website monitor is relatively simplistic, it should be able to run fine, even on a Raspberry Pi Zero.
Throughout this guide, we will show you how to program your own script to monitor a website. Using this knowledge, you should be able to expand the script to suit your specific needs.
If you would prefer not to learn how the code works, you can skip to the section titled “Running your Raspberry Pi Website Monitor Periodically“. However, you will need to set some details within the code for email notifications to work.
This project is perfect for a headless Raspberry Pi as it doesn’t require an interface to use it.
Even though this guide focuses on the Raspberry Pi, this code will work on any device where Python 3 is available. That means you can even run this script on your Windows device if you like.
Equipment
Below is a list of the equipment we used when setting up a script to monitor websites on our Raspberry Pi.
Recommended
Optional
This tutorial was tested on a Raspberry Pi 400, running the latest version of Raspberry Pi Bullseye. However, this project should run on any device as long as you have access to Python 3.
Table of Contents
- Preparing your Raspberry Pi for the Website Monitor
- Programming your Raspberry Pi’s Website Monitor
- Running your Website Monitor Periodically
- Conclusion
Preparing your Raspberry Pi for the Website Monitor
Before we get started, we need to make sure that we have all the packages we need to run our website monitoring script.
These steps include ensuring we have Python 3 installed and the needed Python packages.
1. Our first step is to update the package list and any existing packages.
We need to run the following two commands within the terminal on our Raspberry Pi to perform these updates.
sudo apt update
sudo apt upgrade -yCopy
2. We need to ensure that we have Python 3, and its package manager called “pip” installed on our device.
Alongside these packages we will also be installing the requests, beautifulsoup4, and lxml packages.
Use the command below to ensure all of the packages we require to run our website monitor.
sudo apt install python3 python3-pip python3-bs4 python3-lxml python3-requestsCopyProgramming your Raspberry Pi’s Website Monitor
Now that we have all the packages we need installed we can write our simple website monitor. We will split each part of this into its own section so you can learn how exactly it all works.
While you can use the nano text editor to write this code, we recommend using a proper IDE such as Visual Studio Code.
If you would like to learn more before proceeding be sure to check out our Python tutorials.
1. Begin writing the Python script to monitor a website on your Raspberry Pi. We will be using “websitemonitor.py” as our script name for this tutorial.
If you want, you can start writing this script using nano by using the following command.
nano websitemonitor.pyCopyWriting a Simple Website Monitor in Python
Let us start with the most basic implementation before we get too deep into writing a complicated website monitor script for our Raspberry Pi.
Within this section, we will write a simple script that grabs a webpage, compares it to the original content if one exists, then prints a message if there is a change.
1. You should always start your script by importing the packages we will need to use. To start this script, we need three packages, “os“, “sys“, and “requests“.
os– This package allows you to interact with the underlying operating system.
In our case, we will use this to create a cache of our last website request. This cache is how we will see if a change has occurred.sys– We will use the sys package to get any arguments passed into the script. In our case, we will be letting the user pass in the website URL and a name for the cache.requests– The requests package is what allows Python to make a request.
Using this, we can grab the contents of a specified website and store them.
import os
import sys
import requestsCopy
Writing our has_website_changed() Function
2. Our next step is to create a function that will handle the bulk of our logic.
This function will have the name “has_website_changed” and will have two parameters that are required to be set.
The first parameter (website_url) is the URL to the website. This is where we will perform our get request.
The second parameter (website_name) is the website name. This will be a shortened version of the name used for the cache filename.
We will have three possible return states from this function, -1 if the website is “not ok”, 0 if the website hasn’t changed, and 1 if the website has changed.
def has_website_changed(website_url, website_name):CopyRemember that with Python, indentation is everything. As we fill out this function, make sure you maintain the indentation.
Defining Headers for our Python Request
3. With our function defined, let us start adding actual functionality.
We can start by defining the headers that the request module will use when requesting the website. With these headers, we are setting two things.
The first is the “User-Agent” header. Feel free to set this to whatever suits your needs. We are keeping this one somewhat simple.
Secondly, we set the “Cache-Control” header to “no-cache“, this is a hint that both requests and the end server shouldn’t cache this request. Not all web servers will honor this request.
    headers = {
        'User-Agent': 'Mozilla/4.0 (compatible; MSIE 6.0; Windows NT 5.1; PIWEBMON)',
        'Cache-Control': 'no-cache'
    }Copy
Making our Request to the Website
4. We can safely use the requests package to fetch the passed-in website with our specified headers.
This is one of the most crucial lines to our Raspberry Pi’s website monitor script, as it is what will get the current state of the site.
With this, we call the “requests” packages get function. We pass in our “website_url” variable and our “headers“. The result from this request will be stored in our “response” variable.
response = requests.get(website_url, headers=headers)CopyEnsure We got an OK Response
5. After our response has been fetched we should ensure that we got an “OK” response from the website.
All this means is that we need to check if the status code is not lower than 200 and not greater than 299.
If it is not within our valid range, we return “-1” indicating that there has been a server error.
    if (response.status_code < 200 or response.status_code > 299):
        return -1Copy
Store the Response Text and Cache Filename
6. With the response checked to ensure we get at least a good status code, let us create two additional variables.
The first is called “response_text“, for now, this will simply store the text from the response we retrieved previously.
We can later use this variable to modify the response text before storing it. Still, for now, our Raspberry Pi website monitor will accept the response text as it currently exists.
Secondly, we create a variable called “cache_filename“, this variable stores the name for our cache file. We will make up this filename from the “website_name” variable and “_cache.txt“.
So, for example, if our website name was passed in as “pimylifeup” we would end up with the filename “pimylifeup_cache.txt“.
    response_text = response.text

    cache_filename = website_name + "_cache.txt"Copy
Creating the Cache on a New Website
7. When you first run the script, a cache file might not exist for the current website URL.
We check if this cache file already exists by using the “os” packages “path.exists()” function.
If this file doesn’t exist, we create it by opening our cache filename using the “w” option. We then the current response text to the file, ready for our Raspberry Pi to monitor the website for changes.
As this is a new request, we return 0, indicating that the response hasn’t changed.
    if not os.path.exists(cache_filename):
        file_handle = open(cache_filename, "w")
        file_handle.write(response_text)
        file_handle.close()
        return 0
Copy
Read the Cached Response for a Previous Request
8. If the code gets to this point, we need to open the cache file and read its contents to our “previous_response_text” variable.
This time with the open function, we use “r+“. This tells open to allow reading and writing of our cache file.
After reading the file, Python moves the stream position, so we must place it back to the start by using the “seek()” function. This will allow us to truncate the file easier if this is a new response.
    file_handle = open(cache_filename, "r+")
    previous_response_text = file_handle.read()
    file_handle.seek(0)
Copy
Check if the Response Text Matches the Cached Response
9. Now that we have both the response text and the previous one, we can check to see if they match.
If the text from both responses matches, we close the file handle and return 0. As mentioned earlier, 0 will indicate that the responses are the same and that no changes have occurred.
This and the else statement make up the final part of our Raspberry Pi’s website monitor’s “has_website_changed” function.
    if response_text == previous_response_text:
        file_handle.close()

        return 0Copy
Cache if the New Response is Different
10. If the responses aren’t a match, this tells us that our Raspberry Pi has detected a change while monitoring the website.
We start by truncating the file back to the current position. Which at the time of running should be position 0.
After the file has been truncated, we write the new response to the file. Once the writing has been completed, we can close the file handle as it is no longer needed.
As the response has changed, we return 1 to indicate that.
    else:
        file_handle.truncate()
        file_handle.write(response_text)
        file_handle.close()

        return 1Copy
Writing the main() Function
We need to write the main function for the next part of our Raspberry Pi’s website monitor. This function will end up being called whenever the script is run.
This part of the script will be straightforward and mainly handle calling the function we created.
11. Let us start by defining the main function.
Within this function is where the brains of our Raspberry Pi’s website monitoring will sit.
def main():CopyChecking if the Website Has Changed
12. We can now make a call to our “has_website_changed()” function. We will use the “sys” package to pass in the first and second arguments into this function.
The first argument will be the website URL. The second will be the name used for the cache file.
We store the value returned by this function in our “website_status” variable.
website_status = has_website_changed(sys.argv[1], sys.argv[2])CopyPrinting Response Based on Website Status
13. Since we now have the website status stored within our variable, we can print a message based on it.
This is the final part of our simple website monitor script for our Raspberry Pi. We will be able to build upon this functionality to either send an email or a text message.
This part of the code is a simple if, elif statement that prints a different message depending on the response.
    if website_status == -1:
        print("Non 2XX response while fetching")
    elif website_status == 0:
        print("Website is the same")
    elif website_status == 1:
        print("Website has changed")Copy
14. Finally, we can finish off our script by adding the call that will call the main function when the script is run.
This simple if statement ensures that the script has been called, rather than imported as a Python module.
if __name__ == "__main__":
    main()Copy
Final Version of the Basic Code
15. At this point, we can now save the script and take it for a test run. The final code should look like what we have shown below.
If you decided to use the nano text editor, you can save by pressing CTRL + X, then Y, followed by the ENTER key.
import os
import sys
import requests

def has_website_changed(website_url, website_name):
    headers = {
        'User-Agent': 'Mozilla/4.0 (compatible; MSIE 6.0; Windows NT 5.1; PIWEBMON)',
        'Cache-Control': 'no-cache'
    }

    response = requests.get(website_url, headers=headers)

    if (response.status_code < 200 or response.status_code > 299):
        return -1

    response_text = response.text

    cache_filename = website_name + "_cache.txt"

    if not os.path.exists(cache_filename):
        file_handle = open(cache_filename, "w")
        file_handle.write(response_text)
        file_handle.close()
        return 0

    file_handle = open(cache_filename, "r+")
    previous_response_text = file_handle.read()
    file_handle.seek(0)

    if response_text == previous_response_text:
        file_handle.close()

        return 0
    else:
        file_handle.truncate()
        file_handle.write(response_text)
        file_handle.close()

        return 1

def main():
    website_status = has_website_changed(sys.argv[1], sys.argv[2])

    if website_status == -1:
        print("Non 2XX response while fetching")
    elif website_status == 0:
        print("Website is the same")
    elif website_status == 1:
        print("Website has changed")

if __name__ == "__main__":
    main()Copy
Testing the Basic Website Monitor on our Raspberry Pi
Now that we have written our website monitor we can run that script on our Raspberry Pi. The following steps will help us ensure the script is working as it should be.
1. First, we should make sure that our website monitor script has execution privileges.
We can give the web monitoring script this privilege by running the following command on the Raspberry Pi.
chmod +x websitemonitor.pyCopy2. Now that the script has the correct permissions we can run it.
When running this script, you will need to know the URL you want to monitor and the name you want to use for its cache.
For our example, we will use “https://pimylifeup.com/” as our URL to monitor and “pimylifeup” as our cache name.
python3 websitemonitor.py https://pimylifeup.com/ pimylifeupCopy3. You can verify that the website monitor created the cache file using the ls command within the terminal.
You should see a file ending in “_cache.txt“. For example, we had “pimylifeup_cache.txt“.
4. You might notice a problem straight off the bat if you rerun this script. Some websites dynamically set metadata, so every request might be different even though no actual content has changed.
For example, you will notice using our website that our script will always mark it as “changed” with the current code.
Our next section will show how we can utilize Pythons beautiful soup to clean up the result and strip out anything that might cause the website to be needlessly marked as “changed“.
Improving the Raspberry Pi Website Monitor with beautifulsoup
In this section, we will improve how our Raspberry Pi monitors websites by utilizing beautifulsoup.
Beautifulsoup is a powerful Python package that allows us to manipulate HTML content easily. For example, we can strip out unneeded content such as style and script tags using this.
1. For this section, you will need to modify the script we created earlier.
We start by adding a new import to the top of the script. This will import the BeautifulSoup module from the bs4 library.
from bs4 import BeautifulSoupCopyWriting a New cleanup_html() Function
Now we need to start our new function. We will use this function to clean up any HTML retrieved from the requests package.
This will help create a more consistent behavior from our Raspberry Pi when monitoring websites.
2. Define this new function by adding the following line to the file.
This function will have a single argument in which we will pass the HTML content for the function to process.
def cleanup_html(html):CopyInstantiate the BeautifulSoup object
3. Here, we create a new BeautifulSoup object. We pass in the HTML string that we want to clean up in the first parameter.
For the second parameter, we set the parser we want to use to handle our HTML. We use lxml as it is very fast while also providing all of the functionality we need.
Fast and more efficient code is always a plus when running something like a website monitor on our Raspberry Pi where resources are limited.
soup = BeautifulSoup(html, features="lxml")CopyCleaning Up the HTML using BeautifulSoup
4. We can now put BeautifulSoup to use by using it to parse and remove certain tags from HTML content.
Using some for loops and BeautfulSoup’s “select” function, we parse and remove “script“, “style“, and “meta” tags.
On each loop, you will notice that we use the “.extract()” function. This function removes that found element from the HTML.
    for s in soup.select('script'):
        s.extract()

    for s in soup.select('style'):
        s.extract()

    for s in soup.select('meta'):
        s.extract()Copy
Returning the BeautifulSoup Object as a String
5. Finally, once BeautifulSoup has finished processing the HTML our website monitor script retrieved, we can now return it.
You can’t simply return the soup object as it exists. Instead, we need to use the “str()” function to convert it into a normal string.
return str(soup)CopyCleaning Up the Retrieved HTML Response
Now that we have our “cleanup_html()” function, we need to modify another part of the script to utilize it.
6. Find and replace the following line of code.
This changes the script so we no longer mindlessly store the response text, and instead first run it through our new function.
Find the following line of code. It should be in the “has_website_changed()” function.
response_text = response.textCopyReplace that line with the following.
response_text = cleanup_html(response.text)CopySaving the New Extended Website Monitor
7. After you have made all those changes to the file, the code should look like what we have shown below.
If you are using nano, remember to save the file by pressing CTRL + X, then Y, followed by the ENTER key.
import os
import sys
import requests
from bs4 import BeautifulSoup

def cleanup_html(html):
    soup = BeautifulSoup(html, features="lxml")

    for s in soup.select('script'):
        s.extract()

    for s in soup.select('style'):
        s.extract()

    for s in soup.select('meta'):
        s.extract()

    return str(soup)

def has_website_changed(website_url, website_name):
    headers = {
        'User-Agent': 'Mozilla/4.0 (compatible; MSIE 6.0; Windows NT 5.1; PIWEBMON)',
        'Cache-Control': 'no-cache'
    }

    response = requests.get(website_url, headers=headers)

    if (response.status_code < 200 or response.status_code > 299):
        return -1

    response_text = cleanup_html(response.text)

    cache_filename = website_name + "_cache.txt"

    if not os.path.exists(cache_filename):
        file_handle = open(cache_filename, "w")
        file_handle.write(response_text)
        file_handle.close()
        return 0

    file_handle = open(cache_filename, "r+")
    previous_response_text = file_handle.read()
    file_handle.seek(0)

    if response_text == previous_response_text:
        file_handle.close()

        return 0
    else:
        file_handle.truncate()
        file_handle.write(response_text)
        file_handle.close()

        return 1

def main():
    website_status = has_website_changed(sys.argv[1], sys.argv[2])

    if website_status == -1:
        print("Non 2XX response while fetching")
    elif website_status == 0:
        print("Website is the same")
    elif website_status == 1:
        print("Website has changed")

if __name__ == "__main__":
    main()Copy
8. You can now test the script again. This time the results should be significantly more consistent. By removing the “script“, “style“, and “meta” tags, we should reduce the chances of getting a false positive.
If you are using this example on our website, every request should no longer be marked as “changed“.
Adding Email Support to the Raspberry Pi Website Monitor
There isn’t a lot of use for our Raspberry Pi to monitor websites if it doesn’t give you some sort of notification that a website has changed.
In this section, we will be extending our functionality by sending an email whenever the script detects a change. Please note that this will require you to know SMTP details for whoever you are using to process your emails.
For our example, we will be using Gmail’s SMTP server details.
Adding a New Import
To perform SMTP connections within Python, we need to import another library. Luckily for us, this library is included with Python.
1. Add the following line to your list of imports at the top of the script.
This line will import the “smtplib” library and allow us to make SMTP connections easily.
import smtplibCopyDefining Constants to Store Email Details
We need to define some constants at the start of the Python script. The following lines will need to be added underneath the other “import” statements.
While Python doesn’t strictly support constants, we will improve by naming these variables with capital letters. You should not change the value of these during runtime.
SMTP_USER
2. This constant defines the login username for your SMTP connection. If you are using Gmail, this will be the email you login with.
We use the value stored within this constant to perform the SMTP connection.
SMTP_USER='example@gmail.com'CopySMTP_PASSWORD
3. Within this constant, you will need to define the password for the account that is performing the SMTP connection.
If you are using Gmail, this is your account’s password. Or, if you have 2FA on (Which you should), you will need to create an application password.
SMTP_PASSWORD='PASSWORD'CopySMTP_HOST
4. The “SMTP_HOST” constant stores the IP or URL that it should use to make the SMTP connection.
For our example, we are using Gmail’s SMTP connection details.
SMTP_HOST='smtp.gmail.com'CopySMTP_PORT
5. With this variable, we define the port that our Raspberry Pi website monitor will use to send an email when it notices a change.
In the example below, we use Gmail’s port for implicit SSL (port 465).
SMTP_PORT=465CopySMTP_SSL
6. Most email services these days support SSL or TLS. For our code, we will only have support for SSL and not STARTTLS.
To enable this support, make sure you set the following constant to True. If you want to disable SSL, set this value to False.
SMTP_SSL=TrueCopySMTP_FROM_EMAIL
7. Finally, we can now specify the email address from which this email will be coming. This email must be one that you have set up.
For example, using Gmail, this must be an email associated with your account. If you are using a transactional mail service like Mailgun, you must have that address and domain name configured.
SMTP_FROM_EMAIL='example@gmail.com'CopySMTP_TO_EMAIL
8. The last variable that needs to be set is the one specifying where the script should send this email.
Type in whichever email you want to receive notifications about changes in the specified website.
SMTP_TO_EMAIL='sendto@gmail.com'CopyWriting our email_notification() Function
Now that we have all of the various constants defined, we can move on to writing our “email_notification()” function. This function will handle creating the SMTP connection and sending the email.
9. Start by defining our new function. It will have two parameters. The first parameter lets us easily set the subject line, and the second parameter lets us set the message itself.
def email_notification(subject, message):CopyCreating the SMTP Connection
10. We start this function by creating the SMTP connection. Since we want support for SSL and unencrypted connections, we need two separate calls split by an if statement.
If “SMTP_SSL” is set to True, we create an SMTP connection and store that connection within the “smtp_server” variable.
Likewise, we do something similar when SSL is disabled. We pass in both the SMTP_HOST and SMTP_PORT variables when creating the connection.
    if (SMTP_SSL):
        smtp_server = smtplib.SMTP_SSL(SMTP_HOST, SMTP_PORT)
    else:
        smtp_server = smtplib.SMTP(SMTP_HOST, SMTP_PORT)Copy
Logging into the SMTP Server
11. Now that we have a connection to the SMTP server, we can begin sending an email.
Our first step is to send an “ehlo” message to the server. This tells the server various things, but we won’t be getting too far into it.
We then need to log in to the server by sending a login message. With this login call, we pass in the user and password stored in “SMTP_USER” and “SMTP_PASSWORD“.
    smtp_server.ehlo()
    smtp_server.login(SMTP_USER, SMTP_PASSWORD)Copy
Formatting the Email
12. Our next step is to create the email we will send through the SMTP connection.
This is one of the most critical parts, as it is how our Raspberry Pi will notify you when it monitors a website change.
You can modify this format to how you want. Just ensure you keep the “FROM“, “TO” and “Subject” lines how they are defined here. Each one on its separate line.
There also needs to be a single blank line before starting the content of your email.
    email_text = \
"""From: %s
To: %s
Subject: %s

%s
""" % (SMTP_FROM_EMAIL, SMTP_TO_EMAIL, subject, message)
Copy
Sending the Email
13. We end this function by using our SMTP connection to send the email.
Into this function call, we pass in the email stored in “SMTP_FROM_EMAIL“, “SMTP_TO_EMAIL“, and finally, the email message we formatted previously.
Finally, we close the SMTP connection once the email has been sent.
    smtp_server.sendmail(SMTP_FROM_EMAIL, SMTP_TO_EMAIL, email_text)

    smtp_server.close()Copy
Adding Calls to the email_notification() Function
Now that we have our required function written, we need to add some calls to them within the code.
For this section, we will be making changes to the “main()” function.
14. Find the following line within your Python script.
        print("Non 2XX response while fetching")
Copy
Add the line shown below above it.
This will make the script send an email whenever the Raspberry Pi website monitor runs into an error when connecting to the website.
        email_notification("An Error has Occurred", "Error While Fetching " + sys.argv[1])
Copy
15. Additionally, we should also add a line so that we get notified when the website has changed.
Find the following line within your script. It should be just below the last line you found.
        print("Website has changed")
Copy
Add the following line above it. This line will send an email whenever the website has been detected as changed.
        email_notification("A Change has Occurred", sys.argv[1] + " has changed.")
Copy
Final Version of the Code
16. After all of the changes have been made to your script, the code should look like what we have shown below.
Remember to save your code before proceeding any further.
import os
import sys
import requests
from bs4 import BeautifulSoup
import smtplib
SMTP_USER='example@gmail.com'
SMTP_PASSWORD='password'
SMTP_HOST='smtp.gmail.com'
SMTP_PORT='465'
SMTP_SSL=True
SMTP_FROM_EMAIL='example@gmail.com'
SMTP_TO_EMAIL='sendto@gmail.com'
def email_notification(subject, message):
"""Send an email notification.
message - The message to send as the body of the email.
"""
if (SMTP_SSL):
smtp_server = smtplib.SMTP_SSL(SMTP_HOST, SMTP_PORT)
else:
smtp_server = smtplib.SMTP(SMTP_HOST, SMTP_PORT)
smtp_server.ehlo()
smtp_server.login(SMTP_USER, SMTP_PASSWORD)
email_text = \
"""From: %s
To: %s
Subject: %s
%s
""" % (SMTP_FROM_EMAIL, SMTP_TO_EMAIL, subject, message)
smtp_server.sendmail(SMTP_FROM_EMAIL, SMTP_TO_EMAIL, email_text)
smtp_server.close()
def cleanup_html(html):
"""Cleanup the HTML content.
html - A string containg HTML.
"""
soup = BeautifulSoup(html, features="lxml")
for s in soup.select('script'):
s.extract()
for s in soup.select('style'):
s.extract()
for s in soup.select('meta'):
s.extract()
return str(soup)
def has_website_changed(website_url, website_name):
"""Check if a website has changed since the last request.
website_url - URL that you want to monitor for changes.
website_name - Name used for the cache file.
"""
headers = {
'User-Agent': 'Mozilla/4.0 (compatible; MSIE 6.0; Windows NT 5.1; PIWEBMON)',
'Cache-Control': 'no-cache'
}
response = requests.get(website_url, headers=headers)
if (response.status_code < 200 or response.status_code > 299):
return -1
response_text = cleanup_html(response.text)
cache_filename = website_name + "_cache.txt"
if not os.path.exists(cache_filename):
file_handle = open(cache_filename, "w")
file_handle.write(response_text)
file_handle.close()
return 0
file_handle = open(cache_filename, "r+")
previous_response_text = file_handle.read()
file_handle.seek(0)
if response_text == previous_response_text:
file_handle.close()
return 0
else:
file_handle.truncate()
file_handle.write(response_text)
file_handle.close()
return 1
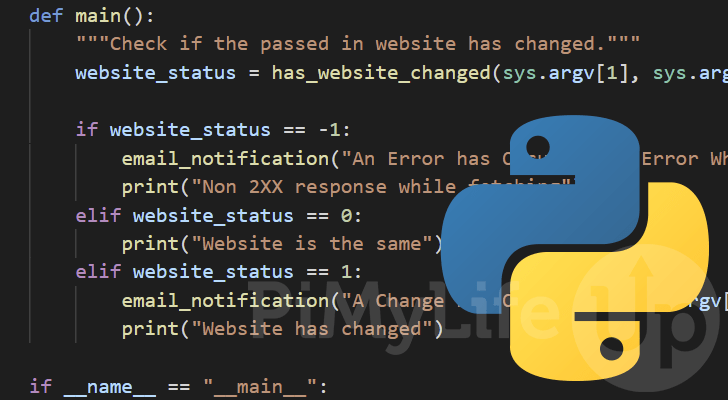
def main():
"""Check if the passed in website has changed."""
website_status = has_website_changed(sys.argv[1], sys.argv[2])
if website_status == -1:
email_notification("An Error has Occurred", "Error While Fetching " + sys.argv[1])
print("Non 2XX response while fetching")
elif website_status == 0:
print("Website is the same")
elif website_status == 1:
email_notification("A Change has Occurred", sys.argv[1] + " has changed.")
print("Website has changed")
if __name__ == "__main__":
main()Copy17. If everything is working as it should, you should now receive email notifications from your website monitor.
Whenever it is run and notices a change in the website, it will send an email. Additionally, if that website goes down or returns a non 2XX status code, it will also send an email.
Running your Raspberry Pi Website Monitor Periodically
Now that you have written the Python script to monitor websites, you will want it to run periodically.
While you could add an infinite loop within the script to run it continually, we will instead use a simple cronjob.
1. Before proceeding, you need to make sure you have our Python script on your Raspberry Pi.
If you chose to skip the previous sections, you can obtain the script from our GitHub repository. Just make sure you fill in the details for your SMTP connection.
This part of the guide will assume that the script sits within the “pi” user’s home directory (/home/pi/).
2. We can now edit the crontab so that it will call our script every minute.
Use the following command to begin editing the current user’s crontab.
crontab -eCopyIf prompted on what text editor you want to use, we recommend using “nano“.
3. Add the following line to the bottom of the file.
You will need to adjust the command slightly to point to the URL you want to monitor. Additionally, you need to set a cache name. The cache name can be any string, its simply to separate this request from another.
* * * * * /usr/bin/python3 /home/pi/websitemonitor.py WEBSITEURL CACHENAME4. You can save the changes to crontab by pressing CTRL + X, then Y, followed by the ENTER key.
5. Your Raspberry Pi will now begin to monitor the defined website every minute.
The script should now notify you if it picks up a change in the website’s content.
Conclusion
Throughout this guide, we have shown you you can set up a straightforward website monitor on your Raspberry Pi.
This Python script will grab the latest version of the specified URL every time it is called. Then, it caches that response to see if a change has occurred on the subsequent request.
This script can send you an email whenever a change occurs or when the URL is unavailable using an external email server.
If you have had any issues with this website monitor script, please comment below.
Be sure to check out our many other Raspberry Pi projects and guides.


Hi Emmet,
thanks for your support, it runs now. Unfortunately it sends me “A change has occured” email almost every minute 🙁
I´ve downloaded the webpage 3 times and compared them uisng winmerge and yes, the HTML is different, the website looks the same though. I have no idea how to filter those diferences. E.g. the links on the website are just in a different order in the HTML every time I download the website, but when I look at the website all links are at the same position. I guess that´s already a change to the python script and the reason why I get those emails!?
Hi Dan,
Sadly, this code is fairly simple and is strictly comparing whether the HTML is an exact match. Any change at all will trigger that message.
The only solution would be to exclude the links that are continually being moved around within the HTML document.
Cheers,
Emmet
Hi, I get a “
ModuleNotFoundError: No module named 'bs4‘” -Error. I already installed bs using “pip3 install requests beautifulsoup4 lxml“.Any idea?
Hi Dan,
I ran into another weird issue while rerunning this tutorial, so I have rejigged it slightly.
The tutorial has been changed so we now install the lxml, and beautifulsoup4 packages from the package repository rather than through “pip”.
To install these, you will want to run the following command.
Please let me know if that solves the issues you are running into.
Cheers,
Emmet