In this project, we will show you how to install and use LazyDocker on the Raspberry Pi.
LazyDocker is a highly configurable yet simple way to manage Docker containers running on your Raspberry Pi.
This tool is designed to help you manage your containers directly from a sleek and easy to use terminal interface. It even has support for a mouse, so you aren’t completely stuck with relying on a keyboard to navigate the interface.
Using LazyDocker, you can manage almost all aspects of your setup without remembering the numerous Docker commands. You can even view the logs of your containers, watch their CPU usage and more.
If you don’t find the functionality you require, the LazyDocker software is also reasonably configurable. You can edit its configuration to add additional commands and screens. You can even edit the config directly within the tools terminal interface.
Best of all, this tool has support for ARM devices, so we can use it to manage our Docker containers running on our Raspberry Pi.
If you are someone who wants a simple to use terminal interface to manage their Docker containers then you can’t go passed LazyDocker.
Of course, if you want something accessible remotely you still can’t go past tools such as Dockge and Portainer.


Equipment
Below is a list of equipment we used to install and run LazyDocker on our Raspberry Pi.
Recommended
Optional
We last tested this tutorial on a Raspberry Pi 5 running the latest version of Raspberry Pi OS Bookworm.
Installing and Running LazyDocker on your Raspberry Pi
In the following sections, we will walk you through the process of installing the LazyDocker tool on your Raspberry Pi.
In addition to installing this Docker command-line interface, we will also give you a very quick rundown of how to use it.
Preparing your Raspberry Pi
1. The first thing you will want to do is install Docker on to your Raspberry Pi. There is no real point in setting up LazyDocker if you don’t have the very thing it was designed to manage.
If you already have Docker installed, you can safely skip to the next step.
https://pimylifeup.com/raspberry-pi-docker/2. Your next step is to install the Go Compiler. LazyDocker is a tool written in Go, and the compiler offers a super easy install option that will grab, compile, and install the latest version of LazyDocker in a single command.
To install this compiler, follow our guide on installing Go on the Raspberry Pi.
https://pimylifeup.com/raspberry-pi-golang/Installing LazyDocker onto your Raspberry Pi
3. With your Raspberry Pi now prepared, all you need to do to download and install the latest version of LazyDocker to your Raspberry Pi is to run the following command.
This process shouldn’t take long to complete, especially if you run this on a Raspberry Pi 5 or newer.
go install github.com/jesseduffield/lazydocker@latestCopyRunning and LazyDocker
4. To launch LazyDocker, you only need to run the following command within the terminal.
As long as your user has permission to access the Docker runtime, LazyDocker will be able to control your Docker containers.
If your user isn’t a part of the “docker” group, you may have to use “sudo” in front of this command.
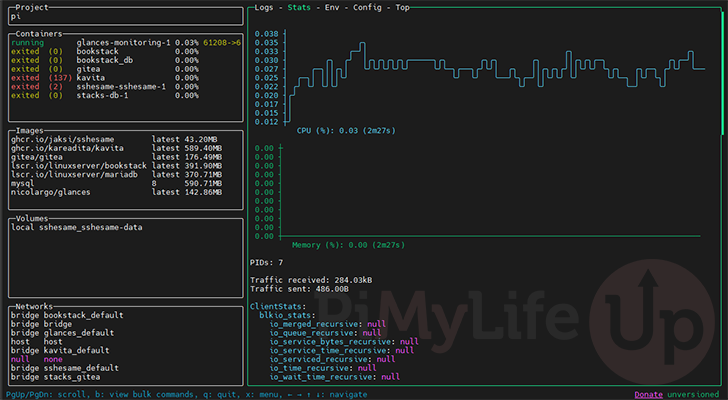
lazydockerCopy5. Now that you have LazyDocker open on your Raspberry Pi, you can now use it to manage the various aspects of your Docker containers.
There are a few ways to navigate through this terminal interface. If you are using a mouse, you can click various elements to change between them. For example, you can click a container to pull up its information and then click the tab headers to swap between them.
If you only have a keyboard, you will want to use the arrow keys to navigate between each section.
- UP and DOWN arrow keys will change the selected elements in the current section.
- The LEFT and RIGHT arrow keys will change the highlighted section.
To change tabs on the right-hand side of the screen, you will want to use the square bracket keys ([ ]). Additionally, the PG UP, and PG DN keys will allow you to scroll up and down.
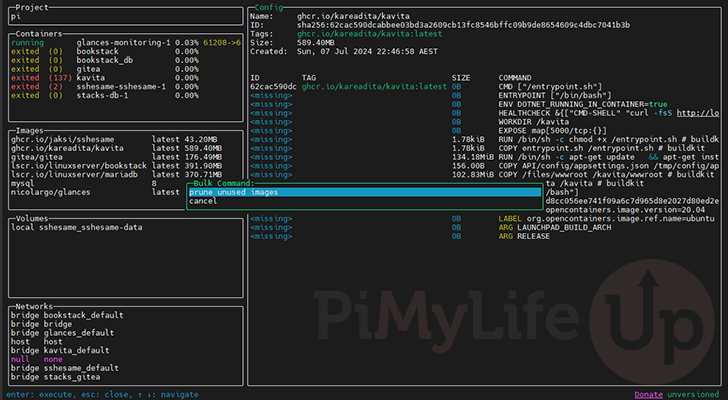
Pressing the “B” key will bring up bulk commands related to your highlighted section.
For example, with images selected, you can press “B” and select the “prune unused images” option. This will delete any image that you aren’t using.
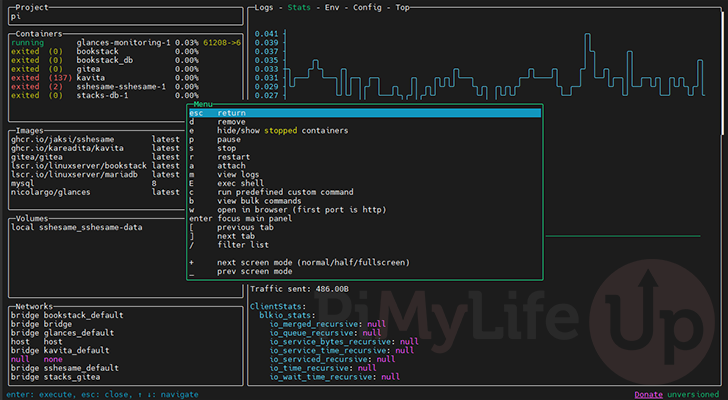
If you want to get related key binds for your current section, press the “X” key.
This will show you the various keys you can press to perform particular actions. You can also select those actions from this menu.
To exit out of LazyDocker, you simply need to press Q.
Conclusion
At this point in the tutorial, you should have LazyDocker installed on your Raspberry Pi.
This tool allows you to easily manage your Docker containers from the terminal. It packs all the functionality you could need and gives you easy access to information like your Docker logs.
Please feel free to post a comment below if you have any questions about running this tool on your Pi.
If you liked this tutorial, we highly recommend that you explore our many other Raspberry Pi projects.