In this guide, we will be showing you how you to get started with a Raspberry Pi.
If you are brand new to the world of Raspberry Pi, you might initially feel a little overwhelmed. There are many different types of Pi’s, each with its pros and cons.
On top of this, we also point you in the direction of some of the accessories you will want when you first start with the Raspberry Pi.
Once you have everything ready, we will walk you through some of the initial steps of installing and starting up your
If you ever feel like this tutorial is missing anything, drop us a comment below and we will try our best to point you in the right direction and improve this getting started guide over time.
Choosing your Raspberry Pi and Accessories
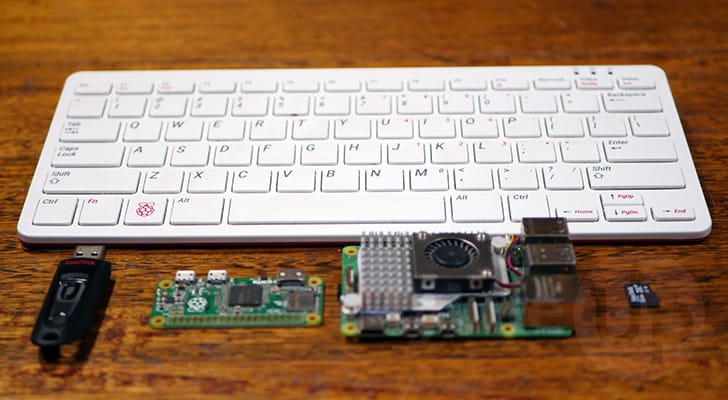
The very first part of this process is choosing the Raspberry Pi you want to use and the accessories you need to get started with it.
The Pi project range has grown significantly since its original release. It started off with a single model and now has blown out two or four different form factors, each with various variations.
What Raspberry Pi Should You Start Off with
Now, what Raspberry Pi you want to use depends highly on what you intend to do with it.
Most people will choose between the three main form factors: the credit card-sized main series, the smaller Pi Zeroes, and finally, the combined keyboard and Raspberry Pi kits.
There is also the Compute Module range of Raspberry Pi’s. If you are just getting started, we recommend avoiding these as they are more aimed at people building their own embedded systems than the average user.
If you want a quick answer to this question. If you are new to Pi’s and are unsure what you want to do, we recommend that you stick with the mainline Pi’s, such as the Raspberry Pi 5 and the Pi 4.
The Keyboard Series
If you only want to use your Raspberry Pi as a desktop PC, you can’t go past the keyboard form factor.

The keyboard series of Raspberry Pi features much of the same hardware functionality as the mainline but with a few slight drawbacks. While you still maintain access to the GPIO header, you won’t be able to use any of the various third-party HATs that add additional functionality to your Pi.
Additionally, due to the form factor of these devices, you also lose access to some of the additional input and output connections. For example, with the Pi 500, there is zero access to the PCIE interface and no access to the MIPI display connector.
You can purchase a Raspberry Pi 500 or 400 from Amazon (Affiliate Links).
Credit Card Form Factor
The form factor of the Raspberry Pi that almost everyone will be familiar with is still the most popular and the one we would choose. It is the main line that the Pi foundation develops, and it is always packed with the latest features while also offering the best performance.
These variants of the Raspberry Pi can do most things you throw at it. The GPIO pins allow you to control other devices easily, the camera interface will enable you to connect particular cameras and screens, and it also has more than enough performance to run various software such as Plex. These are designed to not necessarily need to be plugged into a keyboard and screen and make a great headless device.
When selecting this Raspberry Pi, we always recommend that people stick with the latest available. The extra bit of performance is usually worth it and allows you to get even more out of this tiny pc and also just help extend the devices lifespan. There usually isn’t a huge amount of saving in purchasing the older generation.
Additionally, there are often key improvements in the device’s connectivity by using the latest release. For example, with the Raspberry Pi 5, you can access a PCIE connector that allows you to connect an M.2 SSD to your Pi.
Once you decide to go with the credit card form factor of the Raspberry Pi, the next choice you will want to make is the amount of RAM. The amount of RAM is probably one of the biggest factors that increase the price of the Pi.
The amount of RAM you want depends on how much you intend to do on your Pi. We would personally recommend the 8GB as a great option. However, if you want to save a bit of money, the 4GB variants are still more than functional enough.
If you don’t mind spending the extra money, the newer Pi’s that offer 16GB of RAM are always a great option. You will never be sorry to have more RAM available, and it will allow you to squeeze more out of your Pi. However, most programs will begin to struggle with the Pi’s CPU than the RAM at that amount.
If you have decided to go down this route, you can purchase a Raspberry Pi 5 or Raspberry Pi 4 through Amazon (Affiliate Links).
The Zero Series
Out of all of the form factors we are covering in this guide, the Zero series is one of the most different. It is still a Raspberry Pi at its core, but it has many different features stripped back to produce a smaller more affordable device.

If you intend to do tasks that rely on a lot of RAM or CPU, you should stick with the bigger variants. The core place that the Zero series cuts down is in these two key areas.
However, outside of the weaker CPU and minimal RAM, the Pi Zero series does offer the full set of GPIO pins, and as long as you pick the “W” variants, you will even have Wi-Fi and Bluetooth.
The primary use case for the Zero series is where space is incredibly important, and you need to maintain a minimal power profile. For example, if you do something battery-powered, you will get a longer run time using the Zero series.
When choosing a Raspberry Pi Zero, we highly recommend spending the little bit extra for the “W” variants. Additionally, the Pi Zero 2 has a significantly better process than the original one.
You can find the various Raspberry Pi Zero devices for sale through Amazon (Affiliate Links).
Recommended Peripherals
Once you have chosen the Raspberry Pi that you want to get started with, you will need to pick out a few other components that you will want to have around.
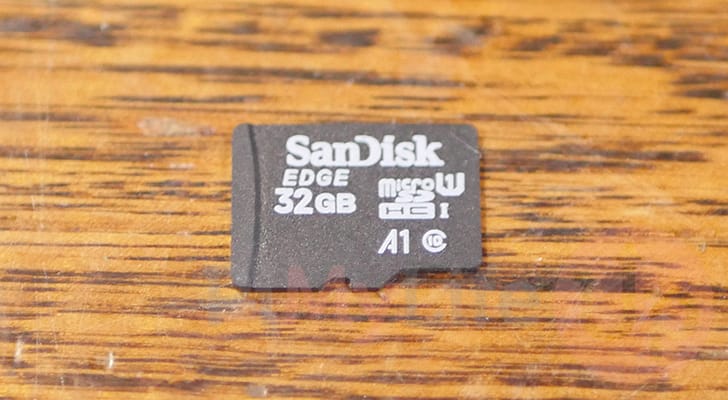
MicroSD Card or USB Drive
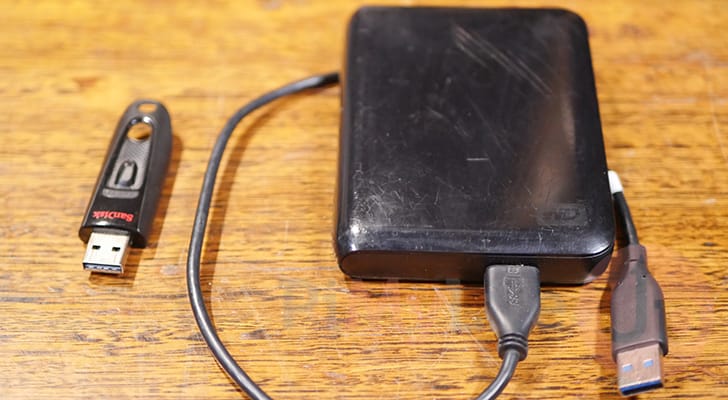
The first thing you want to get for your Raspberry Pi is a MicroSD Card or a USB storage device. Your choice here depends more on personal preference and whether you want to sacrifice a USB port or not.
The bootloader used on the newer Pi’s will automatically detect the boot drive using the order, Micro SD Card, USB Drive, and then M.2 NVME (If you are using the Pi 5).
Whichever one you choose, we highly recommend that you have at least 32GB in size. This gives you more than enough space for most things you will want to do.
Whichever one you decide to go with, we highly recommend that you have at least 32GB in size. This gives you more than enough space for most things you will want to do.
However, if you want to turn your Raspberry Pi into a NAS, or use a software package like Immich, the more space you have the better.
If you are deciding on where to get your MicroSD Card or USB Storage drive (Affiliate Links), Amazon is usually a good place to purchase either of these. You can get large sized MicroSD Cards for a decent price.
Official Power Supply
The next step in getting started with the Raspberry Pi is choosing how you will power the device. Our simplest advice here is to stick with the official Raspberry Pi power supplies. They are priced pretty competitively and have guaranteed support for the Pi.
While you can get away with using a generic USB charger, the Pi, especially the Raspberry Pi 5, does have some weird power requirements which means the average USB charger may not be able to provide the right amount of power, leading to a persistent low voltage warning and potential stability issues
For the Raspberry Pi 4, 5, 400, and 500, you will need to have a USB-C power connector.
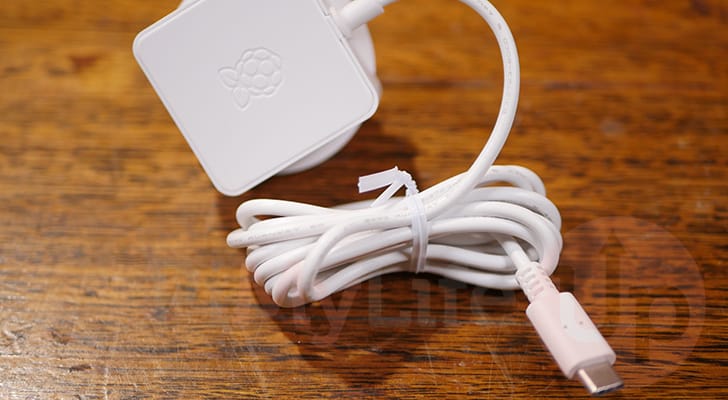
Older versions of the Raspberry Pi, including the Zero series, use a Micro-USB cable for its power connector.

Depending on the route you take, sellers often sell various compatible power supplies for the Raspberry Pi through Amazon (Affiliate Link).
Display Cable
If you intend to use your Raspberry Pi with it connected to a monitor, the next thing you want to purchase is a display cable.
What display cable you purchase depends on what Raspberry Pi you use. Different models of the Pi use different display cables which can be something that is a bit confusing for those just getting started with the Raspberry Pi.
You shouldn’t worry too much about is about the cable brand you are buying; you should be able to get away with super cheap ones from places like Amazon.
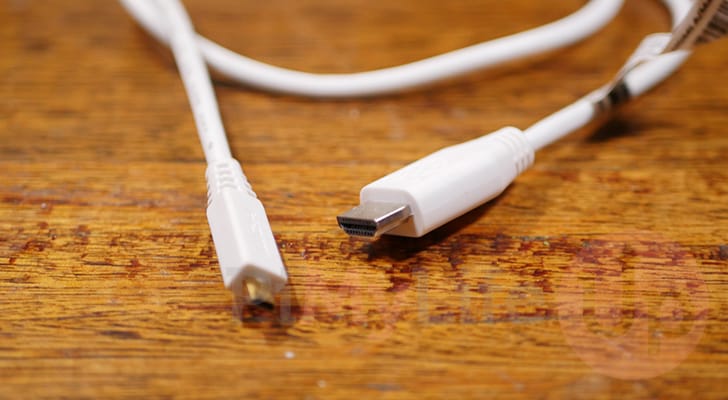
If you are using a Raspberry Pi 5, 4, 500, or 400, you will want to purchase a micro-HDMI to standard HDMI cable (Not to be confused with a Mini-HDMI cable). This end of this cable is super small and should look a bit like what we have shown below
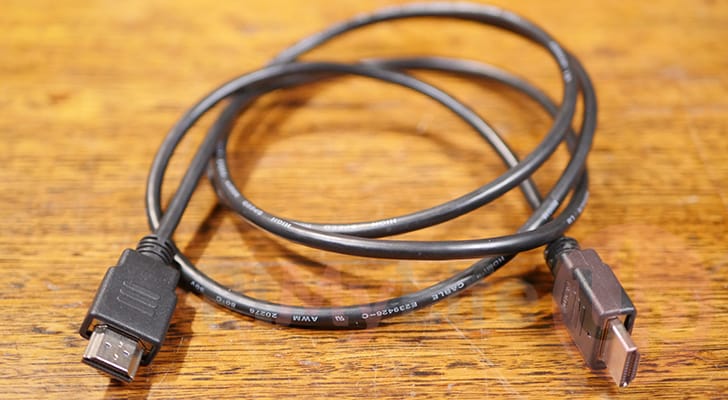
For the older Raspberry Pi’s such as the Raspberry Pi 3, 2 and 1, you will want to purchase a standard HDMI to standard HDMI cable. These are something you are more likely to have lying around as a huge range of devices use them.
Finally, going down the Raspberry Pi Zero route, you must use a mini-HDMI to standard HDMI cable. These are slightly flatter and larger cables compared to the micro-HDMI used by the newer Pi’s, but they are still smaller than the typical HDMI cable.
A great source for finding various HDMI cables such as the Micro–HDMI, Mini-HDMI and standard HDMI cable is Amazon (Affiliate Links). The Amazon basics cables are usually really good value for money and are ones we often use personally.
Keyboard and Mouse
We also recommend that those who are getting started with the Raspberry Pi use a keyboard and mouse.
You can’t go too wrong here as long as your keyboard and mouse can utilize a USB connection, whether that is using a USB dongle to connect or being plugged directly into the Raspberry Pi itself.
When you are just starting out, we would personally try to avoid Bluetooth mice and keyboards. Pairing devices can be a messy experience, especially for those just trying to find their feet with Linux and the Raspberry Pi.
Of course, if you are using the Raspberry Pi 500 or 400, you will only need to invest in a mouse as that device obviously comes with its very own keyboard.
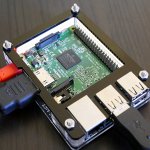
Cases
When getting started with a Raspberry Pi, a case is definitely not a requirement, but it can add a bit of extra protection to your device. With some cases, they can even significantly improve the cooling of your Raspberry Pi, either by acting as a giant heat sink or adding a fan.
Most of the time, cases are more up to a pure aesthetic choice than anything. We have a list of some cases that we have tried out over the years. If you have a 3D printer, you can even 3D print your own case , which can be a fun way of making your Raspberry Pi yours.
You can even find cases that come packed with additional functionality such as the addition of power buttons, screens, and more.
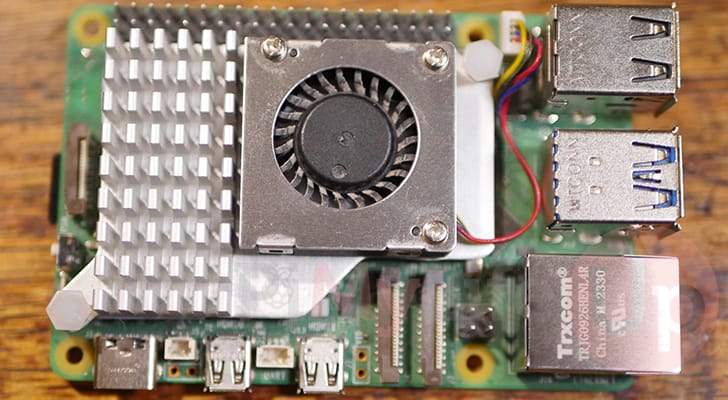
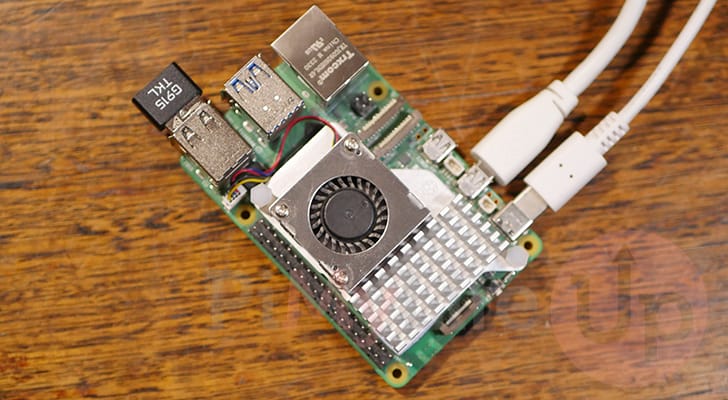
Cooling the Raspberry Pi
While cooling isn’t essential to use a Raspberry Pi, it can definitely help improve performance and stop the device from thermal throttling. Thermal throttling happens when your Raspberry Pi gets to hot and needs to slow down a bit to keep temperatures in check.
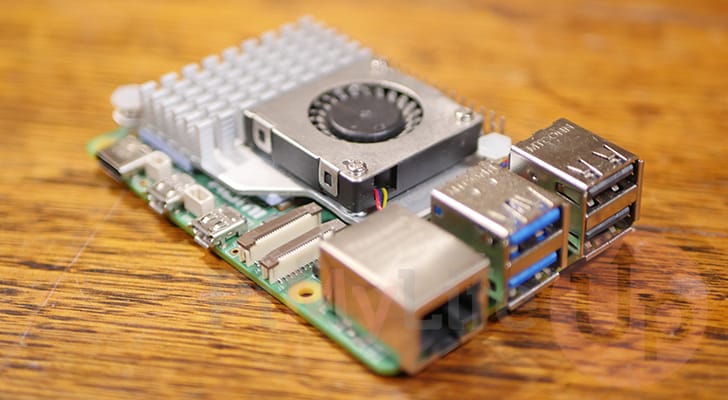
If you are planning on getting a Raspberry Pi 5, we highly recommend getting the official active cooler. This is basically a super affordable little heatsink with a tiny fan that will help keep the temperatures in check and maximize the performance you can get out of this device.
You can find the active cooler for sale from various sellers as well through Amazon (Affiliate Link).
Getting Started with Your First Raspberry Pi Operating System
Once you have your Raspberry Pi in your hands, the very first thing you will need to do is set up the operating system.
Thanks to the Raspberry Pi imager tools, you will find getting started with an operating system one of the easiest parts of this whole process.
1. The first thing you will want to do is install the Raspberry Pi imager onto your device. This imaging software supports Windows, macOS, and Ubuntu, so it should work fine no matter what device you are running
You can find the imager by downloading it from the official Raspberry Pi website.
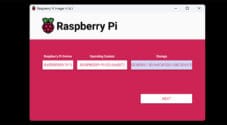
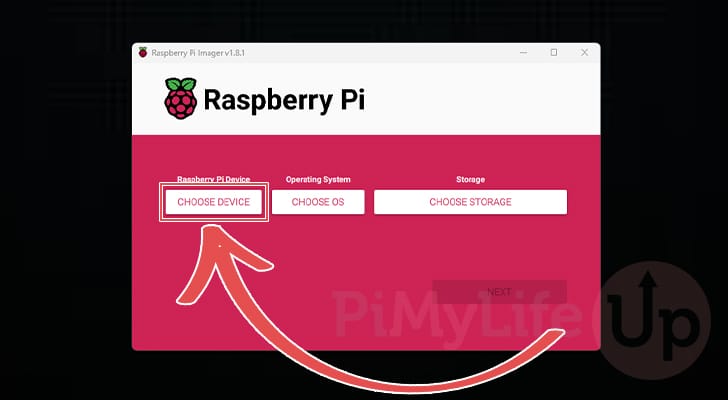
https://www.raspberrypi.com/software/2. Once you have the Raspberry Pi imager open, you will be greeted with three different options.
To get started installing your Raspberry Pi’s operating system you will need to select the “CHOOSE DEVICE” option.
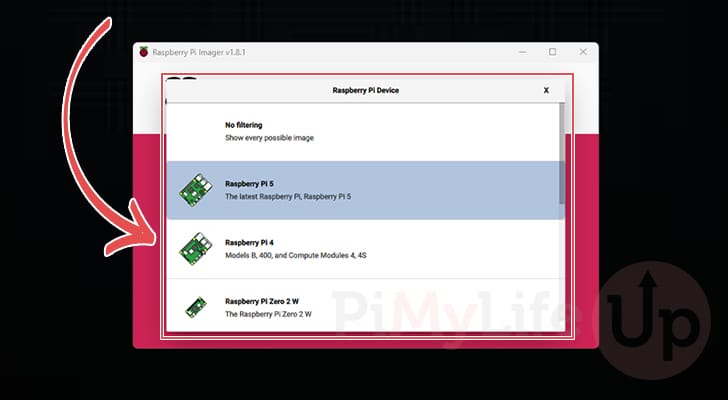
3. You will now see a list of the various Raspberry Pi’s that the imager supports.
Use this box to select the Pi on which you are installing the operating system. This basically helps tell the imager what operating systems it can offer you. As an OS that works on one device may not work on another, especially when you go away from Raspberry Pi OS.
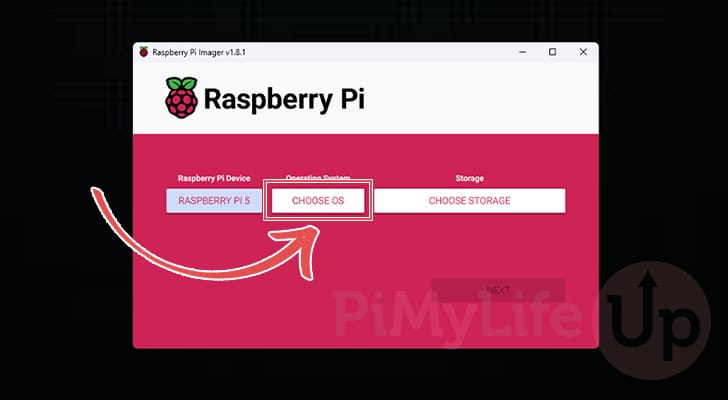
4. Once you have selected your Raspberry Pi selected, you will want to click the “CHOOSE OS” button.
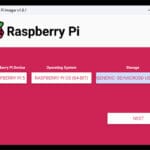
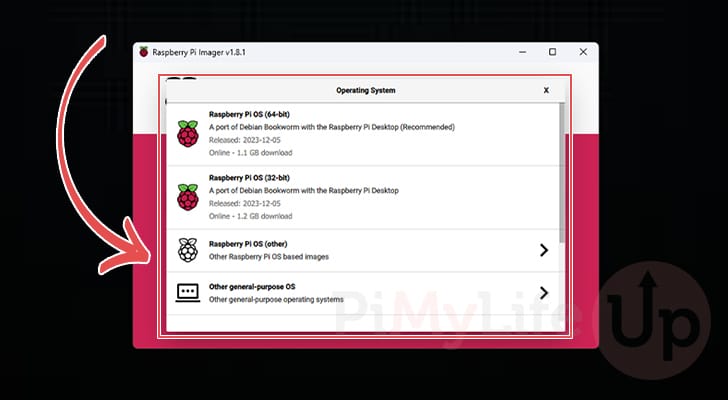
5. You will now be greeted with a wide range of the operating systems that you can install for your Raspberry Pi.
If you are just getting started with the Raspberry Pi, we recommend that you stick with the official Raspberry Pi OS images. These have the best support for the hardware and are where you are least likely to run into issues. It can be tempting to go with a more known operating system like Ubuntu, but we personally find this to not be as nice of an experience on the Raspberry Pi.
When presented with the choice between 64-bit or 32-bit, we recommend that, for the vast majority of cases, you select the 64-bit option.
You now have a choice here. First, do you want a desktop interface, or are you planning on running a lighter operating system?
If you want a desktop interface, the two options presented at the top of this list are the ones you will want to select. These are the variants of Raspberry Pi OS with a desktop interface and some recommended software.
Alternatively, select the “Raspberry Pi OS (other)” option then select one of the “lite” variants of Raspberry Pi OS. These lack a desktop interface but can be a great choice when running software that doesn’t need a full desktop interface or running it headless.
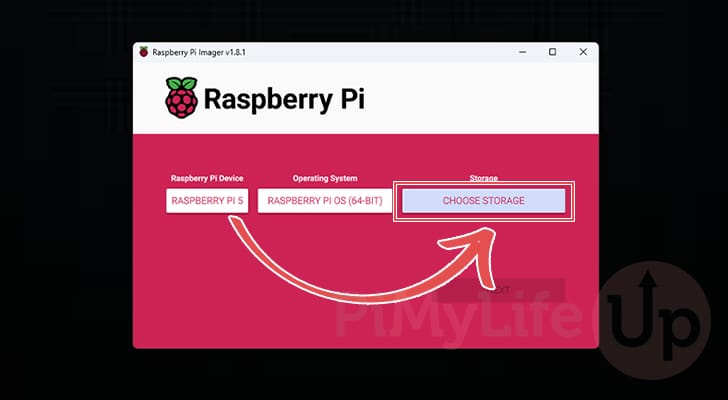
6. With the operating system selected, your next step is to select the storage device on which you will install the operating system.
To select this storage device, click the “Choose Storage” button.
7. You should now see a list of devices that the Raspberry Pi imager can write your chosen operating system to. In our case it has detected our 128gb microSD card.
This same dialog will also show any USB drives you have attached as well. Just be careful when selecting the correct drive.

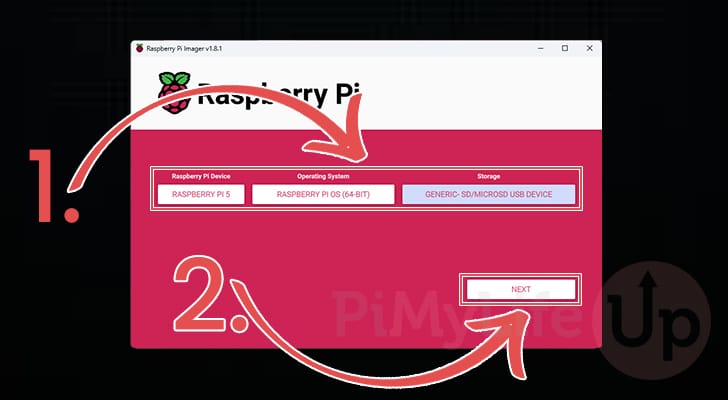
8. You will now want to verify that everything has been selected correctly (1.).
Once you are happy you have set everything properly, click the “NEXT” button (2.).
9. Now here is where some people getting started with the Raspberry Pi can get tripped up a little. The Raspberry Pi imager has some incredibly useful functionality baked into it that allows you to set up some key parts of your operating system.
Personally, we recommend that you select the “EDIT SETTINGS” button (1.). However, if you want to just write the OS and set things up later, click the “NO” button instead (2.).

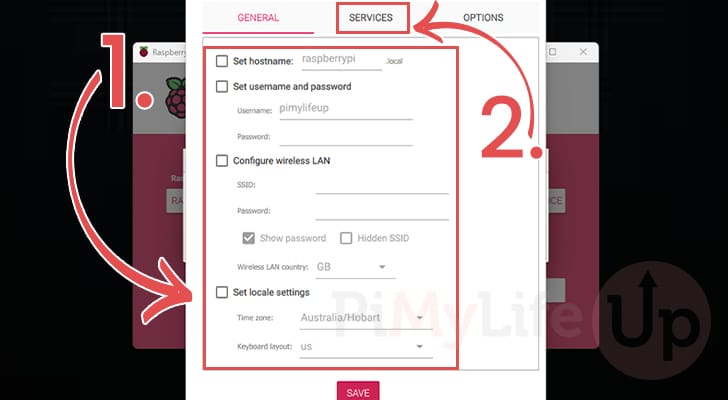
10. This first screen allows you to set up several important bits of information (1.). On this screen, we recommend configuring a few key pieces of information, this can save you a lot of hassle of messing around with an operating system that you aren’t yet familiar with.
- We highly recommend that you start off by toggling on the username and password checkbox. Once ticked, type in a username and password that you will use to login to your Raspberry Pi.
- Next, if you are using a Wi-Fi connection for your Raspberry Pi, toggle on the “
Configure wireless LAN” option and then enter your SSID and password for your wi-fi network.
Once you have your username, password. and Wi-Fi setup, change to the “SERVICES” tab (2.).
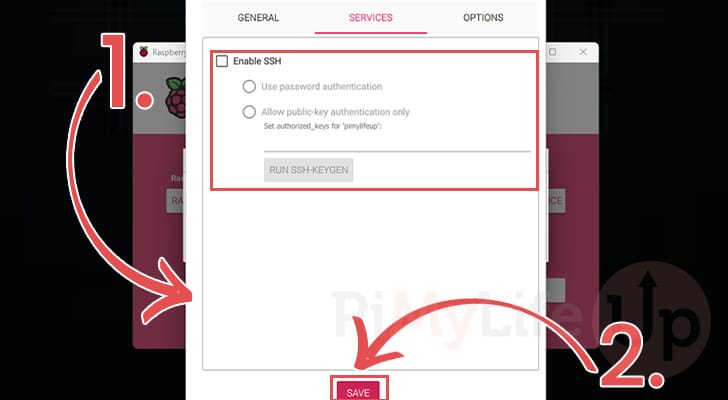
11. On this screen, there is a single service that we highly recommend turning on. Toggle the “Enable SSH” option (1.) on and ensure the “Use password authentication” option is selected.
SSH is a remote protocol that will allow you to manage your Raspberry Pi without needing to have a keyboard and mouse plugged in. While require for a headless setup, it is incredibly useful in most other cases as well.
Once you are done, click the “Save” button (2.).
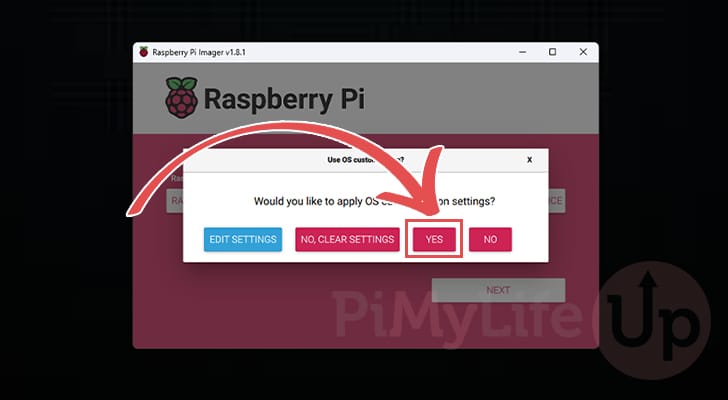
12. After customizing your OS, you will want to now click the “YES” button to begin flashing this operating system to your chosen storage device.
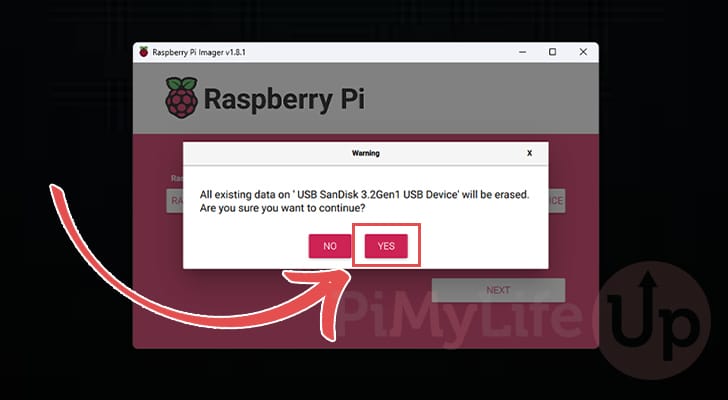
13. You will now be warned that all existing on your storage device will be erased during the process of installing your Raspberry Pi’s new operating system.
If you are happy that you have selected the right storage device, click the “YES” button.
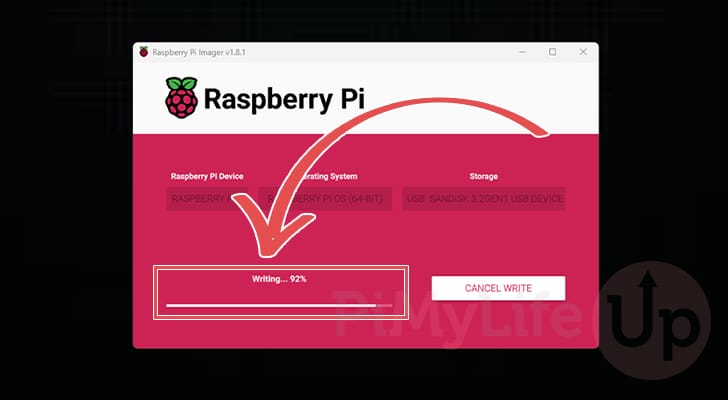
14. The imager will now download and install your chosen operating system. This process can take some time depending on your internet speed and the speed of your storage device.
15. To ensure that the operating system it just installed isn’t corrupted, the imager will quickly scan the storage device.
This is a crucial process, and we recommend that you wait for it to complete. Corruption issues can cause a huge number of issues down the track.

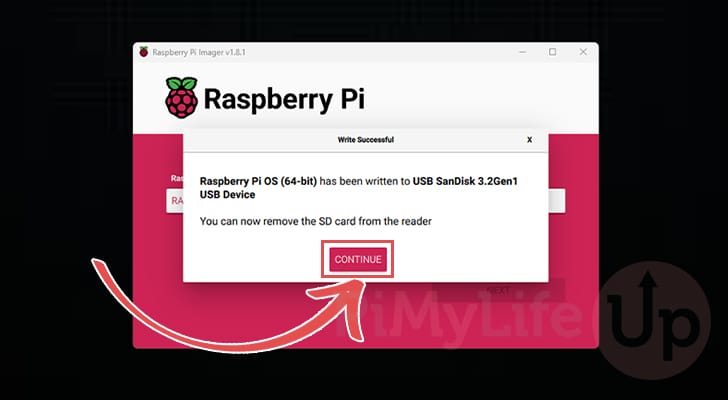
16. At this point, your operating system has now been successfully installed and you can now use it to start up your Raspberry Pi.
Powering your Raspberry Pi on For the First Time
With an operating system installed on your chosen storage medium, you are ready to get started with your Raspberry Pi and power it on for the first time.
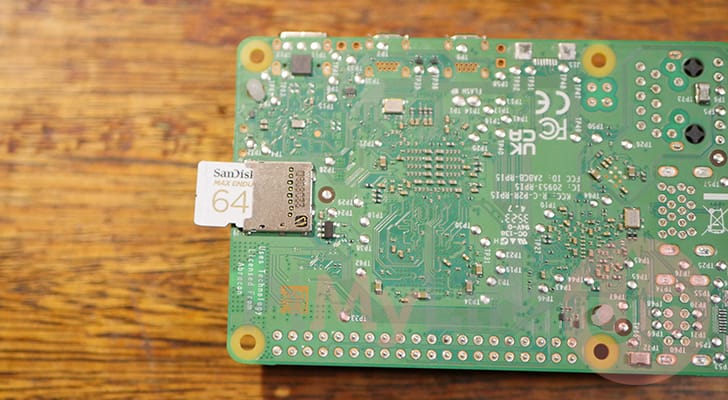
1. At this time, you will want to get started by plugging in your SD Card or USB storage device into your Raspberry Pi.
The micro-SD Card should just slot straight into the SD card slot on the bottom of your Raspberry Pi. The copper pins of the SD card will be against the board, and the printed label towards you. You will know if you are inserting it correctly as the card will slot in nicely with minimal force.
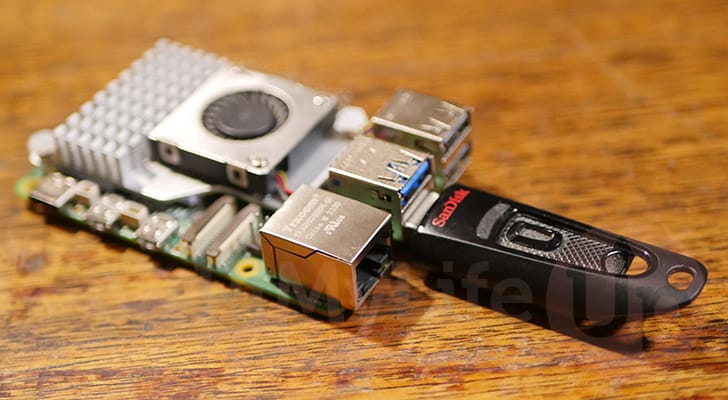
If you are using a USB storage device, we recommend that you plug it into a USB 3.0 port if your Pi supports it. This is the USB port that is color-coded blue. Plugging it into the USB 2.0 slots will cause everything to be significantly slower.
Alternatively, if you have gone down the NVME route with the Raspberry Pi 5, you will need to have a HAT that adds support for it, and then it must be routed to the Raspberry Pi using a ribbon cable.
2. Next up, you will want to plug in a display cable into your Raspberry Pi. With the older Pi’s this is super obvious as there is only a single HDMI port.
However, the Pi 4, 5, 400, and 500 have two HDMI ports. While you may think this makes things more complicated, it doesn’t matter which HDMI port you plug your display cable into.
The Raspberry Pi’s operating system will automatically detect the HDMI port that is in use and begin to output using it.
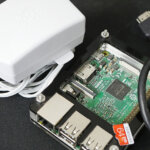
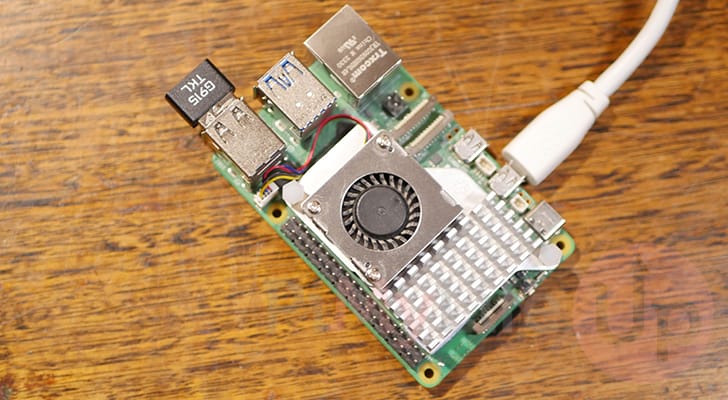
3. Now plug in any USB devices that you intend on using, for example, we have plugged in both our keyboard and mouse.
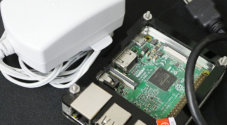
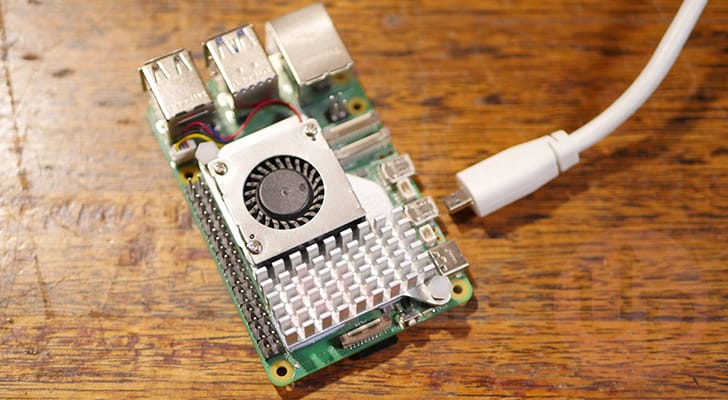
4. We are finally at the point where you have finished setting up your Raspberry Pi and can now power the device on.
The Raspberry Pi’s do not have an on and off switch. To power your Pi on, you only need to plug in the power cable. It will immediately turn on and begin the startup process.
5. Once the Raspberry Pi finishes starting up, you will either be greeted by the terminal or desktop interfaces.
You can now begin to explore everything the Pi has to offer. We have a wealth of different projects that are worth exploring that will also help you learn what you can do with this small computer. You will quickly find that using the Raspberry Pi for projects is relatively simple.
Conclusion
Hopefully, at this point, you will have a good idea of how you can get started with a Raspberry Pi.
In this guide, we have tried to help you choose which Raspberry Pi to go with, as well as the peripherals/accessories that are worth purchasing.
Additionally, we walked you through the initial set up steps of getting your first operating system installed on to your Pi.
If you liked this guide, we highly recommend exploring some of our Raspberry Pi projects. You will quickly see the huge range of different things that you can do with this device.