This project will show you how to run the Steam client on the Raspberry Pi.
Steam is the number one video game marketplace and client for the PC market. It represents an enormous number of video games sales for the platform. It has been developed to work on numerous platforms, including Linux.
While Steam doesn’t have a native ARM client, there is a special program to get the official client running on our Raspberry Pi.
By getting Steam on the Raspberry Pi, you can install any native Linux game to your device. So if the game uses relatively low resources, you may very well be able to play it on your device. So, for example, a game like FTL should be playable on the device.
Please note that your experience with Steam on the Raspberry Pi will definitely be messy. We personally experienced several crashes and graphical glitches but were able to get games to download. In addition, as we rely on an emulator to run the software, you are likely to run into random crashes and performance issues.
If you have a computer, install Steam to that and then use Steam Link to stream the games to your Raspberry Pi. For starters, the experience should be much smoother as games will be supported better. Also, you will be able to use any controller or keyboard connected to your Pi to play these games.
Equipment
Below is a list of equipment we used when installing the official Steam client to our Raspberry Pi.
Recommended
Optional
This tutorial was tested on a Raspberry Pi 4 running the latest version of Raspberry Pi OS.
Preparing your Raspberry Pi for the Steam Client
As the Steam client for Linux is an x86 application, we can’t just run it straight away and will need to do some preparatory work.
For most of these steps, we will be using the command line. On the desktop version of Raspberry Pi OS, you can open this using the CTRL + ALT + T keyboard shortcut.
1. Let us start by ensuring our Raspberry Pi’s software is up to date and that we have the latest package list.
Update both the package list and installed packages by running the command below.
sudo apt update
sudo apt upgrade
2. With that done, you will now need to go and follow our tutorial on installing box86 on the Raspberry Pi.
box86 is a special software that emulates the x86 architecture on an ARM platform. This emulation allows us to run software that was never compiled for our Raspberry Pi.
3. Once you have the box86 software installed on your Raspberry Pi, we can now prepare for the Steam client.
Not having the emulator installed will cause several errors later on in this guide.
4. Our next step is to install some additional packages that will help improve your experience with running Steam.
The Linux Steam client relies on the functionality provided by these packages to operate correctly. Without them, you will likely run into additional crashing issues.
sudo apt install libappindicator1 libnm0 libtcmalloc-minimal45. Now, we should also add some additional environment variables to our system. Again, these will help the Steam software run better and reduce the number of errors you will experience.
Let us create a new file within the “/etc/profile.d/” directory. This file will be called “steam.sh“.
sudo nano /etc/profile.d/steam.shTo create this file, we will be using the nano text editor. It is one of the most accessible terminal-based editors you can use.
6. Within this file, enter the following two lines of code.
export STEAMOS=1
export STEAM_RUNTIME=1
Simply put, these two lines will set two new environment variables, one called “STEAMOS” and one “STEAM_RUNTIME“. Both of these variables will have the value of “1” assigned to them.
7. Once you have added those lines, save and quit by pressing CTRL + X, followed by Y, then the ENTER key.
8. To make sure these two variables are correctly set, you should now restart your Raspberry Pi.
To restart your Pi, you can use the following command.
sudo rebootInstalling the Steam Client
With our Raspberry Pi now nicely prepared, we can proceed to download and install the Steam client.
This process is relatively simple as the package that we will be downloading does most of the work for us.
1. First, we need to download the Debian package for Steam. This package is what will download everything Steam needs to run.
To download the Steam installer, use the following command in the terminal.
wget https://steamcdn-a.akamaihd.net/client/installer/steam.deb2. Once the Steam package has been downloaded to your Raspberry Pi, we need to install it.
You can install this package using the “dpkg” commands install (-i) option as we have below.
sudo dpkg -i steam.debRunning Steam on the Raspberry Pi
Now that we have Steam installed on our Raspberry Pi let us show you how to load it up.
For these steps, you will need to have access to the operating system’s desktop, as that is how we will be accessing Steam.
1. Start by clicking the Raspberry Pi icon in the top left-hand corner of the screen (1.) to open the start menu.
With the menu open, you next will need to hover over the “Games” sub-menu (2.).
Finally, you can open Steam by clicking the “Steam” option (3.) that should have appeared.

2. When first starting up Steam, you may run into the following message stating that it needs to rebuild its “pins”.
You will just need to wait for this dialog to complete for Steam to start running.

3. Steam will now begin to update itself. This will download the latest version of the Linux Steam client to your Raspberry Pi.

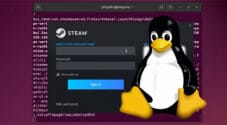
4. Once the Steam client finishes updating, you will now be able to login to your account.
To proceed with this guide, login to your Steam account.

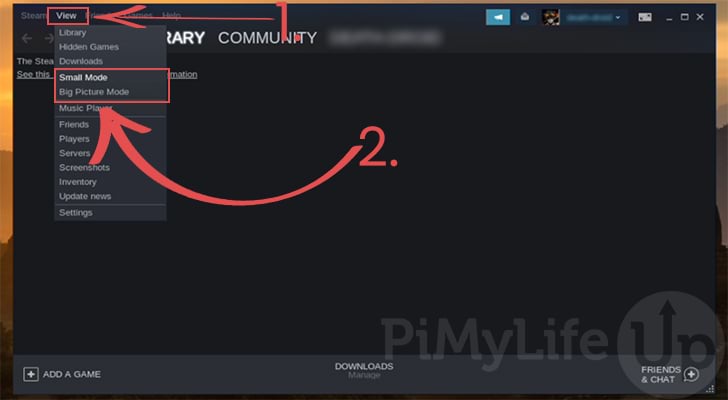
5. When Steam first loads, you will immediately notice that some things do not function at all. For example, the Steam library will not load as its component is only compiled for 64-bit systems.
We can work around this issue by changing to “Small Mode” or “Big Picture Mode“.
To find these modes start by clicking the “View” option in the toolbar (1.).
Within this sub-menu, you can change the mode by clicking the “Small Mode” or “Big Picture Mode” option (2.). The “Small Mode” option is where you will get the best experience. However, you will still experience numerous issues.
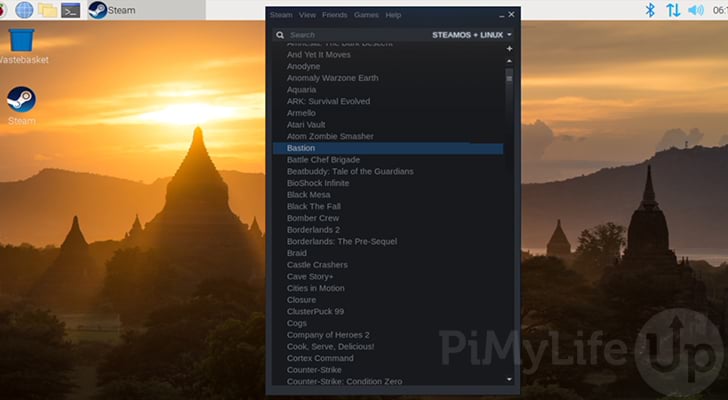
6. You should now be able to use Steam on your Raspberry Pi.
As this is running through the box86 emulator, you will experience some issues with the client. Still, it should be able to successfully download games to your device.
Conclusion
Hopefully, you will now have the Steam client up and running on your Raspberry Pi.
You will probably have noticed that the client can crash very easily, far from the best experience. If you would like a good Steam gaming experience, you can use software such as Steam Link. The only catch being is you will need a PC to stream the games from.
If you want to turn your Raspberry Pi into a gaming machine, we have many great projects. For example, you can stream games to it using Parsec or play retro games using RetroPie.
If you have run into any problems with getting the Steam client installed on your Raspberry Pi, please comment below.