In this Raspberry Pi Chromecast tutorial, we will be showing you how you can set up your Raspberry Pi to act as a Chromecast device.
While we can’t implement the same protocol that Chromecast relies on we can replicate this on the Raspberry Pi.
We replicate its behavior by using two key pieces of software on the Raspberry Pi. The first of these pieces of software is omxplayer. This software handles the video and audio files that are cast to our Raspberry Pi.
Our second piece of software is the OpenMax, Image viewer. We utilize this piece of software to handle images sent to the device.
Lastly, we rely on an Android application called Raspicast. This application is what we will utilize to cast videos, songs, and images to the Raspberry Pi.
While this setup does have a lot of similarities to Chromecast it’s important to remember that it isn’t Chromecast. There are some functionalities that the Raspicast software can’t do but Chromecast can.


Equipment List
Below are all the pieces of equipment that we made use of for this Raspberry Pi Chromecast tutorial.
Recommended
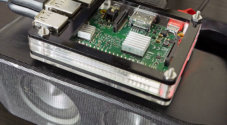
- Raspberry Pi Amazon 2 or newer
- Micro SD Card Amazon
- Ethernet Cable Amazon (Recommended) or Wi-Fi Amazon
- Android powered mobile phone Amazon or tablet Amazon
Optional
- Raspberry Pi Case Amazon
Setting up Raspbian to Operate as a Chromecast
1. Now before we get started with setting up our Raspberry Pi as a Chromecast-like device, we must first ensure that our Raspberry Pi is actually up to date and that we have the latest package list.
We can update our Raspberry Pi by running the following two commands on it.
sudo apt update
sudo apt upgrade
2. For this tutorial, we will require to use GIT and Make. While these packages should be pre-installed on Raspbian, we will run the command below just to make sure they are.
To ensure this is installed just run the following command on the Raspberry Pi.
sudo apt install git make -y3. With our Raspberry Pi now up to date, we need first to make sure we have OMXPlayer installed, while Raspbian usually comes with this installed we will make sure it exists anyway.
The reason we need OMXPlayer is so that it can handle video and audio processing for any video or audio files that we cast to our Raspberry Pi Chromecast.
One advantage of OMXPlayer to other video and audio players is that it was designed specifically for the Raspberry Pi’s GPU meaning it offers some of the best performance, something that is critical for any files that are cast.
Run the following command to install OMXPlayer on to your Pi.
sudo apt-get install omxplayer -y4. With OMXPlayer now installed to our Raspberry Pi, we need to move onto setting up the next piece of the pie. While we now have a piece of software ready that can handle our video and audio files we still need something that can handle images.
For the task of handling images on our Raspberry Pi Chromecast, we will be installing a piece of software that is called OpenMax Image Viewer.
OpenMax Image Viewer is a must for this project as it is a GPU accelerated image viewer explicitly designed for the Raspberry Pi’s GPU, meaning we can display any images as fast as possible and reduce the load on the Raspberry Pi’s CPU.
To begin the process of setting up OpenMax Image Viewer, we must first clone its code repository from Github.
Just run the following two commands on your Raspberry Pi to clone this repository to your Raspberry Pi.
cd ~
git clone https://github.com/HaarigerHarald/omxiv.git
5. With the OpenMax Image viewers code now cloned to our Raspberry Pi, we must now install a couple more packages.
These two packages that we need are libjpeg8-dev and libpng12-dev. These packages contain development libraries for the PNG format and the JPEG format, both which are required to compile the code.
Let’s download and install these packages to our Raspberry Pi by running the following command.
sudo apt install libjpeg8-dev libpng12-devNote: If for some reason Raspbian fails to find the packages, try running sudo apt-get update.
6. We can now finally proceed on to the steps to compiling and installing OpenMax Image viewer to our Raspberry Pi Chromecast device.
To start off, we must first change into the directory where we cloned our code, do this by running the following command on our Raspberry Pi.
cd ~/omxiv7. Now that we are in the right directory we need to initialize the compiling process now. Compiling will give us the files we need to run the OpenMax Image Viewer software for our Raspberry Pi Chromecast device.
Thanks to the make software, compiling the code is a very simple and straightforward process.
To do this run the following two commands on the Raspberry Pi. If make fails, try running sudo apt-get update and sudo apt-get upgrade.
make ilclient
make
8. With the OpenMax Image Viewer now compiled, there is one last command we must utilize.
This last command is what will setup OpenMax on our Raspberry Pi so that it is available to the general operating system.
Type the following command into the terminal on your Raspberry Pi, and you will be all set to proceed to the next section of our guide.
sudo make install9. Now the last thing we need to do is grab our Raspberry Pi’s local IP address.
Run the following hostname command to grab to do it, make sure the ‘I‘ is capitalized otherwise this command won’t work correctly.
hostname -IUsing Raspicast to Cast to the Raspberry Pi
1. With our Raspberry Pi now setup to act like a Chromecast, we now need to download an app to our Android device.
This application is Raspicast. Raspicast is the piece of software that will allow us to cast images and videos from our Android devices to the Raspberry Pi.
Either search up “Raspicast” on the Google Play Store or go to the following URL to go directly to the Raspicast on your Google Play from this link.
Download, install and run the Raspicast application.
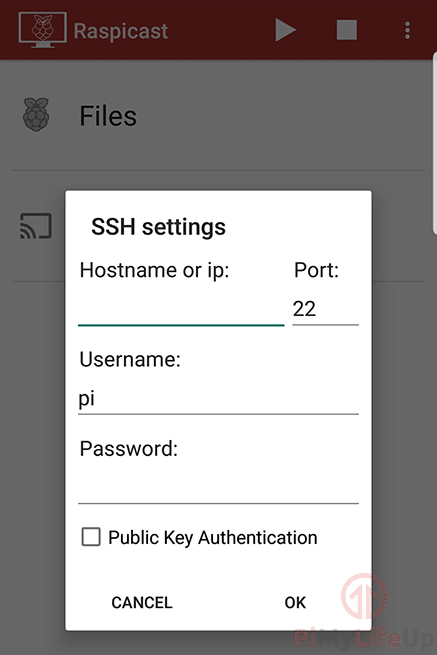
2. You should now be greeted with the following screen. This screen will ask you to enter your SSH details as it will use these to talk to your Raspberry Pi.
If you haven’t already set up SSH on your Raspberry Pi, then you should do this now as it is required for the Raspicast software to talk with it.
2. Once you have entered the correct information, you should now be able to cast videos, song, and images from your Android device to the Raspberry Pi.
We hope by the end of this Raspberry Pi Chromecast tutorial you should now be able to cast any video, images or audio files from your phone to your Raspberry Pi like a Chromecast using the Raspicast software.
If you have any thoughts, feedback or anything else then be sure to leave a comment below.


If you login with a diferent User AS Pi you could need this
sudo usermod -a -G video $(whoami)And reboot the pi
Thanks a lot, this solved the problem I had!
Does it work with any PC’s?
I believe it’s limited to mobile apps, you can try using this software instead.
Hi many thanks everything working it looks like all I needed was a firmware update. kind regards.
Des
Yes I have tried this but the make still fails, with the same error.
Try running the following, this reportedly fixes the problem.
Make fails with the following error, any ideas? of how to resolve this will be much
appreciated.
Have you tried running sudo apt-get update & sudo apt-get upgrade.
Running those fixed the issue for me. Let me know if you’re still having problems.
Can i cast youtube video’s or only my phone file’s?
Hi Tom,
You can cast youtube videos as well, but you will need to copy the youtube URL into the Raspicast app.
Cheers,
Emmet
Followed all directions and it does not work. Omx player will not start on the pi when I tell the phone to cast to it.
Hi Rob,
Thanks for picking up on the mistake in step 7. I just tested the tutorial with the fix, and worked fine. Do you have any additional errors? What version of Raspbian are you running on?
I did finally get it to work and set up the rpi as an access point so I could connect to to the tv and the phone would play saved video from the phone or on the pi. Worked great! Thanks!! Is there a proprietary sequence that is patented or encrypted that prevents the raspicast from working with chromecast TV’s?
Hi Rob,
Sadly the Chromecast implementation protocol includes a built in authentication method that stops a connection to a non certified Chromecast device.
Cheers,
Emmet