In this tutorial, we will be showing you how to install and use Auto-GPT on the Raspberry Pi.
Auto-GPT is a tool developed originally by Significant Gravitas and is a way of utilizing OpenAI’s GPT-4 or GPT-3.5 to complete a given objective with a defined set of goals.
This tool feeds data to GPT and then uses its responses to work out how it can process the given task. To learn more, you can check out the official Auto-GPT repository.
Over the following sections, we will show you how to install Auto-GPT on the Raspberry Pi and utilize it for the first time.
As this software relies on OpenAI, we have to note that this API is not free to use and does come with some costs. You can view the pricing for OpenAI on their website. New accounts are often given some credit to trial the service with.
Equipment
Below you can find a list of the equipment we used when setting up and using Auto-GPT on our Raspberry Pi.
Recommended
Optional
This tutorial was last tested on a Raspberry Pi 400 using the latest version of Raspberry Pi OS Bullseye 64-bit.
How to get an API Key for OpenAI
As Auto-GPT on the Raspberry Pi relies on the OpenAI API, you must first grab an API key from the website. This API allows us to interact with models like ChatGPT for a small fee.
1. Before you can generate an API key for OpenAI, you will need to have signed up for an account.
Once you have signed up for an account, you can proceed to the next step.
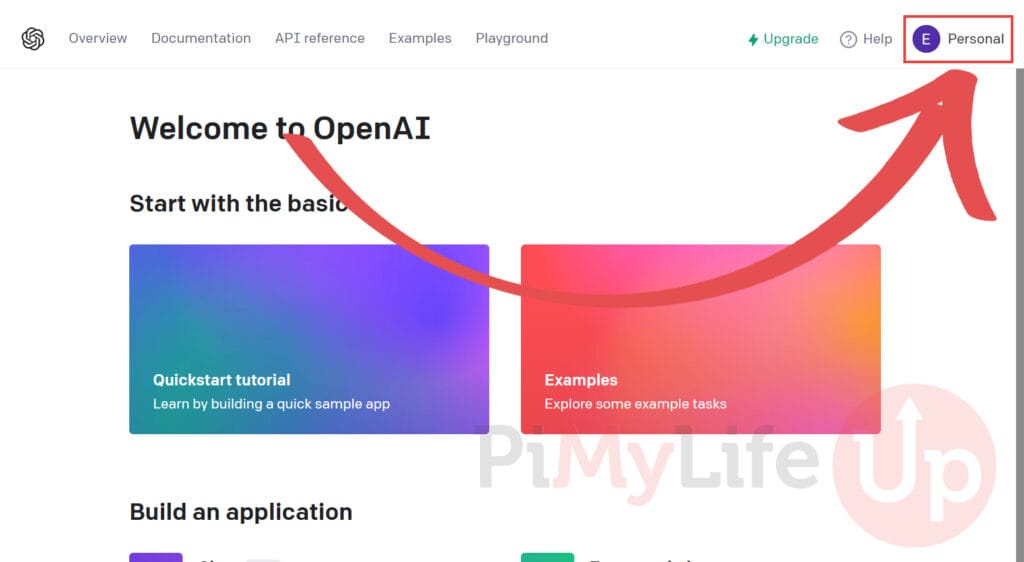
2. Once logged in to your account, you will want to click the profile icon in the upper right-hand corner of the screen.
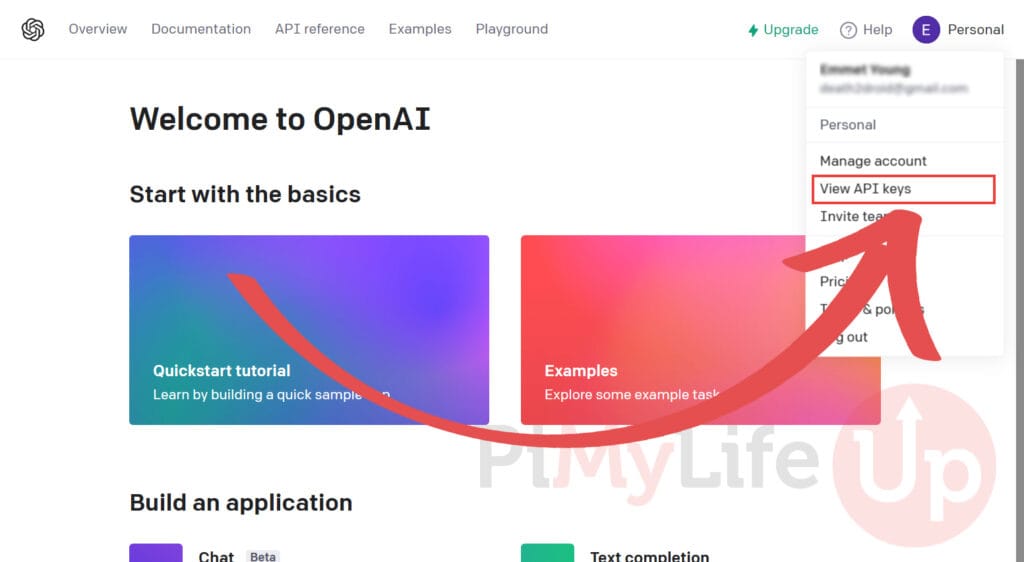
3. Now, with the pop-up menu open, search for the “View API Keys” option and click it.
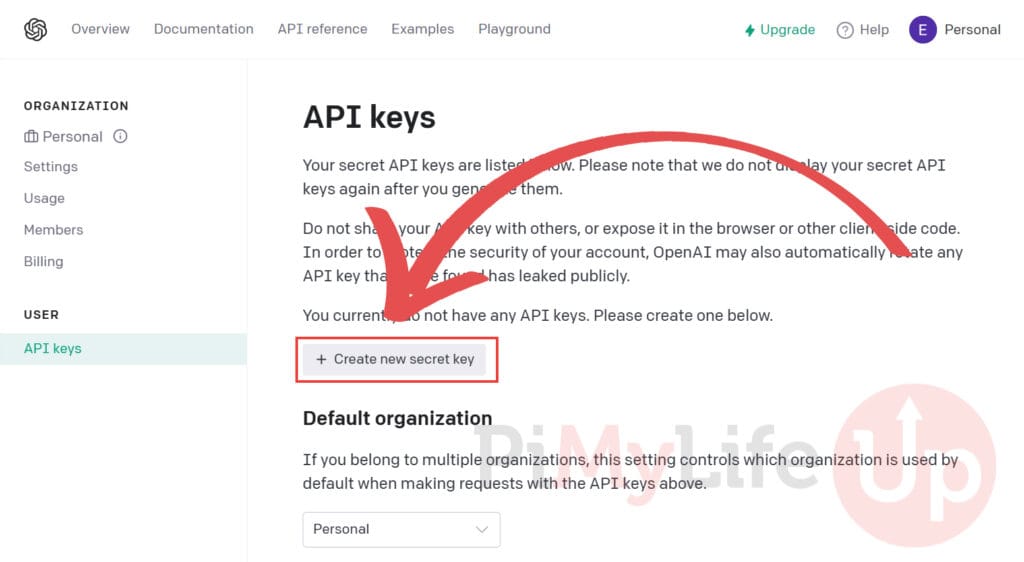
4. We can now generate a new API key for Auto-GPT on our Raspberry Pi by clicking the “Create new secret key” button on this page.
This button will take us through the steps for generating an API key for OpenAI.
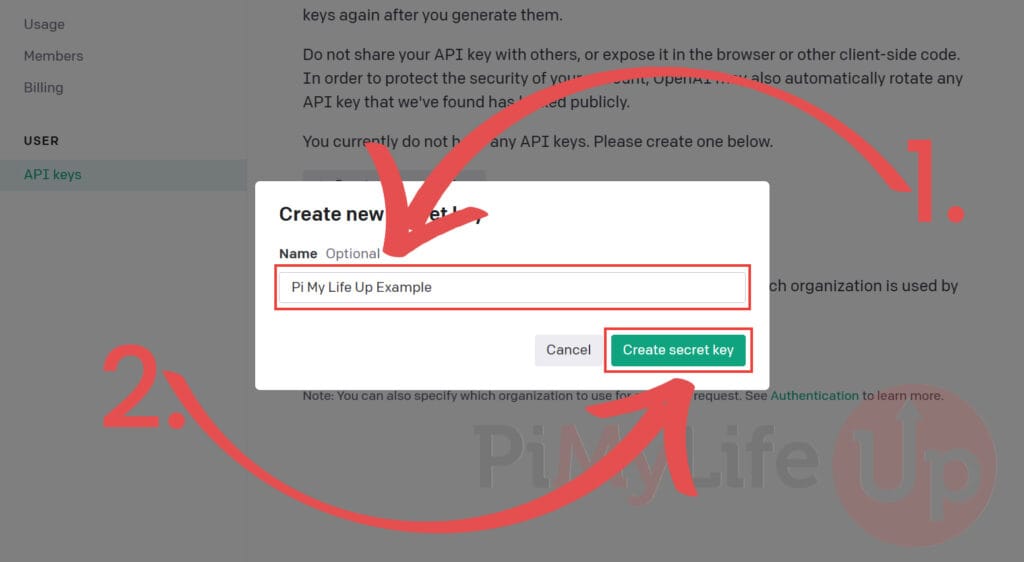
5. You now have the chance to give a name for your API key (1.). This name will help you differentiate between any other key that you generate.
Once you are happy with the name, click the “Create secret key” button (2.) to generate the API key.
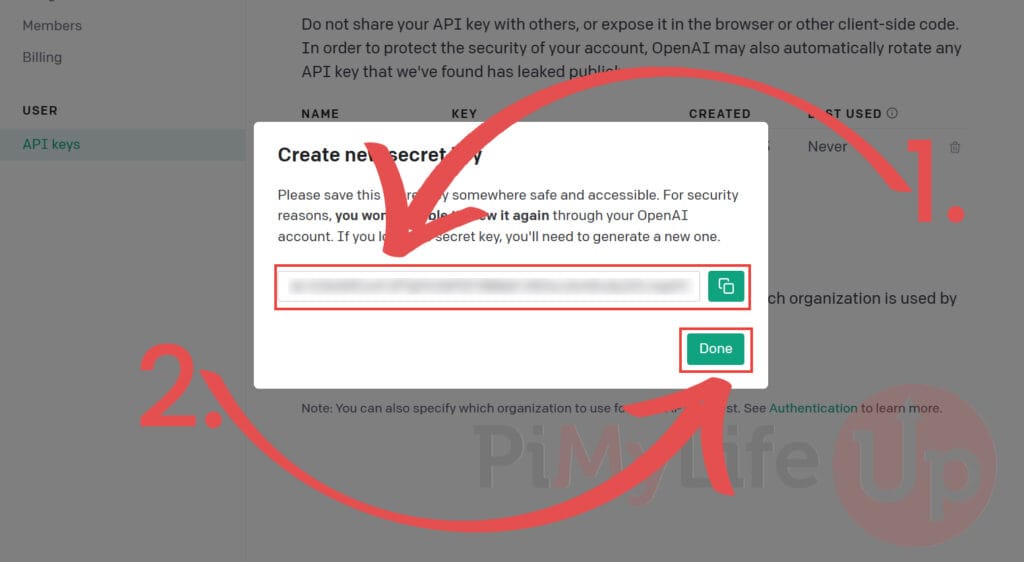
6. You will now see the OpenAI API key on your screen (1.). Ensure that you copy this key down. as we will need it later in this tutorial.
With the API key copied, click the “Done” button (2.).
7. While you are on the dashboard you should also explore where you can view your usage of the OpenAI API.
Click the “Usage” option in the left-hand sidebar to get to the usage screen.
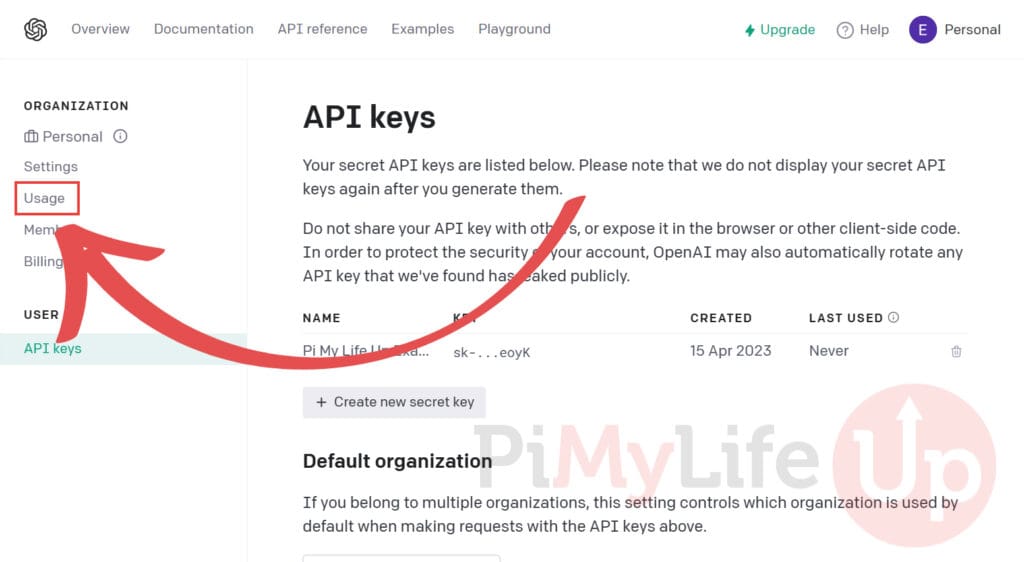
8. The graph on your screen shows how much you have consumed of the OpenAI API in USD.

Using Auto-GPT On the Raspberry Pi
In this section, we will show you how to set up Auto-GPT on the Raspberry Pi and how to run it for the first time.
The following steps are all run within the terminal. If you use the desktop flavor of Raspberry Pi OS, you can open the terminal quickly by pressing CTRL + ALT + T on your keyboard.
Preparing your Raspberry Pi for Auto-GPT
1. Before we start, we must ensure our Raspberry Pi’s packages and package list are up to date.
You can perform both actions by using the following two commands within the terminal.
sudo apt update
sudo apt upgradeCopy
2. Next, we must install the required packages to set up and run Auto-GPT on our Raspberry Pi.
Those two packages are “git” and “python“. We will use Git to pull the latest version of Auto-GPT, and Python will be used to run the software.
sudo apt install git python3 python3-pipCopy3. Now that we have the required packages, we can use git to pull the the latest version of the “Auto-GPT” code to our Raspberry Pi.
To pull this code, run the following command within the terminal.
git clone https://github.com/Torantulino/Auto-GPT.gitCopyInstalling Auto-GPT on your Raspberry Pi
4. We need to move into the directory where we just cloned the Auto-GPT code to our Raspberry Pi.
We can change directories by using the cd command within the terminal.
cd Auto-GPTCopy5. Now that we are in the correct directory, we will need to download and install all of the Python packages that AUto-GPT requires.
Luckily the team provides us with a requirements file that we can tell pip to run through. Use the command below to install the numerous Python packages Auto-GPT relies on.
pip install -r requirements.txtCopySetting the OpenAI API Key for Auto-GPT
6. Our next step configuring Auto-GPT on our Raspberry Pi by adding the OpenAI API key we retrieved earlier in this guide.
Before doing this, we must copy the template ".env” file so that we can edit it. Copy this file by using the following command.
cp .env.template .envCopy7. We can now use the nano text editor to edit the environment configuration file using the command below within the terminal.
nano .envCopy8. You will want to find the following line within this file. This line is used to define the API key for Auto-GPT to utilize.
Once you find this line, you will want to replace “your-openai-api-key” with the key you retrieved earlier.
OPEN_API_KEY=your-openai-api-keyCopy9. Once you have entered your API key into the file, you can save and quit by pressing CTRL + X, followed by Y, then the ENTER key,
10. Finally, we need to create an empty file so that Auto-GPT knows it can save anything in its memory to it.
This file needs to be called “auto-gpt.json” and will be stored within the main directory of the repository we cloned.
To create this file, use the following command within the terminal on your Raspberry Pi.
touch auto-gpt.jsonCopyUsing Auto-GPT on your Raspberry Pi for the First Time
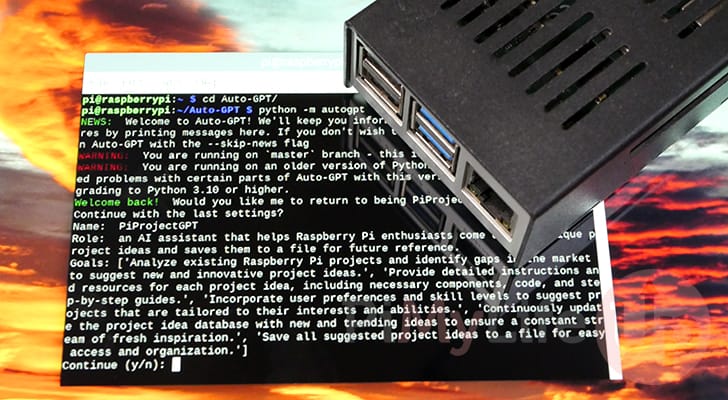
11. To start running Auto-GPT on your Raspberry Pi, you will need to run the following command from within your terminal.
Before running this command, you will need to ensure that you are still in the “Auto-GPT” directory we cloned earlier in this guide.
python -m autogptCopy12. When you first launch Auto-GPT, you will be asked to explain what is the goal of this automation.
For example, you could ask it to write you a list of Raspberry Pi projects to write about or numerous other things.
I want Auto-GPT to:By default, Auto-GPT will attempt to automatically generate a set of goals and a name for your project. However, you can override this and manually define the goals using “--manual“.
13. Whenever Auto-GPT wants to run a particular command, you will be prompted to confirm it before it continues.
To confirm the command it references, you must type “y” and then press the ENTER key. You can also abort by typing “N” instead.
Conclusion
Hopefully, at this point, you will have successfully installed and run Auto-GPT on your Raspberry Pi.
Auto-GPT is an exciting way to utilise the powerful GPT from OpenAI to automate tasks that you set it.
While it is still very much a work in progress, it gives a good insight into how useful GPT can be when paired with some smart programming.
Please comment below if you have run into any issues with running Auto-GPT on your Pi.
If you found this tutorial useful, be sure to check out our many other Raspberry Pi projects.