This tutorial will show you how to install the remote desktop software, AnyDesk, to the Raspberry Pi.
AnyDesk is one of the best solutions for adding remote desktop support to your Raspberry Pi.
Using this software, you can remotely access your Raspberry Pi from anywhere in the world using a secure connection.
Unlike TeamViewer for the Raspberry Pi, you can even use this software to remotely manage other devices running the AnyDesk software.
Best of all, the AnyDesk team has developed an optimized version of their software just for the Raspberry Pi.
Thanks to AnyDesk having a native build for the Pi, it has excellent performance, low latency, and decent bandwidth utilization.
Equipment List
Below is a list of the equipment we used when installing AnyDesk to the Raspberry Pi.
Recommended
- Raspberry Pi Amazon 4, 400, CM4
- Micro SD Card Amazon
- Power Supply Amazon
- Ethernet Cable Amazon or Wi-Fi Amazon
- HDMI Cable Amazon
- Monitor Amazon
- USB Keyboard Amazon
- USB Mouse Amazon
Optional
- Raspberry Pi Case Amazon
We tested this guide on installing AnyDesk on a Raspberry Pi 400 running the latest version of Raspberry Pi OS Buster.
Installing AnyDesk on to the Raspberry Pi
The process for installing the AnyDesk remote desktop software is relatively straightforward.
It will involve us needing to download the latest version of the software and installing it.
1. Before we get started, we should first update our Raspberry Pi OS installation.
This helps ensure that you are running the latest available software and have a smooth experience with the AnyDesk software.
Updating your Raspberry Pi’s operating system is as simple as running the following two commands.
sudo apt update
sudo apt full-upgrade
2. Once your Raspberry Pi has finished updating, we can move on to installing AnyDesk.
To do that, we will need to download the AnyDesk Debian package.
Download AnyDesk to your Pi by running the following command on your device.
wget https://download.anydesk.com/rpi/anydesk_6.1.1-1_armhf.debPlease note that this may not be the latest version. You can verify this by visiting the AnyDesk for the Raspberry Pi website.
3. With the AnyDesk Debian package now downloaded to the Raspberry Pi, we can now install it.
Installing this package is as simple as running the following command.
sudo dpkg -i anydesk_6.1.1-1_armhf.debThe dpkg tool will extract the package, installing all of the AnyDesk files into the correct location.
4. With AnyDesk now installed on your Raspberry Pi, we need to ensure no packages are missing.
Luckily for us, we can run the command below to use the apt package manager to fix any missing packages.
sudo apt-get install -fAfter this command has finished running, you should now be ready to get the software up and running.
Running the AnyDesk Software
This section, will show you how easy it is to open the AnyDesk software now that it has been installed.
Additionally, we will also show you how to handle an incoming remote desktop connection.
1. After installing AnyDesk, you will find opening the remote desktop is a simple process.
There is two different ways that you can open AnyDesk on your Raspberry Pi.
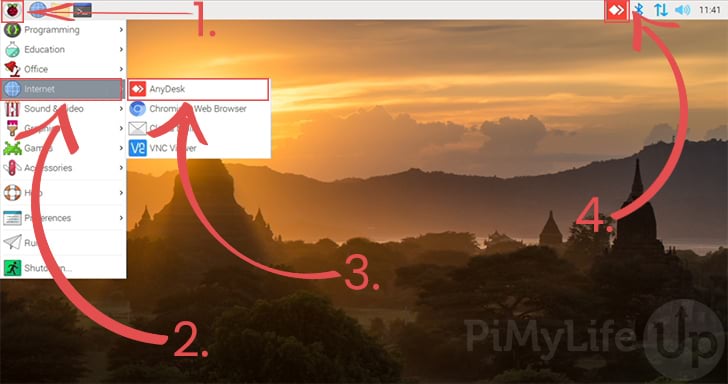
The easiest way is to click the AnyDesk icon that should have been automatically added to the taskbar at the top of the screen (4.).
Alternatively, you can find it within the desktop interfaces start menu (1.).
Within the start menu, you will need to hover over the “Internet" option (2.).
A sub-menu will pop up, and you should now see the “AnyDesk” option, click it to open the software (3.).
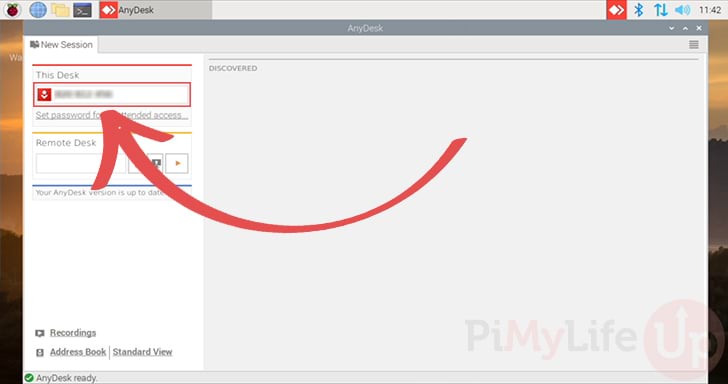
2. You should now be greeted by the AnyDesk remote desktop interface.
The first thing that we will bring your attention to is the ID located under the “This Desk” header.
You will use this ID to connect to your Raspberry Pi from another computer running the AnyDesk software.
3. It is also possible to use the AnyDesk Raspberry Pi client to connect to another computer.
Under the “Remote Desk” header, you should see a textbox. Use this textbox to enter in the ID for the computer you want to connect to (1.)
With a code entered, you can begin the connection by clicking the play button at the end of the row (2.).
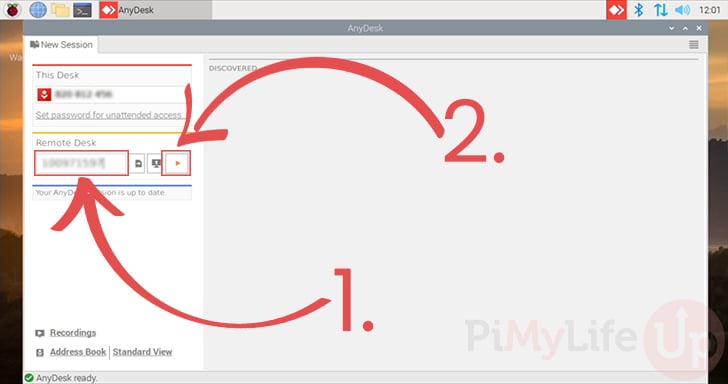
When you connect to another device, you will have to wait for them to approve the connection. If they have unattended access set up, you may also have the option of typing in a password to log in.
Receiving a Remote Desktop Connection
When your Raspberry Pi receives a remote connection from an AnyDesk client, the connection process is incredibly simple.
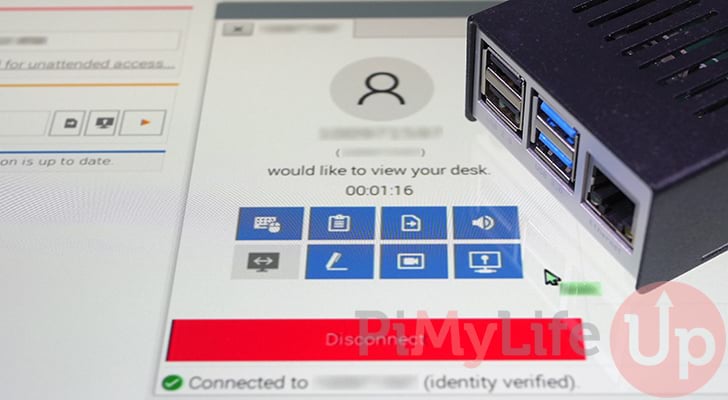
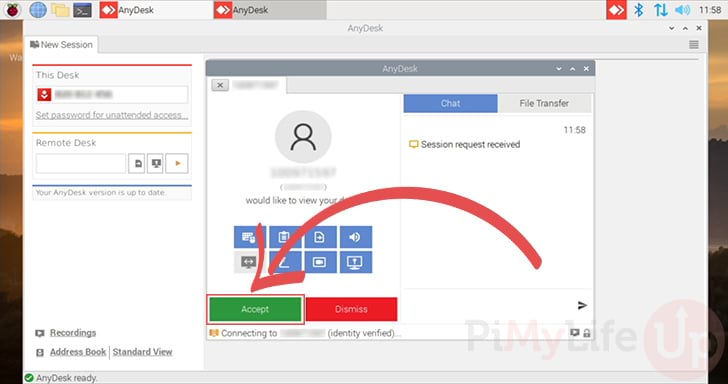
1. When you receive an incoming connection, you will see a screen similar to the one below appear.
Using this screen, you can accept or dismiss an incoming connection. You can even use this dialog to chat with the person on the incoming connection.
If you are sure that this user is the one you want to receive a remote desktop connection from, you can click the “Accept” button.
2. If you accept the connection, it is a fairly simple process to disconnect from the user.
All you need to do is click the “Disconnect” button.
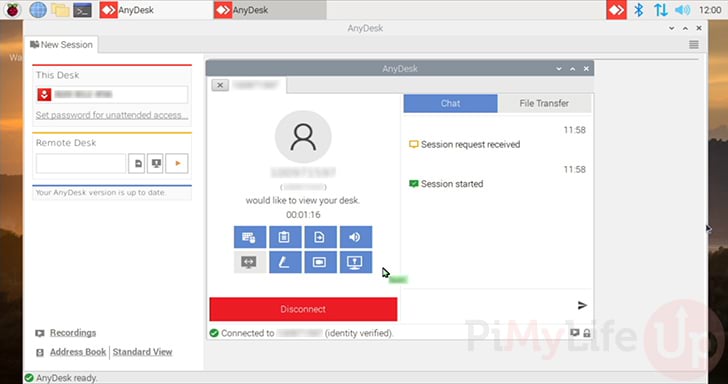
While the user is connected, they will be able to control your operating system as if they were there, so be careful who you give access to.
Configuring Unattended Access
If you want to access your Raspberry Pi using AnyDesk without being there to approve the connection, don’t worry. The AnyDesk software comes in with inbuilt support for unattended access.
Using this option, you can allow someone to enter a password to access your system remotely. Additionally, you can even enforce 2-factor authentication support.
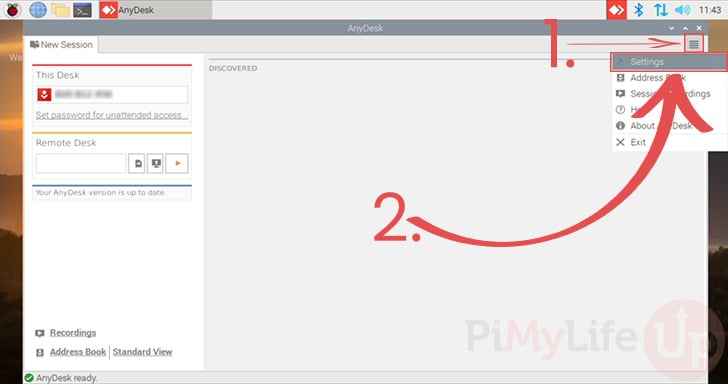
1. To enable this option, we need to first get to the AnyDesk settings page.
To find the settings, click the hamburger icon on the top right of the screen (1.).
A pop-up menu should appear, find and click the “Settings” option (2.).
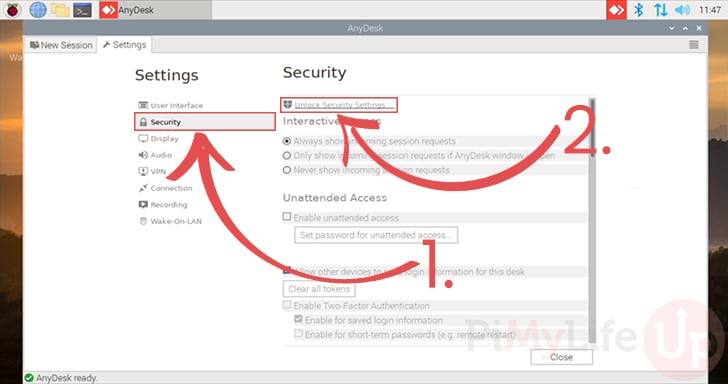
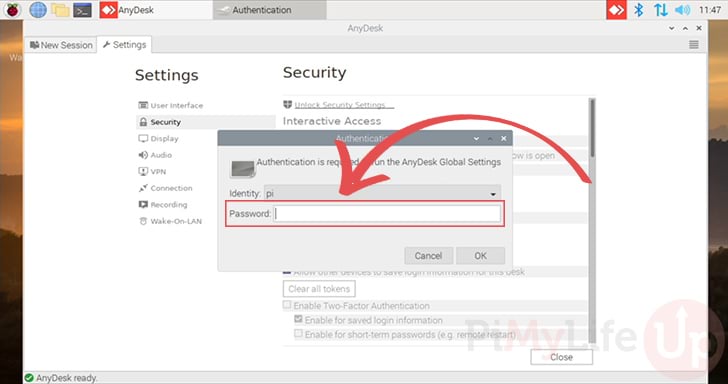
2. Within the settings menu, we will need to change to the “Security” panel (1.).
We won’t be able to modify these settings till we unlock the settings. To begin the unlock process, click “Unlock Security Settings...” (2.).
3. You will now be required to authenticate yourself.
The identity should be automatically set to the current user, which our case would be the “pi” user.
Enter the password for the specified user, then click the “OK” button to unlock the settings.
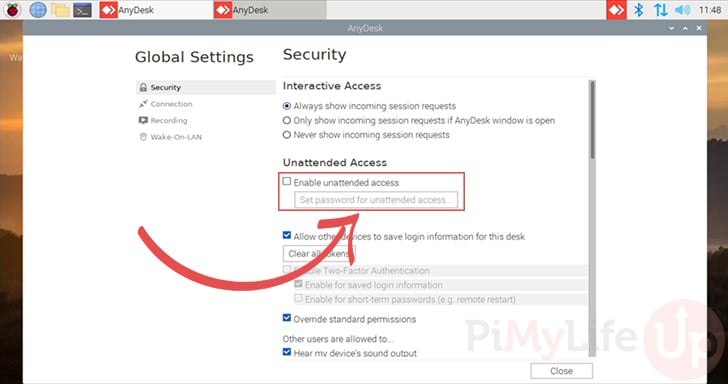
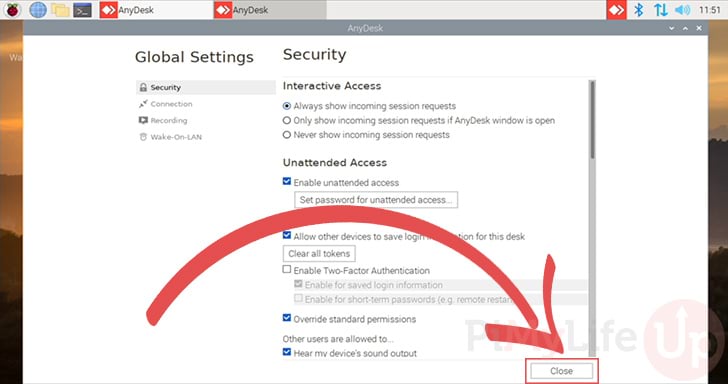
4. We can now adjust the security settings, such as enable unattended access to our Raspberry Pi.
Find the “Enable unattended access” option on this page, click it to begin configuring the setting.
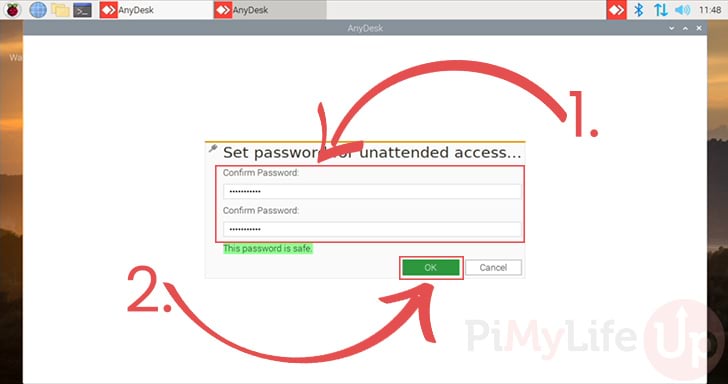
5. Before you can use unattended access, you will need to set a password.
Enter the password you want the user to enter before completing the AnyDesk connection (1.).
Once you have entered the password, click the “OK button to confirm it (2.).
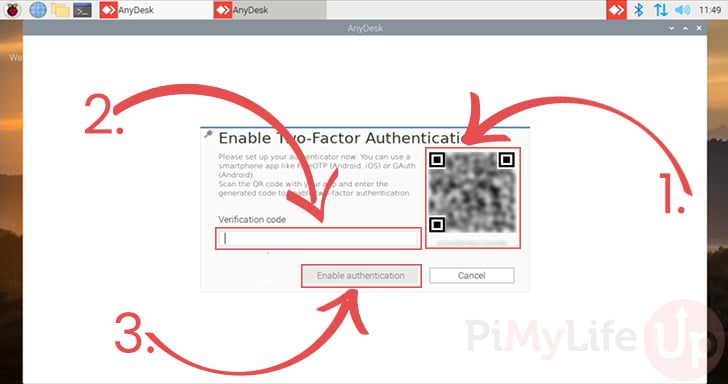
6. The first time you set a password for unattended access, you may be prompted to enable two-factor authentication.
We recommend that you enable this feature as it helps enhance the security of your device. If you would prefer not to use 2FA, click the “Cancel” button.
If you want to use 2FA, scan the provided QR code using a 2FA application such as Authy or Google Authenticator (1.).
Once you have scanned the code, you should start seeing generated codes on your device. Type this code into the provided text box (2.).
With everything set correctly, click the “Enable authentication” button (3.).
7. With AnyDesk’s unattended access enabled on your Raspberry Pi. You can now close out of the settings.
To close out of the settings page, you can click the “Close” button at the bottom of the page.
Next time someone connects using your AnyDesk code, they will now be able to connect using a password rather than having to have you manually approve the connection.
Conclusion
Hopefully, this guide will have shown you how to get the AnyDesk software running on your Raspberry Pi.
AnyDesk is a super easy-to-use remote desktop software that has a performant desktop client.
It is a fantastic alternative to the TeamViewer client and even allows you to connect to other remote devices.
If you have had any issues with getting AnyDesk installed, feel free to leave a comment below.
Be sure to check out some of our other great and easy-to-follow Raspberry Pi projects.


Good day . I installed AnyDesk on my RPI 4. But AnyDesk won’t start. I watched on the forums many people cannot run AnyDesk on RPI 4.
Is there a solution to this problem?
Hi Konstantin,
From what I recall AnyDesk should work completely fine on the Raspberry Pi 4 as long as you are not running a 64-bit operating system.
At this stage the AnyDesk team has not released a 64-bit client for the Raspberry Pi.
Cheers,
Emmet
Hi: I have installed Anydesk in my RPI 4 . It is working well. But I have two RPI 4 module but both have same Anydesk ID and therefore I cannot remotely access them separately. Please help me to how to change ID.
Hi Amitha,
If these are two fresh installations of Anydesk they in theory should both have their own unique ID.
To get a new ID we will need to delete the existing keys that have been generated.
1. Start by making sure all sessions of AnyDesk are closed.
We also need to temporarily stop the AnyDesk service by running the following command.
2. Next, you will need to delete the file where AnyDesk keeps it’s certificates.
Deleting this file will force AnyDesk to generate new client certificates, which will in turn generate a new ID.
3. Finally, bring the AnyDesk service back online.
Let me know if this fixes the issues that you are facing.
Cheers,
Emmet