If you’re looking for a Pi-Top unboxing and assembly guide, then look no further. In this guide, I take a look at the contents of the kit and how to put this Raspberry Pi laptop together.
For those who don’t know the Pi-Top is a Raspberry Pi laptop that you put together yourself. It’s a cool kit and a great learning tool for people looking to dive into the world of computing.
If you’re thinking of buying one, then be sure to check out my Pi-Top review before you do. I take a look at both the hardware and the software of the device.
I hope that you enjoy this assembly and unboxing guide and that it helps you with your assembly of the Pi-Top.
Video
If you want to see the unboxing and assembly being done, then be sure to check out my video below.
Stay up to date on more videos, tutorials and much more by subscribing to us or following us on social media.
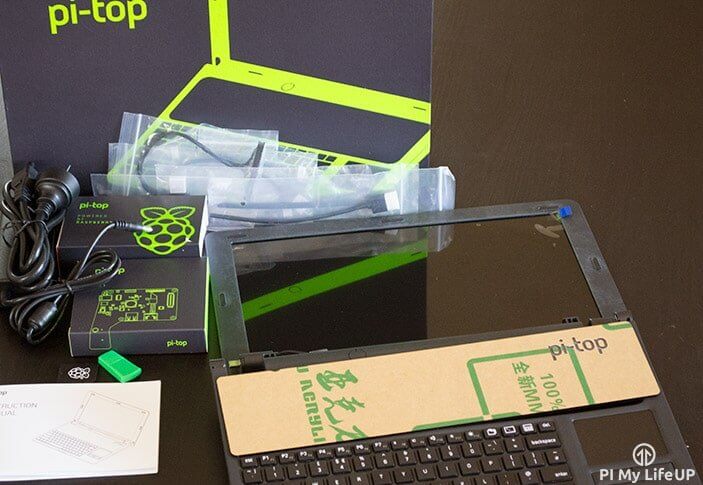
Pi-Top Unboxing
I will just briefly touch on each of the items you should receive with the Pi-Top box and what you can expect out each of the pieces.
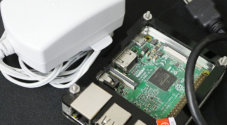
Raspberry Pi
In the kit, you will receive a Raspberry Pi 3. At the writing of this guide, it is the latest and currently the fastest Pi on the market. If you want to learn more about the Pi, then be sure to check out the guide on what is a Raspberry Pi.
PCB Hub
The PCB hub is the item that connects the battery, pi and the laptop screen together. It powers the Pi and all of the components that you find in this laptop. You will find that this also communicates with the screen so you will need to hook up an HDMI cord from it to the Pi.
Base
The base is the bottom of the case and where the PCB hub and the Raspberry Pi will be secured to. The base is also where the battery is stored underneath a sealed unit. You can expect to get about 10-12 hours of runtime out of the battery.
Keyboard & Touchpad
The keyboard and touchpad are located on the cover of the base. You can get the keyboard in both UK and US layouts. The track-pad is located to the right side of the keyboard and has left and right mouse buttons right below it.
Screen
The screen is 13.3” big and features a 1366 x 768 resolution. It also has an anti-glare finish, so if you plan on using this outside you should still be able to see the screen. This screen is built into the casing so it is can easily be assembled as a laptop.
Everything else
There are a few other smaller pieces you will find in the box. I will list them below.
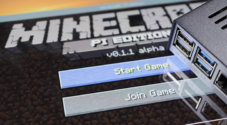
- A microSD card with the pi-top OS pre-installed on it.
- A variety of cables for connecting all your devices.
- Bolts & nuts
- WiFi dongle, so you’re able to connect to a WiFi network.
- A charger so you can keep the battery charged and your laptop running.
- Finally, there is also some instructions to guide you through the process of putting your Pi-top together.
Pi-Top Assembly
Assembling the Pi-Top is a pretty straightforward process. I will go through the steps I took to get this laptop assembled correctly. For a better understanding and being able to see how the assembly is done I recommend watching the video above. The pi-top also has super handy instructions that will help you put this together.
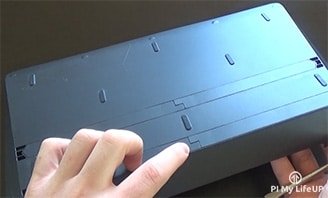
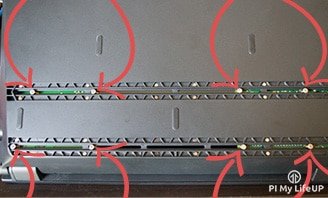
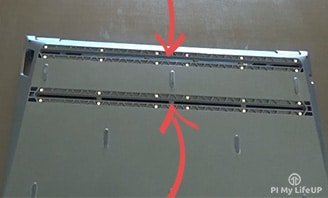
1. Firstly, remove the magnetic rail covers located on the bottom of the base. I used a flat head screwdriver to push these out so I could easily grab and remove them.
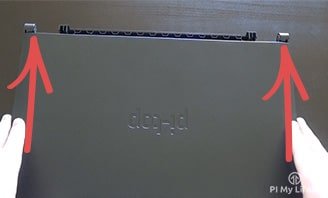
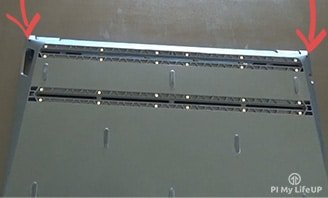
2. Next, place the screen on the base and push it into the slots located at the rear of the base. Push this until it is perfectly aligned with the base of the laptop.
3. Once done flip the laptop and find the small screw holes at the back of the laptop. Use the 1.25 mm Allen key to tighten these. Be careful not to over tighten the screws as it could damage the screws.
4. Now place the laptop up in the correct way and open it up. If you haven’t already done it, screw the nuts and standoff screws onto PCB hub.
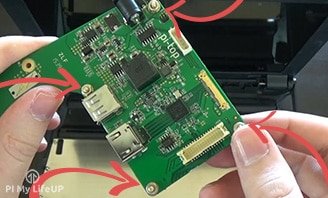
5. Now insert the ribbon cable into the slot on the PCB hub. To do this find the slot and then align and insert it. Then secure it using the locking the bar on the ribbon cable.
6. Once you have done this, align the battery connector with the slot on the base and push down until it is fully inserted. Secure the board using a bolt and the screw near the power connector.

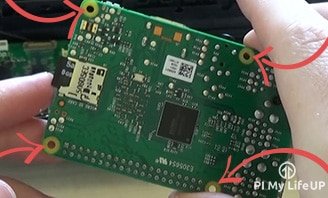
7. Next, insert the microSD card into the Raspberry Pi and also if you haven’t already attached the stand-off screws and bolts.
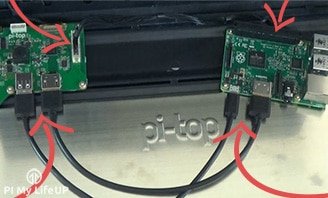
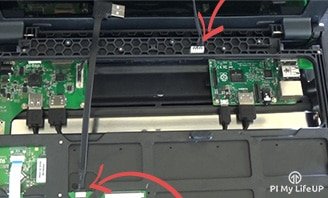
8. Now connect the GPIO breakout cable from the Pi to the PCB hub. Also, do the same for the HDMI cord and the USB to micro-USB. Finally, place the WiFi dongle into the Raspberry Pi.
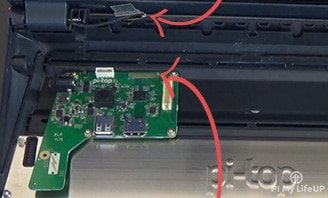
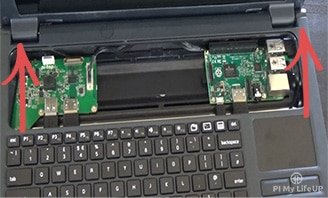
9. Next secure PCB hub and the Raspberry Pi to the base by screwing the normal screws into the standoff screws. For this from the bottom of the laptop (Where you removed the magnetic covers from).
10. Next, grab the base top that contains the keyboard and touchpad. Attach keyboard cable to the slot on the base top and connect the USB to the Raspberry Pi. Attach the power button cable to the base top slot and then to the PCB hub.
11. Now secure the base top to the bottom by sliding it up, so it neatly meets the top. Then push the top into the base, and it should click together.
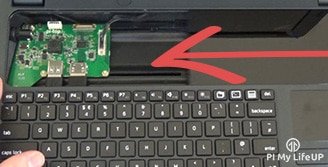
12. Now slide the component cover into place. (From the righthand side of the laptop) Don’t forget to remove the paper covering from it first!
13. Place the magnetic covers back onto the base of the Raspberry Pi laptop.
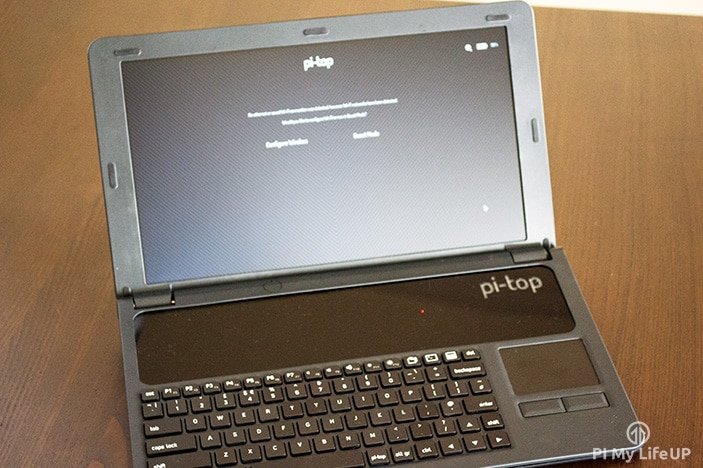
14. Now you can hook it up to a power source and turn pi-top on. You should now be able to start learning and using your very own Raspberry Pi laptop.
If you have any troubles, I have missed something or just want to leave feedback then feel free to drop a comment below.
Hopefully, this Pi-Top unboxing and assembly have helped you be able to either understand what you get in the kit or help you put it together. If you’re interested in getting one, then be sure to check out my in-depth pi-top review on the device.


I’ve watched closely for RPI form factor laptops. Very few options and worse, tied to RPI only. By this time, the RPI 4 is long in the tooth. There are also other vendors that have similar products, with better specs. Most current are boards using the RK3588 octo core SOC, Mali GPU and AI processor. Form factor makes it a no go here.
Even better, a generalized design using a CM4 carrier board. That would take care of many of the issues. Would also allow for features like m.2 ssd support, additional video outputs, etc. most important, any vendor supporting the CM4 spec would be compatible. Given the current RPI 4 pricing and specs, may help.
I watched your review of the pi-top grey laptop (which I recently purchased and received). In your review, you noted that during boot up, the software wouldn’t/couldn’t auto connect to your wireless, and that you had to log in as guest before continuing.
It looks like the pi-top people listened to you, because when I booted it, the network connectivity gave me the option to show available ssid’s and then select and connect to one. So, props for getting them to advance their design and props to them for listening to their reviewers.
Thank you!
Best regards!