In this Raspberry Pi project, we will be showing you how to set up the Surfshark VPN on your Raspberry Pi.

Surfshark is relatively new to the VPN scene but has quickly gained a lot of popularity for its privacy, security, and speed.
By following this tutorial, you will be able to get your Raspberry Pi’s network traffic routed through Surfsharks VPN servers.
Using a VPN like Surfshark can help you remain private when browsing through the internet.
Using Surfshark on your Raspberry Pi is a great project to go alongside a torrent box or one of the many web browsers.
Before completing this tutorial, you will need to sign up for an account with Surfshark.
Equipment
All the equipment that you need to set up Surfshark on the Raspberry Pi.
Recommended
- Raspberry Pi Amazon
- Micro SD Card Amazon
- Ethernet Cable Amazon or Wi-Fi Amazon
- Power Supply Amazon
- Surfshark Subscription Surfshark
Optional
Getting your Surfshark Service Credentials
Before we set up Surfshark on our Raspberry Pi, we need to get your Surfshark service credentials.
These credentials are not the same as what you use to login to your Surfshark account.
1. To get these service credentials, you need to first log in to your Surfshark account.
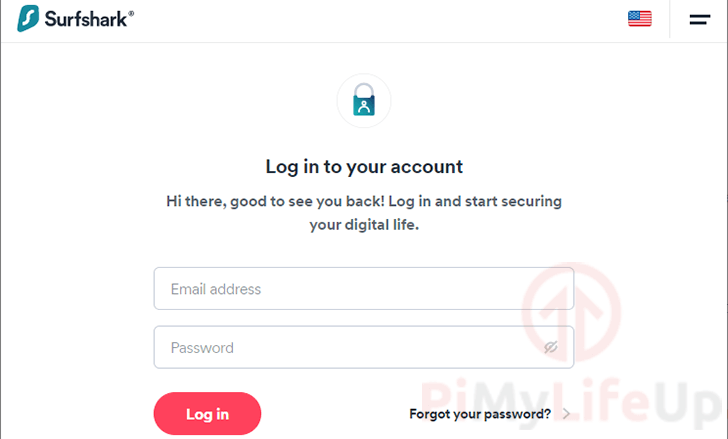
2. Once you have logged in to your account. Go to Devices, then Manual
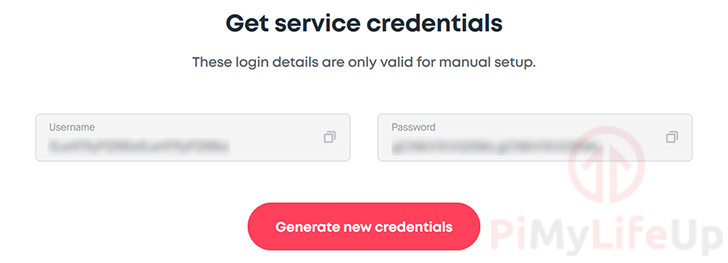
3. At the bottom of the page, you will find your service credentials.
You will need to use the username and password mentioned here to log in to the Surfshark VPN from your Raspberry Pi.
Setting up Surfshark on the Raspberry Pi
To connect to Surfshark from our Raspberry Pi, we will be making use of the OpenVPN client software.
OpenVPN is one of the most popular standards for connecting and hosting VPN’s and is one of the best supported.
1. Before we begin the Surfshark setup process, let us make sure that everything is up to date.
We can do this by running the following two commands on your Pi.
sudo apt update
sudo apt upgrade
2. Let us now install the packages we need to set up Surfshark on our Raspberry Pi by using the command below.
The first of these packages is OpenVPN. We use OpenVPN to connect to Surfsharks VPN servers.
The second package is unzip. The unzip package is used to extract the Surfshark OpenVPN configuration files that we will be using.
sudo apt install openvpn unzip3. Luckily for us, the Surfshark team has provided a super-easy way to retrieve the needed config files.
Use the following two commands to change to the openvpn directory and download the configuration files.
cd /etc/openvpn
sudo wget https://my.surfshark.com/vpn/api/v1/server/configurations
4. We can now unzip the Surfshark configuration files to the Raspberry Pi.
To extract the files, run the following command.
sudo unzip configurations5. With the files extracted, we no longer need to have the configuration archive stored on our device.
Delete this archive by using the rm command below on your Raspberry Pi.
sudo rm configurations6. We can now use the ls command to list all of the config files we have access to.
lsUse this list of files to work out which Surfshark VPN server you want to connect to.
For example, if we wanted to connect to the Sydney Surfshark server using the UDP protocol, we would use the following file.
au-syd.prod.surfshark.com_udp.ovpn7. To connect to Surfshark using OpenVPN, you can use the following command.
Make sure that you replace YOUR_FILENAME, with the file for the VPN you want to connect to.
sudo openvpn YOUR_FILENAMEFor example, if we wanted to use the file we grabbed in Step 7, we can connect using the command below.
sudo openvpn au-mel.prod.surfshark.com_udp.ovpn8. When you connect to the server, you will be required to enter your Surfshark service credentials.
These credentials are the ones you found during the first section of this guide.
9. You should now hopefully be successfully connected to Surfshark from your Raspberry Pi.
10. If you ever want to disconnect from Surfshark, then you can just quit out of the currently running terminal by pressing CTRL + C.
If you have closed out of the terminal, you can also kill the OpenVPN process.
To kill all of the currently running OpenVPN processes, you can use the command below.
sudo killall openvpnStarting Surfshark at Boot
In this section, we are going to be showing you how to start Surfshark at boot.
Doing this will allow you to be connected to your VPN as soon as your Raspberry Pi boots up.
1. First, we need to create a file that will store the username and password to Surfshark.
We will modify the OVPN files to reference it for credentials.
Begin writing the file using nano by using the command below.
sudo nano /etc/openvpn/auth.txt2. Within this file, enter the Surfshark credentials that you got in the first section of this guide.
The first line should be the username.
The second line needs to be the password.
USERNAME
PASSWORD
3. Once done, save the file by pressing CTRL + X, followed by Y, then ENTER.
4. For our next step, you will need to have an OVPN file already in mind to use.
Remember that you can use the ls command to list out of all the existing files.
We will be copying this file and naming it after the original but with a different extension.
For our example we will be using the au-mel.prod.surfshark.com_udp.ovpn file and copying it so it’s called au-mel.conf.
sudo cp /etc/openvpn/au-mel.prod.surfshark.com_udp.ovpn /etc/openvpn/au-mel.confThe reason we need to do this is the OVPN software expects it to end in .conf and not .ovpn when running as daemon.
5. Let us now modify the copied version of the file by running the following command.
We need to make some modifications to this file to use the auth.txt file that we wrote.
sudo nano /etc/openvpn/au-mel.conf6. Within this file, we need to find the following line.
auth-user-passReplace this line with the following. This change tells it to use our auth.txt file
auth-user-pass auth.txt7. Now save the changes to our file by pressing CTRL + X, followed by Y, then ENTER.
8. For our next step, we need to modify the OpenVPN defaults to connect to the Surfshark VPN.
Begin modifying the file by running the command below.
sudo nano /etc/default/openvpn9. Within this file, you need to find the following line.
#AUTOSTART="all"Then replace it with the following.
AUTOSTART="au-mel"Make sure that you replace au-me with the name of the file you created earlier. Don’t include the .conf part of the filename.
9. Once you have made the change save it by pressing CTRL + X, followed by Y, then ENTER.
10. With our changes made, we need to enable the OpenVPN service.
Enabling the service will allow the system to bring it to start OpenVPN at boot.
sudo systemctl enable openvpn11. To test that everything is now working, let us restart our Raspberry Pi.
To restart our Pi, go ahead and run the following command.
sudo rebootOnce your device restarts, you should be automatically connected to the Surfshark VPN.
Preventing DNS leaks
One problem that can sometimes occur when using a VPN is that the DNS server can leak your IP address.
To resolve this, we can change the DNS servers that our Raspberry Pi uses to an alternative one.
For this guide, we are going to use Cloudflare’s 1.1.1.1 DNS service.
1. Begin modifying the dhcpcd configuration file by running the command below.
sudo nano /etc/dhcpcd.conf2. Within this file, we need to start by finding the following line.
You can also use CTRL + W to find this line quicker.
#static domain_name_servers=192.168.0.1Replace that line with the following.
static domain_name_servers=1.1.1.1If you want to use a different DNS server, make sure that you replace 1.1.1.1.
3. Save your changes by pressing CTRL + X, followed by Y, then ENTER.
4. To load in our changes, let us go ahead and restart our device.
To reboot the Raspberry Pi, you can run the following command.
sudo reboot5. You can verify that your IP address is no longer leaking by making use of the ipleak.net service.
Hopefully, at this point, you will now have successfully connected to the Surfshark VPN service on your Raspberry Pi.
If you have run into issues with getting connected to Surfshark, feel free to leave a comment below.
Affiliate link disclaimer: All the products I mention on this website I have personally purchased and used at least once. Some of the links on this website are affiliate links that earn me a small commission whenever a sale is made.


Hello,
I have try to follow the steps but stuck on Step 4. I have attach a screenshot. Where am I missing it?
Thanks
Hi Opam,
It looks to me as if you have added spaces to the URL we are running
wgeton.The command you used should look like
and not
Cheers,
Emmet
URL to SurfShark’s “configurations” file has changed to:
https://my.surfshark.com/vpn/api/v1/server/configurationsHi Rick,
Thank you very much for pointing this out. I have updated the guide to use the new URL.
Cheers,
Emmet
“sudo nano /etc/defaults/openvpn” doesn’t work for me, how do I find out the real path? I’m on Raspbian lite latest on Pi 4
Hi DP,
Thank you for pointing that out, I accidentally added an s on to “default”.
I’ve corrected the issue within the tutorial so it should be working fine now!
Cheers,
Emmet
Is there a fee/charge/subscription/membership/cost associated with using the Surfshark service? Why would I select Surfshark over TunnelBear which I already have?
Hi Dashing,
Yes there is a monthly subscription to use the Surfshark service. So if you are after a free one then this is definitely not the one to go with.
The biggest advantange to a service like Surfshark is the speed and privacy. Like for example Surfshark reworked there server software so it runs entirely on RAM, meaning no data is ever logged to the hard drive. So if the server is ever powered down or rebooted all the information is cleared completely.
Cheers,
Emmet