In this tutorial, we will be showing you how to run Pi-hole on a Synology NAS.
Pi-hole is a super powerful and useful network-wide ad blocker that acts as a DNS sinkhole.
Being a DNS sinkhole makes this ad blocker super versatile. It should work with any device that lets you change the DNS server. All you need to do is point a device to your DNS server, which will block any ad provider requests.
A Synology NAS is a great way to run Pi-hole as it is a device you will typically have running all the time anyway. In addition, Pi-hole is super lightweight, meaning it shouldn’t consume too much processing power or memory.
Best of all, it is really easy to set up Pi-hole on a Synology NAS; in fact, you can have it up and running within a few minutes.
If you choose to use an ad blocker, we recommend supporting the sites you visit often in another way. Most websites rely on ads to keep running. We offer a premium offering on PiMyLifeUp that removes ads from our site while still supporting us.
Installing and Running Pi-hole on your Synology NAS
In the following sections, we will walk you through the process of installing and running the Pi-hole network adblocker on your Synology NAS.
These steps were written for DSM 7.2 and should work on almost any of the Synology range.
Preparing your NAS
1. Before you continue any further, you must have Docker installed on your Synology NAS.
If you haven’t set up Container Manager already, follow the guide we linked above.
Creating a Folder for Pi-hole on your Synology
2. To run Pi-hole on your Synology NAS, you will need to create a folder to store the “Compose” file and two additional folders to store various configuration files.
To start creating these folders, open the “File Station” application from your Synology interface.

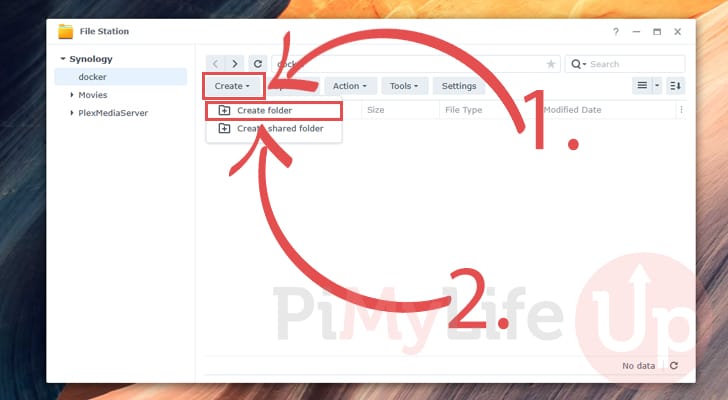
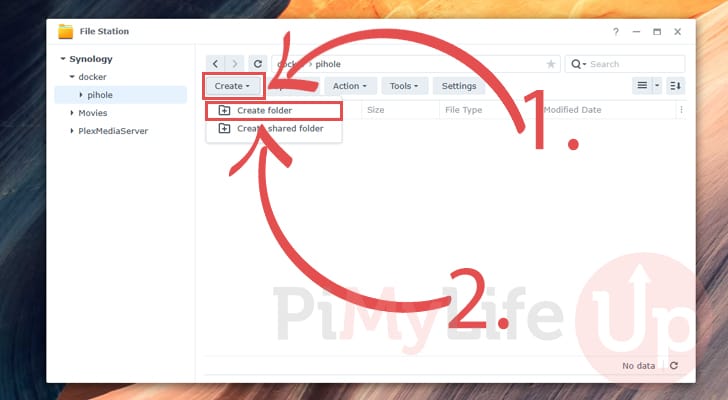
3. With File Station open, navigate to the share where you want to store Pi-hole’s configuration. We use the “docker” share created when we set up Container Manager.
Once you are in the correct place, click the “Create” button (1.), and then click the “Create Folder” option (2.).
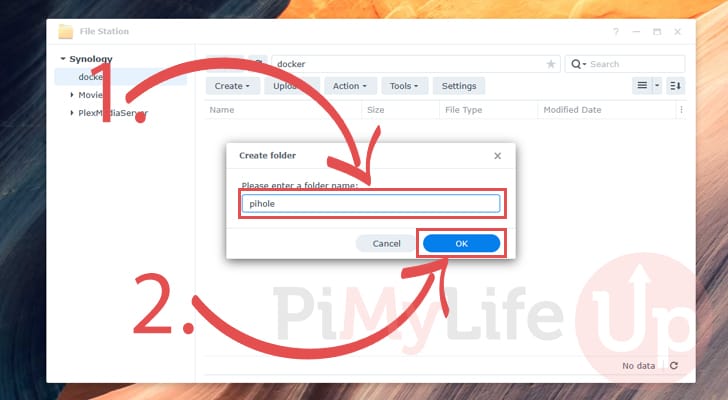
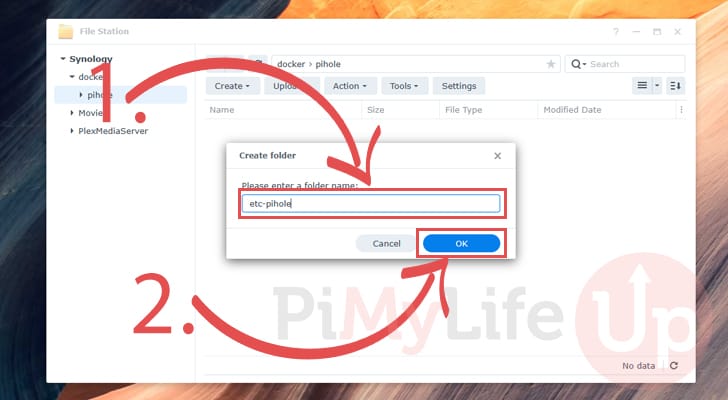
4. As this folder will store Pi-hole and its various files we will name this folder “pihole” (1.).
Once you have typed out a name, click the “OK” button (2.).
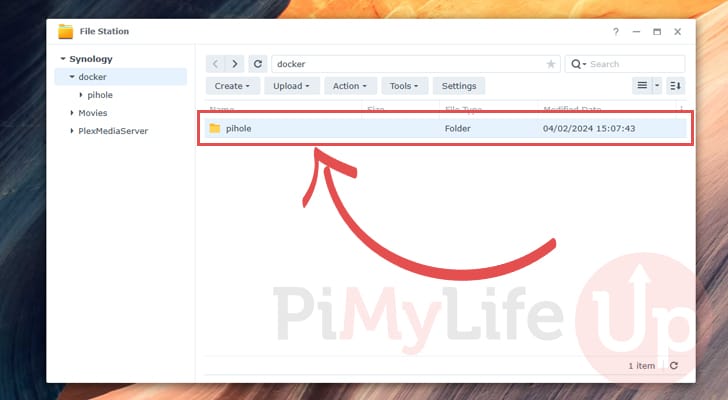
5. Once the folder is created, change into it, as we still need to create two directories.
You can open a folder by double-clicking it.
6. Again, open up the create folder dialog by clicking the “Create” button (1.) followed by the “Create Folder” option (2.).
7. We are creating a folder where Pi-hole will store its configuration files on our Synology NAS. We will name this folder “etc-pihole” (1.).
After typing out the name, click the “OK” button (2.).
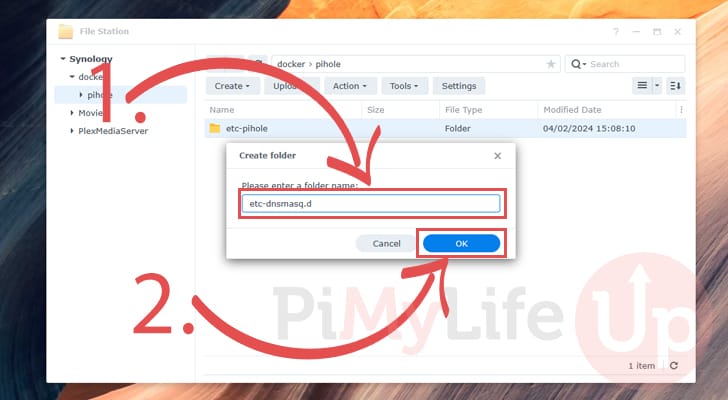
8. We can create the final folder we require by opening the create folder dialog one last time.

9. This particular folder will store configuration files that control how the Pi-hole DNS server works. Name this folder “etc-dnsmasq.d” (1.) and then click the “OK” button (2.) to continue.
Opening Container Manager
10. Since DSM 7.2, Synology has provided a container manager that makes setting up Docker containers like the one we use for Pi-hole a really straightforward process.
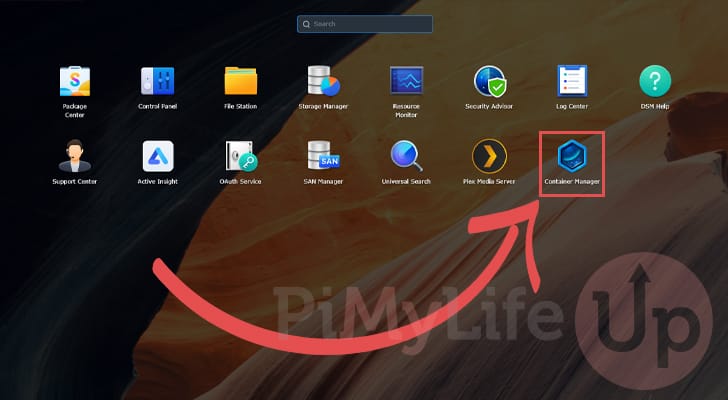
To access this app, click the applications button in the top-left corner.
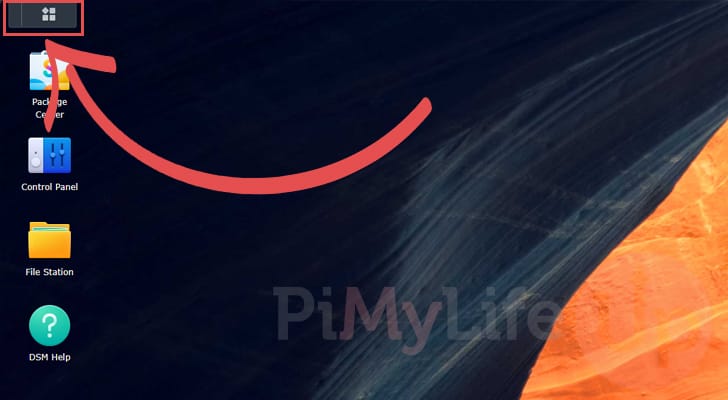
11. Within the list of applications, you should see one labeled “Container Manager“. Click this icon to launch the application.
Setting up Pi-Hole on your Synology NAS
12. Now that you have the Container Manager open on your screen we can move on to setting up Pi-hole on your Synology NAS.
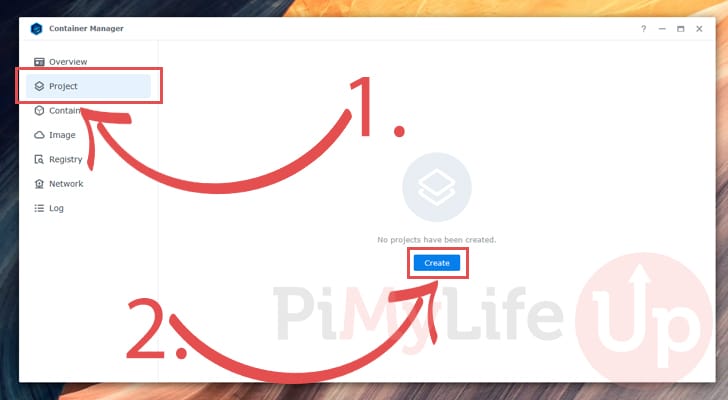
First, you will want to change to the “Project” tab using the sidebar (1.). Projects allow us to use Docker Compose files, which makes installing the Pi-Hole container easy.
Once on this page, you should see a button labeled “Create” (2.). Click this button to proceed.
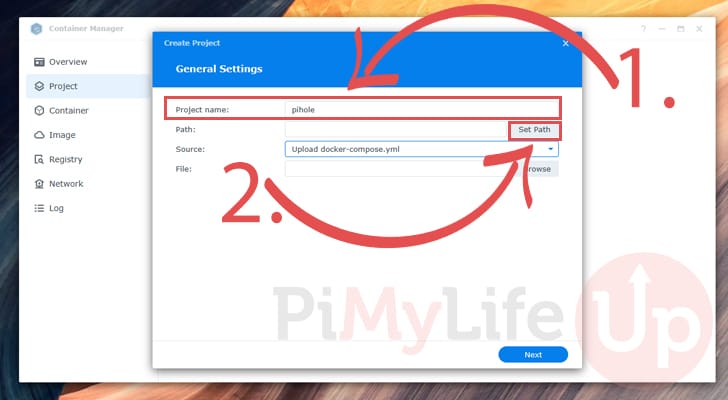
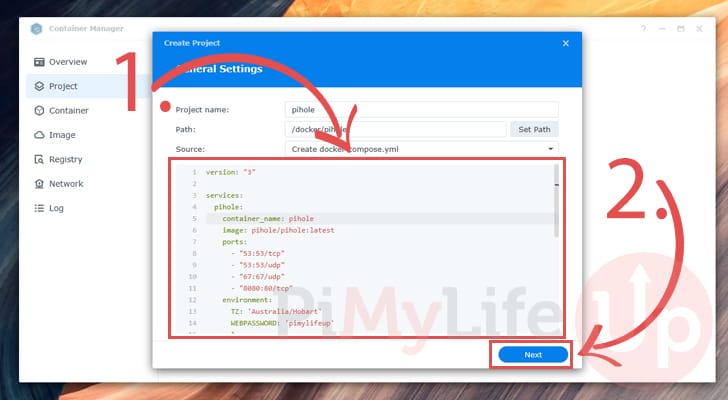
13. We now need to fill out some additional information about this “project“. Your first step is to name this project (1.). Since we are using this to run Pi-hole, we simply named as “pihole“.
After naming the project, we need to select where it will be stored. Click the “Set Path” button (2.) to open the file chooser.
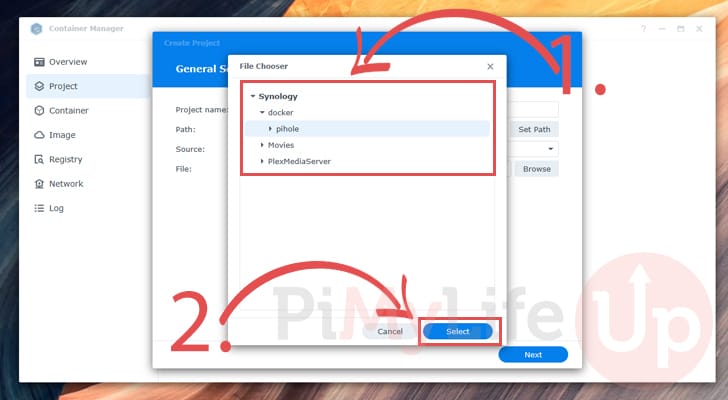
14. With File Chooser open, find and select the “pihole” directory that we created at the start of this tutorial (1.). In our example, this directory was located within the “docker” share.
Once the correct folder is selected, click the “Select” button (2.).
15. Our next step is to change the mode from “upload” to “create“. To begin changing the mode, click the select box on the screen (1.).
From the dropdown box that appears, click the option labeled “Create docker-compose.yml” (2.).

16. Within the textbox on the screen (1.), you will want to enter the following lines. These lines tell Docker on your Synology how to run the Pi-hole container.
While typing out these lines, you will need to replace two placeholders.
<TIMEZONE>: Setting the time zone allows all of Pi-hole’s statistics to match up with where you live. You must replace this value using a valid TZ identifier.
For example, we would use “Australia/Hobart“.<PASSWORD>: Replace this placeholder with the password you will use to access the Pi-hole web interface.
version: "3"

services:
  pihole:
    container_name: pihole
    image: pihole/pihole:latest
    ports:
      - "53:53/tcp"
      - "53:53/udp"
      - "67:67/udp"
      - "8080:80/tcp"
    environment:
      TZ: '<TIMEZONE>'
      WEBPASSWORD: '<PASSWORD>'
    volumes:
      - './etc-pihole:/etc/pihole'
      - './etc-dnsmasq.d:/etc/dnsmasq.d'
    cap_add:
      - NET_ADMIN
    restart: unless-stoppedCopy
Once you have finished filling out this form, click the “Next” button to proceed (2.).
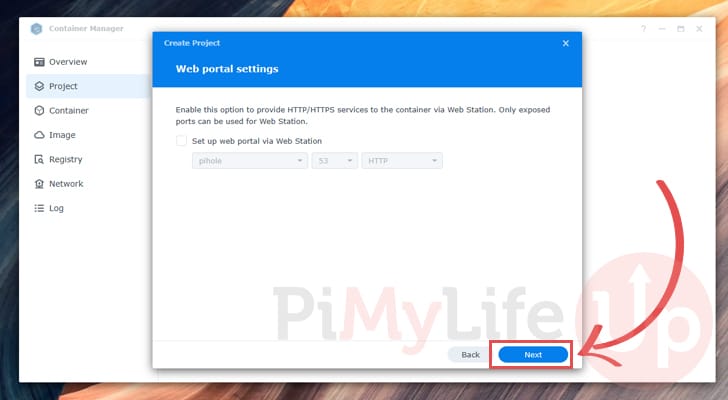
17. You will now be asked if you want to set up “web portal” for your new service. As we aren’t interested, we can simply click the “Next” button to proceed.
18. You will now be given a quick summary of the project you are creating.
To start up Pi-hole on your Synology NAS all you need to do now is click the “Done” button.

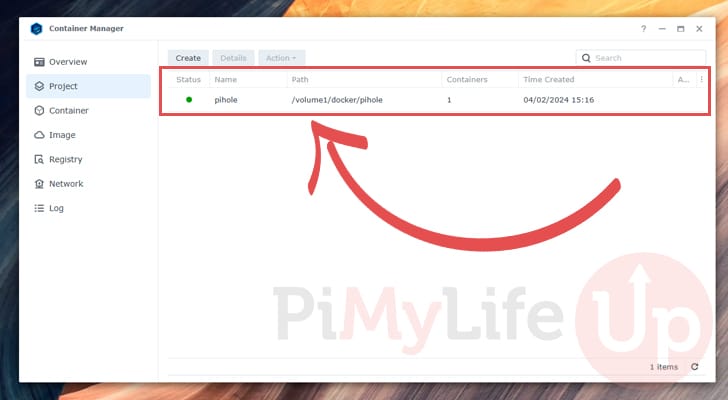
19. If everything has worked correctly, you should now have Pi-hole up and running, and the orb in the “Status” column should be green.
Accessing the Pi-hole Web Interface
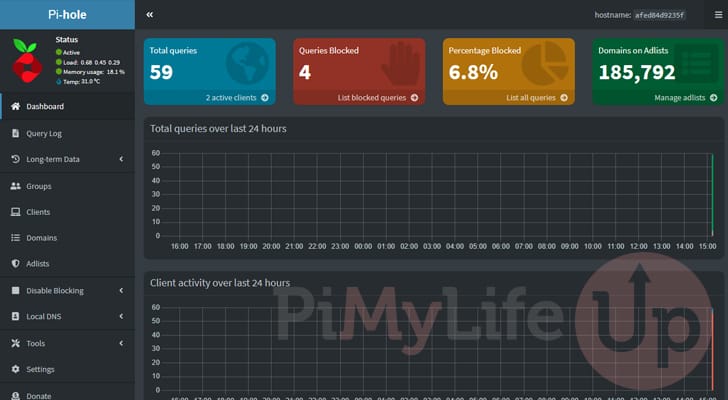
20. Now that you have Pi-hole set up on your Synology NAS you will want to know how to access its web interface. This interface allows you to control basically every aspect of the network-wide ad-blocker as well as where you can see how it is performing.,
To access the web interface, you will want to go to the following URL in your favorite web browser. Ensure that you replace “<IPADDRESS>” with the IP of your NAS.
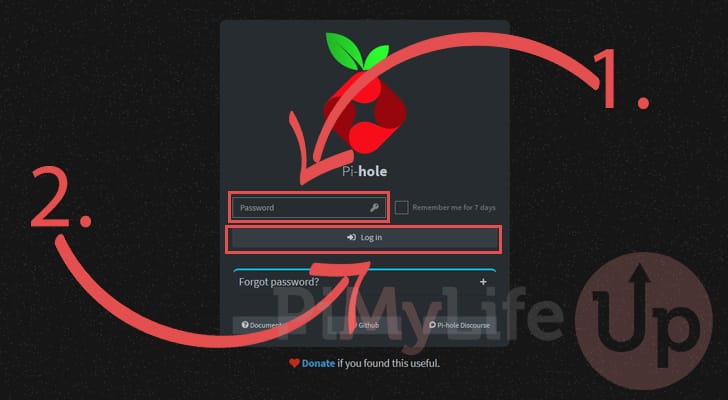
http://<IPADDRESS>:8080/admin21. When you go to the URL above, you must log in to access the web interface. First, you must type in the password (1.) that you set earlier in this guide.
After filling out your password, click the “Log In” button (2.).
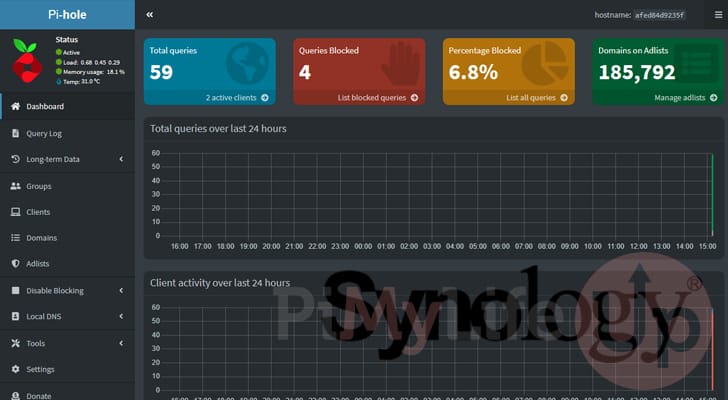
22. Below, you can see that we now have Pi-hole running on our Synology NAS and that our devices are already sending DNS requests to it.
Remember that for Pi-hole to work you will need to point your devices to the IP address of your NAS. Pi-Hole is operating on ports 53 and 67 and will immediately begin to handle DNS requests.
Conclusion
By this point in the guide, you should hopefully have Pi-hole up and running on your Synology NAS.
As mentioned earlier, your NAS is a great place to host tools such as this network ad blocker as you typically keep your NAS running 24/7.
If you need help running this software, please feel free to comment below.
If you liked this tutorial, please feel free to explore our many other Synology guides.


“For those who come after”
I had an issue with Line 14 command “WEBPASSWORD:” of the copy/pasta
When attempting to log into PiHole in step 21, I would just receive an error message stating password is incorrect
After digging around, I found this command:
FTLCONF_webserver_api_password:
after changing to ^ line, it instantly let me log in
To sum up, or rephrase in case above is confusing.
If you also receive an error message stating password is incorrect, try changing line 14 to
FTLCONF_webserver_api_password: ”
Other than this weird issue I came across and not sure as to why, I want to say thank you for an amazingly clear guide. and I appreciate the work that went into this. You guys are the GOAT
Great tutorial! I was running adguard, shut it down and switched to PiHole. Thank you so much!
Very clear and detailed tutorial.
Kudos.