In this tutorial, I go through the steps of installing a Minecraft server on a Mac computer.

Minecraft is a hugely popular sandbox game where you can create your own world solo or with other people. There are loads of solutions for hosting your world, but if you have some spare hardware, you can host it yourself.
A Minecraft server is very dependent on how much RAM is available on your system. At a minimum, you will require 1-3 GB for 1-5 players.You can check to see how much RAM is available by going into the memory tab in the Activity Monitor application.
The steps below will take you through installing the Minecraft server software onto a computer running macOS. In addition, we have other guides that can show you how to do the same on Ubuntu, Raspberry Pi, or a VPS.
Installing the Java Minecraft Server on Mac
The process of installing a Minecraft server on a Mac computer is relatively straightforward. First, however, you must ensure you have Java installed on your system.
This tutorial will use the terminal application on your Mac, as it is much easier to follow the instructions. You can find the terminal app in the applications section of finder.
1. Firstly, you will want to ensure that Java is installed on your Mac. If you do not have it installed, I recommend following our guide on installing Java.
java --versionCopyYou will get a notice with the version number if you have it installed. Otherwise, you will see an error message like the one below.
The operation couldn't be completed. Unable to locate a Java Runtime.Copy2. Next, we will want to create a directory to store all our Minecraft server data. Enter the following command to ensure you are in your home directory.
cd ~CopyNow create the Minecraft directory by running the following command in the terminal.
mkdir minecraftCopyNext, use the cd command to change into our newly created directory.
cd ~/minecraftCopy3. With Java installed and our directory setup, we can download the Minecraft server software from the website.
I recommend using the wget command to download the server package. Alternatively, you can browse the website and download it to our Minecraft directory.
wget https://piston-data.mojang.com/v1/objects/8f3112a1049751cc472ec13e397eade5336ca7ae/server.jarCopyIt will now download the server.jar file to your Mac computer.
3. You can use the ls command to confirm that the file has downloaded successfully. The directory should only contain server.jar.
guss-MBP:minecraft gus$ ls
server.jar
Starting the Minecraft Server
Now that we have the Minecraft server downloaded, we will want to start it for the first time. The steps below explain each step and the command you need to start the server.
1. Before you launch the server, you should learn the Java command and the options you will use to specify resources.
-Xmsis for specifying the initial size of the memory allocation pool. The default number is in bytes, but entering a letter after the number lets you specify a different size. For example, K or k for kilobytes or M or m for megabytes.-Xmxis for specifying the maximum size of the memory allocation pool. The default number is in bytes, but entering a letter after the number lets you specify a different size. For example, K or k for kilobytes or M or m for megabytes.-jarallows us to point Java to our server jar file.noguispecifies that we do not need to use the GUI (Graphical User Interface). The server will run entirely in the terminal.
A Minecraft server traditionally uses a lot of memory, so it is best to set quite a high minimum and maximum. First, you will need to check how much RAM your Mac has available. My model has 8GB, so I will specify a minimum of 1024M and a maximum of 4096M.
Below is the command that I will be using to run the server.
java -Xms1024M -Xmx4096M -jar server.jar noguiCopy2. The server will begin to launch but will stop soon after, as you need to agree to a EULA first.
[22:37:51] [ServerMain/ERROR]: Failed to load properties from file: server.properties
[22:37:51] [ServerMain/WARN]: Failed to load eula.txt
[22:37:51] [ServerMain/INFO]: You need to agree to the EULA in order to run the server. Go to eula.txt for more infoCopy
3. Accept the EULA by opening the eula.txt file. You can do this by entering the following command. Alternatively, you can find it using the GUI.
nano eula.txtCopy4. Find the line that says eula=false and update it to say eula=TRUE. Changing the value to true means you agree to abide by the Minecraft Eula.
5. Now, run the command to start the server, and it should start without issue.
java -Xms1024M -Xmx4096M -jar server.jar noguiCopyIf you ever need to stop the server, enter /stop into the terminal. Alternatively, you can unsafely shut the server down by pressing control + c.
Whenever you go to relaunch the server, ensure the terminal is in the correct directory.
Testing the Server
To test that the server is working correctly, you will want to launch the Minecraft Java client on a different computer from the one the server is running on.
1. First, find the IP address of the Mac computer running your server, as you will need it to connect to the server.
In the terminal, you can run the following command to get the IP address. Replace en0 with en1 if you are using ethernet.
ipconfig getifaddr en0CopyAfter entering this command, you should see an IP address.
192.168.0.11Copy2. On your client computer, download and install the Minecraft client from the official website.
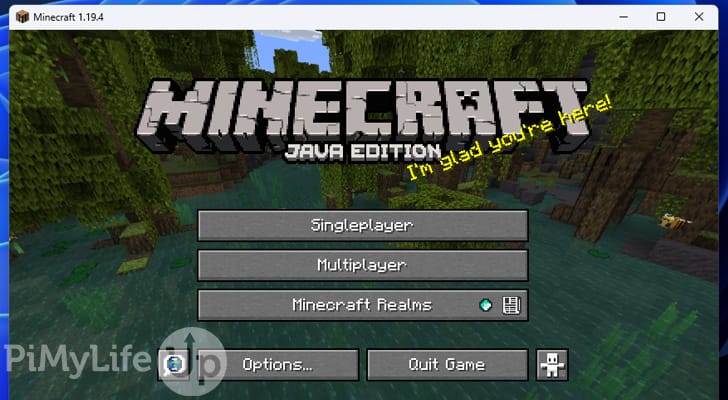
3. Load the Minecraft client on your computer and click on the Multiplayer menu option.
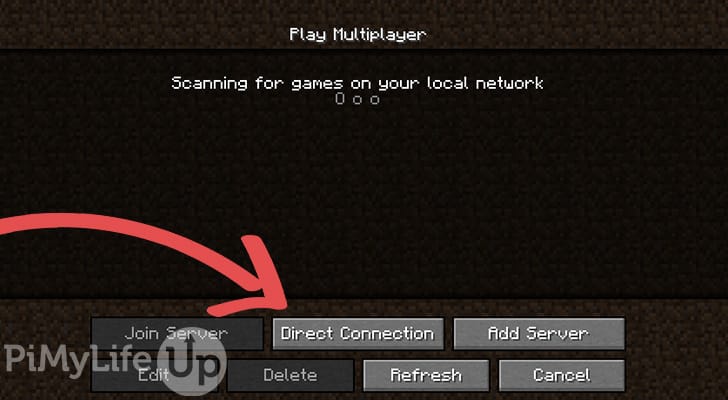
On the next screen, click on direct connection and enter the IP address we retrieved earlier.
You should now successfully connect to the Mac Minecraft server. If you are having trouble connecting, try restarting the computer running the server and launching the server again.
Additional Configuration
These steps are optional, but I recommend doing them if you want to configure the server to suit your requirements better.
Making a User OP
To make a user a server operator, you can run a simple command in the server’s terminal. Making a user a server operator will allow them to perform administration actions within the game. For example, changing the time of day, banning other users, and more.
To make a user OP, use the command below. Ensure you replace username with the username of the user you wish to promote.
op usernameCopyIf the command is successful, you will see a response like the example below. However, if you get an error, such as “That player does not exist”, you may need that user to login to the server.
[Server thread/INFO]: Made username a server operator.CopyIf you ever wish to remove a user as a server operator, use the deop command.
deop usernameCopyEditing the Server Properties
You may want to adjust the server properties so that the server is more catered to your liking. For example, you can change the difficulty, max players, game mode, and much more. However, I recommend checking out different server properties before making any changes.
To make changes to the server properties, you can edit it within the terminal or find it using the finder tool.
Using the Terminal
1. To locate it using the terminal, simply navigate to our Minecraft directory.
cd ~/minecraftCopy2. Inside this directory, run the following command.
nano server.propertiesCopyUsing Finder
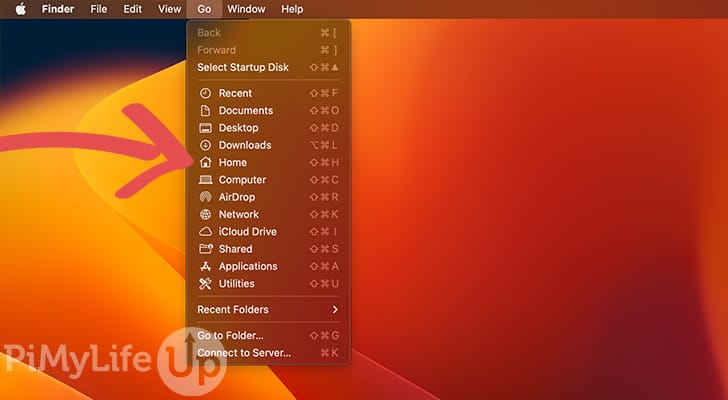
1. Open the finder app and click go in the top navigation bar. Then, inside the dropdown, click on Home.
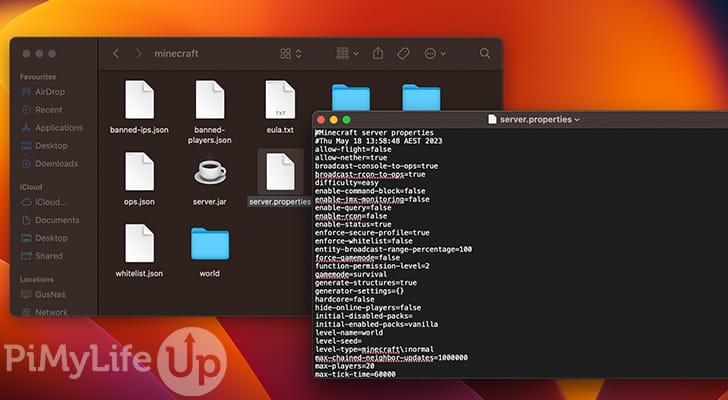
2. Inside this directory, double-click on the Minecraft folder.
3. Double-click server.properties to open the file. You may receive a prompt asking you to choose an application to load the file. I use the basic text editor, but any text editor will work fine. You should not need to download any additional software from the app store.
Port Forwarding
If you ever want to play with friends outside your local network, you will need to set up port forwarding. However, there are additional security risks when you open up external ports to internal hardware, so be vigilant when opening ports.
Since every router differs, we recommend following the manufacturer’s instructions for opening ports. Typically, you will need to tie the internal IP and port to an external port. For example, Minecraft’s default port is 255650.
Another thing to be wary of is some ISPs use CGNAT, which makes port forwarding almost impossible. So, you may need to look into other solutions such as Tailscale.
Start on Boot
Setting up the Minecraft server to startup on boot will require extra configuration within the operating system. We recommend starting the server whenever you plan on playing the game.
Conclusion
I hope you now have a Minecraft server running on your Mac computer and that you are able to connect to it.
If you are having issues, try going back through each step and checking to see if any errors have occurred. These errors will help troubleshoot any issues you may be having when trying to run the server.
If you run into any issues or have any feedback, feel free to drop a comment below.