This guide will show you how to perform a traceroute on macOS by using the terminal.
Performing a traceroute on macOS is a useful tool that allows you to check the route your connection takes.
By checking the route your connection takes, you can diagnose why you can’t reach a certain website or why that connection might take a considerable time.
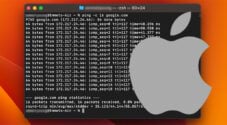
When used alongside the ping utility, the traceroute tool can be a handy tool for diagnosing networking issues on your Mac.
Traceroute works by logging each router that your Mac’s connection passes through. The log contains the IP address of the router as well as the latency of connecting to it.
Since macOS Big Sur, Apple removed the Network Utility application, and the only way to perform a traceroute now is through the terminal. Luckily using the terminal on macOS is a straightforward process.
How to Run a Traceroute on Mac within the Terminal
Over the following few sections, we will show you how to open the terminal on your Mac and perform a traceroute against a website like Google.
Opening the Terminal on macOS
1. Before performing a traceroute from your Mac, we will need to open the terminal.
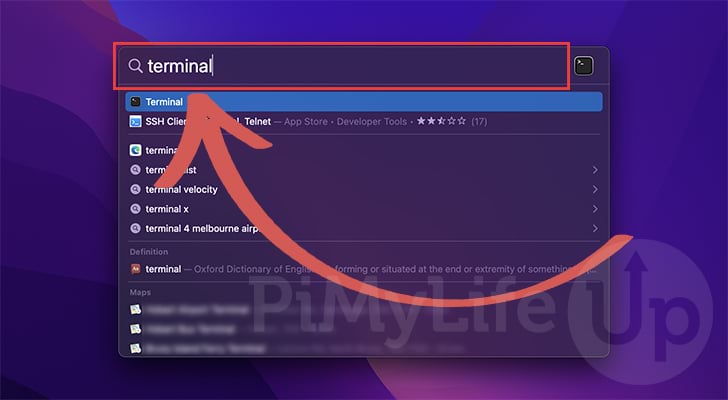
The easiest and fastest way to open the terminal is by using Spotlight. You can open Spotlight on macOS by pressing COMMAND + SPACE.
2. With Spotlight open, you need to type in “terminal” and either press the ENTER key or select the first option, as shown below.
3. You can also open the terminal by opening the “Finder” application, opening the “Applications” folder, then switching to the “Utilities” folder and opening the “Terminal” application from there.
We find Spotlight a much easier and faster way to open the terminal.
Using the Traceroute Command on your Mac
Once you have the terminal open on your Mac, we can now show you how to perform a traceroute.
Over the following few sections, we will show you the syntax for the traceroute command and how to utilize it.
Syntax of the Traceroute Command on macOS
Let us start by looking at the syntax for the traceroute command. The traceroute options allow you to modify the behavior of the routing and perform additional lookups, such as getting the ASN for each hop.
When used without any options, the command will trace the route your connection takes to get to the destination. On every hop, the tool will log the IP address it has connected through and the latency for connecting to that hop.
At its most basic usage, you only need to use “traceroute” followed by the destination you want to route to.
traceroute [OPTIONS] DESTINATIONCopyRunning a Traceroute on Mac
To showcase the traceroute in action, let us route the connection our Mac took when connecting to a service like “Google.com“.
1. Tracing this route on macOS will be as simple as using “traceroute” followed by our destination, which will be “google.com“.
Even though we specify a domain name, the traceroute tool will automatically resolve this to an IP address and route to it.
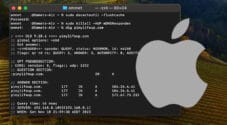
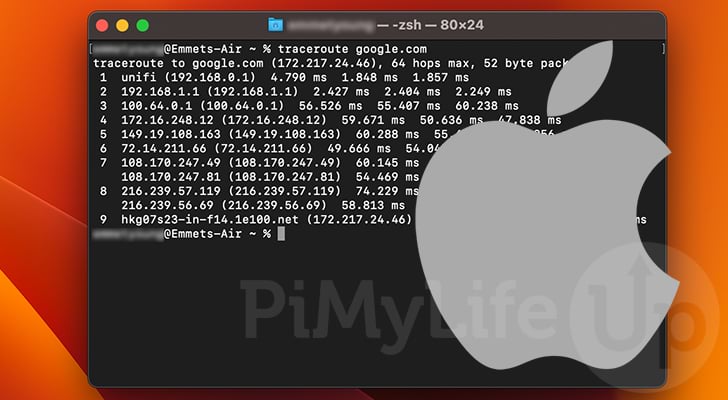
traceroute google.comCopy2. Below is an example of a result you would get from running the traceroute command on your Mac.
Traceroute will log each hop your connection makes on a new line. You will see the IP address you routed through on each line and the latency to that particular router.
By default, the traceroute tool will make three queries to each hop giving you three different latencies for connecting to that hop. This latency differs from the one produced by the ping command, which returns the total time.
traceroute to google.com (172.217.24.46), 64 hops max, 52 byte packets
 1  unifi (192.168.0.1)  4.790 ms  1.848 ms  1.857 ms
 2  192.168.1.1 (192.168.1.1)  2.427 ms  2.404 ms  2.249 ms
 3  100.64.0.1 (100.64.0.1)  56.526 ms  55.407 ms  60.238 ms
 4  172.XX.XXX.XX (172.XX.XXX.XX)  59.671 ms  50.636 ms  47.838 ms
 5  149.XX.XXX.XXX (149.XX.XXX.XXX)  60.288 ms  55.650 ms  49.256 ms
 6  72.XX.XXX.XX (72.XX.XXX.XX)  49.666 ms  54.045 ms  42.405 ms
 7  108.XXX.XXX.XX (108.XXX.XXX.XX)  60.145 ms  75.856 ms
    108.XXX.XXX.XX (108.XXX.XXX.XX)  54.469 ms
 8  216.XXX.XX.XXX (216.XXX.XX.XXX)  74.229 ms  61.089 ms
    216.XXX.XX.XX (216.XXX.XX.XX)  58.813 ms
 9  hkg07s23-in-f14.1e100.net (172.217.24.46)  48.333 ms  46.870 ms  60.349 ms
3. If you ever want to stop the traceroute before it completes, you simply need to press CTRL + C on your keyboard.
Reading the Traceroute Results on your Mac
Let us explore the data that the traceroute utility gives you on your Mac by breaking it down into four separate columns.
Each column tells you something different about the router your connection passes through.
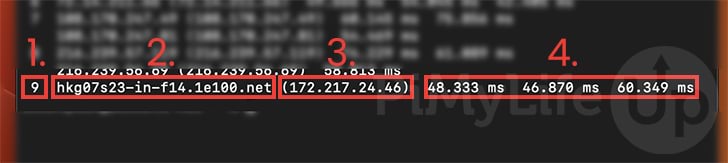
1. The first column is the current hop for that particular entry. Each time your connection has to route through another router, this value will be increased by one.
You will notice that in a home network, the first hop will typically be your router. After that, additional hops will be the routers your connection passes through to reach its destination.
The last hop should be that of the destination server.
2. The second column will either show an IP address or DNS name belonging to that particular hop.
If you see a domain name, this is a reverse DNS name and will be a DNS record that should route to the IP address shown in column 3.
3. The third column will always contain the IP address belonging to the router that the connection passes through on that hop.
4. The final columns show you the round-trip times for your connection. The number of columns here will differ depending on how many queries you have told traceroute to make from your Mac. By default, this means you should see three different times.
The round-trip time shows you how long it takes for your Mac to send a message to that router and then to receive a response. This timing gives you an idea of how fast a particular route takes.
Conclusion
Hopefully, at this point in the guide, you will know how to perform a traceroute on macOS.
A traceroute allows you to check the route your Mac’s connection takes to the destination. This tool is incredibly useful for diagnosing connection issues where a host is either unreachable or behaving unexpectedly.
Please comment below if you have questions about using traceroute on a Mac.
To learn more about using macOS, check out our many tutorials.