In this tutorial, we will be showing you how to install Home Assistant on your system using Docker Compose.
Home Assistant (HASS) is one of the best open-source solutions for home automation. Thanks to being so heavily supported, this software has gained the support for numerous third-party devices.
There is an unending amount of use cases for Home Assistant. For exampledocke, you can use Home Assistant to control whether an aircon system should be turned on or off depending on the forecast temperature for the day. You can even use it to monitor data from a weather station and much more.
You can install this smart home software to a device in several ways. One of the most popular solutions is to install Home Assistant using a Docker container using Compose.
The advantage of using Docker is that you don’t have to dedicate your whole operating system to Home Assistant. You also don’t have to worry about other software interfering with Home Assistant’s functionality.
The two other methods for installing Home Assistant is the following.
- Home Assistant OS (HASSOS) is the recommended way to set up Home Assistant. However, it means your entire system will be dedicated to running this operating system. It doesn’t offer a clean way of installing additional software alongside the smart home server.
- Home Assistant Core is another variant. This version allows you to install all of the functionality of Home Assistant to a Debian-based operating system. This allows you to run other software alongside the smart home software. However, it is the most difficult solution to get running and is the one you will most likely have issues with.
Using Docker Compose to set up Home Assistant offers a middle ground between the two versions. It allows you to keep using your chosen operating system while also being easy to set up and use.
The significant downside, however, is that you lose access to add-ons. Addons are user-created and help extend the functionality of Home Assistant. They will often integrate directly into the server with little to no work needed by the end user. Installing things like Node-RED becomes a lot more messy when dealing with Docker.
The only pre-requisite for using the Docker version of HASS is that your system can run Docker.
These particular steps we will be covering will assume that you are running a Linux based operating system.
How to Install Home Assistant using Docker Compose
Now that we have gone over the differences between the variants of Home Assistant let us move on to how to use Docker Compose to install this smart home software.
During these installation steps, we will add a couple of other crucial pieces of software you will likely want to use.
Thanks to Docker compose, installing additional software is super simple and we can keep it all within the same file.
If you prefer to watch a video on how to install Home Assistant using Docker, be sure to check out the video we have embedded below. Alternatively, you can skip to the next section to follow our written version of the guide.
Preparing for Home Assistant
Thanks to the Docker container for Home Assistant, there isn’t much we must do to set it up.
1. Before proceeding, you must install Docker on your operating system. We have guides that cover this for the Raspberry Pi and Ubuntu.
Once you have installed Docker and ensured it works, you can start this guide.
2. Another essential thing to have set up is a static IP address for the device you plan to run Home Assistant on.
This home automation system often needs to communicate back and forth with devices, so having an IP that changes can break things. Additionally, it makes it a lot easier to manage when you know what IP address it will always be on.
The best way to set a static IP address is through your routers DHCP reservations. However, we do have guides on setting a static IP address on Ubuntu and a Raspberry Pi.
3. Our next step is to create a folder to keep the Home Assistant Docker Compose file. This directory will be located at “/opt/stacks/hass“.
You can create this directory by using the mkdir command, as shown below.
sudo mkdir -p /opt/stacks/hassCopyUsing the “-p” option ensures that mkdir can create all missing directories in the path.
4. After creating the new directory, we can now change to it by running the command below.
cd /opt/stacks/hassCopyWriting the Docker Compose File for Home Assistant
5. Now that we are within the correct directory, let us start writing a Docker Compose file for Home Assistant using the command below.
We will use this Compose file to install the Home Assistant, Node-RED, and VS Code containers.
While we are using the nano text editor in this guide, you can use whatever you feel like
sudo nano compose.yamlCopy6. We will break this Compose file into multiple sections to explain what is happening.
Understanding what this Compose file for Home Assistant does will make your life easier later on if anything goes wrong.
Docker Compose Config for Home Assistant
a. At the top of this file, we will add our first service. That service will be Home Assistant itself.
Home Assistant’s Docker setup doesn’t require us to specify much for it to work. The main things we need to set are the volumes.
With this configuration below, we are setting it up so Home Assistants config files will be kept within the “/opt/stacks/hass/hass-config” directory.
services:
  homeassistant:
    container_name: homeassistant
    image: "ghcr.io/home-assistant/home-assistant:stable"
    volumes:
      - ./hass-config:/config
      - /etc/localtime:/etc/localtime:ro
      - /run/dbus:/run/dbus:ro
    restart: unless-stopped
    privileged: true
    network_mode: hostCopy
Config for Node-RED
b. The next container we will add to our Compose file is Node-RED. Node-RED is something you will want to use alongside Home Assistant, it makes setting up automation a straightforward process.
Using the “depends_on” option ensures this service only starts once Mosquitto and Home Assistant have started.
You must replace “<TIMEZONE>” with a valid TZ Timezone value. You can find the identifier using the list of tz database time zones on Wikipedia.
For example, living in Hobart, Australia, I would use “Australia/Hobart” for my time zone.
  nodered:
    container_name: nodered
    image: nodered/node-red
    environment:
      - TZ=<TIMEZONE>
    ports:
      - 1880:1880
    volumes:
      - ./nodered:/data
    depends_on:
      - homeassistant
      - mosquitto
    restart: unless-stoppedCopy
Setting up a Mosquitto Broker
c. Our next container is for Mosquitto. This MQTT broker service can work alongside our Home Assistant Docker container.
MQTT acts like a messaging service that makes it easier for Home Assistant to send and receive messages from sensors and other devices.
Like Node-RED above, you must replace “<TIMEZONE>” with your time zone.
  mosquitto:
    container_name: mosquitto
    image: eclipse-mosquitto
    environment:
      - TZ=<TIMEZONE>
    ports:
      - 1883:1883
      - 9001:9001
    volumes:
      - "./mosquitto/config:/mosquitto/config"
      - "./mosquitto/data:/mosquitto/data"
      - "./mosquitto/log:/mosquitto/log"
    restart: unless-stoppedCopy
Adding VS Code for Easy File Editing
d. The final service we want to add to our Home Assistant Docker Composer setup is for VS Code.
This tool will allow us to quickly and easily edit Home Assistant’s configuration files from the web browser.
  code-server:
    container_name: code_server
    image: lscr.io/linuxserver/code-server:latest
    environment:
      - TZ=<TIMEZONE>
      - DEFAULT_WORKSPACE=/config
    ports:
      - 8443:8443
    volumes:
      - ./hass-config:/config
    restart: unless-stoppedCopy
Save your Changes
7. With that done, we have now finished writing the compose file for our Home Assistant setup.
If you are using nano like we are, you can save and quit by pressing CTRL + X, Y, and then ENTER.
Setting up Mosquitto for your Docker Compose
Before we can start up our Docker Compose file for Home Assistant, we must do some additional configuration for mosquitto.
Writing the Config File for Mosquitto
8. There are a couple of things that we want to enable for Mosquitto that aren’t in the default configuration.
Namely, we want to enable data persistence and specify the location for Mosquitto to log data.
To do this, let us first create the directory where this config file will be stored by running the following command.
sudo mkdir -p /opt/stacks/hass/mosquitto/configCopy9. Once we have created the directory to store the config file, we can begin writing it using the below command.
sudo nano /opt/stacks/hass/mosquitto/config/mosquitto.confCopy10. Within this file, enter the following lines.
persistence true
persistence_location /mosquitto/data/
log_dest file /mosquitto/log/mosquitto.log
listener 1883
listener 9001
allow_anonymous true
11. After finishing entering the lines above, save and quit by pressing CTRL + X, then Y, and finally ENTER.
Creating a User for the Mosquitto Docker Container
12. The Mosquitto Docker container is set up to use a very specific user with a UID and GID of 1883.
First, we can use the following command to create a group with the name “mosquitto” and the GID of 1883.
sudo groupadd -g 1883 mosquittoCopy13. With the group created, we can now create the user by using the following command. Here, we need to pass in “1883” for the user and group IDs.
sudo useradd -u 1883 -g 1883 mosquittoCopy14. Finally, with the user created, we want it to take ownership of the “mosquitto” directory within our folder.
sudo chown -R mosquitto: /opt/stacks/hass/mosquittoCopyCreating a Directory for Node-RED
15. Due to the Node-RED container wanting to operate under the user with the UID 1000, we must create the directory and take ownership of it.
First, create the directory by using the following command.
sudo mkdir /opt/stacks/hass/noderedCopy16. After creating the required directory, take ownership of it by running the command below.
sudo chown 1000:1000 /opt/stacks/hass/noderedCopyStarting up Home Assistant using Docker Compose
17. We are finally at the point where our Docker Compose file is now ready to start up.
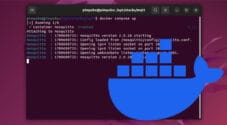
All you need to do to start Home Assistant is use the following command. Please note that this process can take a few minutes as there are a few things to download and start.
Using the “-d” option, we are telling Docker to detach from the current terminal session once it has successfully started.
docker compose up -dCopyConnecting to your Home Assistant Docker Compose Setup
At this point, you should now have Home Assistant successfully running under Docker on your device.
This section will show you how to access your new Home Assistant installation and then configure Node-RED and MQTT. Unlike using add-ons, we need to manually configure the home automation server to utilize what we just added.
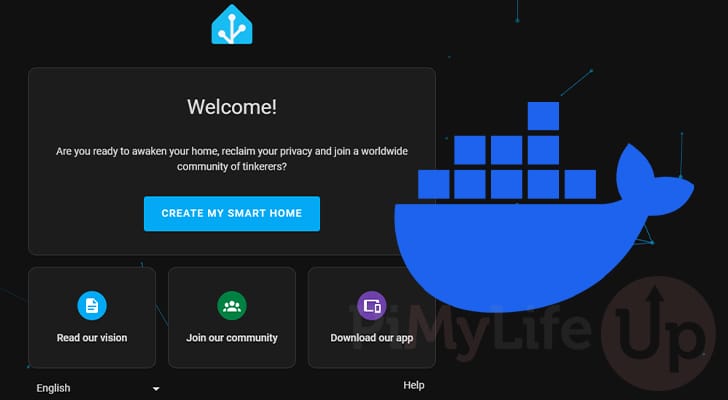
First Run of Home Assistant
1. To access the web interface for Home Assistant, all you need to do is go to your device’s IP Address followed by port 8123.
http://<IPADDRESS>:81232. Follow the prompts to set up your account for Home Assistant and some additional information about yourself to help with automation.
These steps are super simple, so we won’t be walking you through them in this particular guide.
Adding Dashboards for Node-Red and VS Code
3. Once you have run through the initial setup steps for your Home Assistant Docker Compose installation, we can add Node-RED and VS Code to your Home Assistant dashboard.
It used to be possible to set up these pages using the YML configuration files
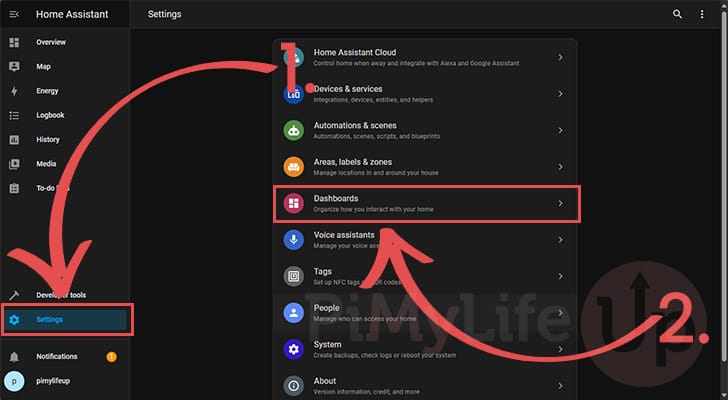
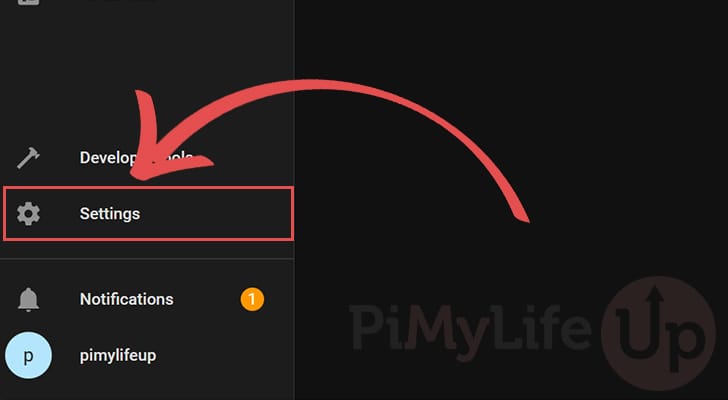
To start this process, change to the settings screen using the sidebar (1.).
Once on the settings screen, swap to the “Dashboards” screen (2.).
4. On the dashboard screen, click the “ADD DASHBOARD” button in the bottom-right corner of the screen.
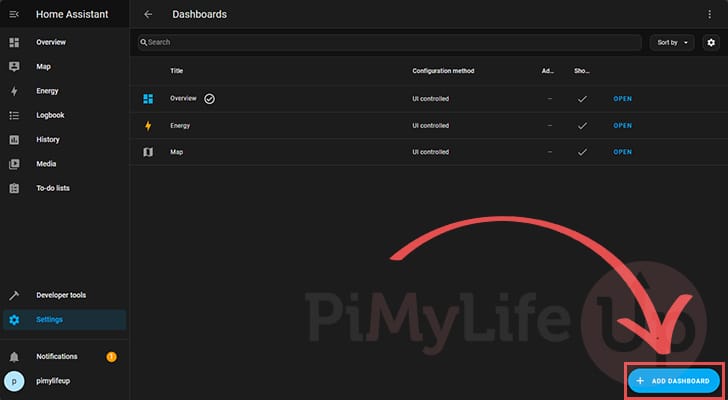
5. You will now see a list of the different dashboards you can add to your Home Assistant interface.
The option you will want to click is “Webpage“.

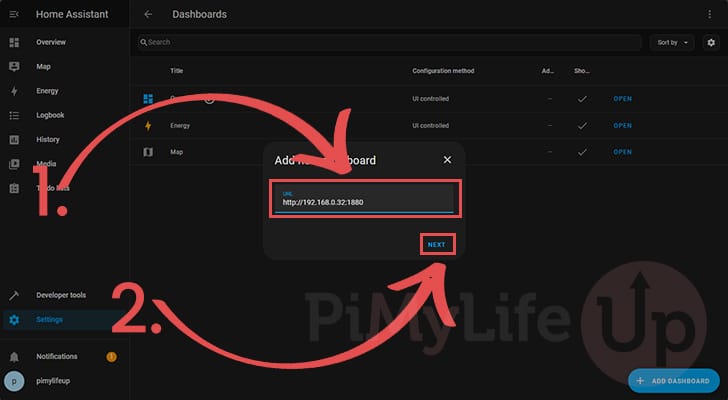
6. This first screen will ask you to enter the URL to the service you want loaded in your dashboard (1.).
In our case, we have two possible choices here. With either choice, replace “<IPADDRESS>” with the IP of the machine where you are hosting Home Assistant using Docker.
- Node-RED:
http://<IPADDRESS>:1880 - VS Code:
http://<IPADDRESS>:8443
Once you entered a URL, click the “NEXT” button to continue (2.).
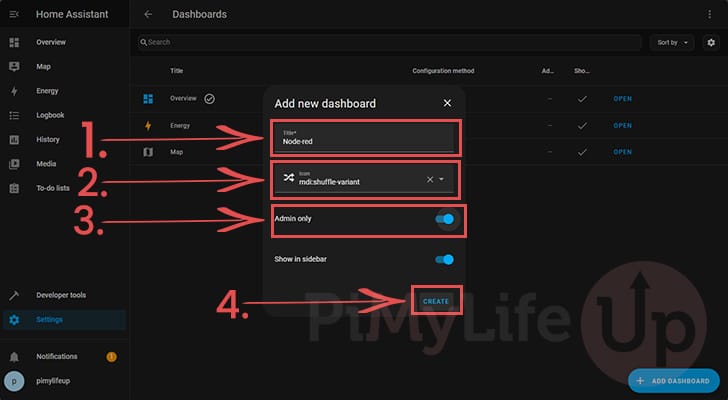
7. You will now need to give additional information on how Node-RED or VS Code will appear in your sidebar.
- First, you will want to set the name for the service you are adding (1.).
We recommend using “Node-RED” for Node-RED and “VS Code” for VS Code. - Your next step is to set an icon to make it easier to identify (2.).
The two icons we use are “mdi:shuffle-variant” and “mdi:wrench” but you can use whichever you like. - Once the name and icon has been set, you will want to also toggle the “
Admin only” option on (3.).
This will hide this element if the user is not an admin user.
After setting all three options, click the “CREATE” button. You will want to repeat from step 4 if you happen to be using both VS Code and Node-RED.
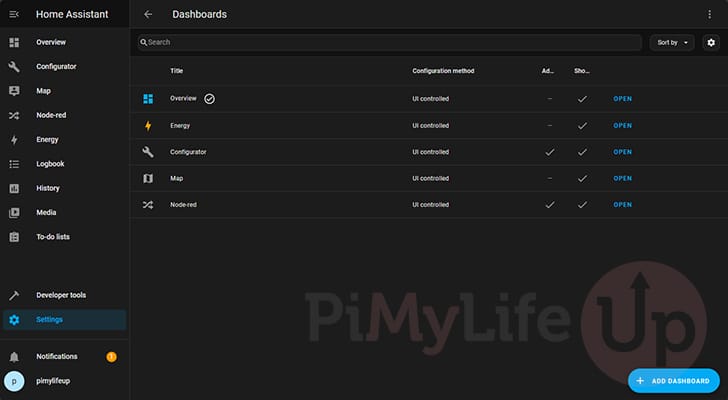
8. After everything has been done, you should see both “VS Code” and “Node-RED” displayed within your sidebar.
Generating an Access Token for Node Red
9. The next part of setting up Home Assistant with Docker Compose is to configure both Node-RED and MQTT.
Our first step is to generate an access token so that Node-RED can communicate with the home automation server.
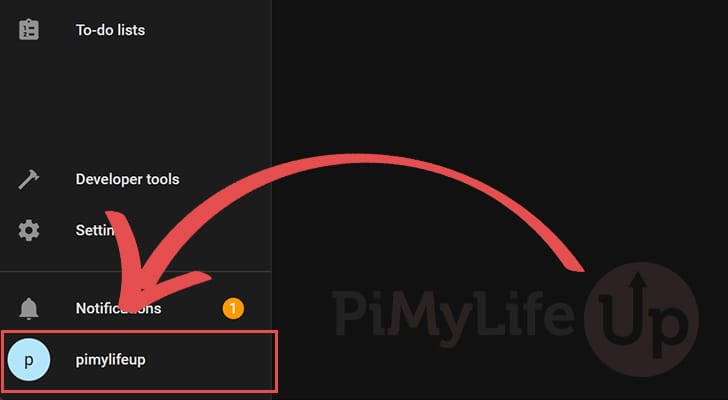
To start this process, click your profile in the bottom-left corner.
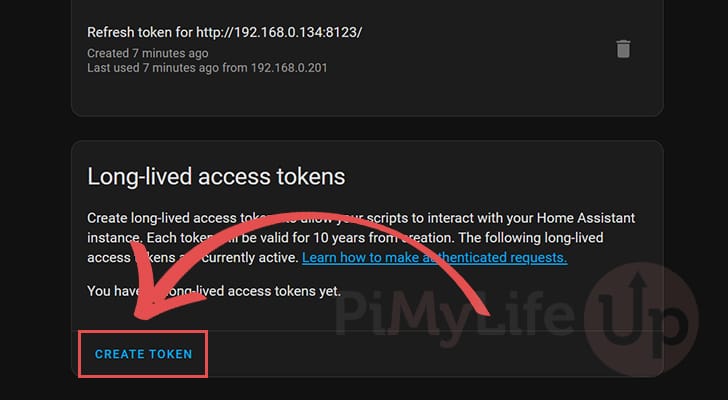
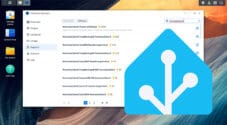
10. On the profile page, scroll down till you find the option labeled “Long-lived access tokens” and click the “CREATE TOKEN” button.
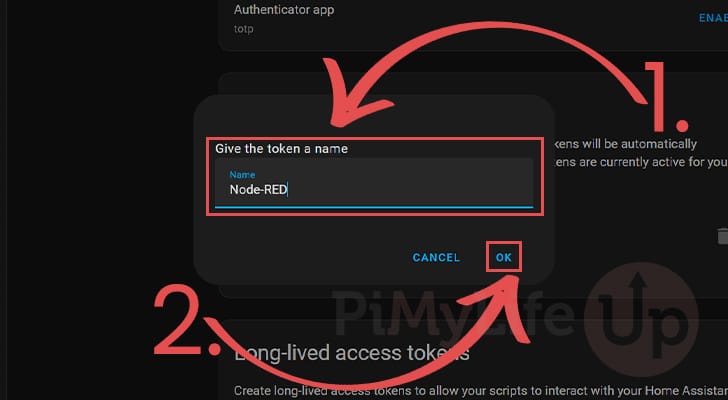
11. You will now be prompted to name this new token (1.). In our example, we will name it “Node-RED“.
Once you have typed a name, click the “OK” button (2.).
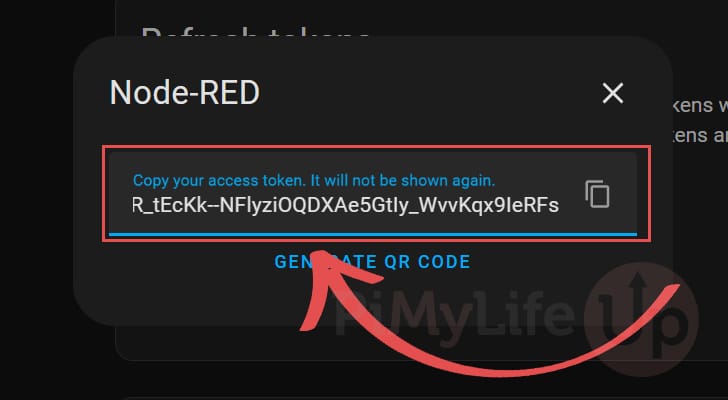
12. You will now have a long string shown on your screen. Copy this string, as we will need it to set up Node-RED to work with our Home Assistant Docker Compose installation.
This token allows Node-RED to communicate with the server.
Configuring Node-RED to Work With Home Assistant
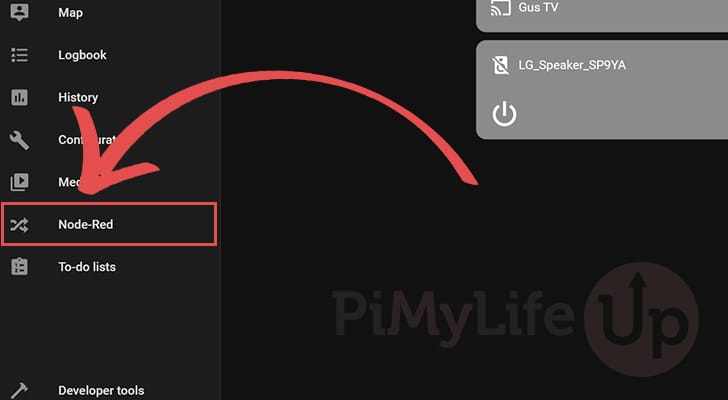
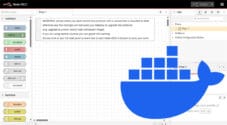
13. Now that you have generated a token for Node-RED to use, let us change to its interface by clicking “Node-Red” in the sidebar.
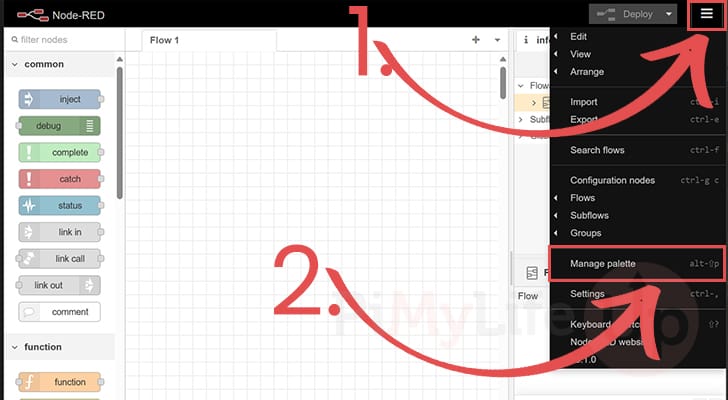
14. With Node-RED now open, click the hamburger icon (Three lines) in the top-left corner (1.).
You should see a pop-up menu with various options. The one you must click is labeled “Manage pallete” (2.).
15. With the Pallete menu open, change to the “Install” tab (1.).
Now that you have the install menu open use the search bar to look for “node-red-contrib-home-assistant-websocket” (2.).
Finally, click the “Install” button (3.) to install this module to Node-RED. This module allows you to perform Home Assistant actions from within Node-RED.

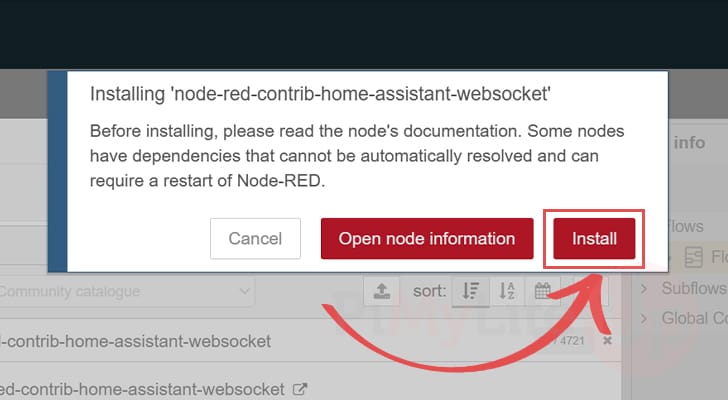
16. Before installing this addon, you will get a message about reading the nodes documentation.
You can either read this or click the “Install” button to continue.
Adding your Home Assistant Docker Compose Server to Node-RED
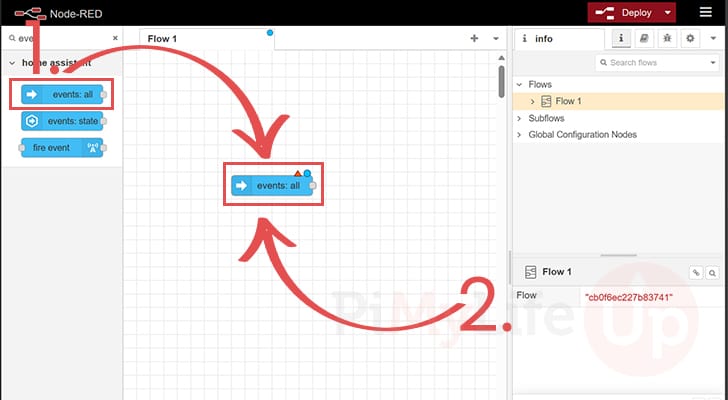
17. We need to now assign your Home Assistant server as a path for Node-RED to use.
You must start this process by dragging the “events:all” node to your flow (1.).
Once dragged onto the screen, double-click the node to begin configuring it (2.).
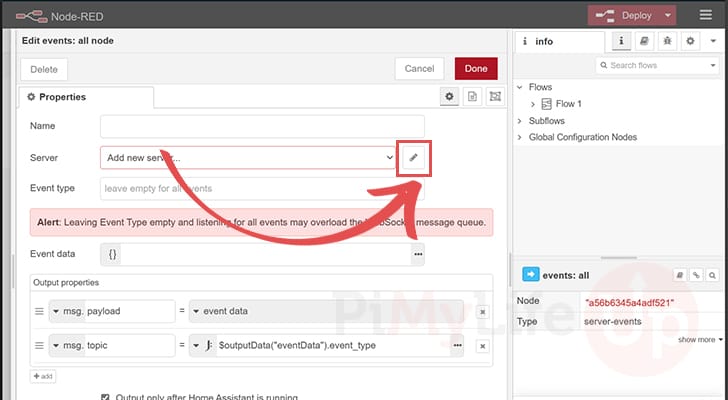
18. To add a new server, click the pencil icon next to the “Server” text box.
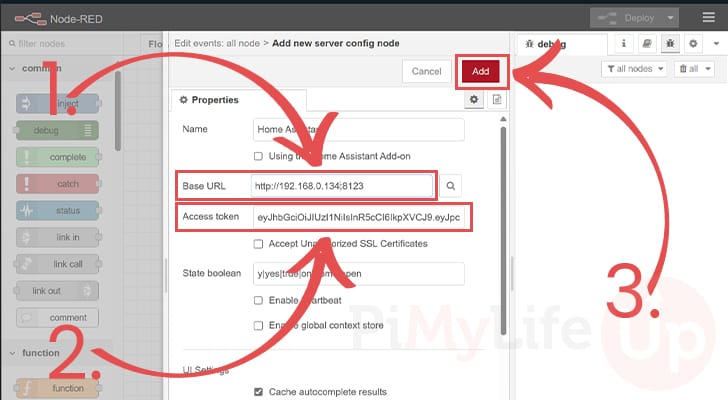
19. On this screen, we can finally add your Home Assistant Docker install as a contactable server.
- First, set the “
Base URL” (1.). This value will be “http://” followed by your server’s local IP address, and finally, the port “:8123“.
For example, a valid setting would be “http://192.168.0.134:8123“. - Next, you must type in the Access Token (2.) you generated earlier in this guide. This token is what lets Node-RED talk securely with Home Assistant.
After filling out these two fields, click the “Add” button (3.).
20. With the server added, you must click the “Deploy” button in the top-right of Node-RED’s web interface.
Your changes won’t be saved until you do this. After deploying, you can safely delete the “events:all” node that we added and click the “Deploy” button again.

Adding your MQTT Server to Home Assistant using Docker Compose
21. Our final steps of this tutorial will show you how to add the MQTT broker we installed to Home Assistant.
Click the “Settings” button in the sidebar to start this process.
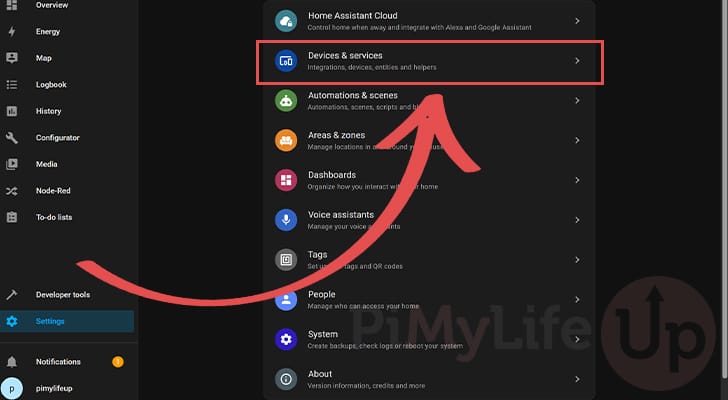
22. Now, navigate the settings menu and click the “Devices & services” option.
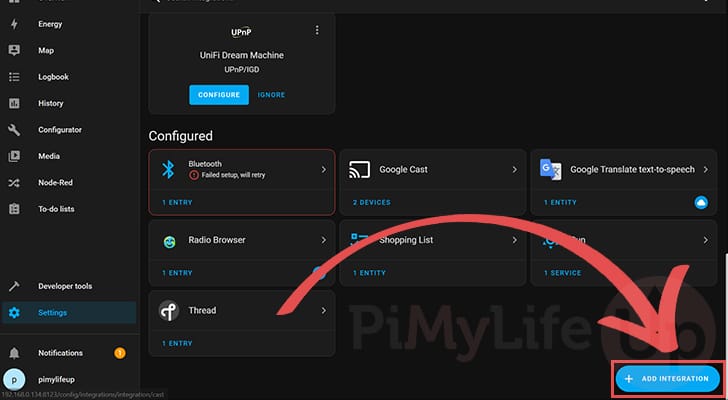
23. Within this screen, you must click the “+ ADD INTEGRATION” button in the bottom-right of the screen.
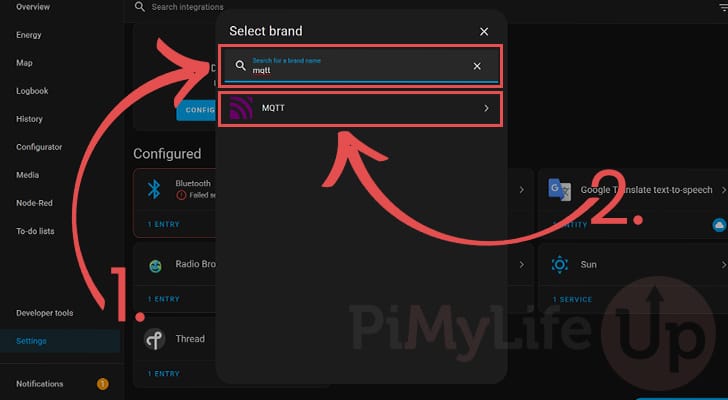
24. Now, using the search box on this screen, type in “mqtt” (1.).
You should see “MQTT” as the only option (2.). Click this integration to continue.
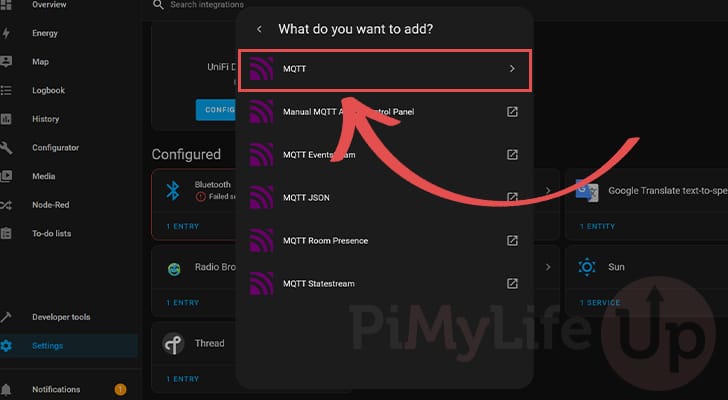
25. You will see a list of different MQTT variants you can add. You will want the one at the top of the list labeled “MQTT“.
26. On here you will want to set “Broker” to the local IP address of your Home Assistant server (1.). For example, in our case we would use “192.168.0.134.
After setting the IP address, click the “Submit” button (2.).

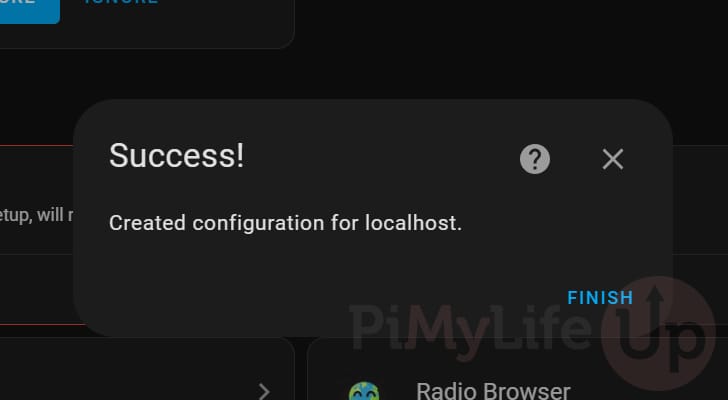
27. You have successfully set up MQTT on your Home Assistant Docker installation.
Updating to the Latest Release of Home Assistant with Docker
One of the neat things about Home Assistant is that they are constantly pushing the software forward with significant improvements. These improvements range from additions to the dashboard to backend changes that increase the number of devices Home Assistant can work with out of the box.
One key advantage of using Docker to run Home Assistant is that the update process is straightforward and can be completed in a few steps.
Of course, before updating, we recommend backing up your Home Assistant installation. This will ensure that you have something to fall back on if the update doesn’t complete smoothly.
1. Once you are ready to begin the process of updating your Home Assistant Docker installation, the first task you will want to do is change to the folder where we created the Compose file earlier.
cd /opt/stacks/hassCopy2. After changing to the correct folder, we next want to tell Docker to pull the latest version of the Home Assistant container, as well as any other containers you have defined in your Compose stack.
To download the latest update of Home Assistant using Docker, run the command below. Please note that while this downloads the new release, it won’t automatically migrate your already-running containers to it.
docker compose pullCopy3. Your next step is to get Docker to upgrade your already running installation of Home Assistant to the new update.
This process is very simple; all you need to do is use the command below. Docker will see that a new image is available, shut down the existing already running container, and then restart it using the release.
docker compose up -dCopyConclusion
Hopefully, at this stage, you will have successfully set up Home Assistant on your system using Docker Compose.
Docker lets you easily get Home Assistant up and running with your chosen operating system. However, it has its drawbacks, as it loses support for add-ons. Addons make adding extra functionality a breeze.
Please feel free to comment below if you have any questions about using Docker Compose to run Home Assistant.
If you found this tutorial helpful, be sure to check out our number of other Home Assistant tutorials.


What is the best way of updating to the latest HA release?
Hi Jon,
I have updated our guide to cover upgrading to the latest release of Home Assistant. The process is pretty straightforward and only takes a couple of commands.
Kind regards,
Emmet
Thanks worked like a charm,
I’m new to HA, was there a way to enable add-ons with this method?
Hi Gegory,
Unfortunately, the one side effect of using the Docker version is that you do lose access to the add-on functionality. It does make it a little bit more painful as useful applications like Mosquitto have to be installed as a separate application and then connected.
Kind regards,
Emmet
Section 6.c does not work in compose.yaml, some extra characters have appeared:
– TZ=<a href="environment: – TZ=”>
ports:
Hi David,
Thank you for alerting me to this. I ahve fixed up the Compose file so it should now be correct. I made some changes recently to how we generate our code block styling and it seems to of inadvertantly revealed some HTML that was being hidden by the old method.
It should now be appearing correctly.
Kind regards,
Emmet
Thank you for the detailed Home Assistant Docker installation. Worked perfectly!
Greetings from Ireland.
Very comprehensive tutorial, all worked perfectly on my RPi400. It’s picking up all my bluetooth and TP-Link devices now with no issues. Next step is to pickup a Zigbee USB Dongle and see what I discover.
Getting an error with Node-RED menu:
Hi Matthew,
It looks like there was some changes with the way Home Assistant handles iframes. I have rewritten the tutorial so you will now add the dashboards through the Home Assistant interface instead.
Please let me know if you continue to run into issues.
Kind regards,
Emmet
Excellent docs. Thanks
Thank you so much for this!
I was fussing a lot about installing HA but wanted it in docker with supervisor features!
It worked great, I just had to adjust some stuff for docker desktop in windows