In this tutorial, we will show you how to install Home Assistant onto a Synology NAS.
A Synology NAS is a popular solution for those wanting an easy-to-use network storage solution.
They have many different versions, but almost all of them have the ability to run Home Assistant.
Thanks to Synology’s DSM operating system supporting Docker containers, installing Home Assistant is a relatively straightforward process.
Home Assistant, if you haven’t heard of it before, is a home automation platform. It allows you to easily connect various devices to either gather metrics from them or perform automation.
A Synology NAS makes an excellent place to run Home Assistant, as you will likely keep it running. It also has enough processing headroom to handle the vast majority of tasks.
Installing and Setting Up Home Assistant on a Synology NAS
This section will cover all the steps required to install the Home Assistant software onto a Synology NAS.
We wrote these steps for Synology DiskStation Manager (DSM) 7.2, but they should also work for older and newer releases. The location of some of the options might differ slightly, but the values you need to set will remain the same.
Before you begin, we expect you to have at least already set up your Synology NAS. You will also need to have the DSM interface open in your web browser.
Installing Container Manager to your Synology NAS
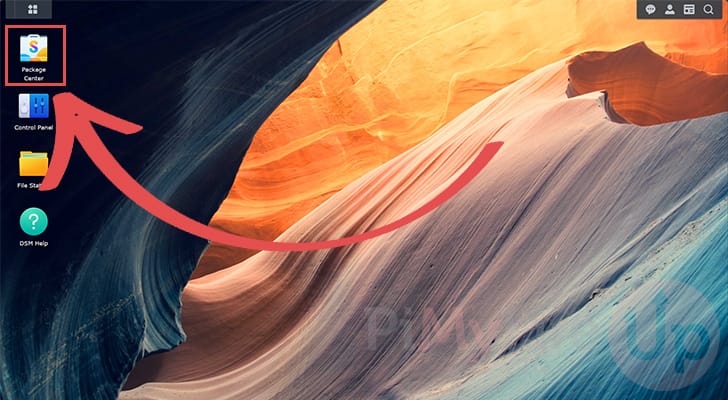
1. Our first step is installing the Container Manager app on our Synology NAS. This software will allow you to install Docker containers like Home Assistant on your device.
To begin this process, open the Package Center. Typically, you can open this by clicking the “Package Center” icon on the DSM desktop.
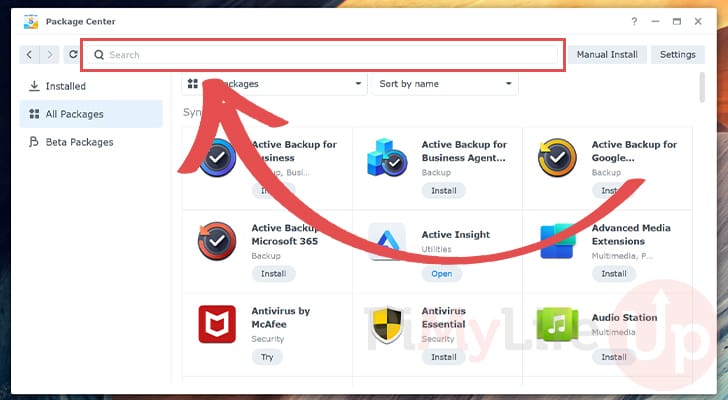
2. With the Package Center open, use the top search bar and type in “container manager” and press ENTER.
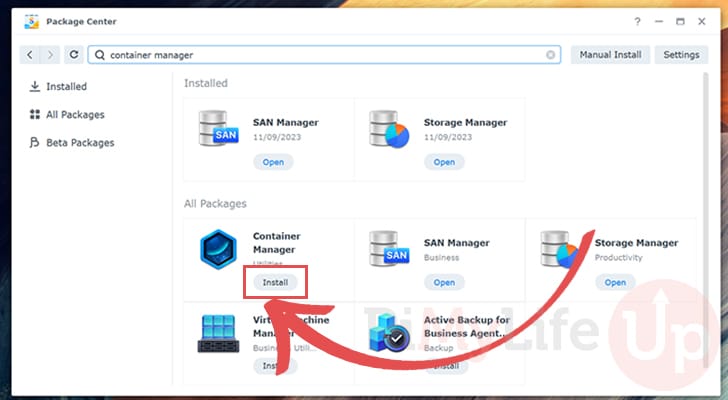
3. You will now see a list of different applications under the “All Packages” header.
Look for the package named “Container Manager” and click the “Install” button.
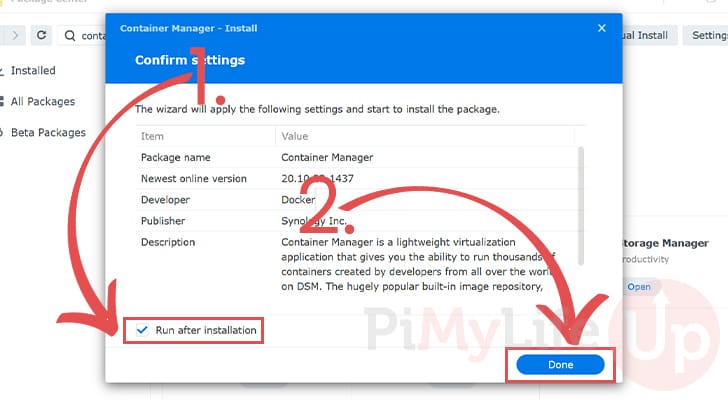
4. Before your Synology will install the Container Manager, you will be asked to confirm the settings.
On this page, ensure that the “Run after installation” checkbox is ticked (1.).
After ensuring the checkbox is ticked, click the “Done” button (2.).
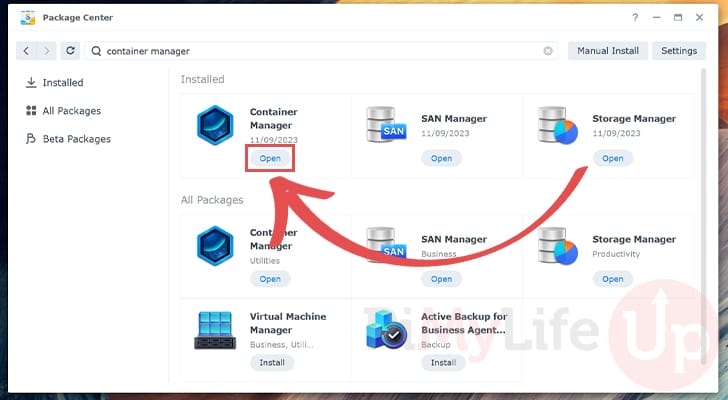
5. After the Container Manager has been installed, it should move up under the “Installed” header.
Find “Container Manager” within your installed packages and click the “Open” button.
Installing Home Assistant on your Synology NAS
In these next steps, we will walk you through downloading and configuring the Home Assistant container on your Synology.
Downloading the Home Assistant Image
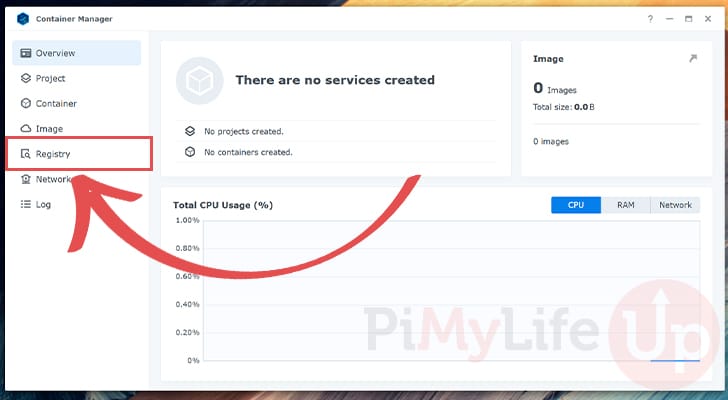
6. Now that we have the Container Manager installed and open on the Synology NAS, we can move on to installing Home Assistant itself.
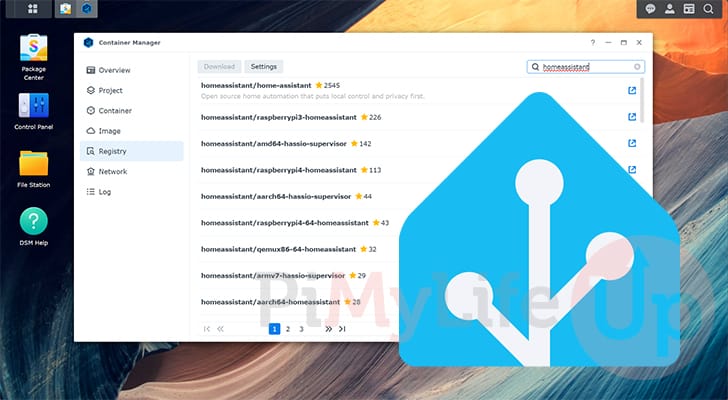
To begin this process, we must change to the “Registry” tab by clicking it in the sidebar.
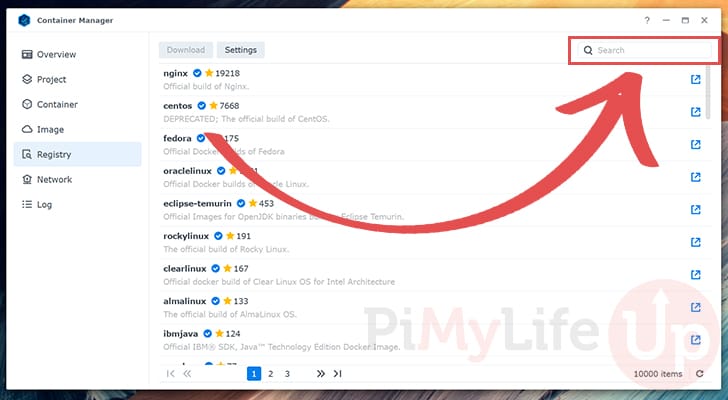
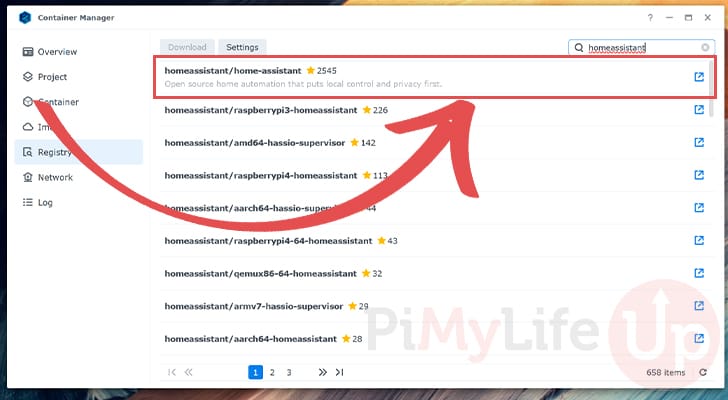
7. Once on the registry screen, use the search bar in the top right corner and type “homeassistant/home-assistant” or just “homeassistant“.
8. You should now find a list of Docker containers that the Container Manager found.
At the top of the list, there should be one called “homeassistant/home-assistant“. Once found, double-click the entry.
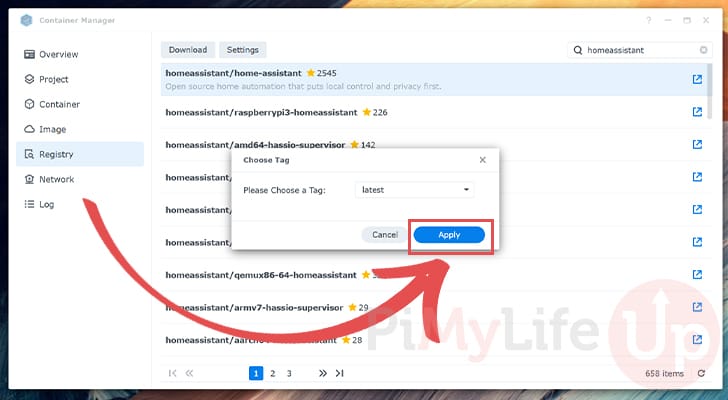
9. You will be prompted to select the tag for the Home Assistant container on your Synology NAS.
Most people will want to stick with the default and keep the “latest” tag. If you are happy with the latest version, click the “Apply” button.
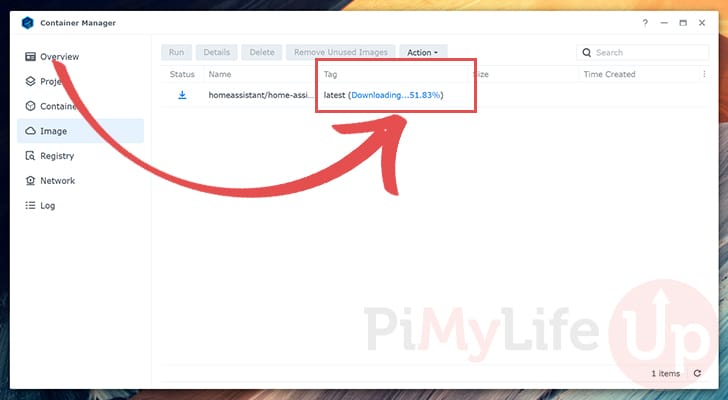
10. Now, wait patiently while your Synology NAS downloads the latest version of the Home Assistant container.
This process can take some time, so please be patient.
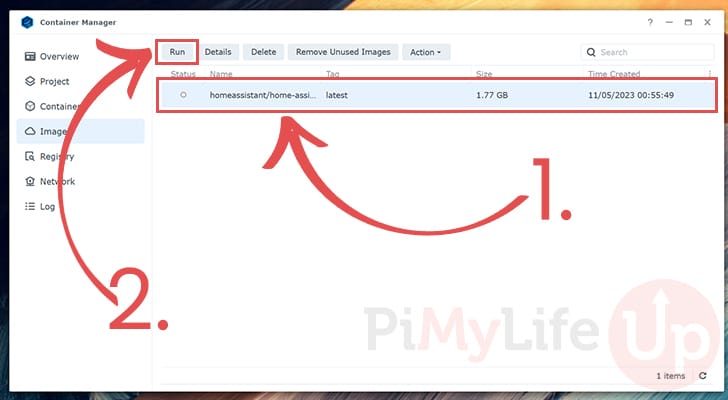
11. For this next step, you must start by clicking the “homeassistant/home-assistant” image you downloaded (1.).
Once selected, click the “Run” button (2.) at the top of the list.
Setting up the Home Assistant Docker Container on the Synology NAS
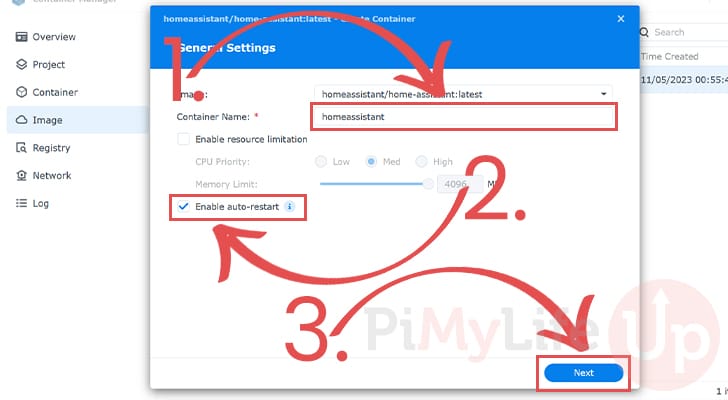
12. We can finally begin setting up the Home Assistant container on our Synology NAS.
First, we should give this container a name (1.). For our setup, we named our container “homeassistant“.
We also want Home Assistant to automatically start on our Synology NAS, so ensure the “Enable auto-restart” checkbox is ticked (2.).
With these two settings configured, click the “Next” button (3.).
Setting up a Mounted Volume
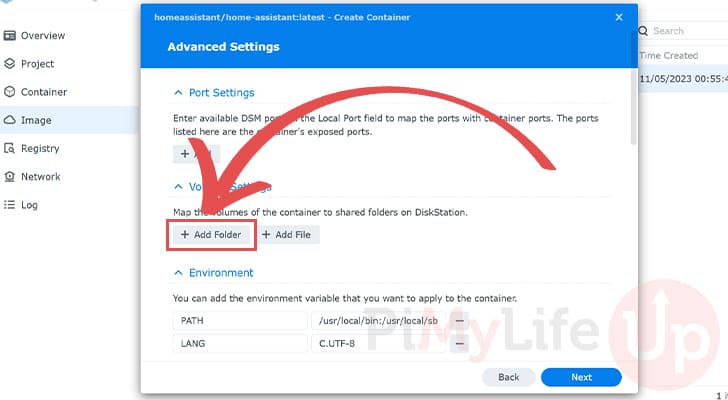
13. The first thing we must configure on the “Advanced Settings” page is the volumes.
We need to add a volume so Home Assistant’s configuration files are stored locally on the Synology NAS and not in the container.
Begin adding a new folder by clicking the “Add Folder” button.
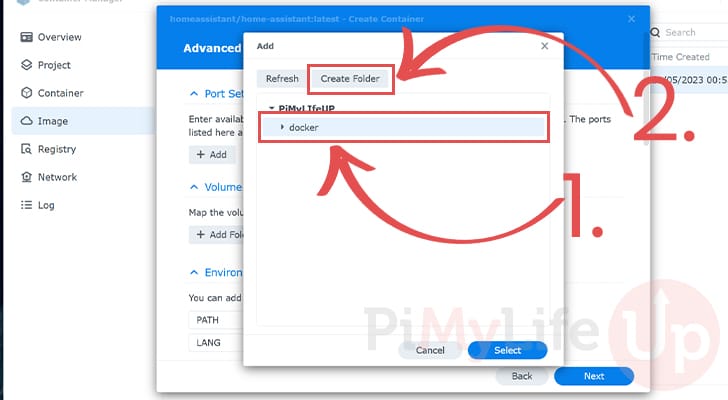
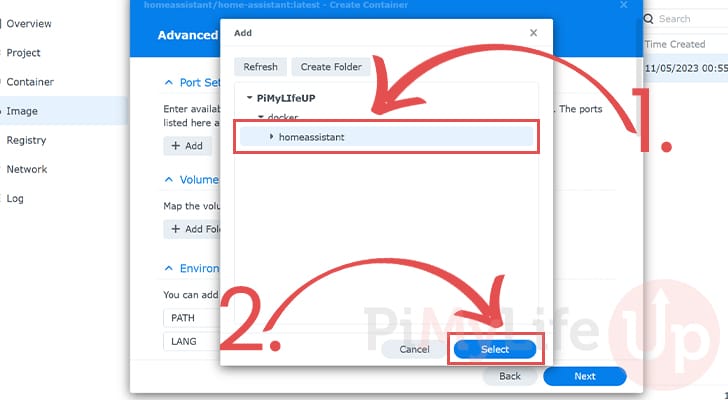
14. Within this dialog box, we must create a folder to store the Home Assistant files.
First, you must click the existing “docker” folder as shown in the screenshot below (1.).
After selecting this folder, click the “Create Folder” button (2.).
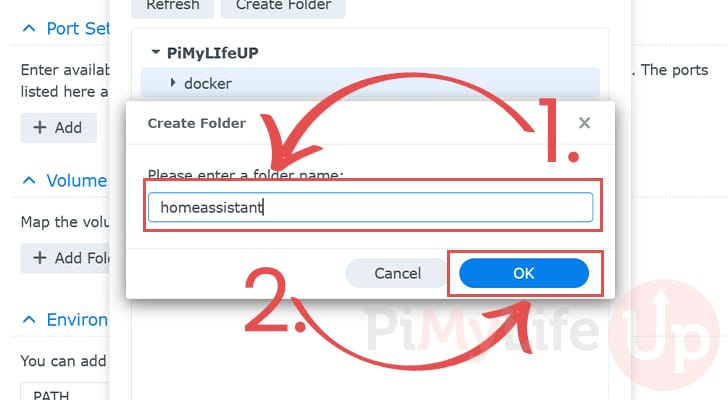
15. You must now name this folder (1.). In our case, we are keeping this simple and calling it “homeassistant“.
Once you have typed out a name, click the “OK” button (2.).
16. After creating our new folder, we will want to select it as a volume destination (1.).
With the new folder selected, click the “Select” button (2.).
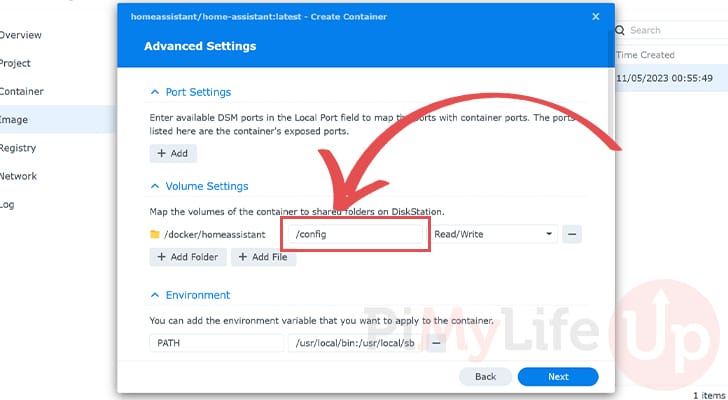
17. Finally, with the new volume added, we must type the location it should be mapped to within the Home Assistant container.
In the textbox next to the directory we selected, type in “/config“.
Adding an Environment Variable
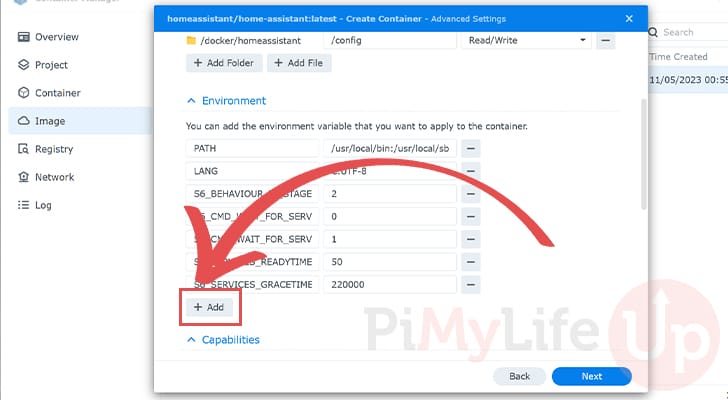
18. For this next step, we will add a new environment variable to our container. The variable we will add will define the Home Assistant’s time zone.
To add a new environment, click the “+ Add” button under the “Environment” header.
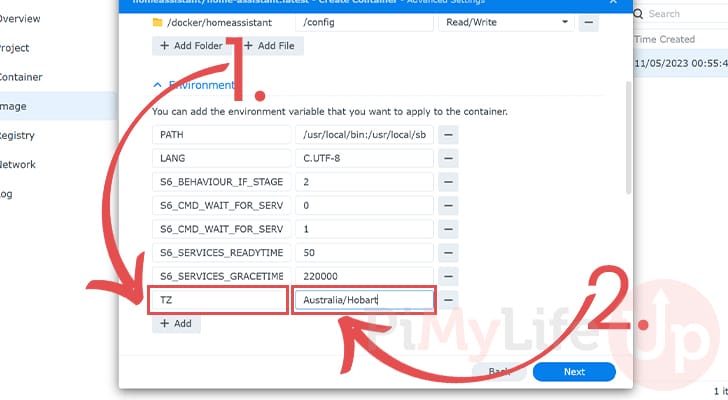
19. In the left-hand box, type in the name for this environment variable. In our case, we want this name to be “TZ” (1.).
Next, you must type in the name of a time zone (2.). Wikipedia provides a good list of time zones. The value you want is under the “TZ Identifier” header.
We will be setting this value to “Australia/Hobart” for the time zone that we live in.
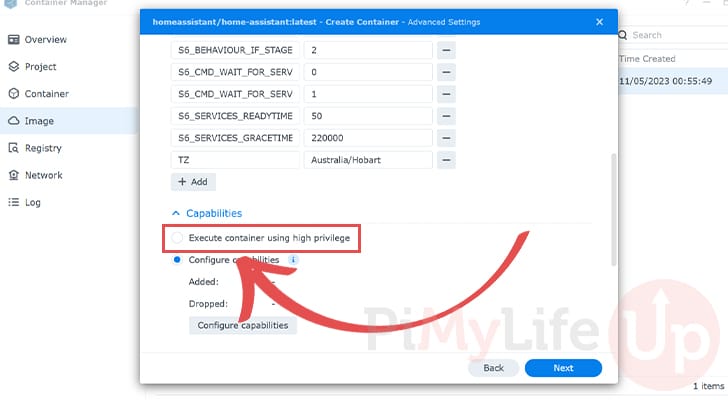
Setting Privileged Capabilities
20. There are various cases in which Home Assistant might need privileged capabilities on your Synology NAS.
You can give your container increased privileges by clicking the “Execute container using high privilege” option.
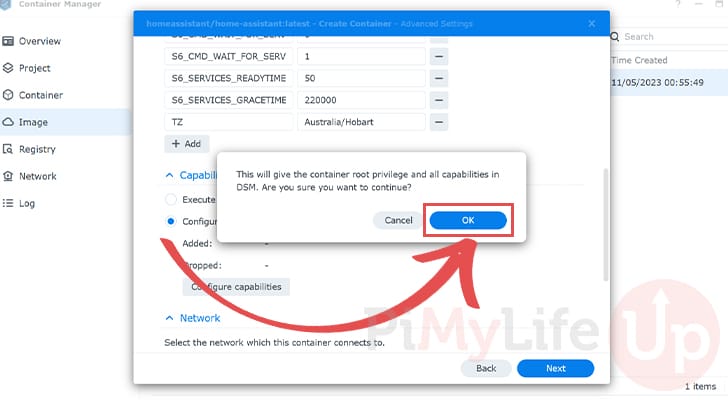
21. You will now get a warning about how root privileges give the container access to your entire system.
If you are uncomfortable with this, Home Assistant will still work without the increased privileges. However, for this guide, we will be clicking the “OK” button.
Changing the Network from Bridge to Host
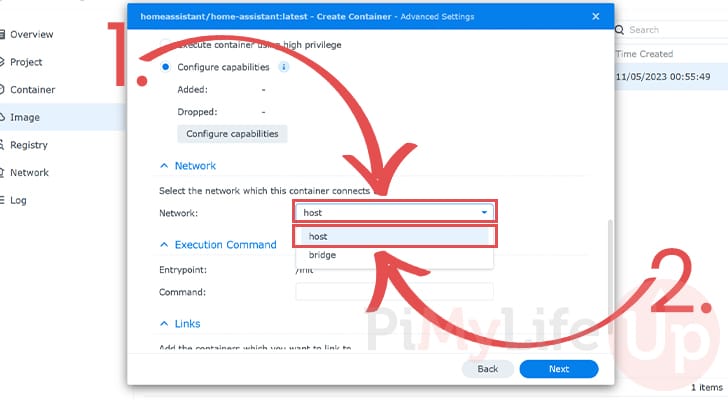
22. We now need to scroll down until you find the “Network” header.
Under this header, click the “network” setting (1.), and then choose the “host” option (2.).
Finishing up Configuring Home Assistant on the Synology NAS
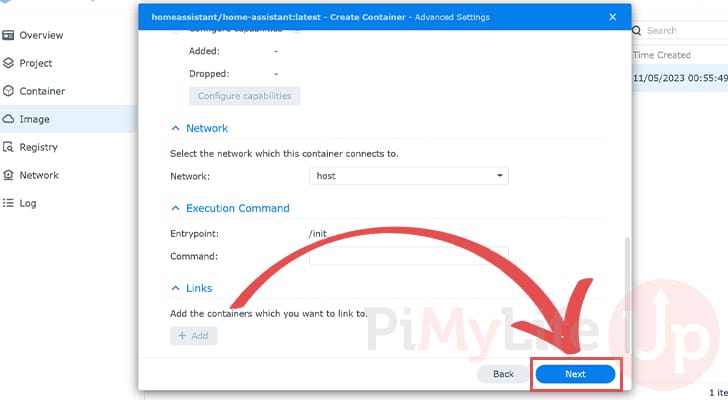
23. We have now finished all the configuration steps for Home Assistant to run on the Synology NAS.
To move on to the summary screen, click the “Next” button.
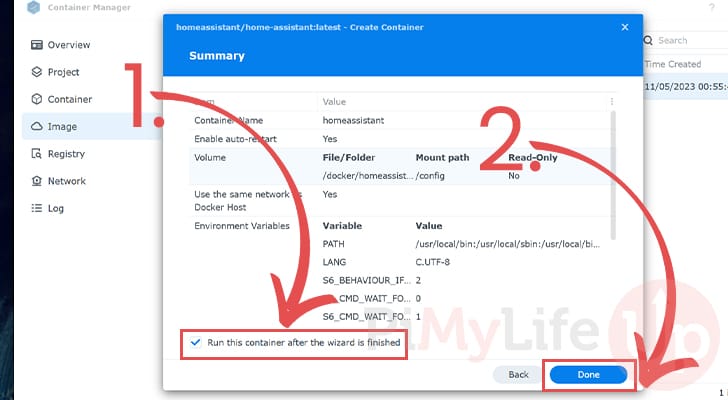
24. The last thing we need to do is tick the checkbox next to the “Run this container after the wizard is finished” text (1.).
You can start everything by clicking the “Done” button (2.).
Verifying Home Assistant is Now Installed
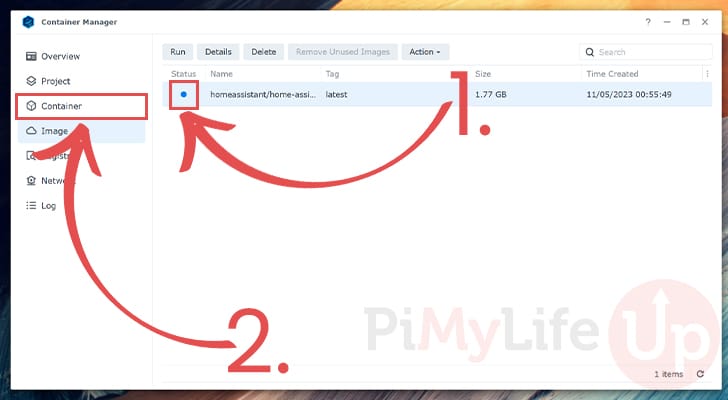
25. After installing Home Assistant to your Synology NAS, the image you downloaded should now have a blue (1.) status symbol. This color means that the image is currently in use.
You can now use the sidebar to change to the “Container” tab (2.).
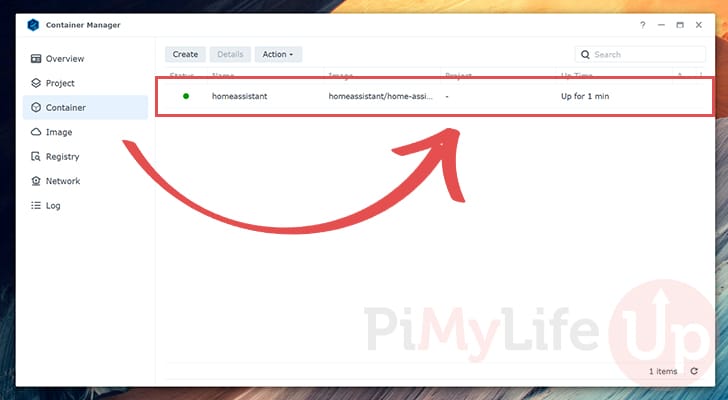
26. On the container tab, you will find the Home Assistant container we just installed.
Here you can see the status of the container, its name, the image it is using, and the uptime.
Accessing the Home Assistant Web Interface
With Home Assistant running on your Synology NAS, you will want to know how to access it.
1. To access the Home Assistant web interface, you must go to your NAS’s IP address followed by the port “8123“.
8123 is the default part that Home Assistant utilizes for its interface.
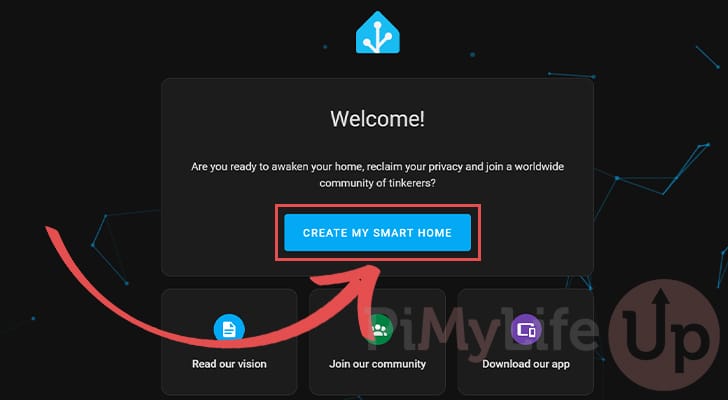
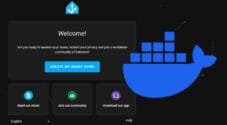
http://<IPADDRESS>:81232. After going to the above URL, you will be greeted with the following welcome screen. This screen links off to a few Home Assistant community pages and is also where you will begin the initial setup experience.
To begin configuring Home Assistant, you must click the “CREATE MY SMART HOME” button.
3. Your first task is to create a user that you will use to access your Home Assistant installation. On this screen, fill out information about your user (1.).
After filling out your name, username, and password, click the “CREATE ACCOUNT” button (2.).

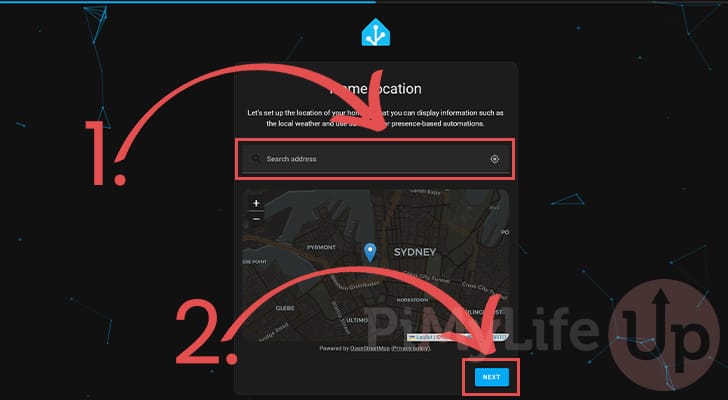
4. Next, you will want to select the location where your Synology NAS Home Assistant installation is located (1.).
The software uses this location to help with automations that use your location. You can click the “NEXT” button (2.) to confirm the location.
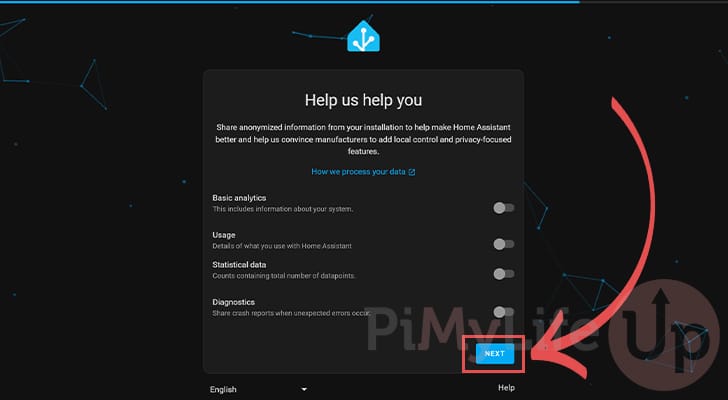
5. Home Assistant will now offer you the choice to opt into any of their analytics. These analytics will help the team improve the software, but it is entirely your choice to enable them.
Once you have made your decision, click the “NEXT” button.
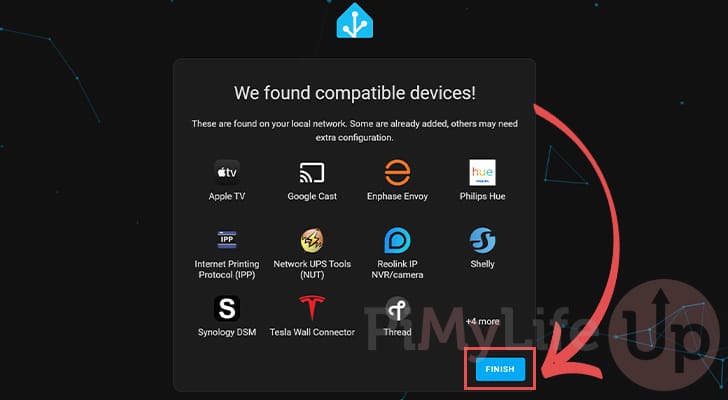
6. The software will now list any devices that it has automatically detected to be compatible with Home Assistant.
You can finish the installation process by clicking the “FINISH” button.
7. At this point, you have successfully installed Home Assistant on your Synology NAS.
With this software up and running, we highly recommend you explore our other Home Assistant tutorials.

Conclusion
Hopefully, at this point in the tutorial, you will have successfully installed Home Assistant on your Synology NAS.
This software allows you to easily start turning your house into a smart home. It boasts support for many third-party devices, even those that are a bit more obscure.
Please feel free to leave a comment below if you have any questions about getting Home Assistant to work on your NAS.

Thank you very much for this great tutorial – it works perfectly fine!
You might to clarify that addons are not available with this method.
Docker is a non-starter for me. No supervisor.
VM on Synology I have read is an option, but a pi is way cheaper if you value your time.