We got our hands on one of the latest devices from Elecrows, the CrowPi 2.
In this review, we will be exploring the large number of changes that the Elecrows have brought to the CrowPi 2.
Elecrows is a company based out of Shenzen, China, focusing on developing easy to use STEM (Science, Technology, Engineering, and Mathematics) devices.
The CrowPi 2 is no slouch when it comes to being an easy to use device, allowing quick access to numerous sensors without having to wire a single thing.
If you haven’t already, be sure to check out our review of the original CrowPi.
We were sent an early production model of the CrowPi 2 to review, the package that we recieved was the starter kit. The starter kit comes with a few additional parts, such as a Raspberry PI 4 4GB edition.
The Elecrows team is currently funding the CrowPi 2 through a Kickstarter campaign.
Unboxing of the CrowPi 2
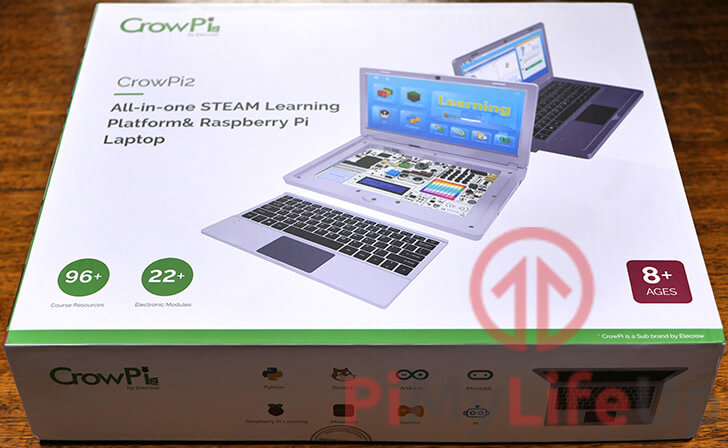
Immediately you will notice that the CrowPi 2 has been sent in a rather sturdy box.
To our eyes, the box should give more than enough strength that the device will be able to handle most rough handling by the mail services.
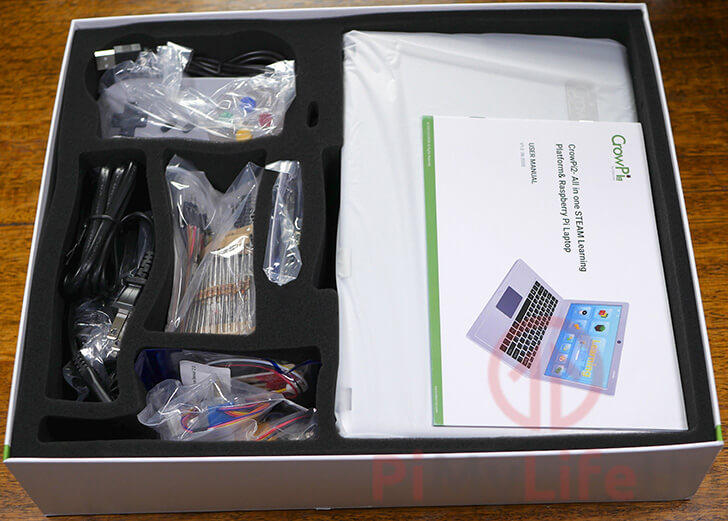
Inside the CrowPi 2 box, you will find an assortment of different parts. What’s contained within the box will differ slightly depending on what package of the CrowPi 2 you purchase.
Included with the starter CrowPi 2 packages are the Minecraft papercrafts. The card these were made out of seemed decent and robust enough for papercraft. Additionally, the print quality seemed to be of high quality with little pixelation and ink bleed.
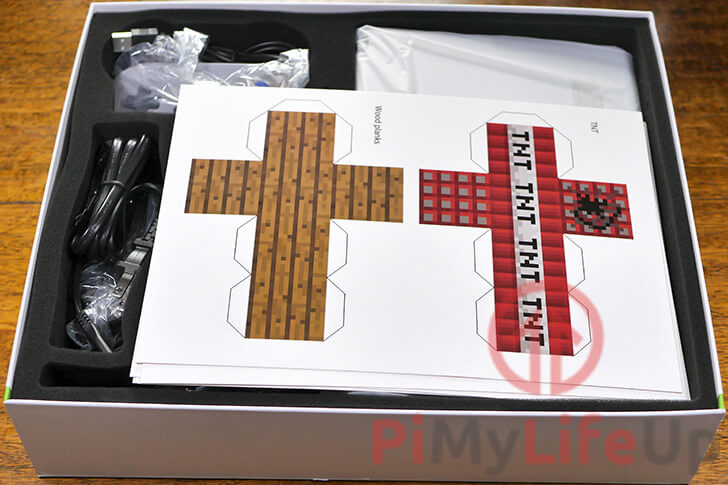
Underneath, you will find the CrowPi 2, itself included in the large component. Around it is a sufficient amount of padding to keep it protected during shipping.
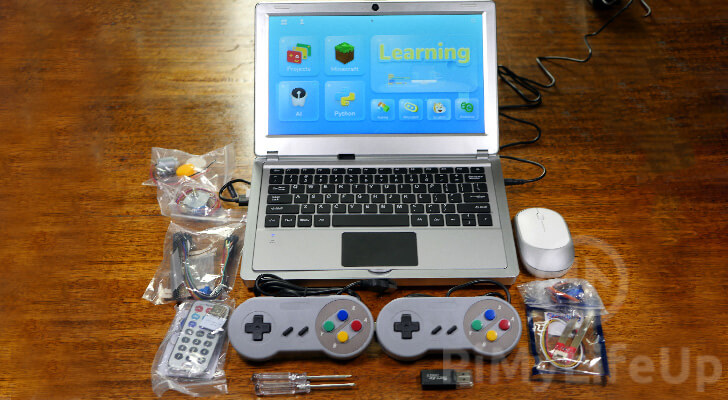
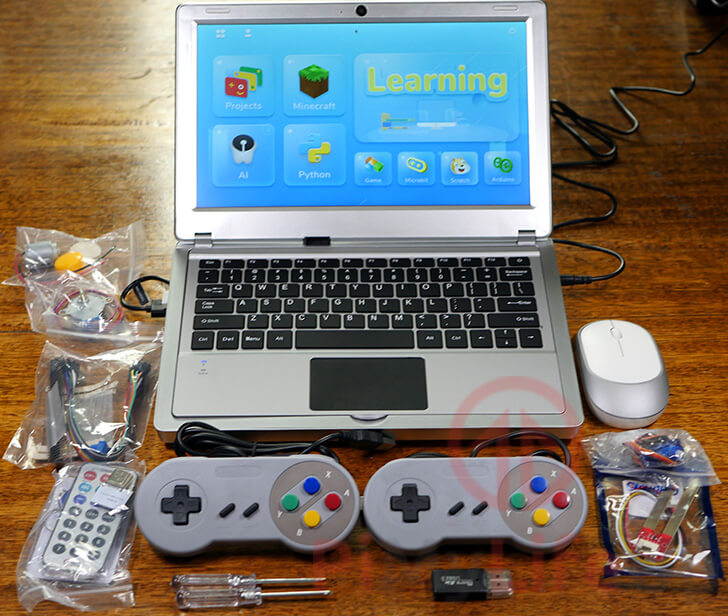
Next to it. you will see all the components included alongside your package. Whats included here will differ slightly.
The parts included with this package are the following.
- The CrowPi 2 itself
- Raspberry Pi 4B 4G
- 32GB TF card with custom system from Elecrows
- 12V/2A power supply
- Micro HDMI Connector
- HDMI Connector
- IR Remote Controller
- IR Receiver
- Stepper Motor
- Crowtail 9G Servo
- DC Motor with Mini Fan
- Phillips Head Screwdriver
- Flat Head Screwdriver
- Flat Head Screwdriver
- RFID Card
- RFID Tag
- Components Pack (Resistors, buttons, etc)
- Crowtail Misoture Sensor
- Game Controller x 2
- 32GB TF Card with RetroPie installed
- TF Card Reader
- Minecraft Papercraft x 5
- RFID Circle Cards x 10
The Case and Build Quality
One of the most significant changes between the original CrowPi and the new one is the case.
Elecrows threw out the old design and decided to go with a new, more laptop-like design.
In this section, we will take a deep dive into the case of the CrowPi 2 and its general build quality.
Before we proceed, we must note that you may notice that the CrowPi 2’s case doesn’t line up quite right.
This is an issue that was already identified by the Elecrows team, and they have notified us that they will have it solved for the final production run.
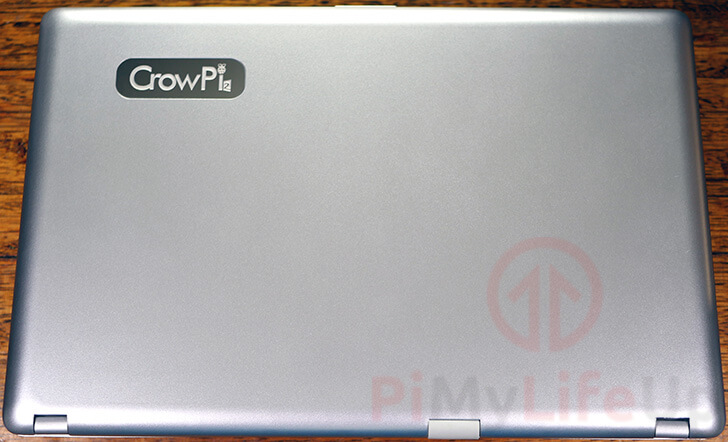
Top
Unopened the top of the case features the CrowPi 2 logo. Using a relatively clean design, there isn’t much else going on here.
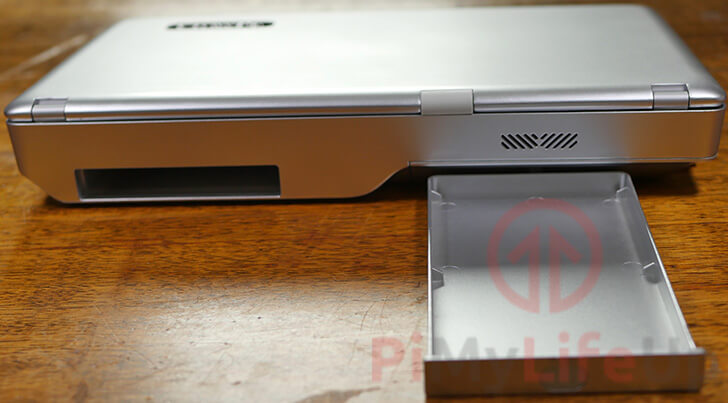
Rear
To the rear of the case, we can see the small vent that the team has included to help deal with the heat produced from the Raspberry Pi.

Included on the rear is a small container. You can use this container to store components or a battery pack if you are using your CrowPi on the go.
To open and lock this container in place, all you need to do is press it in.
Right Side
You will find the two potential power connectors that you can use on the right side of the case. The CrowPi 2 allows you to use a DC-12V jack or a Micro USB cable to supply to the device.
You will also find the power button which switches on and off the screen and the Raspberry Pi.
To cut off power to your Raspberry Pi and the screen, you will need to remember to use this button.
Using sudo shutdown will not turn off the CrowPi. However, the command should be used to make sure the Raspberry Pi powered down cleanly.
There is also a volume rocker that you can use to turn the volume up and down.
Finally, there is a headphone jack. This jack allows you to connect other audio devices to your Raspberry Pi.
The inclusion of the jack is helpful as the one featured on the Raspberry Pi is blocked within the case.

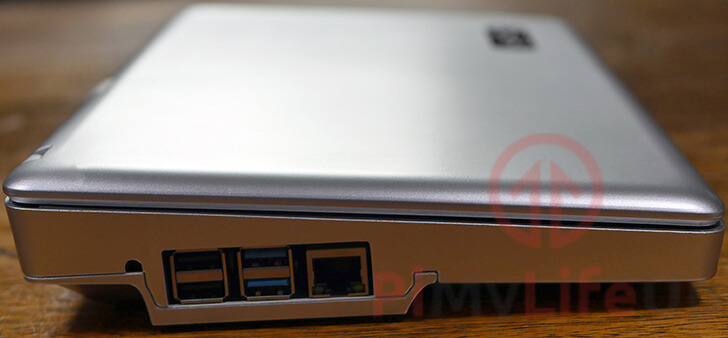
Left Side
On the left side of the CrowPi 2, you will see where the Raspberry Pi itself sits.
From here, you can gain access to the Ethernet port as well as the Pi’s USB ports.
You will also notice that next to the Pi is a little hole. This hole is where the USB cable for the CrowPi’s camera/microphone will come out to plug into the Raspberry Pi.
Front Side
There is not a huge amount to see on the front side of the CrowPi 2.
There are no connections, and the only standout thing is the slight lip on the top part of the case to make it easier to open the lid.

Bottom
On the bottom of the CrowPi 2, there are a few things that you will notice.
At the bottom of the photo you can see the holes for the stereo speakers included with the device.
The more important part is to the top right. Sliding this cover off gives you access to where the Raspberry Pi connects to the CrowPi.
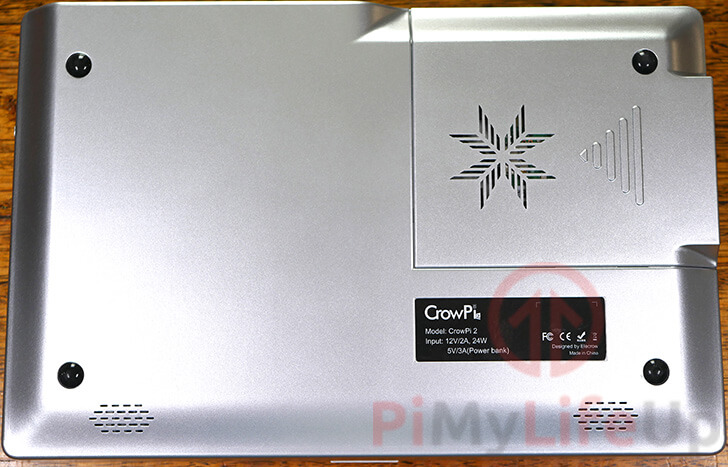
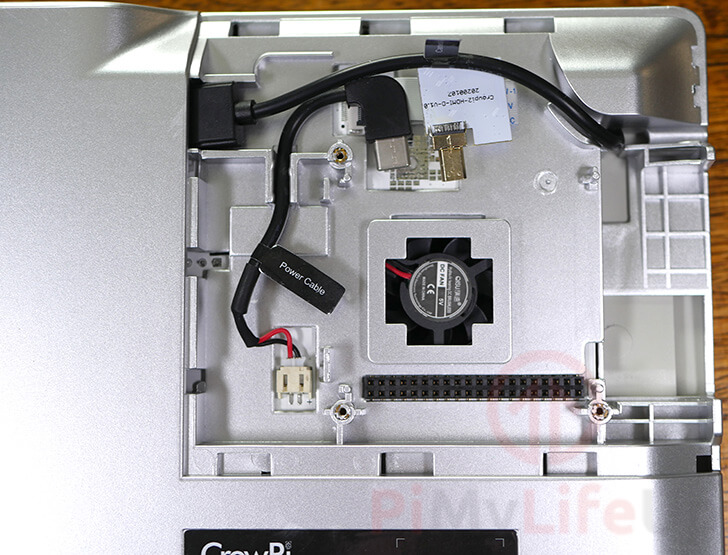
With the slider open, you can see all the cables that need to be plugged into your Raspberry Pi.
Each of these cables is labeled, so you have an idea where you need to plug them in on your device.
The cable labeled “power” plugs into the Raspberry Pi’s power port (In the Pi 4’s case, this is the USB C port).
The HDMI connector connects into the HDMI port, and the camera cable needs to be routed out and plugged into one of the USB ports.
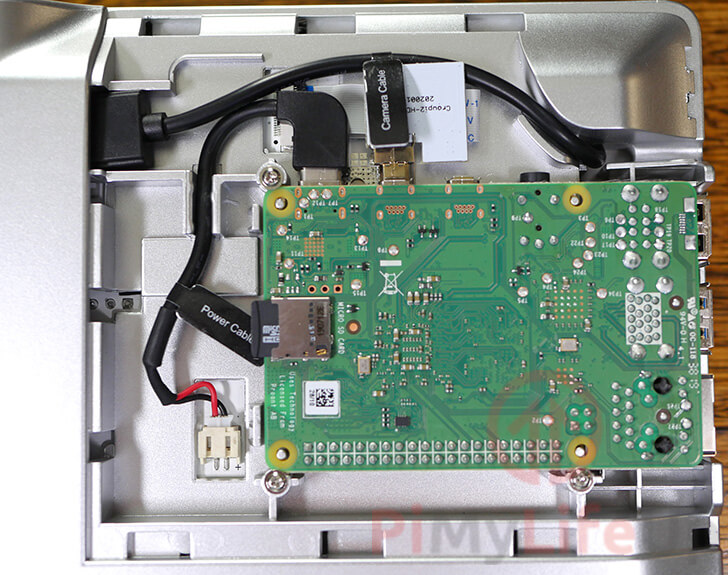
Below is what the Raspberry Pi looks like when it has been plugged in to the case.
The GPIO header helps you position the Pi within the case. It is then secured by using three separate screws.
THe CrowPi uses the GPIO pins to connect your device
The way the Pi is mounted within the device is a very straightforward process. Everything slots together without issue, and a minimal amount of fiddling is required.
This is a nice improvement from the original CrowPi that could sometimes be a bit finicky.
Inside of the Device
Some of the most significant improvements come from the inside of the CrowPi.
The first and for us, one of the biggest ones is the inclusion of a wireless keyboard. This keyboard sits nicely within the case.
One of the letdowns of the original CrowPi is that you would still have to carry around a potentially bulky mouse and keyboard with the device, this solution solves that issue.
Elecrows have put a notch in the case to make it easy to remove the keyboard and gain access to the CrowPi’s components.
We will touch a bit more on the included keyboard later on in the review.
With the keyboard removed from the device, you will find all of the inbuilt components.
All of the components you see here can be easily accessed from your Raspberry Pi.
You even still retain access to the GPIO pins and a mini breadboard so you can prototype new components rapidly.

Overall thoughts on the Case Build Quality/Design
Overall we feel like the case design is a significant improvement over the original CrowPi.
It feels like a lot of thought has been put into how everything goes together.
The Raspberry Pi is slotted away nicely underneath and is super easy to install with clearly labeled cables and a simple screw system.
The keyboard can be easily removed and re-inserted back into the case without any issues with small magnets holding it nicely.
The only real downside that we found with the case is that the plastic feels cheap. However, we wouldn’t expect it to be any different as the CrowPi 2 is already giving you a lot for your money.
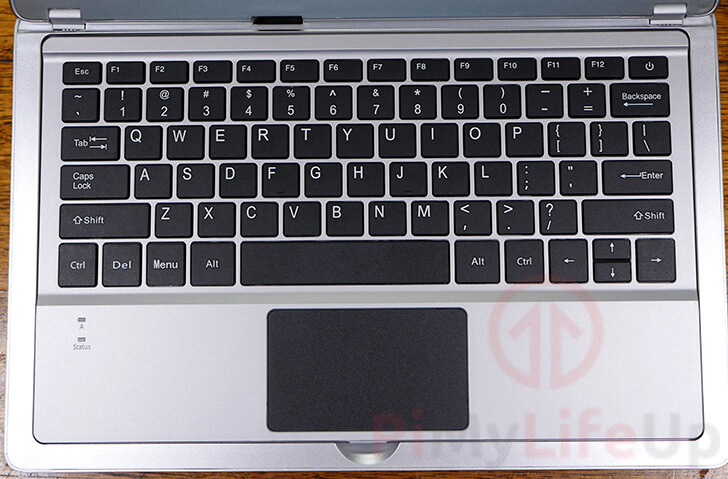
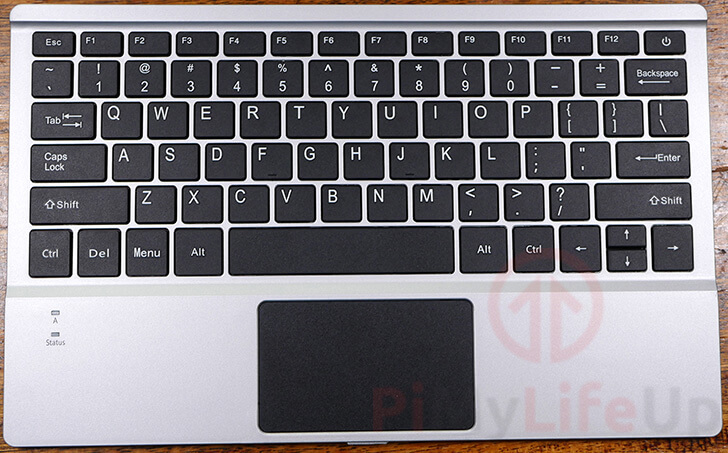
The CrowPi’s Keyboard
One of most significant changes with the new CrowPi is the addition of the keyboard.
There have been some changes to the keyboard that isn’t present in the model we were sent.
Instead of the power button in the top right corner, there will be a switch that will turn the keyboard on and off.
The addition of a keyboard, allows the CrowPi to be a more versatile and portable device.
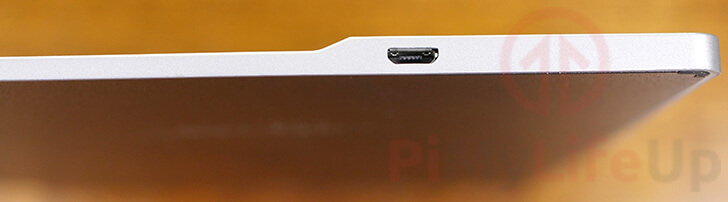
To charge the keyboard, you will need to make use of a micro-USB cable. This little port is on the right side of the keyboard and was something we missed when first checking out the device.
The package we received from CrowPi didn’t come with a micro-USB cable to charge the keyboard with.
We feel like this is something that should be included with the device. This is because you are less likely to have a micro-USB cable with the move to USB-C.
Overall we found the keyboard to be decent enough to type on, even for long term use it is going to be more than good enough.
The trackpad also seems to track reasonably well. We found no issues using it to navigate the Raspberry Pi OS interface and CrowPi’s custom interface. It is decent enough that it almost negates the need to have the included mouse.
For the wireless keyboard to connect to your Raspberry Pi, you will need to make use of the dongle hidden underneath the included mouse.
Both the wireless mouse and keyboard use the same dongle, so they will only consume one of your USB ports.
The Screen
The CrowPi 2 dropped the touchscreen that was featured in the first device to pack in a larger and higher resolution screen.
While a touchscreen is always nice, we feel like the benefits of the new screen outweigh it, especially for the use case of the CrowPi.
In place of the touchscreen, they put in an 11.6-inch screen with a resolution of 1920 x 1080.
This higher resolution and screen size allows you to see much more on the screen. This should be a nice improvement for those using the lessons built into the CrowPi 2 operating system.
Thanks to the use of an IPS panel, the colors from the screen are vivid, and the viewing angles are excellent.
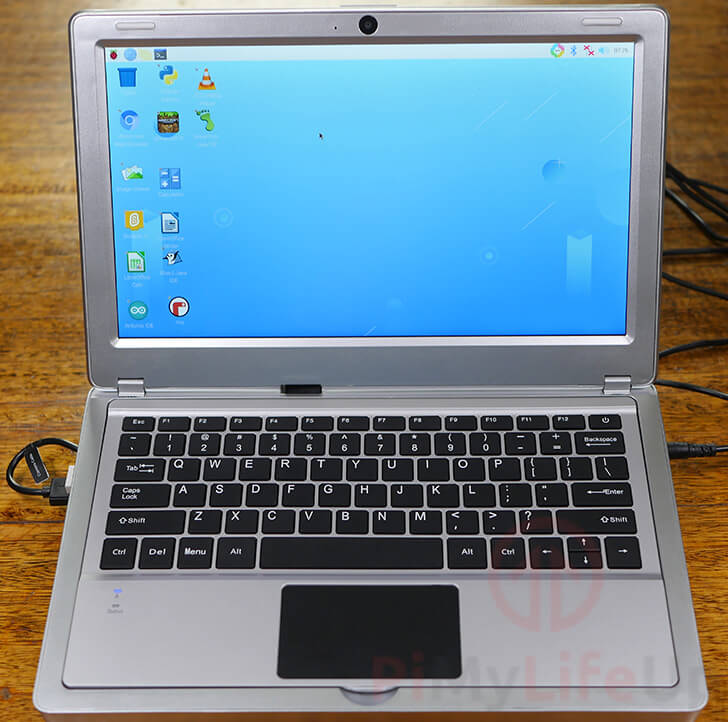
Overall we feel like the use of a larger display is a welcome improvement. The CrowPi team made a smart decision dropping the small touchscreen and using a decent IPS panel. The colors are more vivid, and it is easier to read and work off the CrowPi 2’s screen when compared to its predecessor.
Speakers
Another welcome addition the Elecrows team has included with the CrowPi 2 is stereo speakers.
These speakers are placed at the front of the case. You can see the holes for the speakers under the front of the CrowPi’s case.
This solves one of the negative points we had about the original CrowPi as it helps make the CrowPi be a highly portable and versatile device.

The quality of these speakers is decent for the price. We tested them by playing some music, videos, and games and found them suitable enough for most situations.
Don’t expect anything too crazy out of the speakers. All of this functionality is being included in a single package for a relatively low price tag.
Sensors & Components
Like the original CrowPi, one of the most prominent features of the CrowPi 2 is the included sensors.
Right off, we can tell you that the layout of the sensors is leagues better than the original design.
They have even included support to disconnect the sensors and allow you to make use of the GPIO pins from your Raspberry Pi.
To switch between the sensors and the GPIO pins, all you need to do is flip a switch.
With the new design, it is even easier to access and use the sensors.
Below is a list of the sensors and components included on the Crow Pi 2’s board. All of these sensors are made available to your Raspberry Pi.
- Joystick
- Relay
- GPIO Indicator LED’s
- DHT11 Temperature & humidity sensor
- Tilt Sensor
- LCD1602
- PIR Sensor
- Sound Sensor
- IR Sensor Interface
- I/O / ADC / I2C / UART Expansion Interface
- 9G Servo Interface
- Stepper Motor Interface
- 4 x 4 Button Matrix
- Buzzer
- Vibration Motor
- Touch Sensor
- 8 x 8 RGB Matrix
- RC522 RFID Reader/Writer
- Light Intensity Sensor
- Ultrasonic Sensor
- Breadboard for prototyping
- GPIO Indicator Lights
- GPIO Passthrough
Operating System
The CrowPi 2 is fully compatible with the standard Raspberry Pi operating systems, such as Raspbian and RetroPie.
The SD card included with the CrowPi 2 comes with a specially modified version of the Raspberry Pi OS.
This modified version is set up with a variety of different things that make using the CrowPi easier.
All the software that you need to run and interact with the integrated sensors and components is already set up for you.
In addition to this, the Elecrow team has written an application that shows off the device’s features.
This software also includes numerous Raspberry Pi projects that you can follow. These are aimed at getting you introduced to using the included sensors, whether using Python or other software.
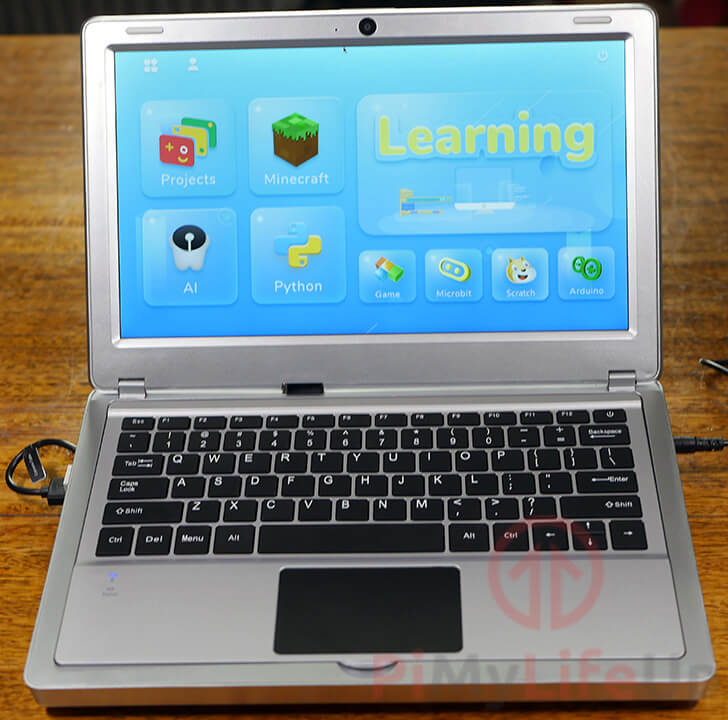
If you are brand new to the Raspberry Pi, then the included CrowPi operating system is incredibly useful. The lessons that are included area great for beginners and allow you to work through them step by step.
We think the software-based lessons are a better alternative to the 81-page tutorial book the original CrowPi came with.
Getting Started with the CrowPi 2
The CrowPi 2 is one of the most accessible devices to get started with and is an even more straightforward process than the original.
The included manual clearly shows you how to plug in the Raspberry Pi to the CrowPi. It also walks you through the steps on using the keyboard, mouse, and other functionality.
While the CrowPi 2 that we were sent already had a Raspberry Pi 4 installed into it, we took it out and placed it back in to see what the installation was like.
We found that it was incredibly straightforward to install the Raspberry Pi into the CrowPi. The cables are labeled, and their length is just right, so they connect without any issues.
The Elecrows team has even included a standard HDMI connector so that it is entirely backward compatible with the Raspberry Pi 3.
To help you get started using all the inbuilt components, the CrowPi team has included an extensive series of lessons.
You can access these lessons through the CrowPi 2’s inbuilt software. Sadly if you don’t use the operating system provided by CrowPi, you will miss out on these lessons.
Overall we found the CrowPi 2 to be even easier to set up and get running than the original. There has been a decent amount of improvements to both the installation and setup process.
The lessons by the Elecrows team are also delivered in a much better fashion than the original.
CrowPi 2 Pricing
Like the original CrowPi, the CrowPi 2 comes in a variety of different bundles.
The cheapest bundle is the “basic kit“. This basic kit will set you back ~$170 USD ($1,310 HKD).
The basic kit comes with the least amount of extras. It does not include a Raspberry Pi. Instead, it only comes with the CrowPi itself and a few extra components to get you started. These extras include a 32GB SD card that contains the customized operating system and a components pack.
We only recommend the basic kit if you already own a Raspberry Pi that you are willing to use. Both the Raspberry Pi 3 and 4 will work with the CrowPi 2.
The next version up is the “starter kit“. The starter kit costs approximately ~$259 USD (HKD $2,008) and comes with a lot more in the package.
For starters, it features a Raspberry Pi 4B 4GB edition. It also features even more components and extras such as 2 game controllers and an additional 32GB SD Card that has RetroPie installed to it.
The starter kit is definitely the best starting point for someone who is new to the Raspberry Pi and wants to get started straight away.
Finally, the Elecrows team offers an “advanced kit“, this kit will set you back approximately $330 USD ($2,550 HKD) during the Kickstarter.
Like the starter kit, this kit also comes with a 4GB Raspberry Pi 4. Instead of a 32GB SD Card, it features a 128 GB SD Card. It also comes with a few more components from the Elecrows Crowtail line of parts. These components include a moisture sensor, an accelerometer, an IR reflective sensor, and a gas sensor.
Overall we feel like the pricing of the CrowPi 2 is incredibly fair considering the sheer amount of stuff contained within the package.
There isn’t many competing products where you will recieve more for your money.
You get a decent-sized screen, speakers, a wireless keyboard and mouse, and a large number of components that you can easily utilize.
CrowPi 2 Review Summary
Overall we believe that the CrowPi 2 is a fantastic device for those who want a great platform to start getting into STEM from.
The device gives you access to a considerable number of sensors, buttons, and output devices, allowing you to prototype and play around with different ideas easily.
The screen and overall build quality of the CrowPi 2 are great for the price. The team has made some considerable changes that fixed most of the flaws from the original CrowPi.
The inclusion of speakers, a compartment to store components, a larger, more useable screen, and a wireless keyboard are welcome additions.
While the larger screen came at the cost of the touchscreen, we feel like it is a much better solution, especially when combined with the new wireless keyboard.
Overall it is one of the most portable STEM orientated devices that we have had a chance of reviewing. It packages almost everything you could need in one affordadable, portable package.
The only thing that the device is lacking now is an inbuilt battery. An inbuilt battery would remove the need to have to carry around a separate battery pack or the DC power adaptor.
Below is a summary of our pros and cons from our CrowPi 2 review.
Pros:
- A new, sleeker more portable case design
- Wireless keyboard that is easily removable from the case
- Decent speakers removing the need to bring your own with you
- Packs in a ton of components in a relatively small package/li>
- Portable package that packs in everything you need
- Has a hidden compartment allowing you to keep components within the CrowPi 2
Cons:
- Still lacks an inbuilt battery
- Case plastics can feel a bit cheap, however it is decent for the price
Simply put, the CrowPi 2 is one of the best Raspberry Pi based STEM devices that you can get. It gives you almost everything you need bundling it in one portable package for an affordable price tag.
If you are after an excellent platform to help you get either yourself or your children into STEM, you can’t go past the CrowPi 2.
If you are interested in buying the CrowPi 2 after reading our review, be sure to go to their Kickstarter campaign. (At the time of publishing only 7 days remaining for the campaign, this will end on the 15th of August, 2020)
Disclaimer: We received out CrowPi 2 for free from the Elecrow’s team for the purposes of reviewing the device.