In this tutorial, we will show you how to install an xrdp server to Ubuntu.
RDP is a proprietary protocol that Microsoft uses to provide remote access between Windows computers.
xrdp is a free and open-source implementation of the server software so that other devices can make use of RDP.
By installing xrdp to Ubuntu, users will be able to remote into the operating system using Microsoft’s own Remote Desktop Client or the free alternatives such as FreeRDP and rdesktop.
This guide on installing xrdp will work on all versions of Ubuntu that have a desktop interface included. If you are using a server-based version of Ubuntu, we recommend that you stick to using SSH.
You can even install the xrdp server software to both Ubuntu 20.04 and Ubuntu 18.04.
Of course, as we are installing packages within this guide, you will need to use a user with superuser privileges.
Installing xrdp to Ubuntu
The process for installing xrdp to an Ubuntu operating system is reasonably straightforward.
The reason for this is that xrdp is available as a part of the official package repository.
1. Before we get started, let us make sure our Ubuntu system is updated.
To update Ubuntu, all we need to do is run the following two commands.
sudo apt update
sudo apt upgrade
Updating the operating system ensures we have an updated base to work off and reduces the chances of running into issues with installing xrdp.
2. Once Ubuntu finishes updating, we can move on to installing xrdp.
Thanks to xrdp being available on the package repository, all we need to do to install the software is to run the following command.
sudo apt install xrdp gnome-tweak-toolDuring the installation process, the xrdp service will be automatically started on our Ubuntu system and a unique user created.
3. Before our installation process is complete, we need to do one last thing.
The xrdp service often utilizes a certificate stored within the “/etc/ssl/” directory called “ssl-cert-snakeoil.key“.
As the xrdp user may need access to these files, we will need to add the user to the “ssl-cert” group.
We can do this by using the usermod command on your Ubuntu system.
sudo usermod -a -G ssl-cert xrdpBlack Screen when using xrdp
When using xrdp to control your Ubuntu operating system remotely, there is a chance that you experience a black screen.
This screen can lock you out of doing anything on your system. Don’t worry, as there is a workaround for this issue.
1. To solve this issue, we need to modify the script that xrdp uses to start up the window manager.
We will begin editing this file using the nano text editor by running the following command
sudo nano /etc/xrdp/startwm.sh2. Within this file, you will need to find the following line of text.
test -x /etc/X11/Xsession && exec /etc/X11/XsessionYou should locate this text at the end of the file, but you can use CTRL + W to search for it.
3. Above this line, you will need to add the following two lines.
unset DBUS_SESSION_BUS_ADDRESS
unset XDG_RUNTIME_DIR
These lines work around an issue caused by the window manager trying to stop multiple sessions from opening.
4. Once you have added those lines to the bottom of the file, it should look like what we have below.
if test -r /etc/profile; then
        . /etc/profile
fi

unset DBUS_SESSION_BUS_ADDRESS
unset XDG_RUNTIME_DIR

test -x /etc/X11/Xsession && exec /etc/X11/Xsession
exec /bin/sh /etc/X11/Xsession
5. Once done, you can save these changes to the file by pressing CTRL + X, then Y, followed by the ENTER key.
Connecting to your Ubuntu xrdp Server
Now that we have Ubuntu set up with the xrdp server, we can use a remote desktop tool to connect to it.
For our example, we will be utilizing the official Remote Desktop Client that is included as a part of Windows.
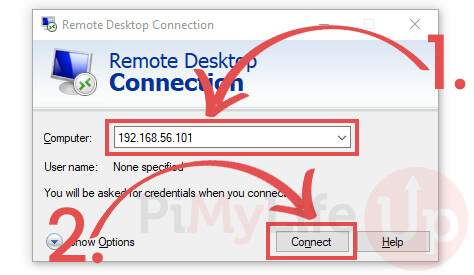
1. On your system, open up the remote desktop client. In our case, this is the Remote Desktop Connection application on Windows.
In this interface, you will need to enter your Ubuntu device’s IP address (1.).
Once you have the IP address entered, you can begin connecting to your Ubuntu system over RDP by clicking the “Connect” button (2.).
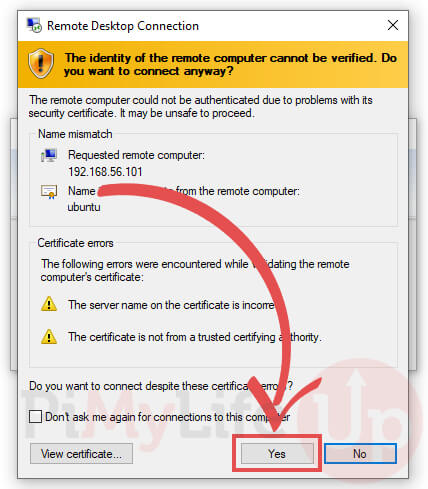
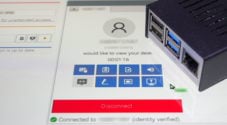
2. When you connect to your Ubuntu system over xrdp it will warn you that the client cannot verify its identity.
Use the certificate, IP address, or name of the device to confirm it is the device you want to connect to.
If you think it is correct, you can click the “Yes” button to confirm the connection.
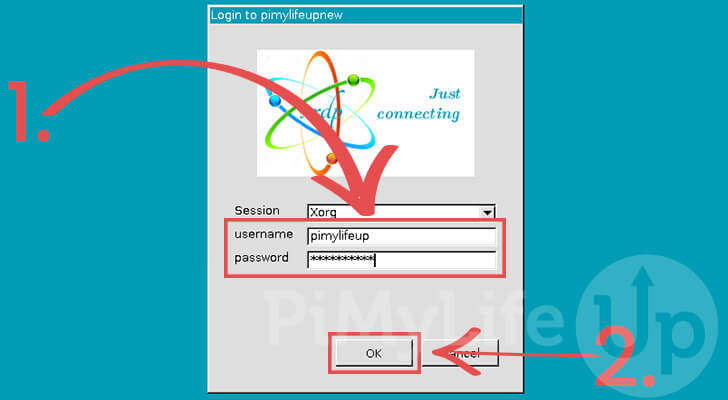
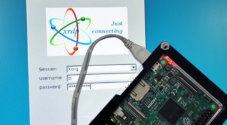
3. You will now be greeted by xrpd’s interface.
You will need to use this interface to enter your Ubuntu systems login details (1.).
Once you have the username and password typed in, click the “OK” button to login (2.).
4. At this point, you should hopefully now be connected to your Ubuntu system over RDP.
This remote desktop protocol allows you to interact with the desktop interface of your system.
Controlling the xrdp Service on Ubuntu
If you would like to start, stop or check the status of xrdp on Ubuntu, we can utilize the system service manager.
Depending on what version of Ubuntu you are using will choose what service manager you need to use.
If you are using a version of Ubuntu that’s newer than 16.04, you can use the following commands.
Checking the Status of xrdp
Using the following command, you can check the status of the xrdp service.
sudo systemctl status xrdpBy using this command, you will get back something like we have shown below.
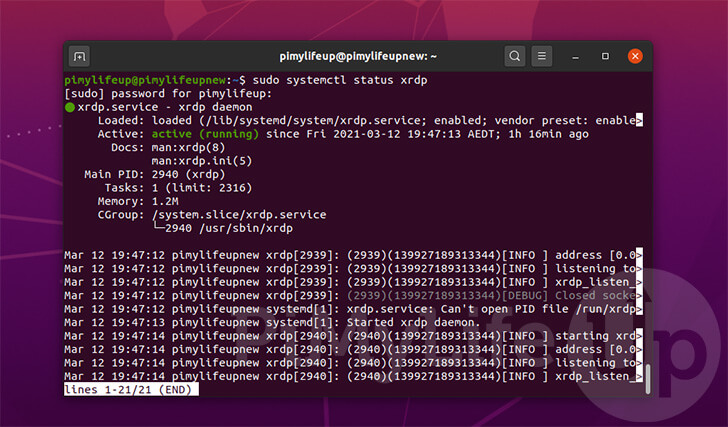
This text shows the current status of the service and how long it has been operating. You will also see additional information like how much memory it is currently consuming.
Stopping and Starting the xrdp service
It is also possible to use systemctl to start and stop the service.
This is useful when you want to temporarily stop the service or get it back up and running again.
You can use the following command to stop the xrdp service from running.
sudo systemctl stop xrdpThe command is very similar, but instead of using the word “stop“, you use “start” to initialize the server.
sudo systemctl start xrdpControlling Whether xrdp Starts at Boot
You can also use this system manager to control whether xrdp will be started at boot or not.
This is useful if you would like to stop xrdp from starting at boot without uninstalling the software.
To enable the service to start at boot, you can run the command below on your system.
sudo systemctl enable xrdpLikewise you can use the following command to make the system manager not boot the service at boot.
sudo systemctl disable xrdpConclusion
Hopefully, you will now have the xrdp server up and running on your Ubuntu operating system.
Using xrdp, you will be able to make remote desktop connections to your device.
The remote desktop protocol allows you to control the device as if you were sitting there with the screen hooked up to it.
If you have had any issues with getting xrdp to run, please leave a comment below.
Be sure to check out our other Ubuntu guides to learn how to set it up for your needs.

If you are having trouble connecting with windows RDC, try adding the following lines: