This tutorial will show you how to install Webmin on the Ubuntu operating system.
Webmin is a web-based tool that allows you to manage Linux-based operating systems such as Ubuntu.
From this web interface, you can control various features of your Ubuntu operating system, such as users, system settings and more.
One of the advantages of Webmin is that it is highly extensible, allowing plugins to be developed to help it manage your operating system.
By the end of the following sections, you should have Webmin installed on your Ubuntu system.
Preparing Ubuntu for Webmin
Before we can install the Webmin tool to the Ubuntu operating system, we need to prepare the operating system. Over the following steps, we will add the Webmin package repository and update existing packages.
The advantage of using the package repository is that we will always get the latest version of Webmin on our Ubuntu device.
1. Our first step is to update Ubuntu’s package list and upgrade any out-of-date packages.
We can perform both of these tasks by using the following commands within the terminals.
sudo apt update
sudo apt upgradeCopy
2. Once the initial update completes, we can add the Webmin repository to our Ubuntu operating system.
To add this repository, you will want to use the following command.
echo "deb [signed-by=/usr/share/keyrings/webmin.gpg] https://download.webmin.com/download/repository sarge contrib" | sudo tee /etc/apt/sources.list.d/webmin.listCopy3. With the repository added, we still need to download and add the “gpg” key to the system. This key helps “apt” verify that the Webmin package we are downloading is legit.
To download, decrypt and save the GPG key, use the command below within the terminal.
curl -s https://download.webmin.com/jcameron-key.asc | gpg --dearmor | sudo tee /usr/share/keyrings/webmin.gpg >/dev/nullCopy4. The final step we need to take before we can install Webmin to Ubuntu is to update the package list again.
The package manager won’t be aware of the new repository without updating the list.
sudo apt updateCopyInstalling Webmin to the Ubuntu Operating System
We can install the Webmin software now that we have prepared our Ubuntu system. The following steps are relatively straightforward, thanks to adding the official repository in the previous section.
Alongside installing Webmin, we will ensure we allow the port Webmin uses through UFW.
5. To install Webmin to the Ubuntu operating system, we only need to run the following command within the terminal.
sudo apt install webminCopy6. Once Webmin is installed to your system you should now allow access through port “1000“.
This port is what Webmin’s web interface operates through.
sudo ufw allow 10000Copy7. The last task we need to complete before logging into the Webmin interface is to check the status of the service.
Getting the status of the service is as straightforward as running the command below.
sudo systemctl status webminCopyIf Webmin is running, you will want to look for the text “Active: active (running)“.
● webmin.service - Webmin server daemon
     Loaded: loaded (/lib/systemd/system/webmin.service; enabled; vendor preset: enabled)
     Active: active (running) since Fri 2023-04-28 21:46:53 AEST; 4min 50s ago
    Process: 196637 ExecStart=/usr/share/webmin/miniserv.pl /etc/webmin/miniserv.conf (code=exited, sta>
   Main PID: 196638 (miniserv.pl)
      Tasks: 1 (limit: 9438)
     Memory: 168.7M
        CPU: 2.136s
     CGroup: /system.slice/webmin.service
             └─196638 /usr/bin/perl /usr/share/webmin/miniserv.pl /etc/webmin/miniserv.conf

Apr 28 21:46:51 pimyubu systemd[1]: Starting Webmin server daemon...
Apr 28 21:46:51 pimyubu perl[196637]: pam_unix(webmin:auth): authentication failure; logname= uid=0 eui>
Apr 28 21:46:53 pimyubu webmin[196637]: Webmin starting
Apr 28 21:46:53 pimyubu systemd[1]: Started Webmin server daemon.
Accessing the Webmin Interface
With Webmin installed on the Ubuntu operating system, you can access its web interface and start interacting with the tool.
Accessing the tool is simple, as all you need is a web browser and the IP address of your Ubuntu machine. When using Webmin, you will likely want to set up your Ubuntu device with a static IP address.
1. You will want to go to the following address in your web browser.
Ensure that you replace “DEVICEIPADDRESS” with the IP of your Ubuntu device.
https://DEVICEIPADDRESS:10000As Webmin is currently using a self-signed certificate, you will get a security warning before being greeted with the login screen.
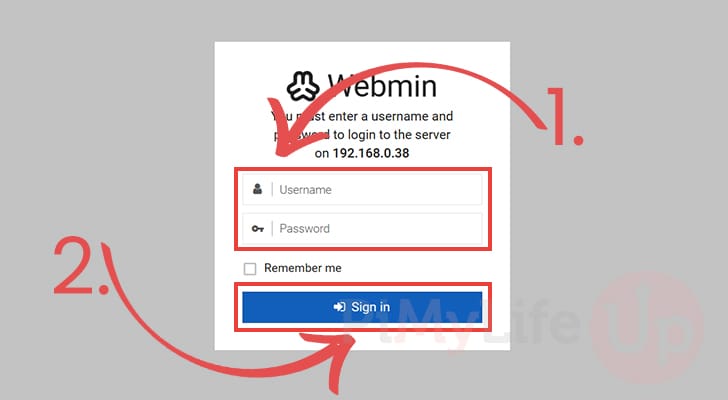
2. Upon loading up the Webmin web interface, you must log in to your account.
Enter the username and password of your Ubuntu user (1.), then click the “Sign in” button (2.) to continue.
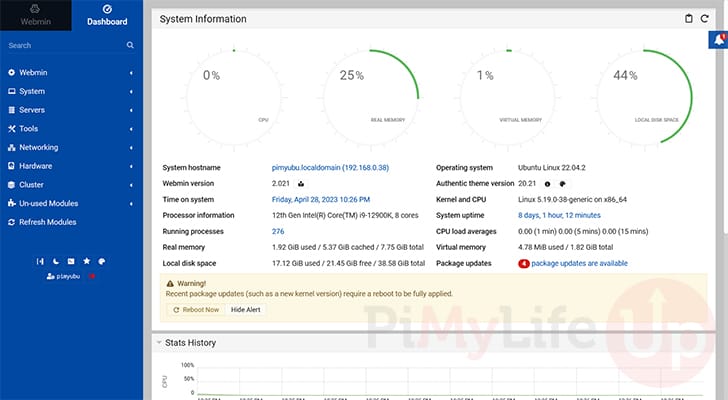
3. You will now be greeted with the Webmin dashboard. This dashboard will give you an overview of your system.
Feel free to explore the many menus in this dashboard to see how you can use Webmin to manage the Ubuntu operating system.
Generating a Signed Certificate for Webmin on Ubuntu
If you use Webmin on Ubuntu, you will likely want to get a signed certificate. A signed certificate will stop the warning you receive when visiting Webmin while enhancing security.
Luckily, Webmin makes generating a signed certificate quite simple by implementing Let’s Encrypt.
Please note that you will require a domain name for this process to work and have that domain pointed to your Ubuntu device’s IP address.
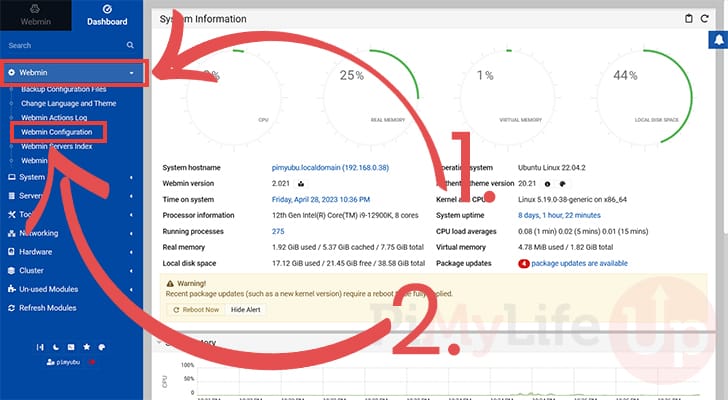
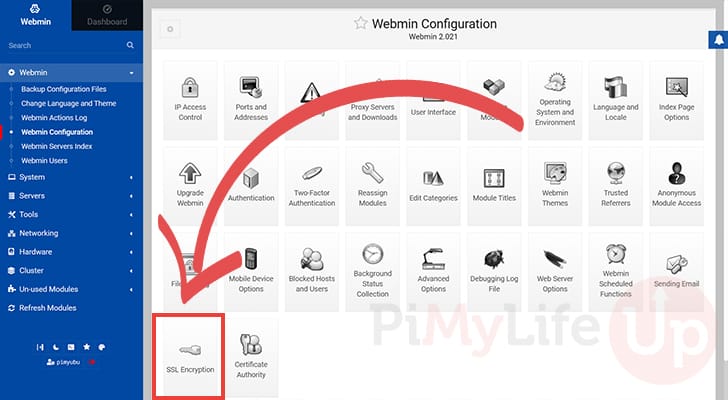
1. On the left-hand side of the screen, start by clicking the “Webmin” option (1.).
In the drop-down menu, you must select the “Webmin Configuration” option (2.).
2. On Ubuntu’s Webmin configuration page you will want to find “SSL Encryption” near the bottom of the page.
Once found, click the option to open up the SSL config page.
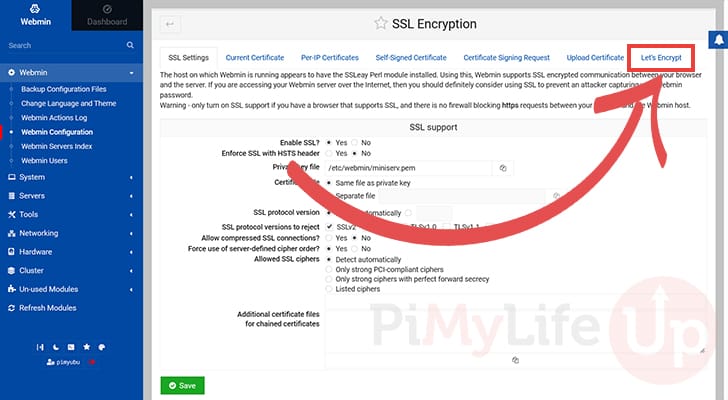
3. Next, you will need to switch to the “Let's Encrypt” page, so that we can generate a signed certificate for Webmin.
This tab is located at the end of the row at the time of publishing.
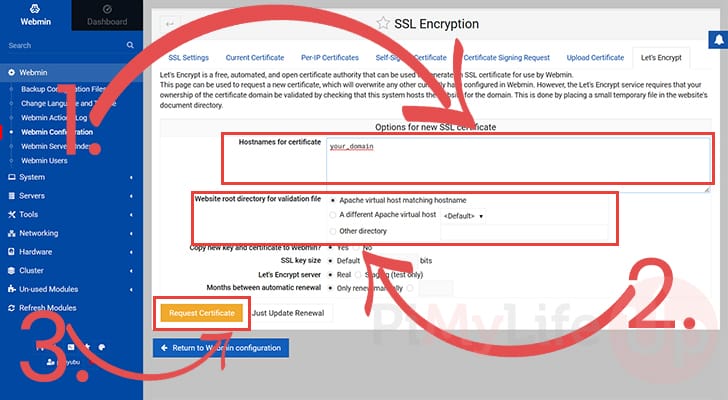
4. As we are finally on the correct page, you must specify the hostname (1.) for which want the SSL certificate generated. This domain name must point to your Ubuntu device to generate the key.
Next, you can choose where Webmin will place the file needed to validate the certificate during generation.
If you don’t have any web servers on your device, you can try using the “Apache virtual host matching hostname” option (2.).
Once you are happy that all options are configured correctly, click the “Request Certificate” (3.) button.
Conclusion
At this point in the guide, you should now have Webmin installed on the Ubuntu operating system.
This tool allows you to manage the operating system from a straightforward web interface.
Please feel free to comment below if you have questions about running Webmin on your system.
If you found this tutorial useful, please check out our many other Ubuntu tutorials.