This tutorial will show you how to change Home Assistant to use MariaDB instead of SQLite.
By default, your Home Assistant installation is set up to use SQLite. The advantage of SQLite is that it is super easy to use and can work straight out of the box. Additionally, it has decent enough performance for most people, and the Home Assistant team has spent a lot of time optimizing the software for SQLite.
As you add more things to your Home Assistant installation, this SQLite setup can get slower, especially when dealing with large data sets.
To try and improve the performance of your Home Assistant installation, you can swap SQLite with MariaDB. MariaDB can be much faster at handling large data sets.
Luckily, switching from SQLite to MariaDB is a reasonably straightforward process. Just be warned you will lose your existing history during the move. While it is technically possible to transfer SQLite data to MariaDB, there is too much to go wrong for us to cover it within this guide as the data types don’t necessarily match up between the two.
Before you continue any further, you must create a backup of your Home Assistant installation. You don’t want to be several steps in and realize you have managed to break your installation.
Please note that if you are using the Docker variant of Home Assistant, these steps will not work. You must be running a version of Home Assistant with add-on support.
Installing and Setting Up Home Assistant to use MariaDB
By the end of the following sections, you should hopefully have your Home Assistant using MariaDB.
Before continuing, we require that you follow our guide on installing Visual Studio Code on Home Assistant. We need to use this editor to make changes to some configuration files. If there is a different file editor you prefer to use, just be aware a couple of the steps will differ slightly.
Installing the MariaDB Add-on
1. Our first step is downloading and installing the MariaDB addon to our Home Assistant server.
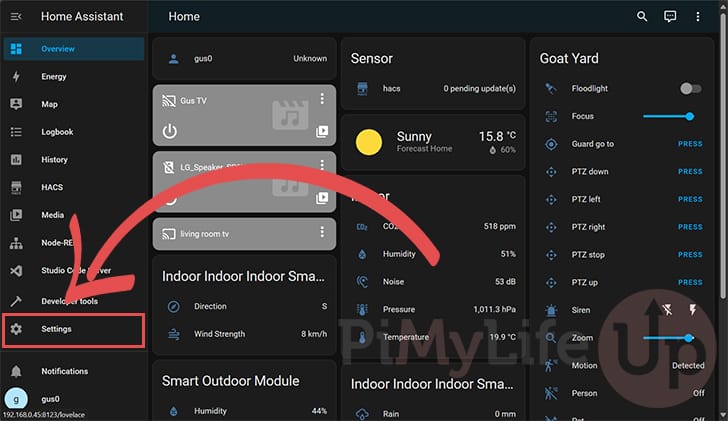
This addon will be what installs the MariaDB SQL server. To add this add-on, click the “Settings” option in the sidebar.
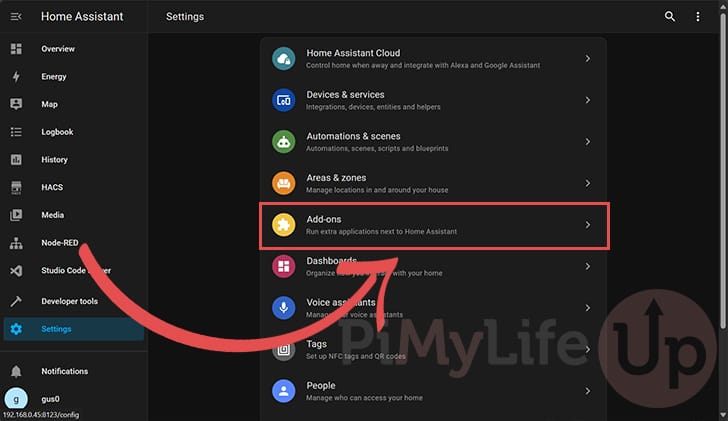
2. Once you are on the settings page, find and click the “Add-ons” option.
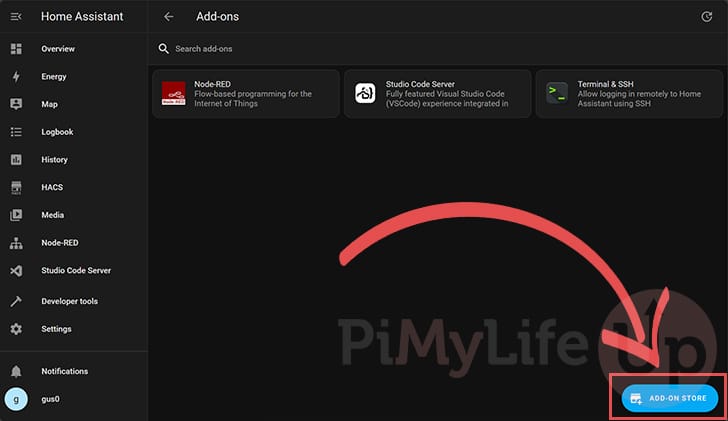
3. With the add-ons page open on your screen, you will want to click the “ADD-ON STORE” button in the bottom-right corner.
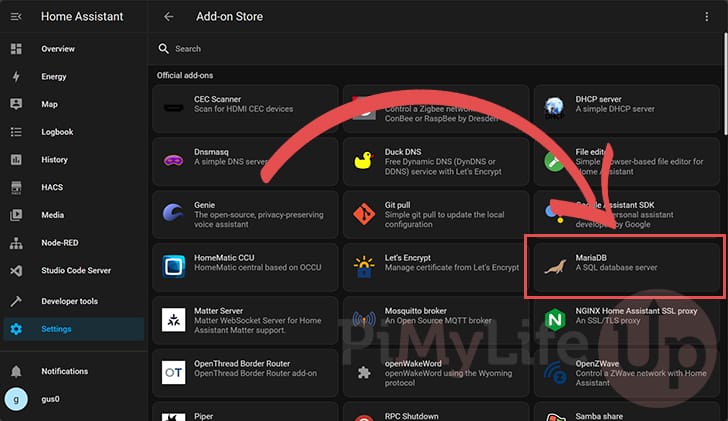
4. You will now see a list of official add-ons you can install on Home Assistant.
Search this list for “MariaDB” and click it.
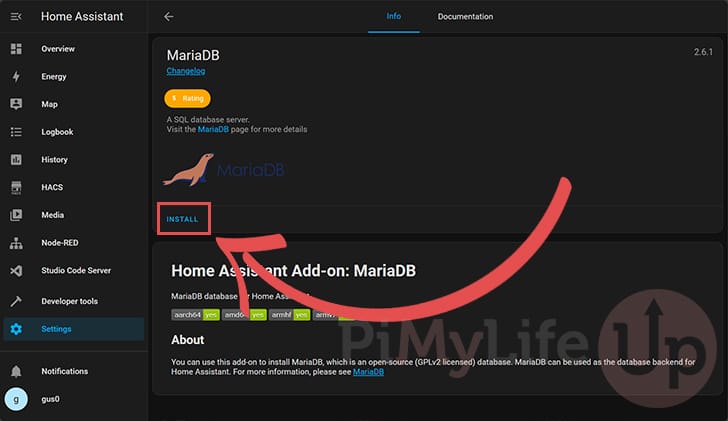
5. You can install the MariaDB to your Home Assistant server by clicking the “INSTALL” button.
Configuring MariaDB for your Home Assistant Server
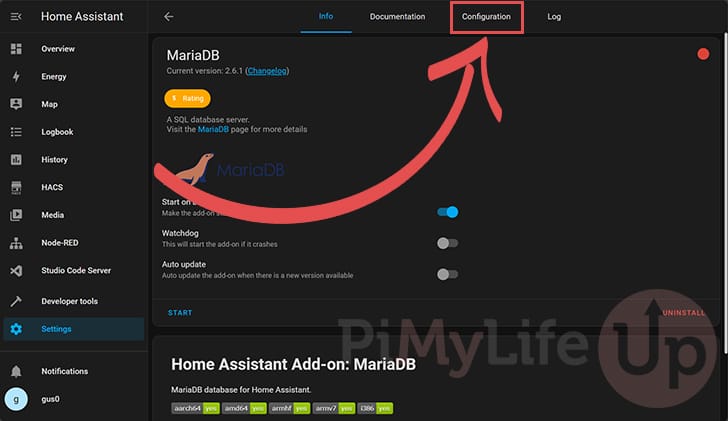
6. Once MariaDB finishes installing, you will need to configure it before starting the server.
To begin configuring MariaDB, click the “Configuration” button.
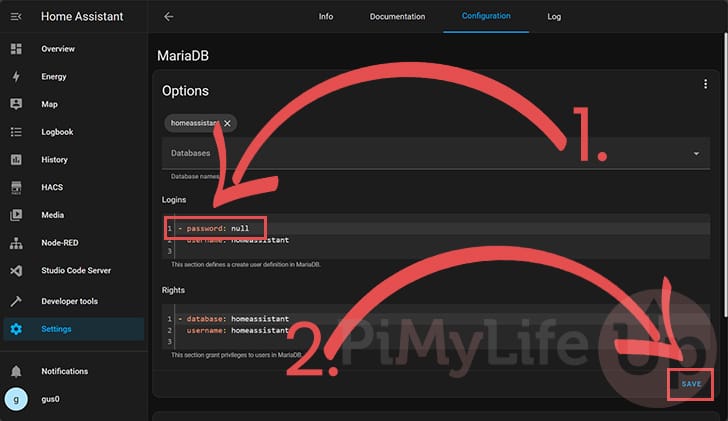
7. Within the configuration screen, you must now set a password for MariaDB by replacing the word “null” (1.). Ensure you make this something secure. You will need it when we define the MariaDB URL.
After setting the password, click the “SAVE” button in the bottom-right corner (2.)
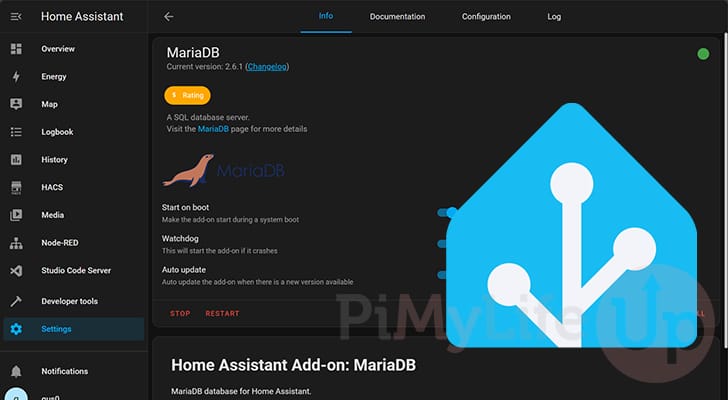
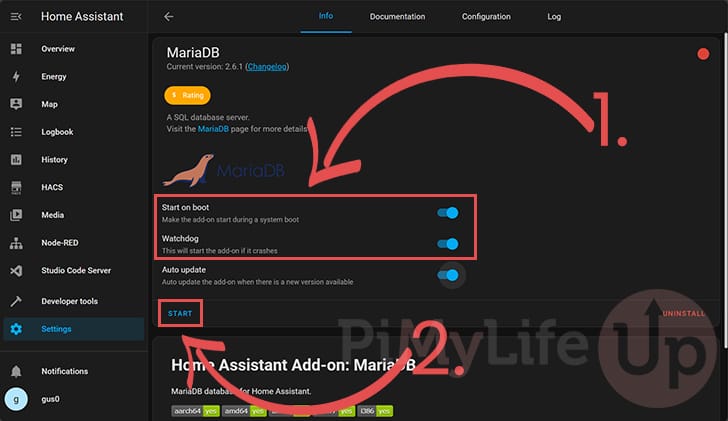
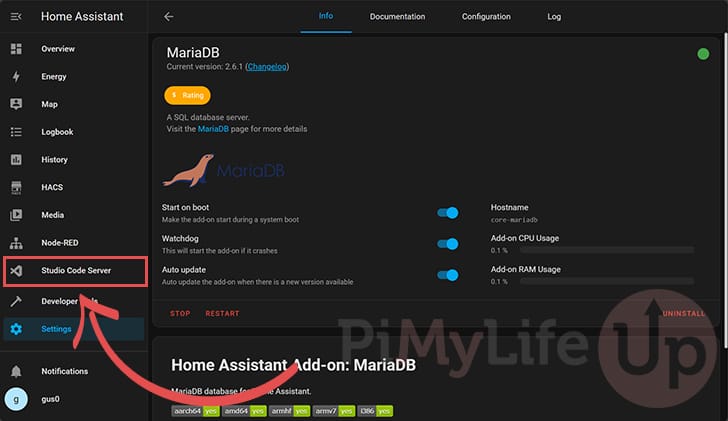
8. Back on the “Info” tab, we can finally start MariaDB on our Home Assistant server.
First, you must make sure both the “Start on boot” and “Watchdog” options are toggled on (1.). These will ensure that MariaDB starts when Home Assistant does, and it will be automatically restarted if it crashes.
To start the server now, click the “START” button (2.).
Setting Home Assistant to use MariaDB Instead of SQLite
9. Now, we must configure Home Assistant to use the MariaDB server we just set up.
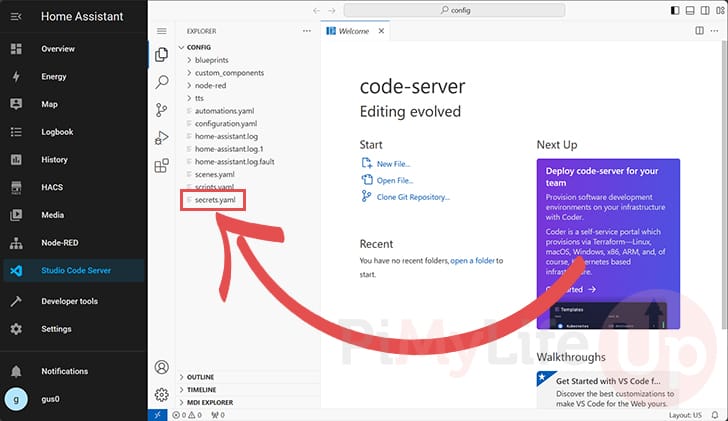
You will need to use a file editor to make changes to the config files. In our tutorial, we will be using “Studio Code Server“.
10. With your text editor open, the first file you want to edit is “secrets.yml“.
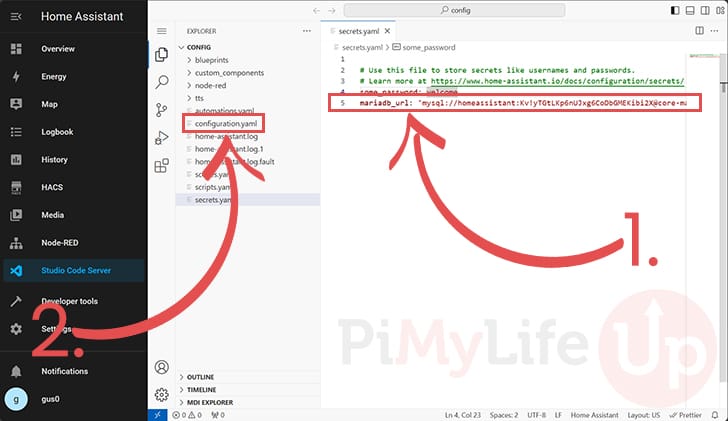
11. Once you have the “secrets.yml” file open, you will want to type in the following line (1.).
This line defines a secret called “mariadb_url” that points to the MariaDB server we set up earlier. Ensure you replace “<PASSWORD>” with the password you set earlier in this guide.
mariadb_url: 'mysql://homeassistant:<PASSWORD>@core-mariadb/homeassistant?charset=utf8mb4'
Copy
After typing out this line, you can save by pressing CTRL + S. Once saved, let us change to the “configuration.yml” file in the sidebar (2.).
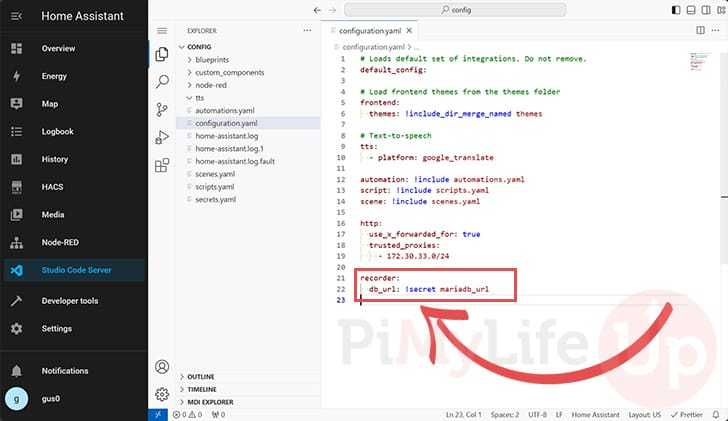
12. Now that you have the “configuration.yml” file open, you must add the following lines to the bottom of the file.
These lines tell Home Assistant’s “recorder” to utilize MariaDB to save data. You can also see that we are specifying the secret that we created earlier.
recorder:
  db_url: !secret mariadb_urlCopy
Once you have added the above two lines to the bottom of the file, you can save by pressing CTRL + S.
Restarting Home Assistant
13. At this point, we have completed all the steps to get Home Assistant to use MariaDB instead of the default SQLite.
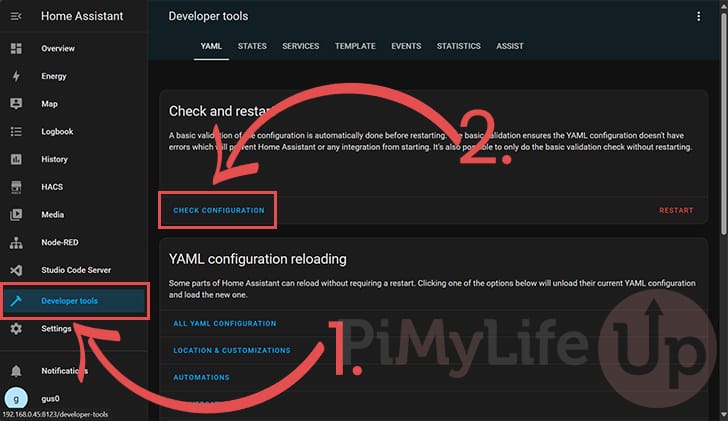
What we want to do now is change to the “Developer tools” tab (1.).
Once you are on the developer tools, click the “CHECK CONFIGURATION” button (2.). Using this functionality allows you to check whether you broke anything before restarting.
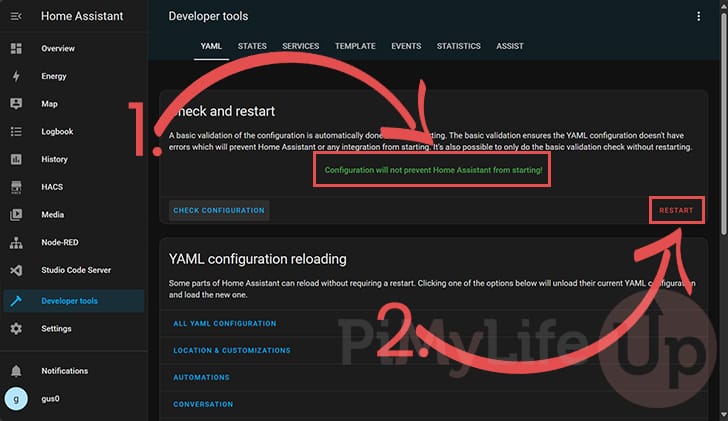
14. If you see the text “Configuration will not prevent Home Assistant from starting!” (1.). You are safe to restart Home Assistant.
To restart Home Assistant, click the “Restart” button (2.).
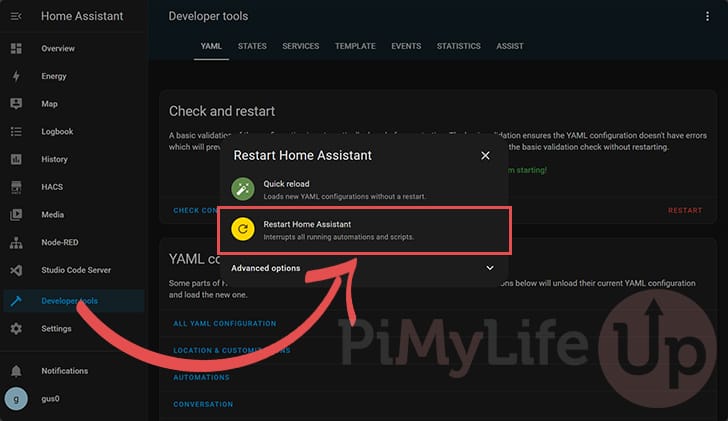
15. You will now see a couple of options, click the “Restart Home Assistant” button.
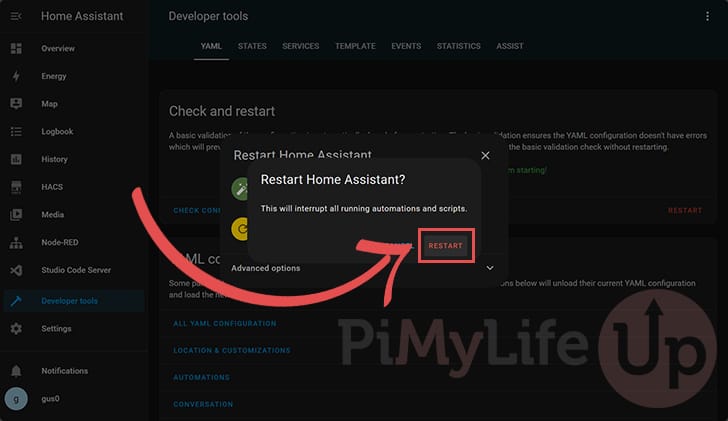
16. You will see yet another warning about restarting your Home Assistant.
Since we need to restart the server for Home Assistant to start using MariaDB, click the “RESTART” button.
Please note that the restart process can take a few minutes to complete. Once Home Assistant finishes restarting, it will need to build the new database.
Checking your Logs After Restart
17. Before we finish up, we should check the logs to ensure there are no database connection errors. Changing from MariaDB to SQLite is a somewhat risky process, and we don’t want to leave the server unable to save new data.
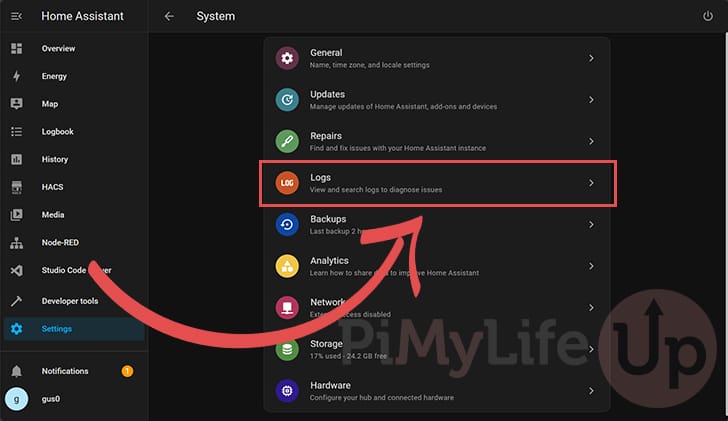
To check the logs, click “System” within the “Settings” screen.

18. Once you have entered the “System” settings, click the “Logs” option.
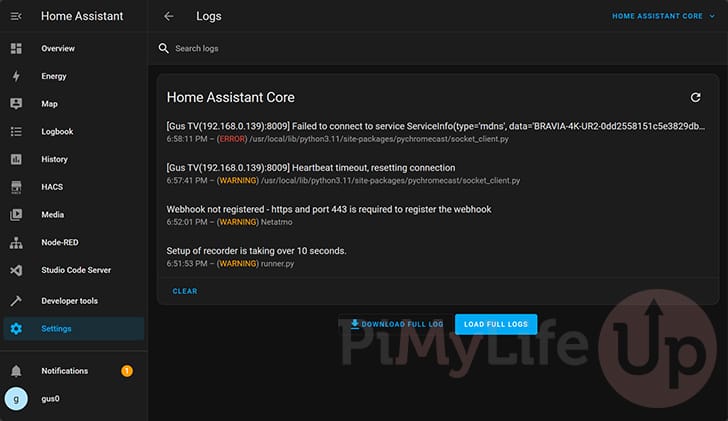
19. Now scan the logs on this page to see if there are any related to the database failing to connect.
In our case, everything went without a hitch, and there are no issues related to the database within our log.
Conclusion
Hopefully, you will now have your Home Assistant server using MariaDB rather than SQLite at this stage.
Most of the advantages of using MariaDB instead of SQLite occur when you have quite a lot of data saved to your database.
At the same time, moving to MariaDB early on is much easier, as porting data from one server to the other isn’t a simple process.
Please feel free to comment below if you have questions about getting Home Assistant to use MariaDB.
If you found our tutorial to be useful, be sure to check out our many other Home Assistant tutorials.